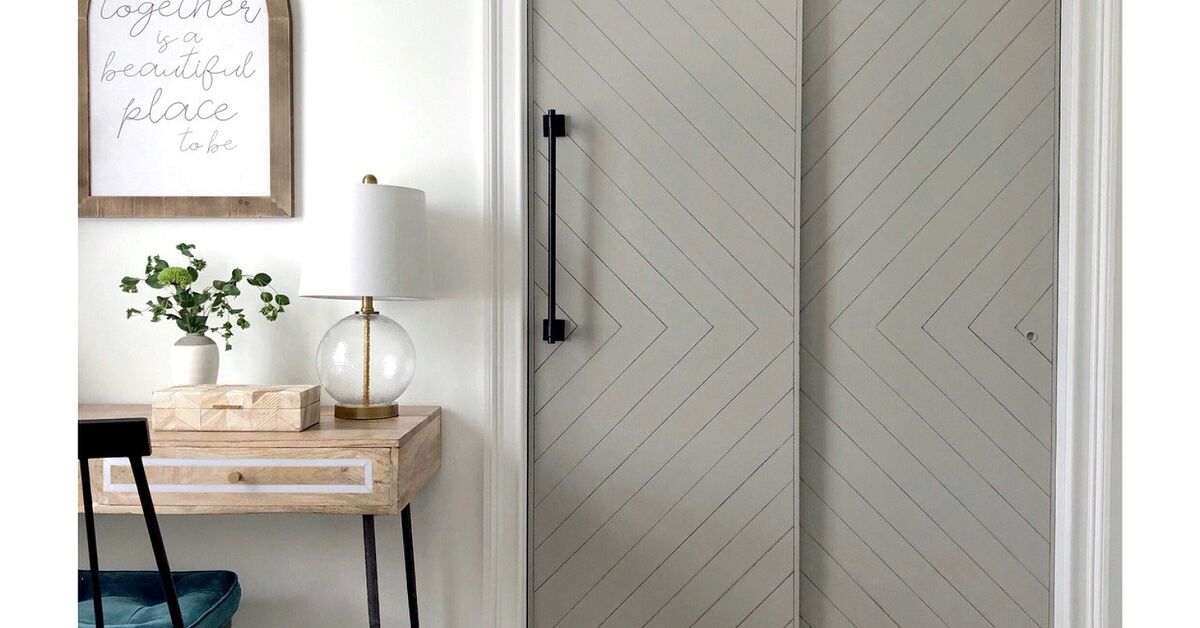

Closet doors are often the beige background actors of a bedroom. They open, they close, and they quietly hide the laundry you promised to fold three days ago. But with paint, a straightedge, and a black Sharpie paint marker, plain doors can become convincing faux shiplap without lumber, power tools, or a small mountain of sawdust.
This Sharpie shiplap closet doors DIY creates the appearance of individual wood planks by drawing carefully spaced horizontal lines across a freshly painted surface. From normal viewing distance, those thin black seams imitate the shadow gaps found between real shiplap boards. The project is especially useful for flat sliding doors, hollow-core closet doors, smooth bifold doors, and basic builder-grade panels that need more personality.
The transformation is inexpensive, renter-friendlier than attaching wood, and manageable over a weekend. The secret is not artistic talent. It is patient surface preparation, accurate measuring, and resisting the temptation to draw the lines while the paint is still soft enough to remember your fingerprints.
What Are Sharpie Shiplap Closet Doors?
Sharpie shiplap is a faux-finishing technique in which evenly spaced marker lines are drawn over a painted surface to mimic the narrow gaps between shiplap boards. Instead of fastening real planks to a door, you create the visual rhythm of those planks with a permanent black line.
Oil-based Sharpie paint markers are particularly suitable because the manufacturer lists wood, plastic, metal, glass, and other materials among their usable surfaces. The ink is also designed to resist water, fading, and abrasion after it dries. A fine or medium point usually produces a more believable seam than a broad marker, which can make the door look less like shiplap and more like a giant notebook.
This treatment is decorative rather than structural. It does not create real grooves or wood texture, but the illusion can be surprisingly effective when the door is viewed from several feet away. Light paint combined with thin charcoal-black lines creates the strongest traditional farmhouse effect, although beige, pale gray, muted green, and dusty blue can also work beautifully.
Why Choose Faux Shiplap Instead of Real Wood?
It adds almost no weight
Real boards can place extra weight on sliding tracks, bifold hinges, and hollow-core door skins. Painted lines add approximately the weight of your enthusiasm, which is much easier on the hardware.
It requires fewer tools
You do not need a saw, nail gun, construction adhesive, clamps, or a diplomatic discussion with everyone who dislikes power-tool noise. The core tools are paint supplies, a ruler or level, a pencil, and a paint marker.
It preserves door clearance
Attaching trim or wood to sliding doors can interfere with overlapping panels, floor guides, handles, or door frames. A painted design does not noticeably increase the thickness of the door.
It is easy to revise
A crooked marker line can usually be covered with the background paint, allowed to dry, and redrawn. Entire designs can also be sanded, primed, and painted over when farmhouse style eventually gives way to whatever interior-design trend arrives wearing oversized sunglasses.
Tools and Materials
- Flat, sliding, or bifold closet doors
- Mild dish soap or a suitable degreasing cleaner
- Clean cloths and a vacuum
- Drop cloth or plastic floor covering
- Screwdriver and small container for hardware
- Wood filler or patching compound, if needed
- 120- to 220-grit sandpaper or sanding sponge
- Bonding primer appropriate for the door material
- Interior door-and-trim paint or durable enamel
- High-density foam mini roller
- Small angled paintbrush
- Painter’s tape
- Tape measure
- Long level, metal ruler, yardstick, or straight board
- Sharp pencil and eraser
- Fine- or medium-point black oil-based Sharpie paint marker
- Scrap board or inconspicuous test area
A high-density foam mini roller is useful on large, flat door surfaces because it can leave a smoother finish than a standard thick-nap roller. Paint formulated for doors, cabinets, or trim is also preferable to ordinary flat wall paint because closet doors receive frequent handling.
Before You Begin: Inspect the Door Material
Wood, MDF, metal, vinyl-coated doors, and laminate do not all accept paint in the same way. A previously painted wooden door may need only cleaning and light sanding. A slick laminate or glossy factory finish often needs a bonding primer made for hard-to-paint surfaces.
Test your proposed primer, paint, and marker combination on the back edge of a door or on a similarly coated scrap. Confirm that the paint adheres, the marker draws smoothly, and the black line does not feather into the finish. This small experiment is far less dramatic than discovering a compatibility problem across six feet of freshly painted closet door.
Older painted surfaces may contain lead. Before sanding doors in an older home, determine whether lead-safe procedures are required. Wear eye protection and an appropriate dust mask or respirator when sanding, and maintain ventilation while using primers, paints, or oil-based markers.
How to Make Sharpie Shiplap Closet Doors
Step 1: Decide Whether to Remove the Doors
Removing the doors and laying them flat on padded sawhorses makes sanding and rolling easier. It also reduces drips and allows you to work without chasing a swinging bifold panel around the room.
However, large sliding doors may be awkward or heavy. They can remain installed if you protect the floor, secure the panels, and maintain access to the full front surface. Label each removed door and its hardware so the panels return to their original positions.
If you have bypass sliding doors, check how much the panels overlap. Continue the faux shiplap lines across both visible faces, but avoid applying thick materials near the overlap. For bifold doors, decide whether lines should continue across the center joint or restart on each panel. Continuous lines usually create the strongest illusion when the doors are closed.
Step 2: Remove or Protect the Hardware
Take off knobs, pulls, guide hardware, and any removable decorative pieces. Keep screws in a labeled cup or resealable bag. If hardware cannot be removed, cover it carefully with painter’s tape.
Do not paint over rollers, hinges, floor guides, or sliding-track components. Paint buildup can interfere with movement and transform your easy closet makeover into an unexpected lesson in door mechanics.
Step 3: Clean the Doors Thoroughly
Wash the surface with mild dish soap and water or a cleaner recommended for the door material. Pay special attention to the areas around handles, where skin oils, lotion, dust, and mysterious household residue tend to gather.
Rinse away cleaner residue and allow the doors to dry completely. Paint manufacturers and major home-improvement guides consistently emphasize cleaning, sanding, repairing, and removing dust before painting because coatings adhere more reliably to a clean, prepared surface.
Step 4: Repair Damage and Sand the Surface
Fill dents, unused hardware holes, gouges, and deep scratches with a product compatible with the door. Let the repair dry, then sand it flush.
Lightly sand glossy painted doors to remove shine and give the primer a better gripping surface. Start near 120 or 150 grit when smoothing notable defects, then move to 180 or 220 grit for refinement. Do not aggressively sand thin laminate or hollow-core door skins; the goal is to dull the finish, not excavate the door.
Vacuum the surface and wipe away every trace of dust with a clean damp cloth or tack cloth. Sanding dust beneath paint becomes tiny bumps, and tiny bumps have an uncanny ability to become the only thing you see after finishing the project. Professional door-painting guidance commonly recommends sanding followed by careful dust removal before primer or paint.
Step 5: Apply the Correct Primer
Prime bare wood, MDF, repaired areas, stained surfaces, and glossy or laminated doors as required. Use a bonding primer on slick finishes. If the existing coating might be oil-based and you plan to apply water-based paint, use a compatible primer rather than hoping the two coatings will settle their differences privately.
Brush primer into narrow edges or recessed details, then use a foam mini roller on broad flat areas. Apply a thin, even coat and follow the manufacturer’s drying instructions. Once dry, lightly sand any raised fibers, roller texture, or drips with fine-grit sandpaper. Remove the dust before painting.
Primer helps the finish coat adhere and creates a more uniform base, particularly over repairs, bare materials, or old dark colors. Bonding primer is especially important when changing from an incompatible or glossy existing finish.
Step 6: Paint the Background Color
Choose a satin or semi-gloss door-and-trim enamel for a finish that is easier to clean than flat paint. Satin creates a softer, furniture-like appearance, while semi-gloss reflects more light and usually tolerates wiping well.
Use an angled brush around edges and details. Roll the main surface in long, overlapping passes from top to bottom. Keep the coat thin; heavy paint can sag along edges and collect near hinges. Allow the first coat to dry, lightly sand imperfections if necessary, remove dust, and apply the second coat.
Two thin coats usually look smoother than one heroic coat applied with the optimism of someone trying to finish before dinner. Door-painting guidance also recommends allowing the finish to dry fully before putting doors back into service, because paint that feels dry on top may still be soft enough to stick or dent.
Step 7: Let the Paint Harden Before Drawing
Follow the paint label’s recoat and handling instructions. At minimum, the final coat should be thoroughly dry. Giving it additional curing time is wise, especially in humid weather or when using a low-temperature workspace.
Drawing too soon can make a ruler stick to the surface, leave pressure marks, or allow the marker tip to drag through soft paint. When in doubt, wait longer and test on an inconspicuous edge.
Step 8: Choose the Shiplap Board Spacing
Common faux-shiplap spacing ranges from about 5 to 8 inches. Six-inch spacing creates a familiar farmhouse scale, while 7- or 8-inch rows feel broader and more contemporary. Existing Sharpie shiplap tutorials commonly use board dimensions in roughly the 6-, 8-, or 10-inch range as visual references.
Measure the total visible height of the door and divide it by your preferred board width. Adjust the spacing slightly so the top and bottom sections are reasonably balanced. For example, an 80-inch-tall door divided into approximately 6.5-inch sections creates about 12 rows without leaving a tiny strip at the bottom.
If several doors sit side by side, measure from one shared reference point, such as the floor or top track. All horizontal seams should align across the entire closet. A quarter-inch discrepancy between adjacent doors is surprisingly noticeable once the panels close.
Step 9: Mark the Layout in Pencil
Beginning at the chosen reference edge, make small pencil marks on both sides of every panel. Use a level, ruler, or straight board to connect the corresponding marks with a very light pencil guideline.
Check each line with a level rather than trusting the door edge, floor, or ceiling. Houses are full of charming irregularities, and some floors consider “level” merely a suggestion.
Close bifold or sliding doors before checking alignment across multiple panels. Open and close them once to confirm that overlapping edges, handles, and folds do not create awkward breaks in the pattern.
Step 10: Prepare the Sharpie Paint Marker
Read the marker instructions. Oil-based paint markers generally need to be shaken and primed by pressing the tip against scrap material until paint begins flowing. Never pump the tip directly on the finished door; the first release may produce a blob.
Practice several lines on painted scrap. Hold the marker at the same angle you will use on the door and determine how much pressure creates a consistent seam. Let the sample dry and inspect it from across the room.
Step 11: Draw the Faux Shiplap Lines
Position the straightedge along the first pencil guideline. Hold it firmly without sliding it across the paint. Draw the marker from one side to the other using steady, moderate pressure.
For long closet doors, draw in controlled sections rather than racing across the entire width. Keep the marker tip against the straightedge, and avoid repeatedly tracing the line unless a second pass is truly necessary. Multiple passes can create uneven thickness.
Wipe the straightedge frequently so wet marker does not transfer to the next row. Work from top to bottom, giving each finished line time to dry before placing tools or hands near it. Sharpie advises allowing paint markers several minutes to dry to help prevent smudging.
On bifold doors, close the panels and draw each line across the visible face so it appears continuous. Near the center hinge, stop just short of the gap rather than forcing the marker into moving hardware.
Step 12: Correct Mistakes
Do not scrub a fresh mistake unless you have already tested a safe cleanup method. Solvents that remove permanent marker may also soften, dull, or remove the background paint.
The safest correction is usually to let the error dry, cover it with a thin coat of the original door paint, allow that repair to dry fully, and redraw the line. Keep a small covered container of matching paint for touch-ups.
If a line is slightly uneven but looks straight from normal viewing distance, consider leaving it. Real wood has irregularities, and perfection pursued from three inches away can turn a cheerful afternoon project into a personal feud with a closet.
Step 13: Decide Whether to Add a Clear Coat
A clear coat is optional. A durable enamel background and oil-based paint-marker line may be sufficient for ordinary bedroom closet doors. However, doors in children’s rooms or high-traffic spaces may benefit from added protection.
Before sealing the entire project, test a compatible clear finish over a painted and marked sample. Some topcoats can alter the sheen, discolor light paint, or disturb marker lines. Let the marker dry thoroughly, then apply several very light coats rather than brushing repeatedly over it.
Step 14: Reinstall Hardware and Adjust the Doors
Once the coating is sufficiently hardened, reinstall knobs, pulls, hinges, rollers, and guides. Tighten hardware carefully so it does not twist against soft paint.
Rehang the doors in their labeled positions. Check that sliding panels overlap smoothly, bifold doors open without rubbing, and the horizontal lines remain aligned when everything is closed.
Design Variations for Faux Shiplap Closet Doors
Classic white with black seams
Warm white or soft white paint with thin black lines produces the most recognizable shiplap appearance. Matte-black pulls add contrast without requiring additional decorative work.
Moody charcoal shiplap
Paint the doors charcoal, navy, or deep green and use a black marker for subtle seams. For more contrast, test a white oil-based paint marker. Dark colors make large closet doors feel intentional rather than invisible.
Vertical faux shiplap
Vertical lines visually emphasize height and can make low ceilings feel taller. This orientation works especially well on narrow bifold panels, although it requires careful spacing around hinges and handles.
Mixed shiplap and trim
Add lightweight wood molding around the perimeter of each door, then draw horizontal lines inside the frame. Confirm that any added trim will clear adjacent sliding doors before attaching it.
Weathered farmhouse finish
Use an off-white or pale greige background rather than bright white. Add dark bronze hardware and keep the marker lines thin. Avoid randomly distressing every corner; a little age looks charming, while too much can make the closet appear to have survived a cattle drive.
Common Sharpie Shiplap Mistakes
Skipping the test patch
Marker ink can behave differently on latex enamel, oil-based coatings, laminate, and clear finishes. A test patch reveals bleeding, poor adhesion, sheen changes, and smudging before they affect the visible surface.
Using a flexible straightedge
A bent yardstick or flimsy piece of cardboard can create bowed seams. Use a rigid metal ruler, long level, or straight board.
Measuring from alternating edges
If one panel is measured from the top and another from the bottom, small differences can accumulate. Use the same reference point for every door.
Making the lines too thick
Real shiplap gaps typically read as narrow shadows. A thick black stripe looks graphic rather than architectural. A fine or medium marker is easier to control.
Rushing the drying time
Paint may feel dry while remaining soft underneath. Premature measuring, taping, stacking, or reinstalling can create dents and stuck edges.
Applying marker over dust or grease
Dust interrupts the line, while greasy residue may prevent both paint and marker from bonding. Preparation is less glamorous than the reveal photo, but it is the reason the reveal photo looks good.
How to Maintain Sharpie Shiplap Closet Doors
Dust the doors with a microfiber cloth. For fingerprints, use a slightly damp cloth with mild soap, then dry the surface. Avoid abrasive scrubbers, strong solvents, and aggressive household cleaners unless the paint manufacturer specifically approves them.
Save a small amount of the background paint and record the brand, color, and sheen. Minor scratches can be covered with a small artist’s brush. Once the repair dries, restore the faux seam with the original marker.
If one section becomes heavily damaged, repainting an entire horizontal “board” between two marker lines can make the repair less noticeable than touching up a random patch in the center.
A Realistic Weekend Experience: What This DIY Project Is Actually Like
The first surprise in a Sharpie shiplap closet door makeover is how little time the dramatic part takes compared with the preparation. Drawing the lines may require less than an hour, while cleaning, sanding, priming, painting, and waiting occupy most of the weekend. This is normal. DIY television has trained everyone to expect a transformation between two commercial breaks, but paint prefers a less theatrical schedule.
A typical project begins on Friday evening by removing hardware and washing the doors. That initial cleaning often reveals details that were previously disguised by dust: old sticker adhesive, shallow dents, fingerprints around the handles, and paint drips left by a previous owner who apparently worked during an earthquake. Repairing these flaws before repainting produces a much more convincing result.
Saturday becomes painting day. Laying the doors flat makes rolling easier, but it also creates a space problem. Two large sliding panels can occupy most of a garage or spare room. Before removing anything, decide where each door will dry without being stepped on, decorated by a pet, or used as an emergency surface for grocery bags.
The first coat may look disappointing. Primer can appear uneven, and light paint over a dark door may look streaky. The second finish coat usually creates the satisfying change. A foam roller helps, although overworking the paint can introduce texture. Load the roller evenly, make smooth passes, and then leave the coating alone so it can level.
Layout day is where patience pays the greatest dividend. It is tempting to measure every six inches and immediately start drawing. A better experience comes from calculating the full pattern first. When the final section would otherwise be only two inches tall, adjusting every row by a fraction creates a balanced design that looks planned rather than accidental.
The first marker line is usually the most intimidating. Practicing on scrap removes much of that anxiety. Once the paint begins flowing consistently, place the straightedge carefully, breathe normally, and make one smooth pass. Stopping and restarting repeatedly tends to create small dark spots. Those spots are rarely visible from across the room, but knowing they exist can briefly make them feel the size of manhole covers.
Another common experience is discovering that the floor, ceiling, and door edges do not agree about what “straight” means. A level should control the pattern. When several doors meet, close them and step back frequently. Viewing the design from the bed, doorway, or opposite wall is more useful than inspecting it with your nose nearly touching the surface.
The finished result often looks more realistic after the hardware returns. Black pulls reinforce the dark faux gaps and give the doors architectural contrast. The room suddenly appears more finished, even though the “boards” are technically lines drawn with a marker. That is the charm of this project: it delivers a large visual change using ordinary materials and careful spacing rather than complicated construction.
The biggest lesson is to treat faux shiplap as a paint project first and a marker project second. When the background is smooth, properly bonded, and fully dry, drawing the seams is easy. When preparation is rushed, even perfectly straight lines cannot hide peeling paint, rough patches, or fingerprints preserved forever beneath the finish.
Final Thoughts
A Sharpie shiplap closet doors DIY proves that a convincing makeover does not always require real lumber or expensive tools. With durable paint, a rigid straightedge, an oil-based paint marker, and disciplined measuring, plain closet doors can become a strong decorative feature.
Clean and prepare the surface carefully, choose balanced line spacing, test every coating combination, and let the paint harden before drawing. Most importantly, judge the finished design from the distance at which people will actually see it. Your guests are unlikely to inspect the fourth seam with a magnifying glass, and anyone who does should immediately be assigned the next closet makeover.
Note: This guide synthesizes practical recommendations from Sharpie, Sherwin-Williams, Benjamin Moore, Behr, The Home Depot, Lowe’s, Family Handyman, HGTV, Bob Vila, Better Homes & Gardens, The Spruce, and established faux-shiplap DIY tutorials. Product instructions should always take priority because drying times and surface compatibility vary.