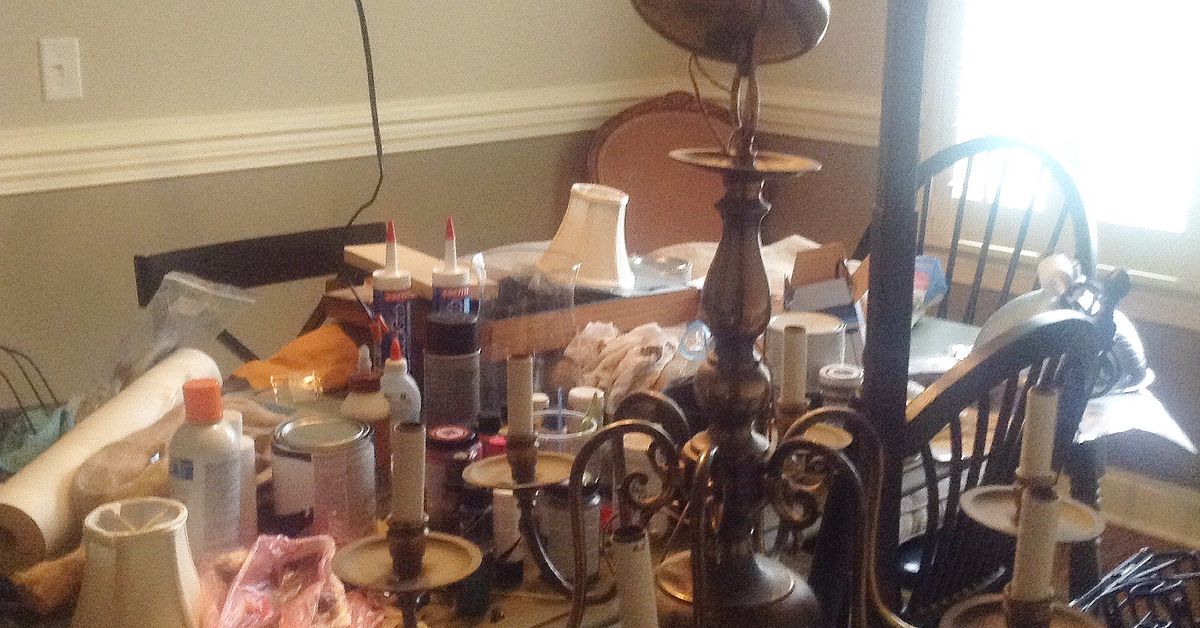

An old brass chandelier can make a dining room look as though it is still waiting for someone to serve gelatin salad from a copper mold. Fortunately, replacing the fixture is not your only option. With a can of metal-friendly spray paint, a little patience, and less money than many new chandeliers cost to ship, you can turn a dated light into a stylish focal point.
This DIY brass chandelier makeover is especially useful for builder-grade fixtures, thrift-store finds, and hand-me-down lights with good bones but an outdated finish. The makeover is inexpensive, beginner-friendly, and customizable. You can create a matte-black chandelier, an aged-bronze statement piece, a soft white fixture, or even a more modern antique-gold finish.
The secret is not spraying paint wildly while whispering, “Please look expensive.” A durable result depends on electrical safety, careful cleaning, light sanding, proper masking, and several thin coats. Here is how to complete the project without blowing your decorating budgetor coating the garage floor in metallic mist.
Why Make Over an Old Brass Chandelier?
Older brass chandeliers are easy to find at yard sales, thrift stores, architectural salvage shops, and online marketplaces. Many have solid frames, decorative arms, and classic proportions. Their biggest problem is often the bright, yellow-toned finish rather than the fixture itself.
Painting an existing chandelier can save money while keeping a usable item out of the waste stream. It also gives you control over the final appearance. Instead of settling for whatever finish is available in your price range, you can coordinate the fixture with cabinet hardware, curtain rods, faucets, picture frames, or furniture.
A makeover works particularly well when the chandelier:
- Has a shape and scale that fit the room
- Feels sturdy and hangs straight
- Has intact sockets and wiring
- Needs only cosmetic improvement
- Can be safely supported by the existing ceiling box
However, do not automatically paint a valuable antique. A magnet can help you investigate the material. If the magnet sticks, the chandelier may be steel or iron beneath a brass-colored coating. If it does not stick, the piece may contain solid brass or bronze worth cleaning or professionally restoring. Look for maker marks and research unusual or ornate fixtures before covering them.
Inspect the Chandelier Before Starting
Paint cannot repair brittle wiring, cracked sockets, missing ground wires, or a loose ceiling box. Before beginning the makeover, inspect the fixture carefully. Look for frayed insulation, scorched areas, corrosion, bent parts, damaged candle sleeves, and loose connections.
If the chandelier buzzes, flickers, smells hot, trips a breaker, or has questionable wiring, stop using it until it has been evaluated by a qualified electrician or lighting-repair specialist. Rewiring a vintage chandelier can still be less expensive than purchasing a high-end replacement, but it should not be treated as an optional cosmetic step.
Check the manufacturer’s label for the maximum bulb wattage. LED bulbs are a useful choice because they generally produce less heat than traditional incandescent bulbs while providing comparable light output. Never exceed the fixture’s listed wattage or use a bulb that touches a shade, sleeve, or decorative element.
Supplies for a Budget Chandelier Makeover
You may already own several of the required supplies. The exact total will depend on whether you need primer, replacement candle covers, bulbs, or professional electrical help.
Basic Materials
- Metal-compatible spray paint
- Bonding or metal primer, unless the selected paint specifically includes one
- Fine-grit sanding sponge or sandpaper
- Degreasing dish soap or a suitable surface cleaner
- Clean lint-free cloths
- Painter’s tape
- Plastic bags, foil, or plastic wrap
- Drop cloth, cardboard, or plastic sheeting
- Disposable gloves
- Safety glasses
- Respiratory protection suitable for the coating being used
- Noncontact voltage tester
- Screwdrivers and pliers
Optional Upgrades
- New chandelier chain
- Replacement candle sleeves
- Decorative LED bulbs
- Small lampshades
- Crystal drops or beads
- Rub-on metallic wax for subtle highlights
- A compatible protective clear coat
A simple makeover may require only one can of paint and a few masking supplies. More elaborate projects can include new bulbs, sleeves, crystals, or a ceiling medallion. Set a spending limit before shopping so your “cheap makeover” does not quietly put on a tiny top hat and become a luxury renovation.
Choose the Right Chandelier Finish
The best color depends on the fixture’s shape, the room, and the mood you want to create.
Matte Black
Matte or satin black can make a traditional chandelier feel modern, industrial, or farmhouse-inspired. It creates strong contrast against pale walls and works well with black cabinet hardware or window frames.
Oil-Rubbed Bronze
A deep bronze finish preserves some of the fixture’s traditional character without the glare of polished brass. It pairs naturally with warm wood, cream walls, leather, and earthy colors.
Soft White
White paint can make an ornate chandelier feel lighter and less formal. It is an effective choice for cottage, coastal, romantic, or Scandinavian-inspired rooms. Choose a warm white when the room contains beige, cream, or natural wood.
Antique Gold
Not all brass needs to disappear. If the original finish simply looks too shiny or yellow, an antique-gold spray paint can create a softer, more current appearance. A dark brown or black glaze added selectively to recesses can produce extra depth.
A Bold Color
Navy, green, coral, or red can turn an inexpensive chandelier into a playful centerpiece. Bold paint is especially effective in a child’s room, breakfast nook, craft space, or eclectic dining room.
How to Complete a DIY Brass Chandelier Makeover
Step 1: Photograph the Fixture
Take clear photographs before removing anything. Capture the chain, canopy, wiring, decorative pieces, crystals, shades, and the order in which washers or nuts are installed. These pictures will be extremely helpful when you are staring at six mysterious rings later and wondering whether the chandelier assembled itself differently overnight.
Step 2: Turn Off Power at the Breaker
Turn off the circuit at the electrical panel. Switching off the wall switch alone is not sufficient protection. Use a voltage tester to verify that the fixture and wires are not energized before touching any electrical connection.
Work from a stable ladder on a dry floor and have another adult nearby to support the chandelier during removal. Chandeliers can be awkward even when they are not particularly heavy. If you are unfamiliar with household wiring, cannot identify the conductors, or discover unexpected connections, hire a licensed electrician.
Step 3: Remove and Label Small Parts
Remove bulbs, shades, crystals, candle sleeves, and loose decorative pieces. Place hardware in labeled bags. Mark similar-looking components by arm or position if necessary. Do not paint bulbs, electrical contacts, wire connectors, socket interiors, labels, or threaded surfaces that must fit together.
Step 4: Clean Away Grease and Dust
Dining-room and kitchen fixtures collect airborne grease, dust, and cleaning-product residue. Paint applied over contamination may bubble, fisheye, or peel.
Wipe the chandelier with warm water and a small amount of degreasing dish soap, using a soft brush for detailed areas. Avoid saturating sockets or wiring. Follow with a damp cloth to remove soap residue, then allow every part to dry completely.
Step 5: Scuff the Glossy Finish
Lightly sand painted or glossy surfaces with fine-grit sandpaper or a sanding sponge. The goal is not to grind away every trace of brass color. You are creating microscopic texture that helps primer and paint grip the surface.
Pay attention to smooth arms, the canopy, the chain, and frequently handled areas. Remove loose paint or rust rather than coating over it. Wipe away all sanding dust with a clean cloth.
Step 6: Mask Electrical and Moving Parts
Cover socket openings with painter’s tape, foil, or tightly fitted pieces of plastic. Mask exposed wire ends, labels, grounding points, threaded rods, chain connectors, and any surface that must conduct electricity or move freely.
If candle sleeves are in good condition, remove and paint them separately only when the material and selected paint are compatible. Replacement sleeves are inexpensive and may produce a cleaner result than trying to rescue stained, brittle plastic.
Step 7: Create a Safe Spray Area
Spray outdoors or in a well-ventilated workspace permitted by the product instructions. Protect floors, walls, vehicles, plants, and nearby objects from overspray. Avoid windy conditions, direct hot sunlight, flames, pilot lights, and other ignition sources.
Hanging the chandelier from a strong hook, metal stand, or sturdy tree branch makes it easier to reach every angle. Confirm that the support can safely hold the fixture. A large cardboard box placed behind or around smaller parts can help contain overspray.
Step 8: Apply Primer
Use a primer compatible with both the chandelier’s surface and the chosen topcoat. Primer is especially helpful on bare metal, highly polished surfaces, rusty spots, drastic color changes, and fixtures that will be handled during installation.
Shake the can for the time stated on the label. Begin spraying just beyond the edge of the chandelier, sweep smoothly across it, and release the nozzle after passing the opposite edge. Apply two or more thin coats as directed instead of trying to achieve full coverage immediately.
Step 9: Spray Several Light Color Coats
Once the primer is ready for recoating, apply the color in light, controlled passes. Keep the can moving and maintain the distance recommended on the product label. Rotate or reposition the fixture so you can reach the undersides of arms, chain links, curves, finials, and the canopy.
Thin coats reduce runs, puddles, and heavy texture. Allow the specified recoat time between applications. A chandelier has more hidden angles than it appears to have, so inspect it from above, below, and both sides before declaring victory.
Step 10: Let the Finish Cure
Dry paint is not necessarily cured paint. A surface may feel dry while remaining soft enough to dent, scratch, or stick to packing material. Follow the manufacturer’s curing instructions and give the finish additional time when conditions are cool or humid.
Do not rush to reinstall the fixture simply because the room looks lonely. Waiting an extra day is much less annoying than leaving fingerprints in the canopy and having to explain that the smudges are “custom artisan distressing.”
Step 11: Reassemble and Reinstall
Remove all masking and check that socket interiors, wires, threads, and grounding locations are clean. Reinstall decorative components according to your photographs and labels.
Before hanging the chandelier, confirm that the ceiling electrical box is rated and structurally supported for the fixture’s weight. Reconnect the fixture only if you have the required electrical knowledge and can follow the manufacturer’s instructions and local codes. Otherwise, have an electrician complete the installation.
Install bulbs that match the fixture’s socket type and wattage limits. Restore power at the breaker and test the light.
Common Chandelier Makeover Mistakes
Painting Without Cleaning
Dust and grease interfere with adhesion. Even a fixture that looks clean may carry residue, particularly if it hung near a kitchen.
Using One Heavy Coat
A thick coat is more likely to drip, wrinkle, sag, or obscure decorative details. Several light coats create a smoother finish.
Skipping the Recoat Instructions
Aerosol products often specify a particular window for adding another coat. Painting outside that window can cause lifting or wrinkling. Read the entire label before starting.
Spraying Over Socket Contacts
Paint belongs on decorative surfaces, not on electrical contacts, wires, grounding points, or socket interiors. Careful masking is mandatory.
Reassembling Too Soon
Fresh paint is easy to damage with pliers, chains, washers, and fingers. Give it enough time to harden before handling.
Ignoring the Ceiling Box
A decorative makeover does not reduce the chandelier’s weight. Verify that the electrical box and framing can support the fixture safely.
Ideas for Making the Fixture Look More Expensive
Paint creates the largest visual change, but a few inexpensive details can make the finished chandelier look more intentional.
- Replace cracked or yellowed candle sleeves.
- Choose matching LED bulbs with a consistent color temperature.
- Add small clip-on fabric shades for a softer look.
- Remove excessive crystal strands for a cleaner silhouette.
- Add a few crystal drops to a plain chandelier.
- Paint the chain and ceiling canopy for a unified finish.
- Use a ceiling medallion to give the installation more architectural presence.
- Coordinate the chandelier with two or three nearby metal accents rather than matching every metal in the room.
Mixed metals can look deliberate when one finish is dominant and another appears in smaller accents. A black chandelier, for example, can coexist with brass cabinet pulls when black is repeated in picture frames or furniture legs.
Sample Low-Cost Budget
Prices vary by location and brand, but a straightforward project might include:
- Thrifted chandelier: $10 to $35
- Metal primer: $7 to $12
- Spray paint: $7 to $15
- Sandpaper and masking supplies: $5 to $12
- Replacement candle sleeves: $5 to $15
- Decorative LED bulbs: $15 to $35
If you already own the chandelier and basic supplies, the cosmetic portion may cost less than a restaurant dinner. Professional rewiring or installation will increase the total, but those expenses address safety and should not be skipped merely to preserve an arbitrary budget.
Experience Notes: What a Cheap Chandelier Makeover Really Teaches You
The first lesson from refinishing an old chandelier is that the project looks easier on social media than it does while you are turning a six-arm fixture upside down in the garage. The painting itself is simple. The time-consuming part is inspecting every curve, masking the sockets, cleaning years of invisible residue, and discovering that one chain link has somehow avoided every coat.
The biggest improvement usually comes from preparation rather than expensive materials. On one budget-style makeover, a basic chandelier looked far better after it was cleaned and fitted with fresh candle sleeveseven before the final color went on. The original sleeves were unevenly yellowed, which made the entire fixture look older and dirtier than it was. Replacing those small parts created a crisp background for the new finish.
Another practical lesson is to test your paint combination on a hidden area or scrap metal. Metallic colors can look dramatically different under store lighting, daylight, and warm indoor bulbs. A gold that appears subtle on the cap may look like a marching-band instrument once it covers the whole chandelier. Matte black is usually forgiving, while bright metallic finishes tend to reveal uneven spraying and surface flaws.
Suspending the fixture also makes a major difference. Laying it on cardboard seems convenient until one side sticks to the surface or remains inaccessible. Hanging it allows you to walk around the chandelier and spray upward into the arms. The challenge is controlling the swinging. A second tie point or temporary stabilizing wire can keep the fixture from rotating like a tiny amusement-park ride every time the spray hits it.
Patience is the least exciting supply and the one most likely to determine the result. It is tempting to fix a thin area immediately, but repeatedly spraying the same spot creates drips. A better approach is to complete one light pass, step away, and return during the proper recoat window. The first coat may look alarmingly patchy. That is normal. The second and third coats produce the transformation.
Lighting also affects the inspection process. A fixture that appears fully covered in a dim garage may reveal brass-colored shadows after it is installed over the dining table. Use bright portable lighting and examine the chandelier from the angles people will see from below. The undersides of curves, socket cups, and decorative leaves are common hiding places for missed areas.
It is also worth deciding which imperfections add character and which look careless. A tiny bit of texture on an ornate vintage-style chandelier may disappear once the fixture is hanging. A run across the smooth ceiling canopy will remain obvious. Concentrate your best finish on the broad, visible surfaces while still coating hidden metal well enough to create a unified appearance.
The cheapest project is not always the one with the lowest receipt total. Reusing questionable wire connectors, ignoring cracked sockets, or hanging a heavy fixture from an unsuitable box does not represent meaningful savings. The smart budget approach is to spend modestly on the cosmetic transformation while paying for professional help when the electrical condition or installation exceeds your experience.
Finally, the makeover can change more than the chandelier. Once the fixture becomes a strong focal point, the room may need fewer decorative objects. A black chandelier can sharpen a plain dining room, while an antique-gold finish can warm up cool walls and simple furniture. That makes this small DIY project unusually powerful: one rescued fixture can alter the character of the entire space without requiring new flooring, new furniture, or a dramatic television-renovation reveal.
How to Maintain the Painted Chandelier
Turn off the light and allow the bulbs to cool before cleaning. Dust the fixture regularly with a microfiber cloth or soft brush. For stubborn residue, lightly dampen a cloth with water and mild soap, then wipe gently. Avoid abrasive pads, strong solvents, and aggressive polishing products that may damage the painted finish.
Check periodically for loose hardware, damaged wires, cracked sockets, flickering bulbs, or signs of heat. Stop using the fixture and consult an electrician if you notice buzzing, scorching, unusual warmth, or an electrical odor.
Conclusion
A DIY brass chandelier makeover is one of the most satisfying ways to update a room on a limited budget. The fixture already provides the shape, wiring framework, and decorative scale; your job is to give the visible finish a new personality.
Start with a sound chandelier, shut off power at the breaker, label every part, clean and scuff the metal, mask all electrical components, and apply compatible primer and paint in thin coats. Let the coating cure before reinstalling the fixture. Add fresh sleeves or bulbs, and an outdated brass chandelier can become a polished statement piece for a fraction of the price of a new one.
Note: Product requirements and electrical installations vary. Follow the paint manufacturer’s label, the chandelier manufacturer’s instructions, and applicable local electrical codes. Hire a licensed electrician whenever the wiring, ceiling support, or installation is uncertain.