
A top knot is the hairstyle equivalent of a reliable best friend: quick to call, easy to trust, and surprisingly ur neck, dress up a simple outfit, and make it appear as though you spent far more time getting ready than you actually did.
The basic idea sounds almost suspiciously simple. Gather your hair high, secure it, wrap it into a bun, and pin it. In reality, the perfect top knot depends on a few important details, including placement, tension, texture, hair length, and the type of finish you want.
This guide explains how to make a top knot in four practical ways: sleek and polished, loose and messy, full and curly, and half-up for shorter or finer hair. Each method can be adjusted to suit straight, wavy, curly, coily, thick, fine, natural, layered, or chemically treated hair.
What Is a Top Knot?
A top knot is a high bun positioned near the crown or uppermost part of the head. Unlike a low chignon, which sits close to the nape, a top knot creates height and draws attention upward. It can look smooth and formal, loose and casual, sculpted and dramatic, or soft and romantic.
Although people often use the terms “top knot,” “high bun,” and “messy bun” interchangeably, there are subtle differences. A high bun describes the placement, while a top knot usually has a more compact, twisted, wrapped, or knotted shape. A messy bun is defined by its relaxed finish rather than its position.
The beauty of the style is its flexibility. The same basic top knot can go from grocery-store practical to wedding-guest elegant with little more than a brush, a few pins, and a different attitude.
Tools and Products You May Need
You do not need a professional styling kit or a bathroom cabinet that resembles a beauty supply store. Most top knots can be created with a few basic items:
- A snag-free hair elastic or soft scrunchie
- Bobby pins or U-shaped hairpins
- A paddle brush, boar-bristle brush, or wide-tooth comb
- Dry shampoo or texturizing spray for grip
- Lightweight gel, mousse, curl cream, or edge control as needed
- Flexible-hold hairspray
- A small brush or clean toothbrush for smoothing flyaways
- An optional bun donut for extra volume
Choose products according to your texture. Fine or slippery hair usually benefits from dry shampoo or texture spray. Thick hair may need a stronger elastic and several long pins. Curly and coily hair often responds better to moisturizing cream, gel, or edge control than to heavy brushing.
How to Prepare Your Hair
For Straight or Fine Hair
Freshly washed straight hair can be so smooth that it escapes from a bun like it has somewhere important to be. Add a small amount of dry shampoo, volumizing powder, mousse, or texturizing spray before gathering it. Concentrate the product around the roots and through the ponytail rather than coating the entire head.
For Thick or Wavy Hair
Detangle the lengths and decide whether you want to emphasize or smooth your natural movement. Use your fingers for a softer finish or a brush for a more controlled shape. A small amount of styling cream can help prevent the ends from puffing out of the bun.
For Curly or Coily Hair
Begin with moisturized, gently detangled hair. You can preserve your curl pattern by using your hands or a wide-tooth comb instead of repeatedly brushing through the lengths. Apply curl cream, leave-in conditioner, mousse, gel, or edge control only where needed.
For Short or Layered Hair
Do not fight every short piece. A half-up top knot, a few strategically placed pins, or softly loose sections can look intentional. Texturizing spray helps short layers grip one another, while small bobby pins can secure pieces that do not reach the main ponytail.
Style 1: The Classic Sleek Top Knot
The sleek top knot is clean, polished, and versatile enough for the office, a formal dinner, or any occasion when you want your hair to suggest that your life is completely organized.
Step 1: Smooth Your Hair
Brush or comb your hair away from your face. Apply a small amount of gel, smoothing cream, or lightweight pomade around the hairline. Avoid using too much product at once; the goal is shine and control, not a helmet with excellent manners.
Step 2: Create a High Ponytail
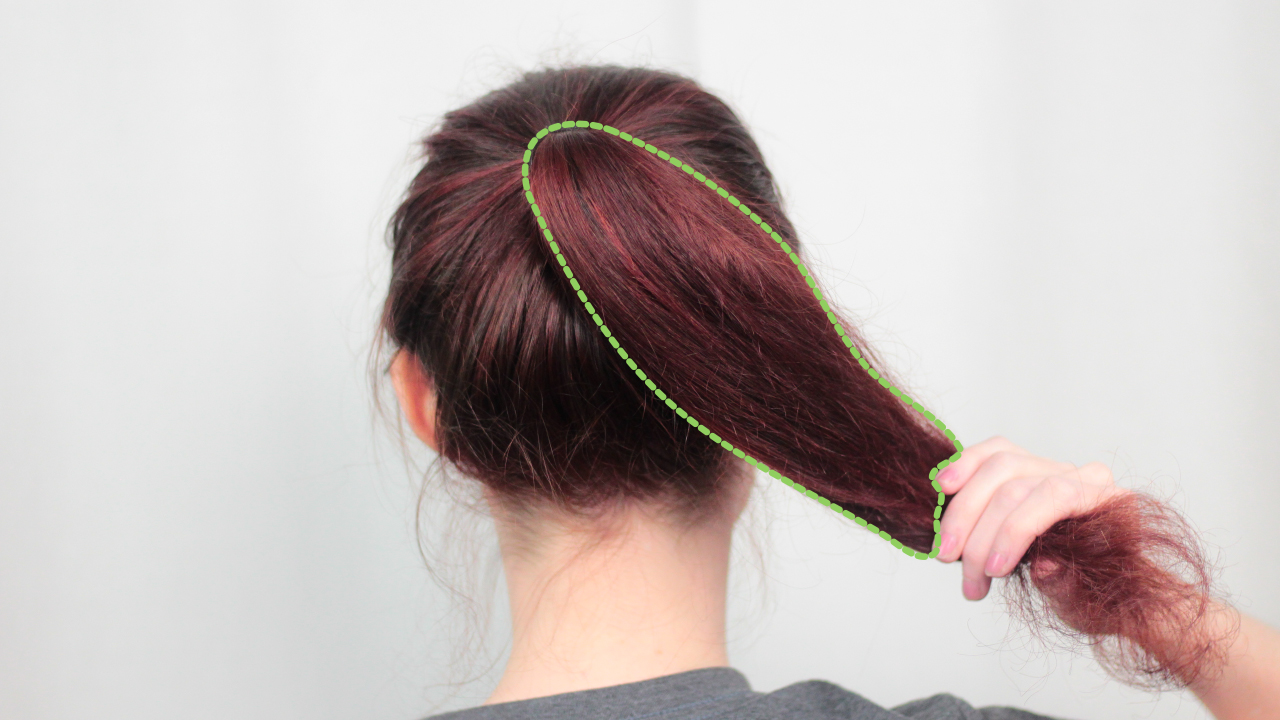
Gather your hair near the crown. For a flattering profile, position the ponytail slightly behind the very top of your head rather than directly above your forehead. Look at the style from the side before securing it.
Tie the ponytail firmly enough to hold but not so tightly that your scalp feels sore. A hairstyle should not cause pain, throbbing, bumps, or a headache.
Step 3: Form the Knot
Twist the ponytail from the base toward the ends. Wrap the twist around the elastic, keeping the shape compact. Tuck the ends beneath the bun and slide in bobby pins around the base.
Insert each pin through a small piece of the bun, then angle it toward the base so it catches the hair close to the scalp. This method usually holds better than pushing a pin straight down through the center.
Step 4: Finish the Style
Use a soft brush to smooth the surface. Apply flexible-hold hairspray or place a small amount of gel on a clean toothbrush and gently sweep down flyaways. For a softer look, release one or two thin pieces near the temples.
Best Adjustments by Hair Type
- Fine hair: Tease the ponytail lightly or place it over a small bun donut before wrapping.
- Thick hair: Divide the ponytail into two sections and wrap them separately around the base.
- Curly hair: Smooth only the roots and let the bun retain some natural texture.
- Coily hair: Stretch the roots gently if desired, then pin sections around the base rather than forcing the entire ponytail into one tight twist.
Style 2: The Easy Messy Top Knot
A good messy top knot should look relaxed, not defeated. The secret is to create a secure foundation first and loosen it afterward. Beginning with complete chaos usually produces a bun that falls apart before you locate your other shoe.
Step 1: Add Texture
Work dry shampoo or texturizing spray through the roots and lengths. If your hair is naturally wavy or curly, scrunch it gently rather than brushing out the texture.
Step 2: Make a Loose High Ponytail
Gather your hair using your fingers so the surface retains a little movement. Secure it high on the head. Leave a small amount of slack near the scalp instead of pulling every strand tightly backward.
Step 3: Build Volume
Lightly backcomb the ponytail if your hair is fine. For medium or thick hair, separate the ponytail with your fingers to create an airy texture. Twist it loosely, stopping before it becomes a tight rope.
Step 4: Wrap and Pin
Coil the ponytail around its base and secure it in several places. Do not worry about making a perfect circle. Gently pull small sections of the bun outward until you like its width and height.
Step 5: Add the Intentional Mess
Loosen a little hair at the crown and pull out a few face-framing pieces. Keep the sides secure so the bun remains balanced. Finish with a light mist of hairspray rather than soaking the style into submission.
Common Messy-Bun Mistakes
- Wrapping the ponytail too tightly and ending up with a tiny knob
- Pulling out large chunks instead of a few delicate pieces
- Using too much oil, which can remove the grip needed for hold
- Relying on one elastic without adding pins
- Placing the bun too far forward, where it may lean toward the forehead
Style 3: The Curly or Coily Puff Top Knot
This version celebrates volume rather than compressing it. It works especially well for curly, coily, kinky, and natural hair because the texture becomes the main feature of the bun.
Step 1: Moisturize and Detangle
Apply leave-in conditioner or curl cream to dry or slightly damp hair. Detangle gently with your fingers or a wide-tooth comb. Avoid piling soaking-wet hair into a tight knot, especially when you plan to wear it for many hours.
Step 2: Gather the Hair Upward
Tilt your head forward and guide your hair toward the crown. Smooth the perimeter with your palms, a soft brush, or a small amount of gel. Preserve the texture in the lengths.
Step 3: Secure Without Crushing the Curls
Use a soft scrunchie, fabric-covered elastic, or adjustable hair tie. Wrap it only as many times as necessary. For very dense hair, an adjustable band can make it easier to control the tension.
Step 4: Shape the Top Knot
Choose one of two finishes. For a puff-style knot, spread the curls around the base and pin only the outer sections. For a more structured bun, divide the ponytail into several sections, twist each one loosely, and pin the twists around the elastic.
Step 5: Style the Perimeter
Smooth or shape the edges according to your preference. You can create a neat finish with edge control, leave the hairline soft and natural, or add a scarf or headband. If the top knot feels heavy, add U-shaped pins through the bun to distribute its weight.
Tips for Protecting Your Hairline
Repeatedly wearing a very tight bun in exactly the same position can place unnecessary stress on the hairline. Alternate between high, medium, and low styles; use gentle accessories; and take the style down when it becomes uncomfortable. Loosen it immediately if you notice pain, persistent tenderness, or excessive pulling.
Style 4: The Half-Up Top Knot for Short, Fine, or Layered Hair
You do not need waist-length hair to join the top-knot club. A half-up version provides the same playful height while allowing shorter layers to remain down.
Step 1: Section the Top Half
Use your fingers or the end of a comb to create a section from the temples toward the crown. For a fuller knot, include hair from just above the ears. For a smaller, more delicate knot, use only the section at the top of the head.
Step 2: Create a Small Ponytail
Gather the section where you want the knot to sit and secure it with a small snag-free elastic. Keep the placement high for a youthful, casual finish or move it slightly backward for a softer silhouette.
Step 3: Add Fullness
If the ponytail is fine, mist it with texture spray and tease it gently. If it is curly, separate the curls with your fingers. Do not overwork the section; a small top knot often looks better with visible texture.
Step 4: Twist, Wrap, and Pin
Twist the ponytail loosely around the elastic. Tuck the ends underneath and secure them with one or two small pins. Pull the bun outward slightly to make it appear wider.
Step 5: Blend the Remaining Hair
Wear the lower section straight, wavy, curly, or natural. For short layers that stick out around the knot, use tiny pins or accept them as part of the look. A deliberately imperfect half-up top knot is usually more flattering than one shellacked into silence.
How to Make a Top Knot Look Fuller
If your bun looks smaller than expected, the solution is usually shape rather than additional hair. Try these techniques:
- Apply dry shampoo or texture spray before styling.
- Tease the ponytail gently before wrapping it.
- Split the ponytail into two or three sections and pin each one separately.
- Wrap the hair loosely instead of twisting it tightly.
- Use a small bun donut that matches your hair color.
- Gently pull the outer edges of the finished knot to widen it.
- Pin curled sections around the base to create a sculpted shape.
Remember that a wider bun is not automatically a better bun. The most flattering size depends on your hair density, head shape, outfit, and the overall effect you want.
How to Keep a Top Knot in Place All Day
Long-lasting hold begins with a stable ponytail. Use an elastic suited to the weight of your hair, then reinforce the bun with several pins placed around its perimeter.
Spraying a small amount of dry shampoo or texture spray onto clean pins may help them grip slippery hair. Cross two bobby pins for extra security in a problem area, but avoid creating a bulky pile of metal in one spot.
For thick hair, U-shaped hairpins can anchor larger sections without flattening the bun. Push the open end through the outer edge of the knot, turn the pin toward the scalp, and slide it into the base.
Finish with flexible-hold hairspray so the style can move naturally. Strong, stiff formulas may be useful for formal events, but they can make a casual top knot appear hard and overly controlled.
Top Knot Troubleshooting
The Bun Keeps Falling to One Side
Your ponytail may be off-center, or the hair may be distributed unevenly. Reposition the ponytail and pin the heavier side closer to the base.
The Knot Looks Too Small
Loosen the twist, tease the ponytail, separate it into sections, or use a bun donut. Wrapping tightly is the most common reason a top knot loses volume.
Short Pieces Keep Falling Out
Apply texture spray and secure the pieces with small pins. You can also twist side sections before adding them to the ponytail. For very short layers, choose the half-up style.
The Style Feels Painful
Take it down and remake it with less tension. Use a softer elastic, reduce the bun’s height, or distribute its weight with pins. Pain is not evidence that the style is secure; it is evidence that the style is painful.
The Roots Look Flat
Before securing the ponytail, lift small sections at the crown with your fingertips. For fine hair, apply volumizing powder or gently tease the roots beneath the surface layer.
The Bun Looks Too Perfect
Pull outward at the edges, loosen the crown, and release one or two face-framing pieces. Do not dismantle the entire structure in pursuit of effortless beauty. Ironically, that becomes quite a lot of effort.
Real-World Top Knot Experiences: What People Commonly Discover
The first top knot many people make is rarely the top knot they imagined. The inspiration photo shows an airy, symmetrical bun floating elegantly above the crown. The bathroom-mirror version may resemble a confused cinnamon roll. That difference is normal because a successful bun depends on learning how your particular hair folds, expands, and responds to tension.
People with fine, straight hair commonly discover that freshly washed hair is not always the easiest hair to style. It may look beautifully shiny yet slide out of every pin. Adding texture before making the ponytail usually changes the experience completely. A little dry shampoo through the roots and lengths can provide enough grip to turn a collapsing knot into a stable one. The biggest lesson is that fine hair often needs preparation, not an entire can of hairspray afterward.
Those with thick hair frequently have the opposite problem. Their top knot may be full without any assistance, but it can feel heavy or refuse to stay upright. Wrapping one large ponytail into a single twist often creates a dense bun that pulls backward. Dividing the ponytail into two or three sections makes the hair easier to control. Each section can be wrapped and pinned independently, spreading the weight across the base.
Curly-haired people often find that brushing is the turning point between a beautiful textured knot and an unwanted cloud of frizz. Using fingers to gather the hair preserves curl definition and creates a softer surface. When a smoother hairline is desired, brushing only the roots allows the bun itself to remain curly and full. The resulting contrast can look polished without erasing the hair’s natural character.
For coily and natural hair, comfort often matters as much as appearance. A very high knot can look dramatic, but dense hair positioned at the very top of the head may feel heavy after several hours. Moving the base slightly behind the crown, using a wider or adjustable band, and anchoring the bun with large pins can make the style easier to wear. Many people also prefer shaping several twists into a bun rather than forcing the entire ponytail into one compact coil.
Short-haired users regularly assume a top knot is impossible until they try a half-up version. The first attempt may produce a tiny sprout rather than a dramatic bun, but texture spray and gentle teasing can add surprising fullness. Decorative clips, scarves, and visible pins can also make the smaller shape look intentional. A top knot does not need to be enormous to be stylish.
Another common experience is that the hairstyle looks best on the second attempt. The first version reveals whether the ponytail is too high, too low, too tight, or off-center. Releasing it and adjusting the placement by even an inch can improve the entire silhouette. Checking the side and back with a second mirror or phone camera is especially useful because the front view does not reveal a leaning bun.
Finally, people often learn that “messy” does not mean “unsecured.” The most dependable messy top knots begin with a firm base, several well-placed pins, and controlled loosening. A few soft pieces around the face create romance; half the ponytail falling onto one shoulder creates an emergency. Secure first, soften second, and stop adjusting once the shape looks balanced.
Final Thoughts
Learning how to make a top knot is less about memorizing one rigid technique and more about understanding what your hair needs. Straight and fine hair may need grip. Thick hair may need sectioning. Curly and coily hair may need moisture, flexible shaping, and gentler handling. Short or layered hair may work best in a half-up knot.
Start with a secure but comfortable ponytail, build the shape before pinning, and adjust the finish afterward. Keep the knot smooth for a polished event, loosen it for an everyday look, preserve natural texture for volume, or wear it half-up when your length is limited.
Most importantly, avoid pulling the hair painfully tight. A top knot should lift your style, not your eyebrows, your mood, and possibly your entire scalp. With a little practice, this five-minute updo can become one of the most useful techniques in your hairstyling routine.
SEO Information