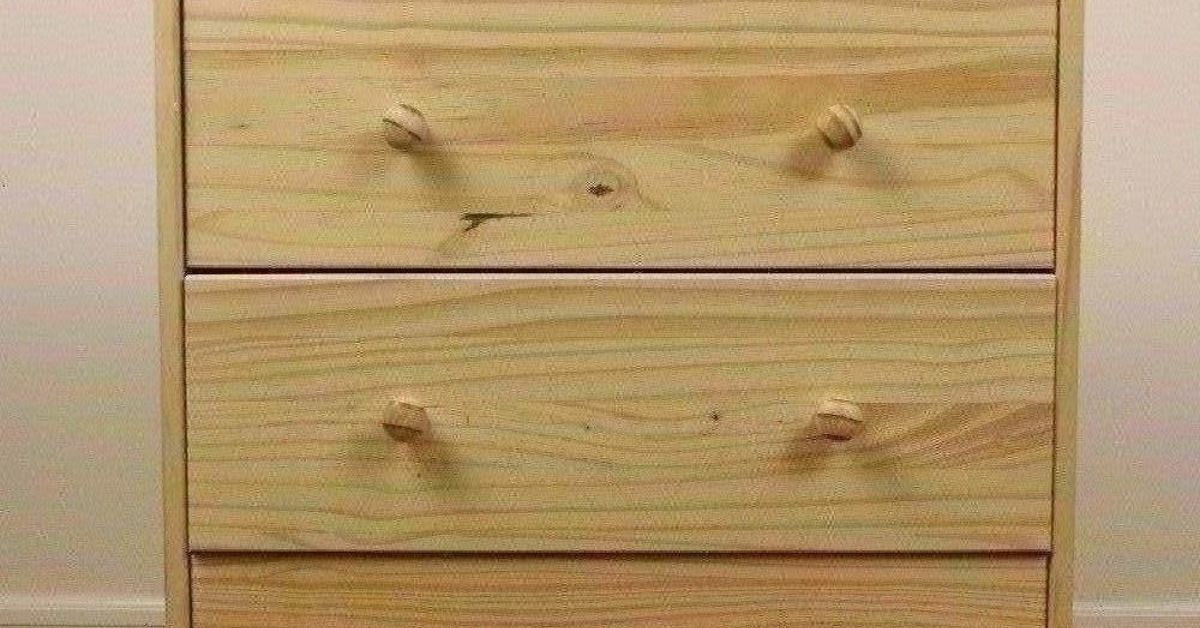

The IKEA RAST dresser begins life with all the visual excitement of a plain shipping crate. That is precisely its charm. Its uncomplicated shape and unfinished pine surface give DIYers a forgiving canvas for paint, pattern, and new hardware. With a bold base color and a reusable furniture stencil, this modest three-drawer chest can become a statement piece that looks far more boutique than flat-pack.
This makeover takes inspiration from a celebrated RAST project featuring a deep blue-green finish, a white Otomi-style pattern, and warm metallic knobs. The method is simple enough for a beginner, but the detailsespecially sanding, alignment, and paint controlseparate a crisp result from a fuzzy one.
Why the IKEA RAST Is Perfect for a Stencil Makeover
The RAST is a compact solid-wood dresser designed to be personalized. Unlike glossy laminate pieces, its pine exterior accepts sanding, primer, paint, stain, and decorative treatments without an elaborate stripping process. Its broad drawer fronts also create a useful canvas for repeating motifs. IKEA and major home publications continue to present the RAST as a practical blank slate for customization.
The best-known stencil version works because it balances three elements: a dark base color, a bright organic pattern, and contrasting hardware. The original tutorial used a dense foam roller, repositionable adhesive, and very little white paint to reduce bleeding beneath the stencil.
Materials and Tools
- IKEA RAST three-drawer dresser
- Drop cloth, screwdriver, and a container for hardware
- 180- and 220-grit sanding sponges
- Wood filler, putty knife, and tack cloth or vacuum
- Wood or stain-blocking primer
- Durable furniture, cabinet, or interior enamel
- Reusable furniture stencil and contrasting paint
- Repositionable adhesive and low-tack painter’s tape
- Two-inch dense foam roller, stencil brush, or foam pouncer
- Small artist’s brush for corrections
- Compatible clear topcoat
- New knobs or paint suitable for the original knobs
- Gloves, dust mask, and adequate ventilation
Follow every product label for ventilation, drying, curing, and compatibility. Test the complete paint-and-topcoat system on scrap pine or the back of a drawer before committing to the visible surfaces.
Plan the Design Before Opening the Paint
Choose the Right Stencil Scale
A medium repeating motif usually works best. Tiny details can clog, while an oversized medallion may lose its shape across drawer gaps. Otomi, Moroccan tile, Art Deco fan, botanical, geometric lattice, and faux bone-inlay patterns are strong choices. Dry-fit the stencil over the assembled dresser so important details do not land awkwardly on knob holes.
Build a Simple Color Story
Deep teal and white create drama, but navy and ivory feel classic, sage and cream feel relaxed, and charcoal with muted gold looks polished. For a Scandinavian variation, preserve some natural pine and stencil only the drawer fronts. Hardware should reinforce the palette: brass adds formality, copper adds warmth, black sharpens the design, and natural wood softens it.
How to Create the Stenciled IKEA RAST Hack
1. Inspect and Test-Fit the Dresser
Check the pine for dents, rough edges, resinous knots, and damaged corners. Assemble the dresser far enough to confirm that each drawer fits properly. Label the backs of the drawers, then remove the knobs.
2. Sand the Pine
Sand visible surfaces with 180-grit paper, following the grain, then finish the drawer fronts and top with 220-grit. You are smoothing raised fibers, not attempting an archaeological excavation. Remove every trace of dust before continuing.
3. Repair and Prime
Fill dents, unwanted holes, or open seams with wood filler and sand the repairs flush. Use a stain-blocking primer on knots that may discolor a pale finish. Apply one thin, even primer coat, let it dry, and lightly sand any new roughness. Reliable furniture-painting guides consistently emphasize cleaning, sanding, repairing, priming when needed, and applying thin coats for a smoother, longer-lasting result.
4. Paint the Base Color
Use a small roller on broad areas and a brush in corners. Apply the first thin coat, allow it to dry fully, and sand away dust nibs if necessary. Add a second coat. One thick coat may look faster, but it often stays soft, shows roller texture, and invites fingerprints from everyone in the house.
5. Center the Pattern
After the base color has dried, reinstall and align the drawers. Mark the dresser’s vertical center with removable tape or a light chalk line. Position the first stencil repeat at the center rather than beginning at one side; this usually produces balanced partial motifs at both edges.
6. Secure the Stencil
Apply a light mist of repositionable adhesive to the back of the stencil according to its instructions. Press it flat and tape the edges. Mask drawer gaps, sides, and any areas that should remain solid. Better Homes & Gardens similarly recommends stencil adhesive, careful alignment, masking, and light paint application on dresser projects.
7. Load, Then Aggressively Offload, the Roller
Roll a small amount of contrasting paint onto a dense foam roller, then remove most of it on folded paper towels or clean cardboard. The roller should look almost dry. This feels absurd until the pattern comes out crisp. Excess paint is the main cause of seepage, and stencil specialists repeatedly advise offloading before application.
8. Apply Light Passes
Roll gently from the stencil edges toward the center, or use a light up-and-down pouncing motion with a stencil brush. Avoid sideways scrubbing and heavy pressure. Two faint passes are safer than one wet pass. Hold delicate bridges flat with a gloved fingertip or the blunt end of a brush.
9. Lift and Repeat
Lift the stencil straight away from the surface without dragging it. Align the next repeat using registration marks or recognizable pattern points. Work from the center toward both sides, cleaning the stencil whenever dried paint begins narrowing the openings.
10. Touch Up the Pattern
Let small bleeds dry, then sharpen them with the base color and a fine artist’s brush. Step back several feet before correcting every wobble. A flaw that appears enormous from six inches away may disappear completely at normal viewing distance.
11. Update the Knobs
Paint the original knobs with a compatible metallic finish or replace them. Burnt orange or copper energizes teal; brass makes navy more tailored; black suits pale modern palettes. If switching from knobs to two-hole pulls, drill and fill the new holes before painting.
12. Seal and Cure
Once the decorative paint has dried as directed, add thin coats of a compatible clear finish to improve resistance to routine handling and scratches. Test first because some topcoats can alter light colors or sheen. Protective clear finishes are commonly recommended for painted and stenciled furniture that will receive regular use.
13. Reassemble and Anchor
Allow the finish to cure for the period listed on the product label before loading the drawers or placing objects on top. Reinstall the hardware, then secure the dresser to the wall with suitable anchoring hardware and the manufacturer’s instructions. The U.S. Consumer Product Safety Commission advises anchoring dressers and other clothing-storage furniture to reduce tip-over risk.
Common Problems and Fast Fixes
Blurry Edges
Reduce the amount of paint, lower the pressure, and make sure the stencil lies flat.
A Crooked Repeat
Return to the centerline and use registration marks. Do not repeat a mistake in the hope that it will become a design choice.
Paint Lifting With the Stencil
Let the base coat dry longer, use less adhesive, and reduce the tack of painter’s tape by pressing it briefly against clean fabric.
Rough Pine Grain
Let the coat dry, sand lightly with fine-grit paper, remove the dust, and continue with thin layers.
Style Variations Worth Trying
A small floral or geometric stencil in white over indigo, blue-gray, or black can imitate the rhythm of bone-inlay furniture. Apartment Therapy has featured RAST transformations that use planned stencil placement to create this high-detail look without actual inlay work.
For a modern dresser, stencil only the center third of each drawer and leave a solid border. For a child’s room, try stars, woodland animals, or simple shapes in muted colors. Two RAST dressers can become coordinated nightstands by mirroring the pattern or reversing the colors.
Experience Notes: What This Project Teaches You
The first lesson is that the plain RAST changes character surprisingly early. As soon as the base color covers the raw pine, the dresser stops looking temporary and begins to look intentional. That quick improvement is motivating, but it can also encourage rushing. The stencil stage rewards the opposite approach: slow alignment, minimal paint, and frequent pauses to check the overall composition.
The most memorable discovery for many first-time stencil users is that an almost-dry roller is the correct roller. Beginners naturally load it as though they are painting a wall, then find a soft halo beneath every opening. After one imperfect repeat, they learn to offload far more paint. It feels wasteful for a moment, but it is the simplest route to sharp edges.
Alignment becomes the second major lesson. A repeating design magnifies tiny decisions. Beginning at one side may leave a narrow, awkward fragment at the opposite edge, while starting in the center tends to balance the composition. Drawer gaps complicate the layout because the eye expects the image to continue smoothly across three moving parts. Reinstalling and aligning the drawers before stenciling makes the pattern easier to judge as a single design.
The project also teaches when not to fix something. Fresh stencil work can look brutally imperfect from close range. A slightly uneven curve may seem disastrous when your face is inches from the dresser. Across the room, the repeated pattern blends into a rich decorative surface. Correct obvious smears, but do not repaint half the design to eliminate a pinhead-sized wobble. Handmade character and careless work are different, yet perfectionism can turn a cheerful weekend project into a hostage situation.
Hardware often delivers the biggest surprise. Knobs occupy very little space, yet their finish changes the entire personality of the piece. Copper makes teal energetic, brass makes navy formal, black sharpens a pale palette, and natural wood makes a busy pattern feel calmer. Holding several options against the painted drawer before choosing them is a tiny step with an outsized payoff.
Finally, the makeover teaches patience after the apparent finish line. A clear coat may feel dry while remaining vulnerable to dents, scratches, and sticking. Daily use is much harder on furniture than a reveal photograph suggests: hands pull the drawers, objects slide across the top, and corners meet vacuum cleaners with depressing regularity. Allowing the finish to cure properlyand anchoring the dresser securely afterwardturns attractive craft work into functional household furniture.
That balance explains the enduring appeal of the stencil method. It does not require structural rebuilding, expensive overlays, or specialist machinery. It asks for a clear design, careful preparation, restrained paint application, and time. In return, a basic pine chest becomes a personal object with color, pattern, and a story.
Conclusion
The best IKEA RAST hack using stencils is less about copying one exact motif than following a reliable method. Smooth and prime the pine, apply thin base coats, center the design, use far less stencil paint than seems reasonable, correct only the flaws that matter, and protect the finish. The famous teal, white, and warm-metal combination is a proven showstopper, but the same technique can look modern, coastal, vintage, bohemian, or minimalist.
Good DIY furniture is part creativity and part chemistry. Choose the pattern you love, let the hardware support the palette, and give every layer time to dry and cure. Chemistry remains completely unmoved by your desire to put a lamp on the dresser tonight.