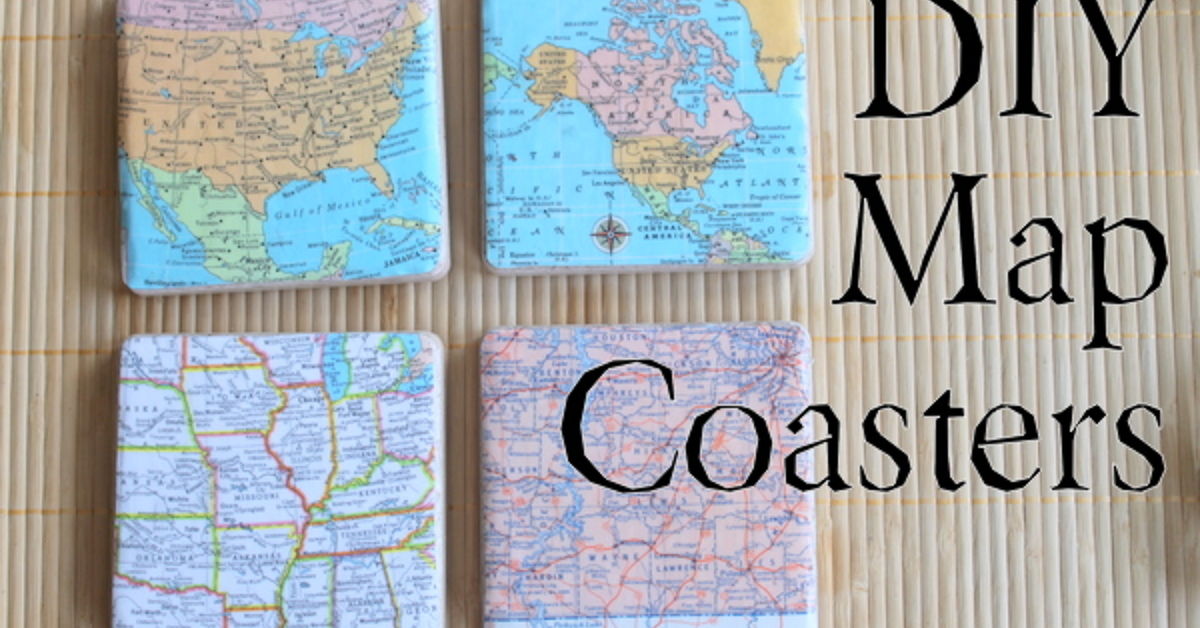

Maps do more than help us locate the nearest coffee shop. They preserve road trips, hometown memories, favorite national parks, college adventures, and vacations during which someone confidently said, “I know a shortcut.” With a few inexpensive supplies, those meaningful places can become practical pieces of home décor.
DIY map coasters are easy enough for beginners, affordable enough for a weekend project, and personal enough to give as wedding, housewarming, anniversary, or holiday gifts. This guide explains how to make durable map coasters from ceramic tile or wood, choose suitable map images, prevent wrinkles, seal the finished surface, and avoid the mistakes that turn a charming craft into four tiny, sticky disasters.
Why Make Your Own Map Coasters?
A homemade coaster is useful. A coaster displaying the neighborhood where you grew up has a story attached to it. That combination makes personalized map coasters more interesting than ordinary store-bought sets.
Each coaster can represent a different location, such as a birthplace, honeymoon destination, favorite hiking trail, or current home. Alternatively, four adjacent sections of one map can form a larger image when placed together like a geographic puzzle.
This project is also a clever way to repurpose outdated road atlases, damaged maps, leftover tiles, and old coaster blanks. However, scan or photocopy sentimental maps rather than cutting the originals. Family treasures deserve better than an accidental meeting with wet glue.
Supplies for DIY Map Coasters
Most materials are available from craft stores, hardware stores, or items already hiding in a drawer. Standard drink coasters are approximately 3.5 to 4 inches wide, which provides enough room for a recognizable location without occupying half the coffee table.
| Material | Purpose | Practical Tip |
|---|---|---|
| Four-inch ceramic tiles or wooden coaster blanks | Creates a strong, flat base | Choose pieces with level surfaces and matching dimensions. |
| Printed or paper maps | Provides the decorative design | Use copies when the original map has personal or collectible value. |
| Decoupage medium | Adheres and initially seals the paper | Select a finish intended for paper and the chosen base material. |
| Foam brush or soft flat brush | Applies thin, even coats | Keep a separate clean brush for the final finish. |
| Scissors or craft knife | Cuts the map accurately | Use a metal ruler and cutting mat when working with a knife. |
| Clear acrylic spray or water-resistant topcoat | Improves protection from condensation | Test compatibility and follow the product label exactly. |
| Cork sheet, felt, or furniture pads | Protects tabletops and reduces slipping | Thin self-adhesive cork creates a neat, full-coverage backing. |
You may also need fine-grit sandpaper, a pencil, wax paper, a brayer or plastic card, a lint-free cloth, and painter’s tape. If using aerosol sealer, work outdoors or in a properly ventilated location away from flames, children, and pets.
How to Choose the Best Maps
Use Places With Personal Meaning
Start with the story rather than the color scheme. A set featuring the cities where a couple met, married, honeymooned, and settled makes an excellent anniversary gift. A national park map can commemorate a memorable hike, while a street map centered on a first home works beautifully for a housewarming present.
Check Image Resolution and Scale
Digital maps must contain enough detail to remain sharp after printing. Before committing to the final sheet, print one sample at actual size. A map that looks crisp on a large monitor may turn into alphabet soup when squeezed onto a four-inch square.
Large-scale maps show smaller areas in greater detail, while smaller-scale maps cover broader regions. For a coaster centered on a specific neighborhood, select a detailed street map. For an entire state or road-trip route, use a broader view with fewer labels.
Respect Copyright and Usage Rights
Owning a paper map does not automatically grant permission to reproduce its artwork commercially. Personal projects made from an original atlas page are generally different from printing and selling copies of a protected digital map. When planning to sell finished coasters, verify the map’s license first.
Historical maps from the Library of Congress often include clear rights information. Many maps produced by the U.S. Geological Survey are in the public domain, although certain modern products may contain credited commercial data. National Park Service map collections also offer many downloadable public-domain options. Always inspect the rights statement attached to the specific file.
How to Make Map Coasters Step by Step
1. Prepare the Coaster Bases
Wash ceramic tiles with mild soap and water, rinse them, and let them dry completely. Remove adhesive residue, dust, and greasy fingerprints. For unfinished wood, sand the top and edges lightly with fine-grit sandpaper, then wipe away every trace of dust.
If a ceramic tile is extremely glossy, very light scuffing may improve adhesion, provided the selected finish permits it. Test one tile before preparing the entire set. Craft projects are more enjoyable when the experimental mishap has only one victim.
2. Select and Crop Each Location
Place a coaster over the desired part of the map and move it until the important location sits where you want it. Centering is not mandatory. An off-center river, coastline, or street grid can produce a more dynamic design.
Trace around the coaster with a pencil. Cut the paper approximately 1/16 to 1/8 inch inside the traced line if you want a narrow border around the design. This border also makes it easier to seal the paper’s edges.
Label the back of each cutout if the locations are not immediately recognizable. Otherwise, Denver may accidentally move next door to Miami during assembly, creating a transportation breakthrough that geographers somehow overlooked.
3. Test Printed Maps for Bleeding
Home inkjet prints sometimes smear when exposed to a water-based adhesive. Brush a little decoupage medium over a scrap from the same printed sheet. If the colors move, allow the print additional drying time or protect it with light coats of a compatible clear spray before gluing.
Laser prints are often less likely to bleed, but testing remains worthwhile. Different papers, printers, inks, and sealers behave differently, and a two-minute sample can save the entire project.
4. Attach the Map to the Base
Apply a thin, even layer of decoupage medium to the coaster. Cover the complete surface without leaving puddles. Position the map carefully, starting at one edge and lowering the rest gradually.
Place wax paper over the map and smooth from the center toward the edges with a brayer, clean plastic card, or your fingers. Gentle, consistent pressure pushes out trapped air and excess adhesive. Do not scrub wet paper aggressively; saturated paper has the emotional stability of a cookie dunked too long in milk.
Check every edge, remove visible adhesive with a damp cloth, and let the map dry naturally. Paper may appear slightly wavy while damp and flatten as moisture evaporates. Trying to force it flat repeatedly can create permanent creases.
5. Seal the Map Surface
Once the glued layer is dry, apply a thin topcoat of decoupage medium. Brush beyond the edge of the paper so the coating connects with the base. Let the coat dry according to the manufacturer’s directions, then repeat with two or three additional thin coats.
Alternate the brush direction between coats if you want a subtle, even texture. Thick applications take longer to cure and are more likely to develop cloudy areas, bubbles, ridges, or tackiness. Several thin coats are more reliable than one heroic blob.
6. Add a More Durable Clear Finish
Decoupage medium holds the map in place, but frequently used coasters benefit from a compatible water-resistant topcoat. Clear acrylic spray or water-based polyurethane can improve resistance to condensation and routine wiping. A two-part resin coating can create a glossy, waterproof-looking surface, although it requires more careful measuring, mixing, ventilation, and curing.
Test the selected topcoat on a spare print and base. Some solvents can disturb ink, discolor paper, or react with the adhesive underneath. When spraying, apply several light passes instead of one heavy coat that runs over the edges. Follow all temperature, humidity, recoat, ventilation, and safety instructions printed on the product.
7. Finish the Back
Cut cork or felt slightly smaller than the coaster. Attach it only after the upper finish is dry enough for safe handling. Full cork backing provides an even, polished appearance, while small felt pads are faster and allow air beneath the tile.
Set the coaster on a flat surface and confirm that it does not wobble. Uneven pads can turn a calm glass of iced tea into a tiny amusement-park ride.
8. Let the Coasters Cure
Dry-to-the-touch does not mean fully cured. Depending on the adhesive, topcoat, number of layers, temperature, and humidity, complete curing may take days or several weeks. Follow the longest applicable curing time among the products used.
Keep the coasters separated in a clean, dry area during this period. Do not stack them, wrap them as gifts, or test them with a sweating glass too soon. Premature use is a common cause of tacky surfaces and circular impressions.
Creative Map Coaster Ideas
- Road-trip set: Feature the starting point, favorite stop, funniest detour, and final destination.
- Hometown collection: Use maps showing childhood homes, schools, parks, and familiar downtown streets.
- National park coasters: Highlight trailheads, lakes, scenic overlooks, or campgrounds from memorable trips.
- Wedding gift: Create coasters for where the couple met, became engaged, married, and built a home.
- Puzzle layout: Divide one larger map image across four or six coaster blanks.
- Vintage theme: Pair historical city maps with stained wood edges, muted paint, or metallic accents.
- College memories: Center each design on a campus building, stadium, favorite restaurant, or questionable first apartment.
Common Problems and Simple Fixes
The Paper Wrinkles
Use less adhesive, choose slightly heavier paper, and smooth the map from the center outward. Allow each layer to dry naturally. A few temporary ripples may disappear during drying.
The Ink Smears
Test the print before assembly. Let fresh ink cure thoroughly and apply a compatible protective mist coat when necessary. Avoid repeatedly brushing over the same wet area.
The Surface Stays Sticky
Tackiness usually indicates incomplete curing, heavy coats, humid conditions, or an incompatible product combination. Move the coasters to a dry, dust-free location and allow more time. Do not stack them while the finish feels soft.
The Map Edges Lift
Apply adhesive all the way to the paper’s perimeter and press the edges firmly during assembly. A narrow uncovered border around the map allows the topcoat to bond directly with the coaster base and encapsulate the paper edge.
Water Leaves Marks
The protective finish may be too thin, insufficiently cured, or intended only for decorative use. Allow full curing before testing. If the product permits recoating, lightly prepare the surface and add a compatible water-resistant finish.
Care and Maintenance
Wipe finished map coasters with a soft, damp cloth and dry them promptly. Do not soak them in a sink or place them in a dishwasher unless every component and finish is specifically rated for that treatment. Avoid abrasive cleaners, scouring pads, and prolonged contact with very hot cookware.
Inspect the edges occasionally. A small chip in the finish is easier to repair before moisture reaches the paper. Store the coasters flat and separate them with thin pieces of felt if the chosen finish remains vulnerable to sticking.
Real-World Experience: Lessons That Improve DIY Map Coasters
The biggest lesson from practical map-coaster projects is that design decisions should happen before the glue appears. A map may contain the correct city but still produce an uninteresting coaster if the selected section is mostly blank countryside. Strong compositions usually include a recognizable road pattern, coastline, river, park boundary, or place name. Moving the template half an inch can completely change the result.
A second useful lesson concerns paper thickness. Thin atlas pages conform beautifully to a tile but become fragile as soon as they absorb adhesive. Heavy cardstock resists tearing, yet it can leave an obvious raised edge that is harder to seal. Ordinary high-quality printer paper is often a comfortable middle ground, especially when the map is printed at home and tested for colorfastness first.
One common beginner experience is applying too much decoupage medium because a thick coat feels more protective. The result is usually the opposite: swollen paper, long drying times, visible brush ridges, and glue escaping from every side. A thin coat should cover the base completely but should not resemble cake frosting. If the foam brush leaves mountains behind, there is too much product.
Timing also matters. The hands-on work may take less than an hour, but the coasters are not truly a one-hour project. Drying and curing account for most of the schedule. A sensible approach is to attach the maps on the first evening, add protective layers the next day, finish the backs later, and then leave the set alone until fully cured. The final steppatiently doing nothingis surprisingly difficult.
Working on several coasters simultaneously improves consistency. Apply the first layer to each base in order, then begin the next stage only after inspecting them as a set. This assembly-line method helps maintain similar brush texture, border width, and coating thickness. It also makes an odd crop or crooked map much easier to notice.
Backing material has a larger effect than expected. Four tiny felt dots are convenient, but their positions must match or the coaster may rock. Full cork backing looks more finished, distributes weight evenly, and provides better protection for delicate tabletops. Cutting cork slightly inside the tile edge prevents it from peeking out like an unfortunate craft-project undershirt.
Finally, the most successful sets usually tell one clear story. Random attractive maps can look decorative, but related places invite conversation. Four cities from a family’s history, four stops from a cross-country trip, or four sections of one beloved park transform a simple decoupage project into a miniature record of experience. That emotional connection is what makes DIY map coasters worth keeping long after an ordinary coaster would have disappeared beneath the couch.
Conclusion
DIY map coasters turn inexpensive materials into functional keepsakes filled with geographic personality. Careful map selection, thin adhesive layers, patient drying, a durable compatible finish, and protective backing are the keys to professional-looking results. Make a set for your own coffee table or give someone a collection of places that matterwithout requiring them to refold a road map afterward.