
A tired kitchen can make every meal feel as though it is being prepared in the break room of a slightly unsuccessful insurance office. Fortunately, you do not need new cabinets, stone countertops, or a contractor carrying a clipboard to change the mood.
This DIY kitchen update uses paint, new hardware, a removable backsplash, better lighting, and a few styling tricks to transform a small or medium-size kitchen for less than $200. The project keeps the existing layout, cabinets, countertops, sink, and appliances. Instead of replacing expensive features, it improves the surfaces people notice first.
The sample budget assumes that you already own basic tools such as screwdrivers, a drill, a paintbrush, and a small roller. Prices vary by location, kitchen size, taxes, and product selection, so treat the figures as a planning model rather than a legally binding promise from the home-improvement universe.
The Before: Functional, but Visually Exhausted
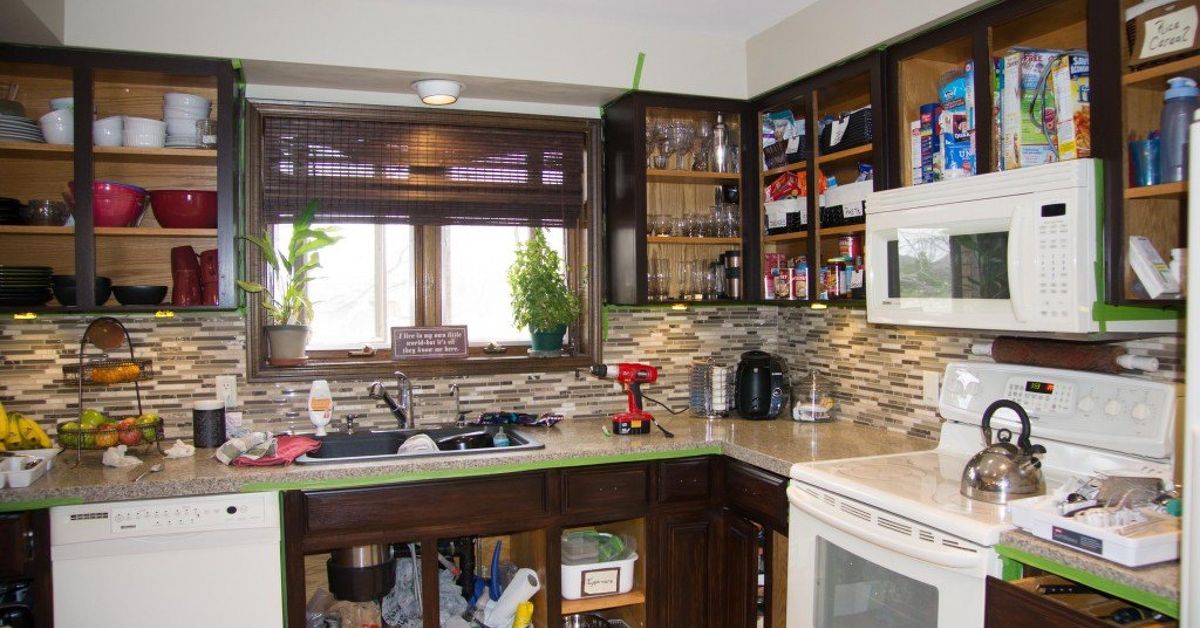
Our imaginary-but-realistic starting kitchen has sturdy cabinets, laminate counters, beige walls, dated wood finishes, mismatched knobs, and one overhead light that seems personally offended by the concept of brightness.
Nothing is structurally broken. The doors close, the drawers work, and the countertops are usable. That matters because the fastest way to destroy a $200 budget is to begin replacing things that still perform their jobs.
The Main Problems
- Greasy, dark cabinet doors make the room feel smaller.
- Old hardware creates a mismatched, unfinished appearance.
- A blank backsplash area lacks contrast and personality.
- Poor task lighting leaves the countertop in shadow.
- Countertop clutter hides the kitchen’s usable workspace.
The goal is not to disguise serious damage. Water-swollen cabinets, unsafe wiring, leaking plumbing, mold, or unstable shelving should be repaired before cosmetic work begins. Paint is talented, but it does not have a plumbing license.
The Under-$200 Kitchen Makeover Budget
Budget renovations work best when every dollar has a specific assignment. A renovation allowance should also include a small contingency instead of assuming that nothing unexpected will happen. This Old House recommends reserving part of a remodeling budget for surprises, which is especially sensible when working with older surfaces and previously repaired cabinets.
| Item | Estimated Cost | Purpose |
|---|---|---|
| Cabinet enamel or durable trim paint | $38 | Refreshes cabinet doors, drawers, and frames |
| Bonding primer | $22 | Improves adhesion on slick or previously finished surfaces |
| Degreaser, sandpaper, filler, and painter’s tape | $18 | Cleans, repairs, and prepares surfaces |
| Cabinet knobs or pulls | $28 | Adds a coordinated modern finish |
| Peel-and-stick backsplash | $34 | Creates an easy-to-clean focal area |
| Plug-in or battery-powered LED lighting | $16 | Brightens countertop work areas |
| Paintable caulk | $6 | Closes visible seams and gaps |
| Thrifted tray or countertop organizer | $8 | Controls clutter and adds warmth |
| Contingency fund | $20 | Covers extra screws, adhesive, or forgotten supplies |
| Total | $190 | Leaves $10 below the spending limit |
A larger kitchen may require additional paint or backsplash panels. To stay under budget, paint only the lower cabinets, update the island, or limit the backsplash to the space behind the sink and primary prep area.
Step 1: Choose a Simple Before-and-After Design
The most convincing inexpensive kitchen makeovers repeat a limited palette. Select one cabinet color, one hardware finish, and one backsplash pattern. Too many finishes make a room look like it dressed during a power outage.
For this makeover, the cabinets receive a warm off-white finish, the hardware becomes matte black, and the backsplash uses a simple white subway-tile pattern with pale gray grout lines. A wood tray and cutting board add enough warmth to prevent the result from feeling clinical.
Paint, hardware, and better lighting are repeatedly recommended as high-impact kitchen upgrades because they change large visual surfaces without replacing the underlying cabinetry.
Photograph and Label Everything
Take clear before photos from the doorway, sink, stove, and opposite corner. These images help you judge whether the finished room is genuinely better or simply different.
As you remove doors and drawers, label each piece with painter’s tape. A door that appears identical to its neighbor may have slightly different hinge placement. Number the cabinet opening and its matching door so reassembly does not become an unwanted logic puzzle.
Step 2: Clean the Cabinets More Than You Think Necessary
Kitchen cabinets collect cooking grease, fingerprints, steam residue, and invisible layers of airborne seasoning. Painting over that film can cause peeling, craters, and poor adhesion.
Remove the doors, drawers, knobs, pulls, and accessible hinges. Wash every paintable surface with a suitable degreasing cleaner, paying extra attention to areas around the stove and handles. Rinse or wipe away cleaner residue according to the product instructions, then allow everything to dry completely.
Professional cabinet-painting guidance consistently emphasizes cleaning before sanding or priming. Sherwin-Williams recommends removing grease and oil buildup, while Home Depot similarly places cleaning and preparation before primer and paint.
A Safety Check for Older Homes
Before sanding painted surfaces in a home built before 1978, consider the possibility of lead-based paint. The U.S. Environmental Protection Agency warns that renovation, repair, or painting work can create hazardous lead dust when old coatings are disturbed. Test the surface or consult a lead-safe certified professional rather than aggressively sanding an unknown finish.
Step 3: Repair, Scuff, and Prime
Fill dents, abandoned hardware holes, and deep scratches with an appropriate wood filler. Once dry, sand the repairs smooth. Lightly scuff glossy cabinet surfaces so the primer has something to grip, unless the coating manufacturer specifically approves another preparation method.
You are not trying to sand the cabinets into sawdust. The objective is to dull the existing finish, smooth damaged areas, and remove loose material. Wipe away all dust before applying primer.
Use a bonding primer when painting laminate, slick finishes, or previously coated wood. Apply a thin, even coat with a brush in corners and a small smooth-surface roller across flat panels. Primer may not provide the dramatic makeover moment, but it often determines whether the dramatic makeover survives next Tuesday.
Do Not Rush Drying Time
Dry-to-the-touch, ready-to-recoat, and fully cured are not the same condition. Benjamin Moore notes that painted cabinets may return to light service after drying, but the finish can require additional time before it should face heavy cleaning or abrasion. Follow the exact instructions for your selected primer and paint.
Step 4: Paint for a Smooth, Durable Finish
Choose a coating designed for cabinets, doors, or trim. These products generally level better and resist handling more effectively than ordinary wall paint.
Apply thin coats rather than one heroic layer. Use a quality angled brush for corners and recessed details, then roll flat areas with a high-density foam or smooth microfiber mini roller. Check edges for drips before moving to the next piece.
Let the first coat dry for the required period, lightly smooth rough spots if the manufacturer recommends it, remove the dust, and apply a second coat. Place doors horizontally while coating them when possible, because gravity becomes considerably less creative in that position.
Where to Spend Your Painting Time
Concentrate on the surfaces that are visible when the cabinets are closed: door fronts and backs, drawer fronts, cabinet frames, exposed side panels, and trim. Painting deep cabinet interiors uses more material and adds significant labor. Unless the interiors are damaged or severely stained, cleaning them may be enough for a sub-$200 makeover.
Step 5: Replace the Cabinet Hardware
New knobs and pulls provide the kitchen equivalent of changing from worn sneakers into polished shoes. The cabinets are the same, but suddenly they appear to have plans.
Measure the existing hole spacing before shopping. Pull measurements are commonly listed from the center of one screw hole to the center of the other. Reusing the same spacing avoids filling old holes and drilling new ones. Lowe’s recommends careful measurement and consistent placement, while HGTV notes that matching existing hardware types is one of the simplest ways to control cost.
If the cabinets currently have knobs with one hole, replacement is easy. If you are adding pulls to previously undrilled doors, use an inexpensive hardware template or create a reusable cardboard guide. Drill slowly with scrap wood behind the door to reduce splintering.
Step 6: Add a Peel-and-Stick Backsplash
A small backsplash zone introduces pattern and creates a cleaner transition between the countertop and upper cabinets. Peel-and-stick panels are particularly useful for low-cost updates because they require no wet mortar, grout mixing, tile spacers, or advanced explanation to your family about why the kitchen is unavailable for three weeks.
Bob Vila’s product testing describes peel-and-stick backsplash panels as a fast, relatively affordable alternative to traditional tile, with products designed to imitate ceramic, glass, or stone.
How to Install It Neatly
- Clean the wall and remove all grease, dust, and loose paint.
- Allow the surface to dry completely.
- Find a level starting line rather than trusting the countertop to be perfectly straight.
- Arrange the first few panels without removing the backing.
- Cut around outlets carefully after turning off power at the breaker.
- Peel away a small section of backing, align the panel, and press gradually.
- Seal exposed edges only when recommended by the backsplash manufacturer.
Use only products approved for the intended location. Follow manufacturer clearance instructions near cooktops, ovens, heat sources, water, and electrical devices. A decorative panel is not worth starting an argument with fire.
Step 7: Improve the Lighting Without Rewiring
Good lighting can make inexpensive paint appear richer and countertops look cleaner. For a strict budget, install a plug-in LED strip or battery-powered puck lights beneath the upper cabinets rather than replacing a hardwired fixture.
Position the lights toward the front underside of the cabinet so illumination reaches the work surface instead of creating a bright stripe against the wall. Conceal cords along cabinet edges with removable cable clips.
ENERGY STAR reports that LED products can produce light much more efficiently than traditional incandescent bulbs, while under-cabinet lighting directs illumination onto food-preparation surfaces.
Do not alter household wiring unless you have the training and legal authority to do so. Kitchen receptacles and lighting involve moisture, heat, grounded circuits, and electrical-code requirements. Use listed products, follow wattage limits, and hire a qualified electrician for damaged outlets, hardwired fixtures, or questionable wiring.
Step 8: Style the Countertops With Restraint
The final improvement costs almost nothing: remove half the objects from the countertops.
Store rarely used appliances, combine cooking oils on one washable tray, move loose mail elsewhere, and keep only a few attractive daily-use items visible. A wood cutting board, ceramic utensil holder, small plant, or bowl of fruit can soften the painted surfaces without rebuilding the clutter you just removed.
Use what you already own before buying decor. A clean glass jar can hold wooden spoons. A shallow serving tray can organize soap and brushes. A framed print from another room may become kitchen artwork. The purpose is to create visual order, not to spend the final $10 on a tiny sign announcing that the kitchen contains food.
The After: What Changed for Less Than $200?
The finished kitchen has the same footprint, appliances, cabinets, countertops, sink, and flooring. Yet it feels brighter, cleaner, and more intentional because the most visible elements now work together.
- The off-white cabinets reflect more light and reduce the visual weight of the old finish.
- Matching matte-black hardware gives every door and drawer a consistent detail.
- The subway-pattern backsplash introduces texture without competing with the countertops.
- Under-cabinet LEDs improve food-preparation lighting and evening ambience.
- Caulked seams and repaired holes make the update look finished rather than temporarily decorated.
- Reduced countertop clutter makes the kitchen appear larger and easier to use.
The transformation succeeds because it focuses on visual continuity. No single material is extravagant. Paint, hardware, backsplash, and lighting simply repeat a clear design direction.
Common Budget Kitchen Makeover Mistakes
Buying Decor Before Repair Supplies
A decorative rug is exciting. Degreaser is not. Nevertheless, clean and properly prepared cabinets contribute more to the final result than accessories.
Choosing the Cheapest Possible Paint
Low-cost wall paint may mark, stick, or wear quickly on high-touch cabinet doors. Save money by limiting the project area, not by using a coating that is unsuitable for the surface.
Changing Hardware Hole Spacing
New hole spacing creates additional filling, sanding, measuring, and drilling. That is manageable, but it adds time and opportunities for crooked handles.
Ignoring Cure Time
Reinstalling doors too soon can cause sticking, dents, and chipped edges. Build drying and curing time into the schedule instead of trying to finish every stage in one afternoon.
Spending the Entire Budget in Advance
Keep a contingency amount for an extra backsplash panel, damaged hinge, missing screw, or second package of sandpaper. The smallest forgotten purchase is often the one that sends you back to the store wearing paint-covered clothes.
Experience Notes: What a Realistic DIY Weekend Feels Like
A low-budget kitchen makeover is often described as a quick weekend project, but the real experience is less like a television montage and more like a sequence of small victories interrupted by drying time.
During the first morning, progress may appear almost nonexistent. Doors come down, drawers move into another room, hardware fills labeled bags, and the kitchen somehow looks worse than it did before. This is normal. Preparation removes the familiar visual clutter and exposes every greasy corner, old repair, and mysterious hole left by a previous owner.
The cleaning stage is usually the first surprise. Cabinets that looked reasonably clean may release an impressive amount of residue, especially near the range. This is also where patience produces the greatest return. Primer bonds more reliably to a properly cleaned surface, and smooth preparation makes the final paint look more deliberate.
The second surprise is how slowly cabinet paint seems to dry when you are eager to reinstall everything. A surface may feel dry while still being vulnerable to pressure. Leaning doors against one another, tightening hardware too aggressively, or stacking painted pieces can leave marks. Giving the finish additional time is frustrating, but repainting a damaged door is considerably more frustrating.
Hardware installation provides the emotional turning point. The first new knob or pull makes the color choice feel intentional. Once several doors are reinstalled, the kitchen begins to resemble the promised “after” photo rather than an improvised workshop.
Backsplash installation usually moves quickly until the first outlet appears. Measuring twice becomes extremely valuable here. A paper template can help transfer outlet dimensions to the panel before cutting. Keeping the pattern level matters more than forcing every edge into perfect alignment with an uneven wall.
Lighting creates the most immediate functional improvement. Switching on under-cabinet LEDs reveals the countertop, highlights the backsplash, and makes evening cooking more comfortable. It also reveals caulk smears and missed paint spots, because every renovation gift arrives with a small administrative fee.
The final cleanup should not be rushed. Remove tape carefully, touch up chips with a small artist’s brush, wipe fingerprints from the new hardware, and return countertop items selectively. Putting everything back exactly where it was can undo much of the visual improvement.
The most useful lesson is that budget design depends more on editing than purchasing. The kitchen looks newer because unrelated finishes have been reduced, damaged areas have been repaired, and necessary objects have been organized. The project does not pretend to be a luxury renovation. It simply makes an existing kitchen feel cared for, coordinated, and pleasant to use.
That is the real value of a DIY kitchen update under $200: it proves that an imperfect room does not need to remain ignored until a five-figure remodeling budget appears. A few carefully chosen changes can make cooking, cleaning, and morning coffee feel better right now.
Conclusion
A successful DIY kitchen update is not measured by how many original materials end up in a dumpster. It is measured by how effectively the room improves within the available budget.
By keeping the existing layout, preparing cabinet surfaces carefully, selecting durable paint, matching the original hardware spacing, limiting peel-and-stick tile to a focal area, and using simple LED task lighting, a dated kitchen can gain a convincing before-and-after transformation for less than $200.
The project requires patience more than advanced skill. Cleaning, labeling, measuring, and respecting cure times may not produce glamorous progress photos, but those steps separate a durable update from a makeover that begins peeling before anyone has finished admiring it.
SEO Metadata