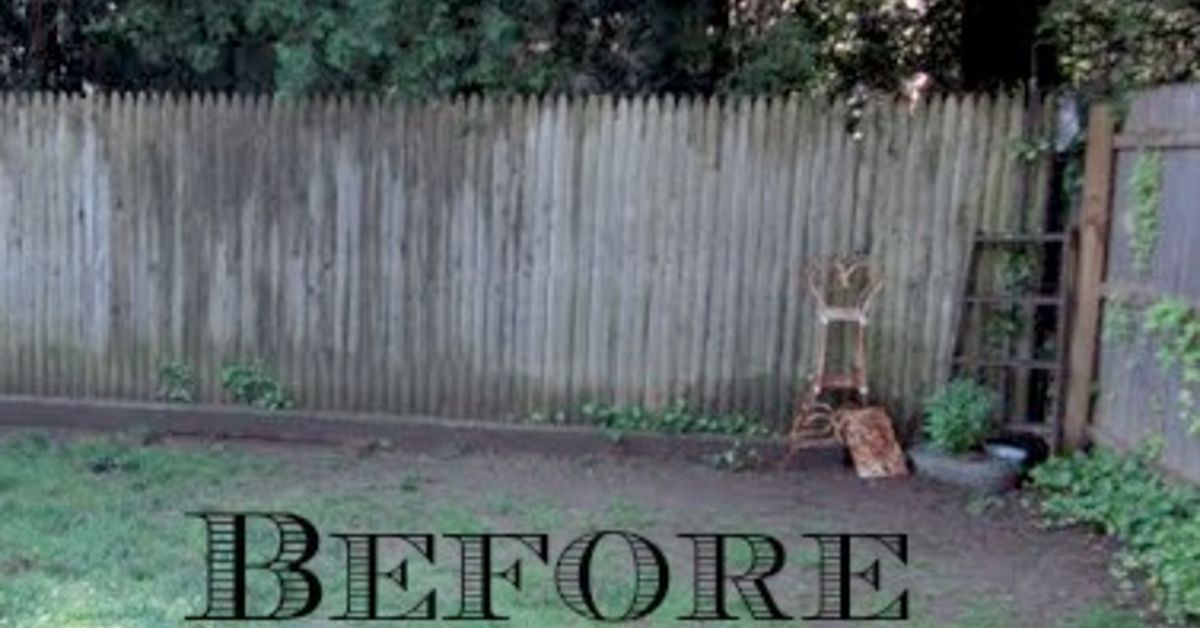

A DIY fire pit and gravel surround is one of those backyard projects that looks expensive, feels luxurious, and secretly gives you the joy of saying, “Oh, this? I built it,” every time someone compliments it. It turns a plain patch of lawn into a cozy outdoor gathering zone where marshmallows meet their destiny, chairs magically form a circle, and everyone suddenly has a story that begins with, “One time at a campfire…”
The beauty of this project is its balance of function and style. Gravel creates a clean, low-maintenance surface around the fire pit, improves drainage, helps define the seating area, and gives the whole space a finished patio feel without requiring a full concrete slab. A fire pit kit, retaining-wall blocks, or a metal fire bowl can become the centerpiece. Add edging, chairs, lighting, and a little patience, and you have a backyard feature that feels custom without requiring a contractor’s vocabulary or a lottery win.
This guide walks through planning, materials, installation, safety, design ideas, maintenance, and real-world experience so you can build a DIY fire pit with a gravel surround that is attractive, practical, and ready for cool evenings.
Why Build a DIY Fire Pit with a Gravel Surround?
A backyard fire pit is more than a place to burn wood. It is an outdoor room. The gravel surround acts like flooring, the fire pit becomes the coffee table, and the chairs complete the living room effect. Unlike grass, gravel does not turn muddy after rain, does not need mowing, and does not complain when you drag Adirondack chairs across it.
Gravel is also flexible. You can create a circle, square, rectangle, oval, or free-form seating area depending on your yard. Pea gravel gives a softer, casual look. Crushed stone packs more firmly underfoot. Decomposed granite feels tidy and compact when properly installed. River rock looks decorative but can be harder for furniture legs. The best choice depends on whether your priority is comfort, drainage, stability, or style.
A gravel fire pit area can work in large suburban yards, compact side yards, lake houses, cabins, and modern outdoor spaces. It also pairs beautifully with stone pathways, raised garden beds, string lights, benches, and weather-resistant chairs. In other words, it is the backyard version of putting on a good jacket: suddenly everything looks intentional.
Safety Comes First: Before You Buy a Single Stone
Before designing the perfect hangout zone, check local rules. Some cities limit open flames, require specific clearances, restrict wood-burning fire pits, or ban fires during dry or windy conditions. Homeowners associations may also have rules about permanent structures, smoke, fire pit height, or placement. A few minutes of research can save you from fines, neighbor drama, or having to move a half-ton of gravel after you already celebrated finishing the project.
Choose a Safe Location
Pick a flat, open area away from your house, garage, shed, fences, low tree branches, shrubs, wood piles, play equipment, and anything that can burn. Many safety recommendations suggest keeping fire pits at least 10 feet from structures and combustibles, while some local rules may require more distance depending on the type of fire and fuel area. When in doubt, choose the more conservative spacing.
Avoid building directly under trees or near dry leaves. Do not place a fire pit on a wooden deck unless the unit is specifically designed and approved for that setting, and even then, follow the manufacturer’s directions carefully. A nonflammable, level base is essential.
Plan for Supervision and Fire Control
Keep a hose, bucket of water, sand, or appropriate fire extinguisher nearby whenever the fire pit is in use. Use a spark screen for wood-burning pits, especially when the breeze is feeling dramatic. Children and pets should be supervised around the fire pit, and the fire should be fully out before anyone leaves the area. Backyard ambiance is lovely; surprise embers are not.
Planning the Layout
Start by deciding how many people you want the fire pit area to seat. A small, intimate circle for four chairs may need a diameter of about 12 feet. A larger gathering zone for six to eight chairs may need 14 to 18 feet or more, depending on chair size and walking space. Leave enough room for people to move behind chairs without doing the awkward sideways patio shuffle.
Common Layout Options
A circular gravel surround is the classic choice because it naturally frames a round fire pit. It feels cozy and balanced, like the fire pit is the sun and the chairs are tiny backyard planets. A square or rectangular gravel patio works well for modern homes, sectional seating, or yards with straight fence lines. A free-form shape is great for rustic, cottage, or woodland settings.
Use marking paint, stakes and string, a garden hose, or rope to outline the area. Stand back from several angles. View it from the house, patio door, driveway, and back corner of the yard. If the shape looks odd from the kitchen window, it will continue to bother you every time you make coffee. Adjust before digging.
Tools and Materials You May Need
Your exact supply list depends on the size and style of the project, but most DIY fire pit and gravel surround builds use similar basics.
Tools
- Shovel or spade
- Rake
- Tape measure
- Level
- Hand tamper or plate compactor
- Wheelbarrow
- Garden hose or marking paint
- Work gloves and safety glasses
- Rubber mallet
- Utility knife for landscape fabric
Materials
- Fire pit kit, retaining-wall blocks, or approved metal fire pit insert
- Metal fire ring or liner for block fire pits
- Crushed stone or paver base
- Pea gravel, crushed gravel, or decomposed granite for the surface
- Landscape fabric rated for patios
- Edging stones, metal edging, pavers, or landscape timbers placed safely away from flame exposure
- Paver sand, if needed for leveling blocks
- Masonry adhesive suitable for outdoor hardscape use
For the fire pit itself, choose materials designed for heat. Ordinary stones, certain concrete pieces, or moisture-trapped rocks can crack when exposed to high heat. Fire-rated blocks, a manufacturer-approved fire pit kit, or a metal liner helps protect the structure and improve durability.
Step-by-Step: How to Build a DIY Fire Pit & Gravel Surround
Step 1: Mark the Area
Place a stake in the center of the planned fire pit area. Tie string to the stake and use it as a compass to mark a circle, or outline your preferred shape with a hose. For a circular design, mark both the outer gravel surround and the fire pit location. Double-check the spacing for chairs. A fire pit area that looks roomy when empty can become cramped once seating arrives.
Step 2: Remove Grass and Organic Material
Remove grass, roots, loose soil, leaves, and debris from the marked area. Dig down several inches so there is room for base material, landscape fabric, and the finished gravel surface. The goal is a stable, level area that will not sink into a lumpy backyard pancake after one rainy week.
Slope matters. If the yard has a slight grade, you may need to remove more soil from the high side or add compacted base to the low side. A slight slope away from nearby structures can help drainage, but the fire pit itself must sit level.
Step 3: Install Edging
Edging keeps gravel contained and gives the project a finished border. Metal edging creates a clean modern line. Stone blocks look substantial and classic. Pavers are easy to match with walkways. Flexible plastic edging is affordable, though it may not have the same polished look.
Set edging firmly before adding gravel. If you are using stones or pavers, create a shallow trench and seat them evenly. Tap them into place with a rubber mallet and check the height as you go. Good edging is the difference between “designed patio” and “gravel slowly escaping into the lawn like it has somewhere better to be.”
Step 4: Add and Compact the Base
A compacted base improves stability and drainage. Spread crushed stone or paver base evenly across the excavated area. Rake it smooth, mist it lightly with water, and compact it with a hand tamper or plate compactor. For larger areas, renting a plate compactor can save time and spare your arms from feeling like overcooked noodles.
Compaction is not glamorous, but it is one of the most important parts of the job. A poorly compacted base can lead to uneven seating, shifting blocks, puddles, and that one chair everyone avoids because it wobbles like a shopping cart with emotional issues.
Step 5: Add Landscape Fabric
Landscape fabric can help separate soil from gravel and reduce weed growth. Roll it over the compacted base, overlap seams, and cut openings as needed. Pin it in place with landscape staples. Do not rely on fabric alone as a magical weed force field. Windblown seeds can still sprout in gravel over time, but fabric helps reduce the battle.
Step 6: Build or Place the Fire Pit
If you are using a fire pit kit, follow the manufacturer’s directions. Typically, you will arrange the first course of blocks around a metal ring, check for level, then stack additional courses. Use outdoor masonry adhesive where recommended. A metal liner helps shield blocks from direct heat and can extend the life of the fire pit.
If you are using a freestanding metal fire bowl or smokeless fire pit, place it on a nonflammable, level surface within the gravel zone. Make sure the legs or base are stable and do not sink into loose gravel. Some homeowners add a small paver pad beneath portable fire pits for extra stability.
Step 7: Add the Gravel Surface
Spread your chosen gravel across the seating area. A common surface depth is a few inches, enough to cover the fabric and create a finished look without becoming so deep that chair legs sink like they are auditioning for quicksand. Rake the gravel evenly and pull it slightly away from the fire pit wall or base if needed to keep the structure clean and stable.
Pea gravel is comfortable underfoot and has a relaxed look, but it shifts more than angular crushed stone. Crushed gravel locks together better and is easier for furniture. Decomposed granite can feel firm and tidy after compaction, especially with a stabilizer. Choose based on how you plan to use the space.
Step 8: Add Seating and Finishing Touches
Place chairs far enough from the flames for comfort and safety. Adirondack chairs, metal patio chairs, benches, and outdoor sectionals can all work. Choose weather-resistant pieces and avoid anything with loose cushions too close to the fire. Add a side table or two for drinks, s’mores supplies, or the phone someone will inevitably use to take seventeen photos of “just the vibe.”
Lighting completes the space. Solar path lights, low-voltage landscape lighting, or string lights on posts can guide people safely at night. Keep lighting cords and poles away from heat and foot traffic. Add planters with drought-tolerant plants around the perimeter, but keep vegetation safely away from the fire zone.
Design Ideas for a Better Gravel Fire Pit Area
Rustic Campfire Style
Use natural stone edging, pea gravel, log-style benches, and simple chairs. This style works especially well near wooded yards, cabins, and informal gardens. Keep the layout relaxed but not messy. Rustic should say “charming retreat,” not “we forgot where the lawn ended.”
Modern Outdoor Lounge
Choose black metal edging, gray crushed stone, a sleek smokeless fire pit, and low-profile chairs. Add square stepping stones leading to the area. This design works beautifully with modern homes, black-trim windows, and minimalist landscaping.
Family-Friendly Gathering Spot
Use a wide gravel circle, sturdy chairs, a spark screen, and clear walking paths. Add storage for blankets and roasting sticks when not in use. Keep the design open so adults can supervise children and pets easily.
Budget-Friendly Weekend Build
Use a portable fire pit, affordable pea gravel, simple paver edging, and secondhand outdoor chairs. Focus your budget on the base, safety, and drainage. Decorative upgrades can come later. Backyards, like people, are allowed to have phases.
Maintenance Tips
A gravel fire pit surround is low-maintenance, not no-maintenance. Rake the gravel occasionally to smooth out footprints and chair marks. Pull weeds early before they become tiny green landlords. Remove leaves and debris, especially before using the fire pit. Organic material can create smoke, mess, and extra fire risk.
After each fire, let ashes cool completely before disposal. Use a metal container for ashes, not a plastic bucket or paper bag. Inspect the fire pit blocks, liner, bowl, or ring for cracks, rust, or movement. If the fire pit shifts, stop using it until it is repaired or reset.
Every season, refresh thin gravel spots and check edging. Freeze-thaw cycles, heavy rain, and enthusiastic chair dragging can move materials over time. A quick tune-up keeps the area looking intentional instead of tired.
Common Mistakes to Avoid
Skipping the Base
Pouring gravel straight onto dirt may seem faster, but it often leads to sinking, weeds, and uneven surfaces. A compacted base gives the project structure and helps the finished patio last longer.
Making the Area Too Small
A tiny gravel ring may look cute in photos, but real people need legroom. Chairs need space. People need to walk around. Someone will bring a giant blanket. Plan bigger than you think you need.
Ignoring Drainage
If water collects in the fire pit area, the gravel can become messy and the base can shift. Choose a location with good drainage, use proper base material, and avoid creating a bowl-shaped patio unless you are secretly building a mosquito spa.
Using the Wrong Fire Pit Materials
Not all stones and blocks are safe for high-heat use. Use fire-rated materials, approved kits, or a proper metal insert. When using a portable unit, follow the manufacturer’s instructions for clearances and surface requirements.
Real-World Experience: What Building a DIY Fire Pit & Gravel Surround Teaches You
The first lesson of building a DIY fire pit and gravel surround is that the project looks simple until you meet the dirt. Dirt has opinions. Roots have ambitions. Rocks appear exactly where your shovel wants to go. The digging stage is usually the least glamorous part, but it is also where the success of the project begins. A clean, level excavation makes every later step easier. Rush it, and the rest of the build becomes a negotiation with gravity.
The second lesson is that gravel quantity is easy to underestimate. A patio area that looks modest on paper can swallow bags of gravel like a backyard monster with excellent taste. Bulk delivery is often more practical for larger spaces, while bagged gravel works for small projects or touch-ups. Either way, stage materials close to the work area if possible. Carrying gravel across a yard one small load at a time builds character, but so does reading quietly indoors, and one of those is less sweaty.
Another experience worth noting is the importance of chair testing before finalizing the layout. It is tempting to build the fire pit first and figure out seating later, but chairs determine comfort. Place a few chairs in the marked area before digging. Sit in them. Stretch your legs. Walk behind them. Pretend someone is carrying a tray of snacks. If the layout feels tight during the pretend phase, it will feel tighter when guests arrive wearing jackets and carrying drinks.
Compaction is another detail that separates a good fire pit area from a great one. When the base is compacted properly, chairs feel stable, the gravel surface looks smoother, and the fire pit feels more permanent. A hand tamper works for small areas, but larger patios benefit from a plate compactor. The vibration settles the base evenly and helps prevent future dips. It is loud, dusty, and not exactly spa-like, but it is satisfying in the way only a truly useful tool can be.
Edging also matters more than most beginners expect. Without a strong border, gravel migrates into the lawn, flower beds, and walkway. After a few weeks, the crisp patio shape can become fuzzy around the edges. Stone, paver, or metal edging keeps the area looking sharp and reduces maintenance. It also gives the eye a stopping point, which makes the entire project look designed rather than improvised.
One of the best practical upgrades is a clear path from the house to the fire pit. Gravel alone can work, but stepping stones or a compacted walkway make the area feel connected to the rest of the yard. This is especially helpful at night when people are carrying blankets, snacks, or a mug of hot chocolate with the confidence of someone who has not yet tripped over a garden hose.
Weather teaches its own lessons. After the first rain, you will see whether the area drains properly. After the first windy day, you will learn where leaves collect. After the first gathering, you will know whether you need more side tables, better lighting, or a dedicated place for firewood. Treat the project as a living space that can evolve. The first version does not have to be perfect; it just needs to be safe, comfortable, and built well enough to improve over time.
The biggest reward is how quickly the space becomes part of everyday life. A finished fire pit area invites casual use. You may step outside for ten minutes and stay for an hour. Friends gather without needing a formal plan. Family conversations stretch longer. Even when the fire pit is not lit, the gravel surround creates a destination in the yard, a visual anchor that makes the outdoor space feel complete.
In the end, a DIY fire pit and gravel surround is not just a landscaping project. It is a small investment in atmosphere. It gives your backyard a reason to be used after sunset, after dinner, and after everyone claims they are “just going outside for a minute.” Build it carefully, use it safely, and maintain it regularly. Your reward is a cozy outdoor room with a little crackle, a lot of charm, and just enough smoke smell to convince everyone you are extremely outdoorsy.
Conclusion
A DIY fire pit and gravel surround can transform an ordinary backyard into a warm, welcoming gathering space without requiring a full patio renovation. The key is thoughtful planning: choose a safe location, check local rules, build on a stable base, use heat-appropriate fire pit materials, install sturdy edging, and select gravel that matches your style and needs. With the right layout, seating, lighting, and maintenance routine, your fire pit area can become the most popular “room” outside your house.
Whether you prefer rustic campfire charm, modern lounge energy, or a budget-friendly family hangout, gravel gives you a practical foundation that looks polished and drains well. Build patiently, measure generously, and do not skip the base. Future you, sitting by the fire with a cozy drink and zero muddy shoes, will be very grateful.