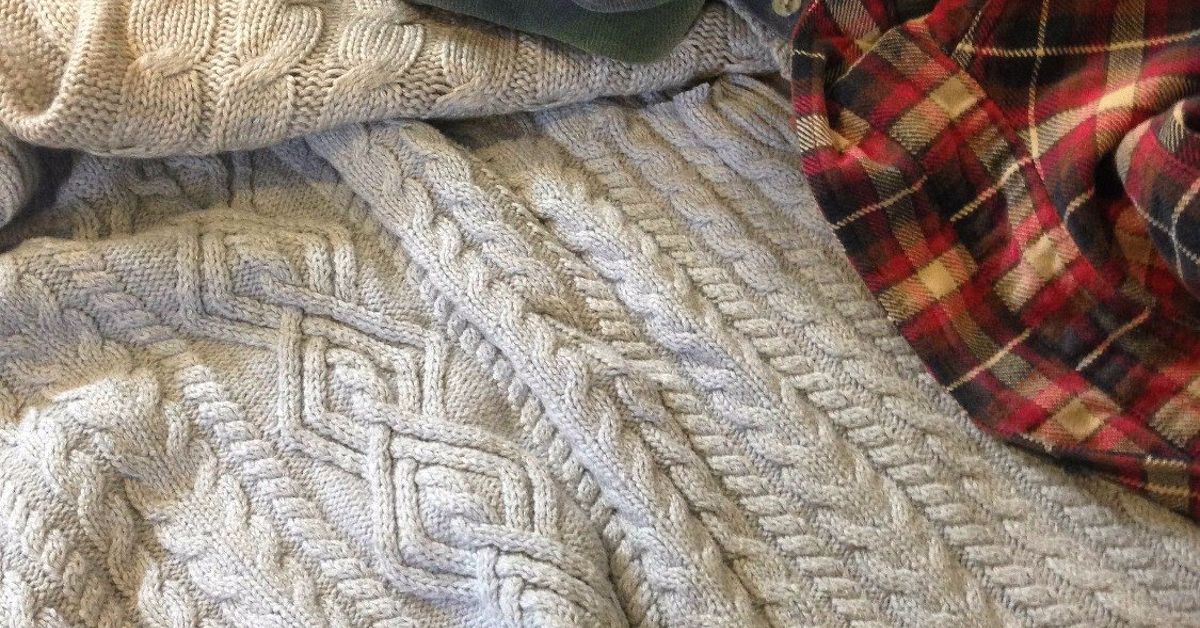

Fall decorating has a funny way of making us believe we need to buy a cart full of pumpkins, candles, ceramic squirrels, and something labeled “harvest chic” just to make the dining table look cozy. But before you surrender your wallet to the seasonal aisle, take a look inside your closet. That old plaid flannel shirt with the elbow drama? The soft pajama pants you loved until the waistband gave up? The kids’ outgrown fall shirts that still have perfectly good fabric? Congratulationsyou may already own the main ingredient for a warm, charming, one-of-a-kind flannel table runner.
Learning how to reuse old clothes to make a flannel table runner for fall is part craft project, part home refresh, and part tiny act of rebellion against throwaway culture. Instead of tossing worn clothing into the trash, you can turn soft fabric into a beautiful autumn table accent that looks handmade in the best possible way. It is practical, budget-friendly, beginner-friendly, and forgiving enough that even slightly crooked seams can be called “rustic character.” We love a craft that gives us plausible deniability.
This guide walks you through choosing old clothes, preparing flannel fabric, measuring your table, designing a patchwork layout, sewing the runner, and styling it for Thanksgiving, fall dinners, coffee tables, sideboards, or everyday cozy living. You do not need to be a professional sewist. You just need old clothes, basic tools, a little patience, and the willingness to believe that a retired shirt can still have a glorious second act.
Why Make a Fall Table Runner from Old Clothes?
A flannel table runner made from old clothing has a different personality than something bought brand-new. Store-bought decor can look polished, but reused fabric carries history. Maybe the plaid came from a favorite shirt worn on apple-picking trips. Maybe the brown cotton came from an old skirt that survived three closets and one questionable fashion era. Maybe the orange check fabric was once pajamas, and honestly, it still wants to be near snacks.
Upcycling old clothes also helps reduce household waste. Textiles can be difficult to recycle, and many unwanted garments are discarded even when the fabric still has useful life. Reusing clothing at home is one of the simplest ways to extend the value of what you already own. A table runner is especially smart because it does not require large, perfect pieces of fabric. Small sections from shirts, sleeves, pockets, cuffs, and pajama legs can all become part of the design.
Flannel is an ideal fabric for fall decor because it feels warm, soft, casual, and inviting. The brushed surface gives the table texture, while plaid and check patterns instantly suggest crisp air, soup nights, football games, leaf piles, and the annual mystery of why one decorative gourd costs more than lunch.
Best Old Clothes to Use for a Flannel Table Runner
Start with clothes that are clean, soft, and mostly stable. The best candidates are cotton flannel shirts, pajama pants, nightgowns, oversized button-downs, children’s shirts, lightweight jackets, and worn but usable cotton garments in fall colors. You can also mix flannel with denim, corduroy, chambray, linen, or quilting cotton, but keep the overall thickness fairly balanced so the runner lies flat.
Great Fabric Choices
Look for warm autumn shades such as rust, burgundy, mustard, forest green, cream, chocolate brown, charcoal, navy, pumpkin orange, and soft gray. Plaid is a natural favorite, but solids help calm the design. If every piece is plaid, your table may start looking like a lumberjack convention with gravy.
Shirts are especially useful because they provide several design elements. The back panel gives you a larger fabric piece, sleeves offer long strips, button plackets add detail, and pockets can become decorative accents. Pajama pants are excellent because they usually have long, uninterrupted panels of fabric. Old scarves can work too, as long as they are washable and not too slippery.
Clothes to Avoid
Skip fabric that is badly stained, musty, brittle, stretched out, heavily pilled, or too thin to hold its shape. Avoid anything with strong odors that do not come out after washing. Very stretchy knits can be tricky because they may wave, curl, or distort when sewn next to flannel. You can still use them for accents, but beginners will have an easier time with woven cotton fabrics.
Tools and Materials You Will Need
You do not need a fancy sewing room. A kitchen table, a basic sewing machine, and a cup of coffee placed far away from the fabric will do nicely.
- Old flannel shirts, pajama pants, or cotton clothing
- Backing fabric, such as cotton, flannel, canvas, or an old sheet
- Optional thin batting or fusible fleece for extra body
- Fabric scissors or a rotary cutter and cutting mat
- Ruler or measuring tape
- Sewing pins or clips
- Iron and ironing board
- Sewing machine and thread
- Fresh sewing machine needle, preferably 80/12 or 90/14
- Seam ripper, also known as the tiny sword of humility
If you plan to sew through several layers of flannel, a walking foot can help feed the fabric evenly. It is not mandatory, but it is helpful. A slightly longer stitch length, around 3.0 mm, often works well for flannel because the fabric is thicker and softer than standard quilting cotton.
Step 1: Wash, Dry, and Press the Clothes
Before cutting anything, wash and dry the clothes the way you plan to wash the finished table runner. This matters because cotton flannel can shrink. If you sew first and wash later, the finished runner may pull, wrinkle, or shrink unevenly. Prewashing lets the fabric get its dramatic shrinking phase out of the way before it becomes table decor.
After washing, press the clothing with an iron. Smooth fabric is easier to cut accurately, and accurate cutting makes sewing much less dramatic. If a shirt has buttons, pockets, or seams you want to use as design features, press around them carefully.
Step 2: Deconstruct the Old Clothes
Now comes the satisfying part: taking clothing apart without feeling guilty. Use scissors to cut along seams and remove collars, cuffs, waistbands, and thick hems. For button-down shirts, cut off the sleeves, separate the front panels from the back, and trim away bulky seams. Save interesting details such as pockets, button strips, labels, and cuffs if they fit your design.
Do not worry if the pieces are odd shapes. A patchwork flannel table runner thrives on variety. In fact, the mix of sizes and patterns is what gives it personality. The goal is not to make every piece perfect; the goal is to make the final runner look intentional. There is a difference, and fortunately for us, it is a very useful difference.
Step 3: Measure Your Table and Choose a Runner Size
A classic table runner usually runs down the center of the table with a small overhang on both ends. For a polished look, add about 12 to 24 inches to the length of your table so the runner hangs roughly 6 to 12 inches over each end. For example, if your dining table is 72 inches long, a runner between 84 and 96 inches will usually look balanced.
For width, 12 to 18 inches works for many dining tables. A narrow table may look best with a 12-inch runner, while a large farmhouse table can handle 16 to 18 inches. Coffee tables, console tables, and buffets may need shorter or narrower runners. The beauty of making your own is that you are not trapped by standard store sizes. Your table is weirdly specific? Wonderful. Your runner can be weirdly specific too.
Step 4: Pick a Design Style
There are several ways to design your upcycled flannel table runner. Choose a layout based on your fabric pieces, your sewing comfort level, and your patience level on the day you start.
Simple Strip Runner
Cut long strips of flannel and sew them side by side. This is the easiest design and works beautifully with plaid shirts. Use strips of different widths for a relaxed farmhouse look.
Patchwork Block Runner
Cut squares or rectangles and sew them into rows. This style is great if you have several shirts in coordinating colors. It creates a cozy quilted look without requiring a full quilt commitment.
Centered Panel Runner
Use one large piece of fabric down the center, then frame it with strips from contrasting clothes. This works well if you have one favorite shirt you want to feature.
Button-Placket Accent Runner
Include a shirt’s button placket as a decorative strip. Place it down the center or near one edge for a playful, obviously-upcycled detail. Make sure buttons are secure and positioned where plates or serving dishes will not wobble.
Step 5: Cut Your Fabric Pieces
Once you choose a design, cut your fabric pieces. For beginners, rectangles are easier than squares because they are more forgiving. Try pieces such as 4 by 8 inches, 5 by 10 inches, or 3-inch-wide strips. Add a seam allowance of about 1/4 inch or 1/2 inch, depending on your comfort level. A 1/2-inch seam allowance can be easier when working with reused clothing because old fabric may fray more than new fabric.
If you are using plaid, decide whether you want to match the lines. Matching plaid can look crisp, but it is not required. A deliberately mixed plaid layout feels casual and handmade. If the patterns are busy, add a few solid pieces to give the eye a place to rest.
Step 6: Arrange the Layout Before Sewing
Lay all pieces on the floor or table before sewing. Move colors around until the runner feels balanced. Avoid placing all the dark pieces at one end or all the bright pieces in the middle unless that is your plan. Take a quick photo with your phone so you remember the layout after your cat, child, or own elbow inevitably rearranges it.
Think of the runner as a long visual path. You want the colors and patterns to travel smoothly from one end to the other. A little contrast is good. Total chaos is also allowed, but it should be charming chaos, not laundry basket chaos.
Step 7: Sew the Top Together
Sew the fabric pieces together in sections. If you are making rows, sew pieces into rows first, press the seams, and then sew the rows together. If you are making strips, sew each strip to the next one, pressing as you go. Pressing seams may feel like an annoying extra step, but it makes the finished runner look cleaner and helps everything lie flat.
Use a straight stitch and a slightly longer stitch length. Do not tug the flannel as it moves through the machine. Let the feed dogs guide it. Flannel can stretch or distort if pulled, especially along bias edges. Pin or clip generously if pieces shift.
Step 8: Add Backing and Optional Batting
Once the runner top is complete, cut a backing piece the same size. If you want a soft, quilted feel, add a thin layer of batting or fusible fleece between the top and backing. For a lighter runner, skip the batting. A single layer of flannel plus backing is often enough for casual fall decor.
Place the runner top and backing right sides together. If using batting, place it on the wrong side of one fabric layer. Pin around the edges. Sew around the runner, leaving a 4- to 6-inch opening for turning. Trim corners carefully, then turn the runner right side out. Use a blunt tool, such as a chopstick, to gently push out the corners. Do not use scissors for this unless you enjoy surprise holes.
Step 9: Press, Topstitch, and Finish
Press the runner flat, turning the raw edges of the opening inward. Topstitch around the entire edge, about 1/8 to 1/4 inch from the edge. This closes the opening and gives the runner a finished look. You can also add quilting lines through the runner to keep layers from shifting. Simple straight lines, diagonal lines, or stitching along patchwork seams all work well.
For a more rustic style, you can add decorative hand stitches, embroidery, or a few appliqued leaves cut from leftover fabric. Keep embellishments low-profile if the runner will sit under plates, bowls, or serving dishes. A table runner should decorate the table, not create a mountain range under the mashed potatoes.
How to Style a Flannel Table Runner for Fall
A handmade flannel table runner already brings texture and warmth, so styling can be simple. Add a wooden bowl of apples, a cluster of mini pumpkins, brass candlesticks, dried leaves, pinecones, or a vase of wheat stems. For Thanksgiving, layer the runner over a plain tablecloth or directly on a wood table. Use neutral plates and cloth napkins to let the plaid shine.
If your runner is colorful, keep the centerpiece calmer. If your runner is mostly neutral, add orange pumpkins, cranberry napkins, or golden candles. For a modern fall look, pair gray and cream flannel with black candleholders and eucalyptus. For a farmhouse look, use buffalo check, white pumpkins, mason jars, and wood chargers. For a cozy cabin look, mix red plaid with enamelware, evergreen sprigs, and warm lighting.
Creative Variations to Try
Once you make one runner, you may start looking at every old shirt as future table decor. This is normal. Possibly concerning, but normal.
Add Pockets
Sew a shirt pocket onto one end of the runner to hold place cards, napkins, cinnamon sticks, or a tiny menu card. It adds charm and makes the upcycled origin obvious in a clever way.
Use Frayed Edges
For a casual rustic look, make a rag-style runner with exposed seams. Sew wrong sides together so the seams show on top, clip the seam allowances, then wash and dry the runner to encourage soft fraying.
Create Reversible Decor
Use fall flannel on one side and neutral fabric on the other. Flip it after Thanksgiving for a quieter winter look. Reversible projects are basically two decorations wearing one coat.
Make Matching Napkin Rings
Use leftover strips to make simple fabric napkin ties. You can sew tubes, braid strips, or tie raw-edge ribbons around napkins for a coordinated but not overly perfect table.
Care Tips for Your Upcycled Flannel Runner
Because this runner is made from old clothes, wash it gently. Use cold or warm water, mild detergent, and a low-heat dryer setting, or lay it flat to dry. Press after washing if needed. If you used decorative buttons, embroidery, or appliques, consider washing the runner inside a mesh laundry bag.
Store it folded loosely in a dry place. Add a sachet of cedar or lavender if you like. Avoid storing it in damp areas, especially if the fabric is cotton. With proper care, your flannel table runner can return every fall like an old friend who brings snacks and does not judge your pie crust.
Common Mistakes to Avoid
The biggest mistake is skipping the prewash. Flannel can shrink, and reused garments may behave differently from one another. Another mistake is mixing very thick and very thin fabrics without stabilizing them. If one piece is floppy and another is heavy, the runner may ripple. Use interfacing on thin pieces if needed.
Do not make the runner too wide for your table. A runner should leave room for place settings. If it crowds plates, glasses, and serving dishes, it becomes less decor and more fabric obstacle course. Also, be careful with tall or bulky embellishments. Buttons, bows, and raised trims are cute until a gravy boat tilts like it is on a carnival ride.
Experience Notes: What I Learned Making a Flannel Table Runner from Old Clothes
The first thing you learn when reusing old clothes for a flannel table runner is that fabric has memory. Not mystical memory, although that would make laundry more interesting, but practical memory. A shirt that has been worn and washed many times is softer than new yardage. It drapes differently, cuts differently, and sometimes refuses to lie perfectly flat because it has lived a full life. That softness is exactly what makes the finished runner feel cozy, but it also means you should handle the fabric gently and press often.
One useful experience is to sort clothing by weight before cutting. A heavy flannel shirt and a thin cotton pajama top may look lovely together, but they can fight during sewing. The heavier fabric may feed more firmly while the thinner fabric shifts. If you want to mix them, use the lighter fabric in smaller accent pieces or add lightweight interfacing to help it behave. Fabric behavior is a little like family at Thanksgiving: most problems can be managed if you plan the seating chart.
Another lesson is that pockets are worth saving. A pocket from an old shirt can become the cutest part of the whole runner. Place one near the end and tuck in a handwritten place card, a sprig of rosemary, or a tiny paper tag that says “Give thanks” or “Please pass the rolls.” It creates a conversation piece without trying too hard. Button plackets are also surprisingly decorative. They add texture and tell guests, “Yes, this used to be a shirt, and now it has been promoted.”
When working with plaid, perfection is optional. Matching every line can take extra time, and if you enjoy that kind of precision, go for it. But a fall runner made from old clothes often looks better when it feels collected rather than manufactured. Rotate some plaids horizontally and others vertically. Break up bold patterns with solids. Add one unexpected fabric, such as denim or cream cotton, to make the layout feel relaxed.
Pressing is the step beginners most want to skip and the step that most improves the final result. Press after each seam, even if it feels fussy. A pressed patchwork top looks intentional. An unpressed one looks like it lost an argument with a laundry basket. The same goes for topstitching. A simple line around the edge gives the runner structure and helps it survive washing.
Finally, the best part of this project is how personal it feels. A runner made from old family clothes can turn a table into a memory display without becoming sentimental in a dusty, museum-like way. It is still useful. It still catches crumbs. It still sits under pie. But it also carries little pieces of past seasons into the current one. That is the magic of upcycling: you are not just saving money or reducing waste. You are giving ordinary fabric another chance to be part of the home.
Conclusion
Reusing old clothes to make a flannel table runner for fall is a smart, satisfying project that combines sustainability, creativity, and seasonal style. It helps you clear closet clutter, reduce textile waste, and create decor that feels warm, personal, and completely unique. With a few old flannel shirts, basic sewing tools, and a simple plan, you can make a runner that works for Thanksgiving, autumn dinners, coffee tables, buffets, and everyday cozy moments.
The best part is that this project does not demand perfection. A slightly mismatched plaid, a rescued pocket, or a visible shirt detail can make the runner more charming. Fall decor should feel welcoming, not like it is applying for a design award. So gather those old clothes, prewash the fabric, cut your pieces, and stitch together something that makes your table feel ready for soup, candles, pie, and people lingering just a little longer after dinner.