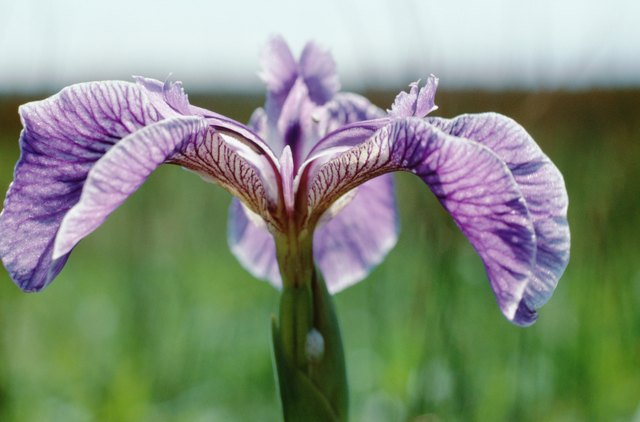

Irises are the kind of garden plant that makes you feel like you have your life together. One minute your flower bed is just soil, leaves, and optimism; the next, it is throwing up ruffled blooms in purple, white, yellow, peach, blue, bronze, and every color that sounds like it belongs on a paint swatch named by a poet. But after a few seasons, even the most glamorous iris patch can start acting dramatic. The flowers become fewer. The center of the clump goes bald. The rhizomes begin piling on top of one another like they are trying to board a crowded subway.
That is when gardeners usually ask the big question: When to dig up iris bulbs? The simple answer is: dig up most bearded iris “bulbs” after they finish blooming, usually in mid to late summer, and divide them every three to five years. The slightly more garden-nerdy answer is that many popular irises, especially bearded irises, do not actually grow from true bulbs. They grow from rhizomes, which are thick, horizontal stems that sit near the soil surface. Gardeners still call them bulbs all the time, and the plants are too polite to correct us.
The best timing depends on your iris type, your region, and why you are digging them. This guide walks through the ideal season, warning signs, step-by-step digging tips, and real-life experience so you can refresh your iris bed without accidentally turning it into a botanical crime scene.
So, When Is the Best Time to Dig Up Iris Bulbs?
For bearded irises, the best time to dig up and divide the rhizomes is typically after blooming has finished, from July through September. In many cooler or Midwestern gardens, July and August are ideal. In warmer regions, early fall may still work, as long as the divisions have several weeks to grow new roots before cold weather arrives.
A useful rule of thumb is to wait about four to six weeks after the flowers fade. This gives the plant time to move energy back into the rhizome. Think of it as letting the iris eat a proper meal after its big spring performance. If you dig too soon, the plant may not have stored enough energy for strong growth. If you wait too late, the new divisions may not settle in before winter.
The Sweet Spot: Late Summer
Late summer is often the sweet spot because bearded irises are not actively blooming, the weather is usually dry enough to reduce rot problems, and the rhizomes are easy to inspect. The leaves are still visible, so you know exactly where the clumps are. This is important if your garden has a habit of turning into a green mystery novel by September.
Digging in late summer also allows the new divisions to root into the soil before winter. That matters because iris rhizomes planted too late can heave out of the ground during freeze-thaw cycles, especially in colder climates. A newly divided iris is tough, but it is not a superhero. Give it time to anchor itself.
Are Iris Bulbs Really Bulbs?
Some are, but many common garden irises are not. This matters because different iris types have different digging schedules.
Bearded Irises: Rhizomes, Not True Bulbs
Bearded irises, including German bearded iris, grow from rhizomes. These thick, knobby structures creep horizontally along or just below the soil surface. They store food, produce roots underneath, and send up fans of leaves from the top. When gardeners talk about digging up iris bulbs, they are often talking about these rhizomes.
Bearded iris rhizomes like sun, air, and excellent drainage. They should be replanted shallowly, with the top of the rhizome at or slightly above the soil surface. Bury them deeply and they may reward your effort by producing leaves and absolutely no flowers, which is a very iris way of saying, “No, thank you.”
Dutch Irises: True Bulbs
Dutch irises are different. They grow from true bulbs, much like tulips or daffodils. These are often planted in fall for spring bloom. In many gardens, Dutch iris bulbs can stay in the ground if the soil drains well and winters are suitable. They are usually dug only when they become overcrowded, when you need to move them, or when local conditions make summer storage safer.
Siberian, Japanese, and Louisiana Irises
Beardless irises, such as Siberian, Japanese, and Louisiana irises, grow in clumps rather than exposed bearded-iris-style rhizomes. They often prefer more moisture than bearded irises and may be divided in early spring or early fall, depending on the type and climate. Do not treat every iris exactly the same. A bearded iris wants its shoulders in the sun; a Japanese iris may prefer a more moisture-rich situation. Same flower family, different personalities.
Signs It Is Time to Dig Up and Divide Irises
You do not need to dig irises every year. In fact, a young clump often blooms best when left alone for a while. But after several seasons, the bed may become crowded and tired. Here are the clearest signs that it is time to grab a garden fork.
1. Fewer Flowers Than Usual
The most common reason to dig up iris bulbs is declining bloom. If your iris patch used to look like a spring festival and now produces three flowers and a shrug, overcrowding may be the problem. As rhizomes multiply, they compete for sun, space, water, and nutrients. Eventually, the clump becomes too congested to flower well.
2. A Dead or Empty Center
Older iris clumps often form a ring, with healthy growth around the outside and a weak or dead center. This happens because older rhizomes in the middle have already bloomed and may no longer be productive. The younger, stronger rhizomes grow outward. When you divide, you keep the healthy outer pieces and discard the tired, woody center.
3. Rhizomes Are Stacked or Exposed Too Much
Bearded iris rhizomes should sit near the soil surface, but if they are stacked in layers, tangled together, or crawling over each other like garden spaghetti, the clump is too crowded. Crowding increases the risk of poor flowering and disease.
4. Soft, Mushy, or Damaged Rhizomes
If you see soft spots, bad odor, holes, or mushy tissue, dig and inspect the clump. Rot and pests can spread if damaged sections are left in place. Healthy rhizomes should feel firm, not squishy. In gardening, “firm” is usually good. “Mushy” is usually the beginning of a sad conversation.
5. You Need to Move the Plant
Sometimes the plant is healthy, but life happens. Maybe you are redesigning a bed, widening a walkway, moving house, or realizing the iris is blocking the sprinkler like a floral traffic cone. If you must move irises outside the ideal window, they often survive, but late summer after bloom is still best for the least stress.
When Not to Dig Up Iris Bulbs
Irises are forgiving, but timing still matters. Avoid digging them while they are in full bloom unless there is an urgent reason. Moving a blooming plant can interrupt flowering and stress the roots. You can do it in an emergency, but do not expect the plant to send a thank-you note.
Early spring is also not the best time for dividing bearded irises if your goal is strong bloom that same year. The plant is preparing to flower, and disturbance may reduce or eliminate that season’s display. Late fall can be risky in colder climates because the divisions may not root before freezing weather. If you live where winters are mild, early fall can still be workable, but give the plant time to settle.
How Often Should You Dig and Divide Irises?
Most bearded irises should be dug and divided every three to five years. In rich soil or warm climates where they grow quickly, they may need division sooner. In leaner conditions, they may go longer. The plant will usually tell you. Fewer flowers, crowding, and dead centers are the plant equivalent of waving a little flag.
If your irises are blooming beautifully, the clump is not crowded, and the rhizomes look healthy, leave them alone. Gardening is not a contest to see how many plants you can disturb before lunch. Sometimes the best move is to admire the flowers and keep your shovel parked.
How to Dig Up Iris Bulbs Without Wrecking Them
Digging irises is not difficult, but a little care makes a big difference. The goal is to lift the clump, divide it into healthy pieces, and replant the strongest sections at the proper depth.
Step 1: Prepare the New Planting Area First
Before you dig, decide where the divisions will go. Choose a spot with at least six hours of sun per day and well-drained soil. Bearded irises hate sitting in soggy ground. If your soil is heavy clay, loosen it and consider adding compost to improve structure. Avoid creating a rich, wet pocket that holds water around the rhizome.
Step 2: Trim the Leaves
Cut the leaves back to about six to eight inches tall, or trim them into a fan shape. This reduces water loss and makes the plants easier to handle. It also gives the divisions a tidy little haircut, which is more than some of us can say after a summer gardening session.
Step 3: Lift the Clump Carefully
Use a garden fork or spade to loosen the soil several inches away from the clump. Lift from underneath rather than yanking the leaves. Shake off loose soil so you can see the rhizomes clearly. If the clump is very old, it may come up as a chunky mass of roots, rhizomes, and garden history.
Step 4: Separate Healthy Rhizomes
Break or cut the rhizomes apart. Each good division should have a firm piece of rhizome, healthy roots, and at least one fan of leaves. Discard old, leafless, shriveled, hollow, soft, or diseased sections. If you use a knife, clean it between cuts, especially if you see rot.
Step 5: Inspect for Iris Borers and Rot
Iris borers can tunnel into rhizomes and cause serious damage. Look for holes, soft tissue, or larvae inside damaged rhizomes. Remove and discard infested pieces. Do not compost diseased or pest-filled rhizomes unless your compost system gets hot enough to destroy problems reliably. When in doubt, bag and trash the bad sections.
Step 6: Replant Shallowly
For bearded irises, dig a shallow hole with a small mound of soil in the center. Set the rhizome on the mound and spread the roots down on both sides. Cover the roots with soil, but leave the top of the rhizome visible or just barely covered. Planting too deep is one of the most common reasons irises fail to bloom.
Step 7: Space Them Properly
Space bearded iris divisions about 12 to 18 inches apart. If you want a nice clump effect, plant three rhizomes of the same variety in a triangle or group, with the leaf fans facing outward. This gives the plants room to grow while still creating a full display.
Step 8: Water and Let Them Settle
Water after planting to settle the soil around the roots. After that, avoid overwatering. Newly divided irises need moisture to establish, but soggy soil invites rot. Once established, bearded irises are fairly drought tolerant compared with many perennials.
Regional Timing Examples for Digging Irises
Because the United States has more climate moods than a teenager with a group project, timing can shift by region. In much of the Midwest, gardeners often dig and divide bearded irises in July or August. In Missouri and similar climates, August through mid-October may work well. In Oklahoma and parts of the southern Plains, late July through August is commonly recommended. In colder northern areas, finish earlier so roots can establish before hard freezes.
The key is not the exact calendar date. The key is the plant’s growth stage: after bloom, before winter stress, and while there is still enough warm soil for rooting.
Common Mistakes to Avoid After Digging Up Irises
Planting Too Deep
This is the classic iris mistake. Bearded iris rhizomes need to be near the surface. If they are buried deeply, they may grow leaves but refuse to flower. If your irises look healthy but do not bloom, check the planting depth before blaming the moon, your neighbor, or the plant’s attitude.
Keeping Old, Woody Rhizomes
Old center rhizomes often look impressive because they are large, but they may no longer bloom. Keep the younger, firm rhizomes with strong leaf fans. Toss the exhausted middle pieces. This feels harsh, but gardening is full of tiny leadership decisions.
Overwatering
Freshly planted divisions need water, but they do not need a swamp. Bearded irises prefer well-drained soil. Too much water, especially around damaged or freshly cut rhizomes, can lead to bacterial soft rot.
Using Too Much Nitrogen
High-nitrogen fertilizer can encourage lush leaves at the expense of flowers and may make plants more prone to soft growth. If your soil needs feeding, use a balanced or low-nitrogen approach and avoid dumping fertilizer directly on the rhizome.
Mulching Over the Rhizomes
Mulch can help prevent winter heaving in cold areas during the first season after planting, but do not bury bearded iris rhizomes under a heavy blanket of mulch during the growing season. They need sun and air. If you use winter protection, pull it back in early spring.
Can You Store Iris Bulbs After Digging?
Bearded iris rhizomes can tolerate being out of the ground for a while, especially if kept dry, shaded, and ventilated. However, the best practice is to replant healthy divisions as soon as practical. The sooner they get back into soil, the sooner they can grow new roots.
If you need to hold them briefly, let them dry in a shaded, airy spot. Do not seal damp rhizomes in a plastic bag and forget them in a hot garage unless your goal is to create compost with extra regret. Label varieties if you care about color placement. Otherwise, next spring’s bloom plan may become “surprise rainbow chaos,” which is not always a bad thing.
Experience-Based Tips: What Gardeners Learn After Digging Irises
After working with irises for a few seasons, one lesson becomes obvious: these plants are tougher than they look, but they bloom best when you respect their preferences. The first time many gardeners dig up a mature iris clump, they expect a neat little bulb. Instead, they find a sprawling network of knobby rhizomes, roots, and old woody sections. It can look less like a flower and more like something a wizard pulled from a pantry.
A practical experience is to start with one clump, not the entire bed. Digging all your irises at once sounds efficient until you are surrounded by thirty rhizomes, three mystery colors, and a sinking feeling that you should have labeled everything. Work in sections. Lift one clump, divide it, replant it, then move on. This keeps varieties from getting mixed and prevents healthy rhizomes from drying in the sun too long.
Another lesson is that the best divisions are not always the biggest pieces. Beginners often want to save the largest rhizome because bigger seems better. With irises, the younger side shoots with strong leaf fans are usually the winners. The old central rhizome may be large, but it may also be finished blooming. It has done its duty. Give it a dignified exit and save the vigorous young sections.
Spacing also matters more than people expect. It is tempting to replant divisions close together for an instant full look. The problem is that irises multiply quickly. A bed planted too tightly may need division again sooner, and flowering can decline as the clump gets crowded. Leaving 12 to 18 inches between bearded iris rhizomes may look a little sparse at first, but the plants fill in. Future you will appreciate not having to perform another iris rescue mission immediately.
Soil drainage is another hard-earned lesson. If a bearded iris rots after transplanting, the cause is often wet soil, deep planting, or both. Plant the rhizome high, keep the top exposed, and avoid low spots where water collects. In heavy clay, create a slightly raised planting area. The rhizome should look like it is sunbathing, not hiding from the authorities.
Labeling is worth the extra minute. Use a weatherproof marker or garden tag when you dig. Iris foliage looks similar after the flowers are gone, and memory is not a reliable filing system. You may think you will remember which one was the pale lavender rebloomer and which one was the golden yellow giant. You will not. The garden will laugh quietly.
Finally, expect some divisions to skip a bloom season, especially if they were small, planted late, or stressed. This does not always mean failure. A newly divided iris may spend its first season building roots and strength. If the rhizome is firm, the leaves are healthy, and the planting depth is right, give it time. Irises can be patient plants, even when gardeners are not patient people.
Conclusion
The best time to dig up iris bulbs depends on the type of iris, but for the popular bearded iris, aim for late summer after flowering, commonly July through September. Dig when blooms have faded, the plant has had time to recharge, and there is still enough growing season left for roots to establish. Divide every three to five years, or sooner if flowering declines, clumps become crowded, or rhizomes show signs of rot or pests.
Remember the golden rules: keep firm young rhizomes, discard old or damaged pieces, replant shallowly, choose full sun, and avoid soggy soil. Do that, and your irises should reward you with stronger growth and better blooms. They may not send a thank-you card, but a gorgeous spring flower show is basically the garden version of applause.