
If you have ever looked at an IBM Selectric typewriter and thought, “That little golf-ball thing can’t possibly be that complicated,” the machine would like a moment to laugh at you. Politely, of course. The Selectric type element looks simple from a distance: a compact sphere with tiny mirrored characters wrapped around it like a typographic planet. But up close, it becomes clear why people still admire it, collect it, repair it, and occasionally stare at it with the thousand-yard look usually reserved for vintage carburetors and impossible crossword clues.
So, can you 3D print a Selectric ball? Yes, sort of. Can you 3D print one that looks cool on a desk? Absolutely. Can you 3D print one that actually types cleanly, aligns correctly, survives repeated impact, and does not turn your beloved Selectric into a very stylish percussion instrument? That is where the real adventure begins.
This is not just a story about nostalgia. It is a story about precision engineering, tiny tolerances, clever restoration work, and the weirdly joyful overlap between vintage office equipment and modern maker culture. If you want to recreate a lost typeface, rescue a rare machine, or simply prove to yourself that a resin printer and stubbornness can defeat time, you are in the right place.
What Exactly Is a Selectric Ball?
The IBM Selectric typewriter changed the game by replacing traditional typebars with a single spherical type element. Instead of dozens of little arms flinging letters at paper and occasionally tangling themselves into mechanical spaghetti, the Selectric used one rotating, tilting element that snapped the correct character into position and struck the ribbon with impressive speed and consistency.
That little sphere became the machine’s signature feature. Better still, it could be swapped out. Want a different font? Pop in another ball. Need special symbols or another alphabet? Same trick. Long before people casually changed fonts in a word processor, Selectric owners could physically switch typefaces in seconds. That is part of the reason the machine still feels futuristic, even when it is older than many office buildings.
Why the Design Was So Brilliant
The genius of the Selectric ball was not merely that it was interchangeable. It was that IBM packed a shocking amount of precision into a small, durable component. The shape, the character placement, the tilt and rotate logic, and the striking surface all had to work together perfectly. The machine expected the ball to be light enough to move quickly, accurate enough to place each character precisely, and tough enough to survive repeated impacts without turning your lowercase “e” into a smudgy blob of regret.
That is why the phrase 3D print a Selectric ball sounds simple and becomes hilariously ambitious the moment you attempt it.
Why 3D Printing a Selectric Ball Is So Hard
Here is the first surprise: you are not just printing a sphere with letters on it. You are printing a highly tuned mechanical interface. Every tiny raised character has to be the right size, the right height, the right angle, and the right position on a curved surface. It also has to strike the ribbon cleanly and consistently. A small geometry error that looks harmless on screen can produce a typed result that looks like your typewriter had a stressful morning.
There are four main problems.
1. The Geometry Is Brutal
A Selectric ball is not a casual weekend CAD exercise. The characters sit on a curved body in carefully organized rows and columns. Their position is tied to the machine’s tilt and rotation system, so spacing mistakes compound fast. Get one row slightly off, and now your punctuation is misaligned. Get several rows wrong, and your page starts to look like it was typed on a boat.
Maker experiments have shown that even when the overall ball shape looks right, the exact profile, latitude placement, and character positioning can still be off enough to hurt print quality. In other words, “close enough” is not always close enough.
2. The Characters Are Tiny, Raised, and Unforgiving
The second problem is detail. Each glyph is small, embossed, mirrored, and expected to produce a crisp printed impression through a ribbon. Desktop FDM printing struggles here because nozzle size, layer stepping, and bead thickness work against ultra-fine raised text. FDM can make a test object. It usually struggles to make a satisfying typing element.
Resin printing is far better for this kind of tiny detail. Smooth surfaces, tighter tolerances, and finer feature reproduction make SLA or DLP the leading candidates for a functional replica. Even then, you are still fighting shrinkage, curing variables, support marks, and the general truth that a clean-looking print is not automatically a clean-typing print.
3. Durability Matters More Than You Think
A Selectric ball is not a decorative figurine. It gets accelerated, positioned, and struck over and over again. That means the part must be light, dimensionally stable, and resistant to wear at the business end of each character. The original IBM elements were engineered for exactly this job. A printed part has to survive real use, not just a glamour shot under good lighting.
This is why hobbyists often talk about “proof-of-concept” balls versus “daily driver” balls. A printed ball that can stamp a few legible lines is a victory. A printed ball that can type page after page without rapidly degrading is a different class of accomplishment.
4. Model Compatibility Can Trip You Up
Not all Selectric elements are the same. Earlier Selectric families commonly use 88-character elements, while Selectric III machines use 96-character elements. That difference is not trivia. It affects layout, compatibility, and the modeling process. If you design for the wrong family, your printed ball may fit badly, align poorly, or not work at all. Vintage restoration has a cruel sense of humor like that.
What the Maker Community Has Learned So Far
The good news is that the idea is no longer theoretical. Enthusiasts have already experimented with printable Selectric balls, shared CAD approaches, and pushed the project from “funny internet dream” toward “surprisingly real restoration path.” Early attempts revealed predictable headaches: inaccurate character placement, imperfect ball profiles, and weak print quality from lower-resolution setups. But later projects, especially those built around resin workflows and configurable geometry, have shown real progress.
The practical lesson is simple: modern desktop resin printing has finally made this project plausible. Not effortless. Not guaranteed. Plausible.
That is an important distinction. Plausible means a skilled hobbyist can prototype, iterate, tweak alignment, and get usable results. It does not mean you should expect a one-click download, a cheap print, and flawless type on the first try. If your personality thrives on calibration, experimentation, and tiny triumphs, excellent. If you want instant gratification, the Selectric has bad news.
The Best Strategy for 3D Printing a Selectric Ball
If your goal is to make one that actually works, the smartest route is part restoration project, part engineering exercise, and part patience test.
Start With the Right Original
If possible, begin with an existing typeball that already fits your machine. Measure it obsessively. Do not trust eyeballing. Do not trust “that looks pretty close.” Use careful measurement, compare rows, confirm the latch geometry, and document the character layout. A known-good original is your best teacher.
Choose Resin Over FDM
For a serious attempt, resin is the better bet. The finer detail and smoother finish matter a lot for raised mirrored glyphs. FDM may still be useful for rough concept models, alignment checks, or fit tests, but for crisp character faces, resin is far more promising.
Expect to Tune the Design
You will probably need to adjust row positions, character heights, or tiny offsets based on your printer, resin, and curing process. This is not failure. This is the process. A design that works on one machine may need tweaking on another. Think of the first print as an audition, not the premiere.
Think About Surface Performance
If the ball prints well but wears too quickly, the next frontier is surface engineering. Some makers have discussed plating, electroforming, or hybrid approaches that preserve low weight while improving wear resistance. That may be overkill for a novelty ball, but it becomes more attractive if you are chasing repeat use or trying to reproduce a rare, genuinely useful element.
Use It for the Right Job
A custom 3D-printed ball makes tremendous sense for rare symbols, novelty fonts, occasional use, artistic projects, demonstration typing, or replacing an unobtainable original. It makes less sense as an everyday office workhorse unless you have already proven the design’s durability through repeated testing.
So, Is It Worth It?
For the average person who just wants to type a letter in Courier, probably not. Original elements still exist, and buying a genuine one is often easier than spending days modeling micro-typography on a curved shell. But for restorers, collectors, and tinkerers, 3D printing changes the equation in a big way.
It means rare fonts are no longer locked behind pure luck. It means broken or unavailable elements might be recreated. It means the Selectric community can preserve function, not just appearance. And that is where this project stops being cute and starts being important.
Vintage machines survive when parts survive. When parts do not survive, reproduction becomes the bridge between admiration and actual continued use. In that sense, a printable Selectric ball is not merely a nerdy side quest. It is a preservation tool.
Real-World Experience: What It Feels Like to Chase a 3D-Printed Selectric Ball
Here is the part that many technical guides skip: the emotional weather. On paper, the project sounds tidy. Measure an original. Build the model. Print the part. Install the ball. Type something dramatic. Frame the page. Done. In reality, the experience is a little more human and a lot more entertaining.
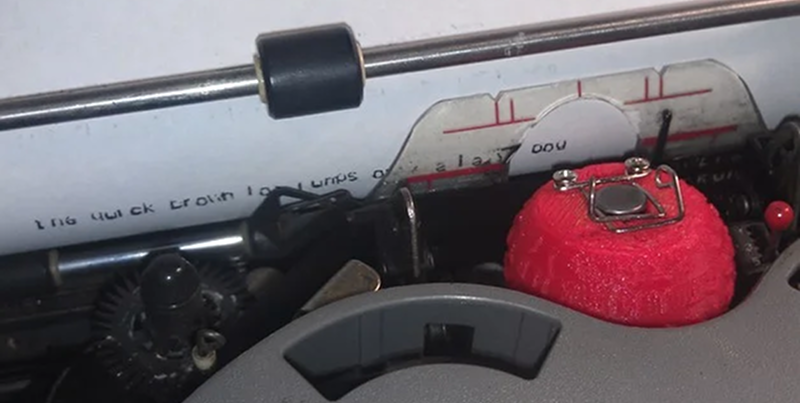
The first print often produces optimism in physical form. You hold the ball in your hand and think, “I have done it. Civilization wins.” Then you install it, type a few words, and discover that your uppercase letters are flirting with the wrong baseline while punctuation appears to be living an independent life. This is not a disaster. It is a rite of passage.
The second phase is detective work. You stop thinking like a casual hobbyist and start thinking like a forensic typographer. Is the glyph height slightly wrong? Did the resin cure shrink the geometry just enough to matter? Are the row positions correct but the strike faces too soft? Is the ball fitting properly on the mount, or is there subtle slop that becomes obvious only under motion? Suddenly you are making test lines, comparing impressions, and squinting at commas like they owe you money.
Then comes the strangely satisfying part: improvement. One revision prints cleaner. Another aligns better. A small adjustment to spacing or face shape turns mushy characters into crisp ones. The machine begins to reward you. That reward is not just a typed sentence. It is the feeling of meeting a mid-century engineering masterpiece halfway and earning a little respect from it.
There is also a creative thrill that is hard to overstate. Once you realize a printable ball can work, your brain starts sprinting. Could you revive an obscure symbol set? Reproduce a damaged scientific element? Make a novelty font for invitations, poems, or gallery work? Build a modern dingbat ball just because the world could use a little more typographic mischief? The project opens a door, and behind that door is a room full of ideas wearing safety goggles.
At the same time, the process teaches humility. The original Selectric ball was not an accident. It was a refined industrial object made for speed, accuracy, and repeat use. Trying to reproduce one at home makes you appreciate how much engineering was hiding in that tiny shell. It also reminds you that modern tools are powerful, but power is not the same thing as effortlessness.
Maybe that is the best part of the experience. You do not just end up with a custom type element. You come away with a deeper respect for mechanical design, print tolerances, and the weirdly beautiful relationship between old machines and new fabrication methods. You start with a question about whether you can help 3D print a Selectric ball. You finish by realizing that the real project was learning how precision, patience, and curiosity still belong in the same workshop.
Final Verdict
Yes, you can help 3D print a Selectric ball. But the honest answer is not “just print one.” The honest answer is: measure carefully, choose the right printing process, expect iteration, and treat the ball like a precision striking tool instead of a novelty trinket.
If you do that, the project becomes one of the most delightful intersections of retro tech and modern fabrication. You are not just making a part. You are extending the life of a machine that once made offices feel futuristic. That is a pretty good reason to fire up the CAD software, clean the resin vat, and give this gloriously unreasonable idea a real shot.
Note: This article is based on documented IBM history, patent descriptions, restoration references, maker experiments, and current manufacturing guidance on 3D-print tolerances and fine-detail fabrication. Practical results will vary by printer, material, calibration, and Selectric model.