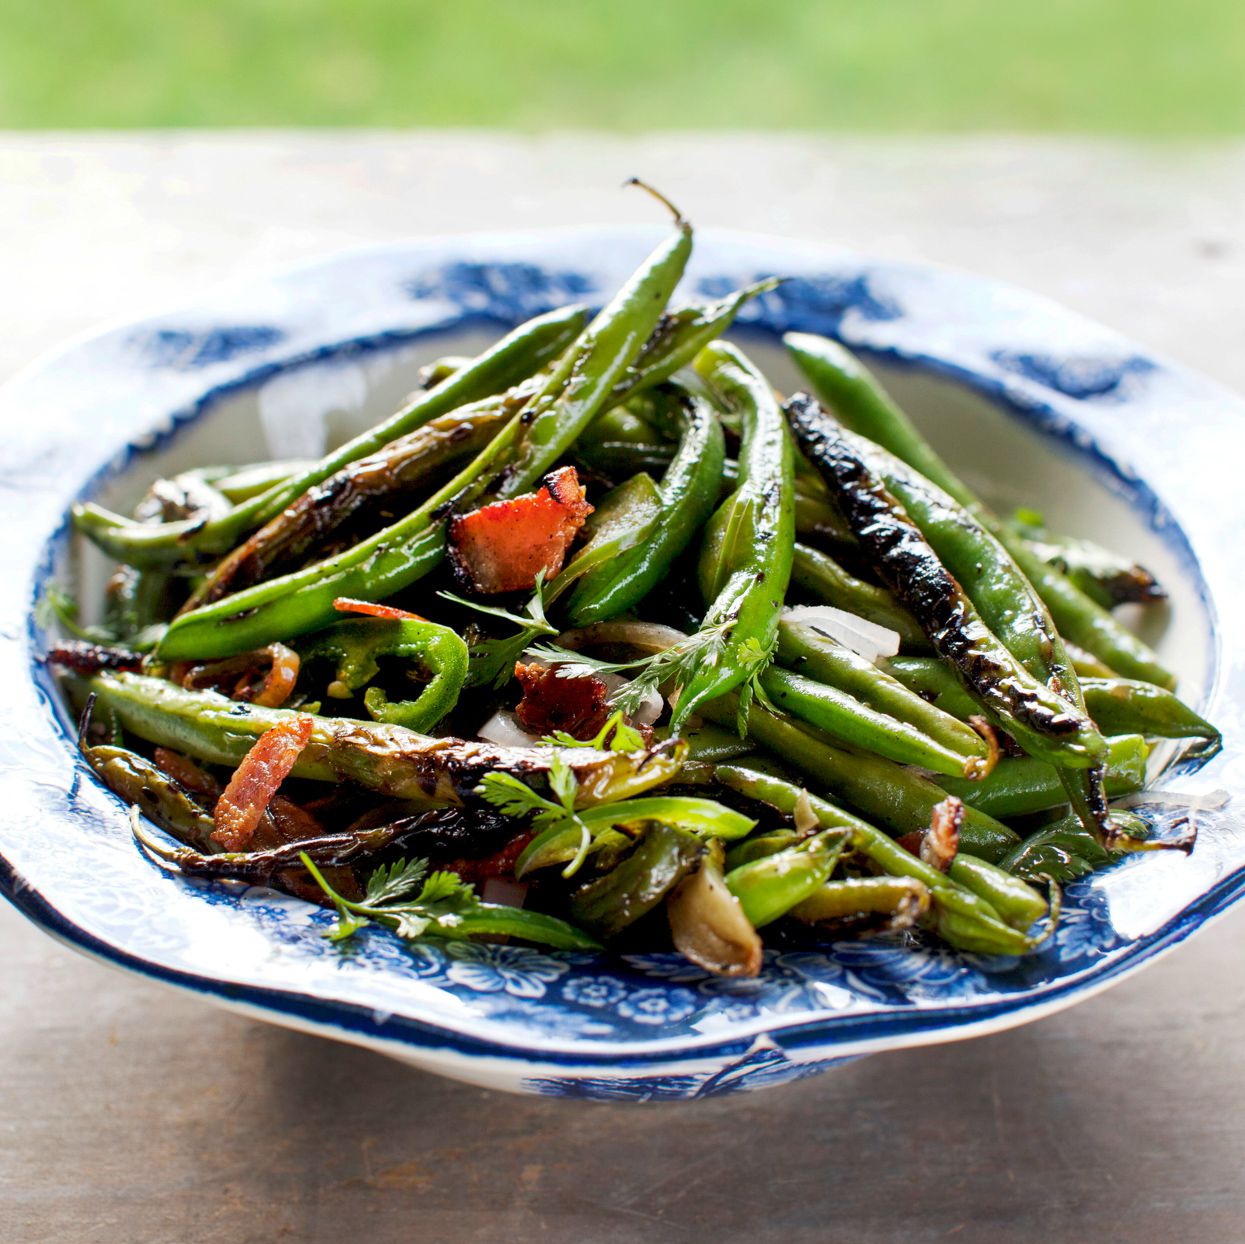

If green beans have ever seemed like the polite, slightly boring guest at the dinner table, this blistered green beans recipe is here to hand them a microphone. With a screaming-hot skillet, a little oil, garlic, lemon, and a few smart cooking tricks, ordinary fresh green beans become smoky, tender-crisp, lightly charred, and wildly snackable. They are the kind of vegetable side dish that makes people say, “Wait, who made the green beans?” which is honestly the highest honor a bean can receive.
Blistered green beans are cooked quickly over high heat until the skins wrinkle, brown, and develop tiny charred spots. The inside stays juicy and crisp-tender, while the outside picks up that deep roasted flavor usually associated with grilling or restaurant stir-fries. The method is fast, flexible, and perfect for weeknight dinners, holiday meals, meal prep bowls, steak nights, roasted chicken, salmon, tofu, or the noble act of eating vegetables straight from the pan while pretending to “check the seasoning.”
This guide covers everything you need to know: the best green beans to buy, how to prep them, the exact cooking method, flavor variations, troubleshooting tips, serving ideas, and real-life cooking experience to help you make the recipe confidently. No limp, gray, sad beans allowed. We are chasing sizzle, color, crunch, and flavor.
What Are Blistered Green Beans?
Blistered green beans are fresh green beans cooked in a very hot skillet until their skins brown, wrinkle, and lightly char. Unlike boiled green beans, which are cooked in water, blistered green beans rely on direct heat. The pan creates caramelized spots that add smoky flavor while the short cooking time keeps the beans bright and crisp.
The technique is similar to stir-frying, dry-frying, or pan-roasting. Instead of constantly stirring, you let the beans sit in the hot pan long enough to make contact with the surface. That quiet moment is where the magic happens. If you toss them every three seconds, they steam. If you let them be, they blister. Green beans, like people, sometimes need personal space to become their best selves.
Why This Blistered Green Beans Recipe Works
The secret is simple: high heat, dry beans, a wide pan, and minimal stirring. Moisture is the enemy of browning, so the beans must be thoroughly dried after washing. A crowded skillet also traps steam, which prevents blistering. Cooking in one layer gives each bean direct contact with the hot surface, creating those delicious brown spots.
Garlic, lemon, butter, soy sauce, herbs, or chile flakes can all be added, but timing matters. Garlic burns quickly over high heat, so it should go in near the end. Lemon juice is brightest when added after cooking. Butter tastes wonderful but can scorch if used alone at very high temperatures, so combining it with a high-heat oil gives you flavor and stability.
Recipe Overview
- Prep time: 10 minutes
- Cook time: 8 to 10 minutes
- Total time: 18 to 20 minutes
- Servings: 4
- Skill level: Easy
- Best pan: Cast iron, stainless steel, or a heavy nonstick skillet
Ingredients for Blistered Green Beans
Main Ingredients
- 1 pound fresh green beans, trimmed
- 1 1/2 tablespoons avocado oil, canola oil, or grapeseed oil
- 3 garlic cloves, finely minced
- 1 tablespoon unsalted butter, optional but highly recommended
- 1 teaspoon lemon zest
- 1 tablespoon fresh lemon juice
- 1/2 teaspoon kosher salt, plus more to taste
- 1/4 teaspoon black pepper
- 1/4 teaspoon red pepper flakes, optional
Optional Flavor Boosters
- 1 teaspoon soy sauce for savory depth
- 1 tablespoon toasted almonds for crunch
- 1 teaspoon sesame oil added off heat for a nutty finish
- 1 tablespoon grated Parmesan for a salty, cheesy twist
- 1 teaspoon capers for briny brightness
- Fresh parsley, basil, mint, or dill for a fresh finish
How to Make Blistered Green Beans
Step 1: Wash and Dry the Green Beans
Rinse the green beans under cool water, then trim the stem ends. You can leave the pointed tips on unless they look dry or tough. After washing, dry the beans very well with a clean kitchen towel or paper towels. This is not the time for a casual pat-pat and good luck. The drier the beans, the better they brown.
Step 2: Preheat the Skillet
Place a large cast-iron or stainless steel skillet over medium-high to high heat. Let it heat for 2 to 3 minutes, or until it feels very hot when you hold your hand several inches above the surface. Turn on your kitchen fan if you have one. Blistered green beans are not difficult, but they do like a dramatic entrance.
Step 3: Add Oil and Green Beans
Add the oil to the skillet and swirl to coat. When the oil shimmers, add the green beans in a single layer. If your pan is small, cook them in two batches. Crowding the pan will cause the beans to steam instead of blister.
Step 4: Let the Beans Blister
Let the green beans cook undisturbed for 2 to 3 minutes. Resist the urge to stir. You should hear a lively sizzle. Once the underside is browned in spots, toss the beans with tongs and let them cook for another 2 to 3 minutes. Continue cooking, tossing occasionally, until the beans are blistered, bright green, and crisp-tender.
Step 5: Add Garlic and Butter
Reduce the heat to medium. Add the butter, minced garlic, black pepper, and red pepper flakes if using. Toss for 30 to 60 seconds, just until the garlic smells fragrant. Do not walk away here. Garlic goes from golden to “why does the kitchen smell like regret?” very quickly.
Step 6: Finish with Lemon
Remove the skillet from the heat. Add the lemon zest and lemon juice, then toss well. Taste and adjust the salt. Serve immediately while the beans are hot, glossy, and proudly wearing their char marks.
Tips for the Best Blistered Green Beans
Use Fresh, Firm Green Beans
The best green beans for blistering are crisp, smooth, and bright green. They should snap when bent, not fold like a tired shoelace. Avoid beans that are limp, spotted, shriveled, or bulging with large seeds. Older beans can be tough and stringy, and no amount of skillet confidence can fully rescue them.
Dry the Beans Thoroughly
Water creates steam, and steam prevents browning. After rinsing, spread the beans on a towel and roll them gently until dry. If you have time, let them sit uncovered for a few minutes before cooking. This small step makes a big difference.
Do Not Overcrowd the Pan
A single layer is ideal. If the beans pile on top of each other, the bottom layer browns while the top layer sweats. For a full pound of green beans, a 12-inch skillet usually works well. If your skillet is smaller, cook in batches and combine everything at the end.
Add Aromatics Late
Garlic, ginger, shallots, and spices taste best when they are fragrant, not burned. Add them after the beans have already blistered. This gives you the bold flavor of aromatics without bitter scorched bits.
Finish with Acid
Lemon juice, lime juice, rice vinegar, or a splash of balsamic vinegar wakes up the smoky flavor. Add acid after the pan comes off the heat so the flavor stays fresh and lively.
Flavor Variations
Garlic Parmesan Blistered Green Beans
Follow the main recipe, then finish with 2 tablespoons grated Parmesan and a little extra black pepper. This version is excellent with pasta, roast chicken, or grilled steak.
Asian-Inspired Blistered Green Beans
Skip the lemon and finish with 1 teaspoon soy sauce, 1/2 teaspoon sesame oil, and toasted sesame seeds. Add a little grated ginger with the garlic for extra warmth. This version pairs beautifully with rice bowls, salmon, tofu, or stir-fried noodles.
Spicy Blistered Green Beans
Add red pepper flakes, chili crisp, or a small spoonful of gochujang mixed with a touch of honey. The beans become smoky, sweet, salty, and spicythe vegetable equivalent of wearing sunglasses indoors and somehow pulling it off.
Mediterranean Blistered Green Beans
Finish the beans with lemon juice, chopped parsley, crumbled feta, toasted almonds, and a drizzle of olive oil. Serve them with grilled chicken, lamb, fish, or chickpea bowls.
Holiday Blistered Green Beans
For a festive side dish, top the cooked beans with crispy shallots, toasted pecans, orange zest, or browned butter. They are lighter than green bean casserole but still special enough for Thanksgiving, Christmas, or Sunday dinner.
What to Serve with Blistered Green Beans
Blistered green beans are flexible enough for almost any meal. Serve them with roasted chicken, grilled steak, pork chops, baked salmon, shrimp, turkey burgers, tofu, rice pilaf, mashed potatoes, or creamy pasta. They also work well as part of a grain bowl with quinoa, farro, brown rice, chickpeas, avocado, and a lemony dressing.
For a simple dinner, pair these beans with pan-seared chicken thighs and roasted potatoes. For a lighter meal, serve them with grilled fish and a cucumber salad. For a vegetarian plate, pile them over rice with a fried egg, chili crisp, and sesame seeds. Suddenly, dinner looks like you planned it. Nobody needs to know the beans took less than 20 minutes.
Can You Make Blistered Green Beans Ahead?
Blistered green beans taste best right after cooking, when the skins are charred and the texture is crisp-tender. However, you can prep ahead by washing, drying, and trimming the beans up to one day in advance. Store them wrapped in a dry towel inside a container or bag in the refrigerator.
If you have leftovers, refrigerate them in an airtight container for up to 3 days. Reheat in a hot skillet for 2 to 3 minutes to revive some of the texture. Avoid microwaving if possible, because it softens the beans and dulls the blistered edges. The microwave means well, but it is not always a texture enthusiast.
Storage and Reheating Tips
- Refrigerate: Store cooked beans in an airtight container for up to 3 days.
- Reheat: Warm in a skillet over medium-high heat with a tiny splash of oil.
- Avoid freezing: Cooked blistered green beans can become soft after thawing.
- Meal prep tip: Trim and dry raw beans ahead, then cook them fresh when ready to eat.
Common Mistakes to Avoid
Mistake 1: Starting with Wet Beans
If your beans are wet, they will steam. Steamed beans can be delicious, but they will not develop the blistered, charred surface this recipe promises. Dry them like you mean it.
Mistake 2: Stirring Too Often
Blistering requires contact with the pan. Let the beans sit before tossing. Think of it as giving them a tiny skillet vacation.
Mistake 3: Using Low Heat
Medium heat will soften the beans, but it will not create the same smoky browning. Use medium-high or high heat, depending on your stove and pan.
Mistake 4: Adding Garlic Too Early
Garlic burns faster than green beans cook. Add it near the end and stir constantly until fragrant.
Mistake 5: Forgetting the Final Seasoning
A squeeze of lemon, a pinch of flaky salt, or a splash of soy sauce can turn good beans into great beans. Always taste before serving.
Nutrition Notes
Green beans are naturally low in calories and provide fiber, vitamin C, vitamin K, folate, and plant compounds that support a balanced diet. This recipe keeps the ingredient list simple and uses a moderate amount of oil, making it a lighter side dish that still tastes rich and satisfying. If you want to reduce saturated fat, skip the butter and finish with extra lemon juice or herbs instead.
Frequently Asked Questions
Can I use frozen green beans?
Fresh green beans work best because they blister more easily and stay crisp. Frozen green beans contain more moisture, so they are more likely to steam. If using frozen beans, thaw and dry them thoroughly before cooking, and expect a softer texture.
Can I make this recipe without cast iron?
Yes. Cast iron is excellent because it holds heat well, but stainless steel or a heavy nonstick skillet can also work. The most important factors are high heat and enough space.
Should I blanch green beans before blistering?
You do not need to blanch them for this recipe. Cooking directly in a hot skillet gives the beans a deeper char and better flavor. If your beans are very thick, you can blanch them for 1 to 2 minutes, dry them very well, and then blister them.
How do I know when the green beans are done?
They should be bright green, browned in spots, slightly wrinkled, and tender enough to bite but not mushy. The best texture is crisp-tender, with a little snap in the center.
Can I double the recipe?
Yes, but cook the beans in batches. If you add 2 pounds of green beans to one skillet, they will crowd the pan and steam. Cook each batch separately, then combine and season at the end.
Personal Cooking Experience: What I Learned Making Blistered Green Beans Again and Again
The first time I made blistered green beans, I made the classic beginner mistake: I washed the beans, shook them once in a colander, and tossed them into the skillet still wearing tiny water droplets like they were headed to a spa. The pan hissed, the beans steamed, and instead of developing dramatic charred spots, they turned soft and polite. They were edible, but they did not have that restaurant-style snap. The lesson was immediate: dry beans are not a suggestion. They are the entrance ticket.
After that, I started treating the drying step like part of the recipe, not a boring pre-recipe chore. I spread the beans on a clean towel, rolled them around, and let them sit while the skillet heated. That one change transformed the dish. The beans hit the pan with a sharp sizzle, and within minutes, little brown blisters appeared. The smell was nutty and green, almost like roasted vegetables and stir-fry had formed a very efficient dinner committee.
I also learned that the pan matters. A thin pan cools down quickly when the beans are added, which slows browning. A heavy skillet holds heat and gives the beans a better sear. Cast iron became my favorite, especially for a full pound of beans. Stainless steel works well too, but it requires confidence and enough oil to prevent sticking. Nonstick is the easiest for cleanup, though it may not create quite the same deep char.
The next big discovery was restraint. My natural instinct was to stir constantly, because standing near a hot pan makes me feel like I should be doing something important. But blistered green beans reward patience. Leaving them alone for a couple of minutes creates better browning than frantic tossing. Once I accepted that “doing nothing” was actually a technique, the recipe improved dramatically. Cooking is humbling like that.
Garlic timing was another lesson learned the smoky way. Add garlic at the beginning, and it burns before the beans are done. Add it at the end, and it becomes fragrant, savory, and golden. Now I let the beans blister first, then lower the heat and add garlic with a little butter. The butter melts into the oil, the garlic blooms, and the whole pan smells like the side dish section of a very good steakhouse menu.
Lemon became my favorite finishing touch. Without acid, the beans are smoky and savory. With lemon, they become bright, balanced, and almost addictive. Lemon zest adds aroma, while lemon juice cuts through the richness. If I am serving the beans with salmon, chicken, or pasta, I use lemon. If I am serving them with rice, tofu, or noodles, I switch to soy sauce and sesame oil. The same basic method can go in several flavor directions, which is why this recipe never feels repetitive.
For family dinners, I often keep the seasoning simple: garlic, lemon, salt, and pepper. For guests, I add toasted almonds or crispy shallots because they make the dish look fancy without requiring heroic effort. For quick lunches, I chop leftover blistered green beans and add them to grain bowls with rice, chickpeas, feta, and a soft-boiled egg. They also make surprisingly good taco fillings with black beans, avocado, and salsa verde. Green beans in tacos may sound unusual, but so did pineapple on pizza, and look how much conversation that caused.
The biggest takeaway from making this recipe many times is that vegetables do not need complicated treatment to be exciting. They need heat, seasoning, contrast, and a little attention. Blistered green beans are proof that a simple side dish can become the most memorable part of the plate. When the beans are smoky at the edges, juicy in the middle, salty, lemony, and just garlicky enough, they do not feel like the vegetable you are supposed to eat. They feel like the vegetable you are lucky to eat.
Conclusion
This blistered green beans recipe is fast, flavorful, and reliable enough for weeknights but impressive enough for holidays. The method is simple: dry the beans, heat the pan, cook in a single layer, let them blister, and finish with garlic, lemon, and seasoning. Once you understand the technique, you can customize the flavor with Parmesan, sesame oil, chili crisp, herbs, nuts, shallots, or your favorite sauce.
The result is a crisp-tender green bean side dish with smoky char, bright flavor, and enough personality to steal attention from the main course. Not bad for a vegetable that often gets invited to dinner out of obligation. With this recipe, green beans finally get their main-character moment.