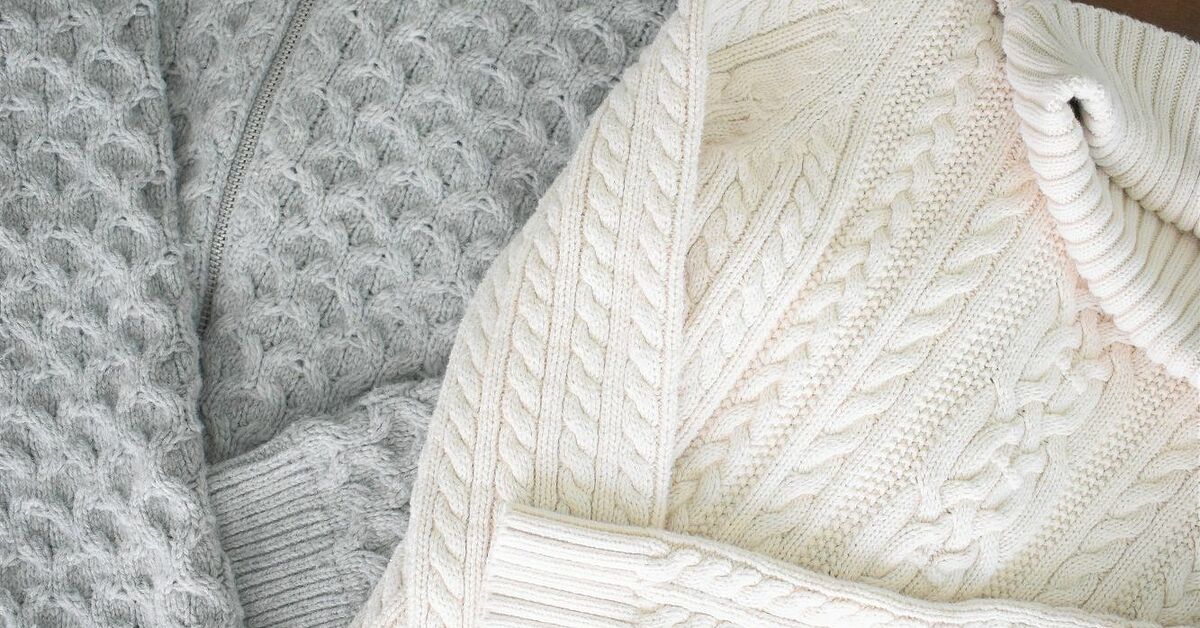

Some crafts whisper, “I am tasteful and timeless.” Others proudly announce, “I used to be a sweater, and now I am the cutest thing on the front door.” A cozy thrifted sweater wreath lands beautifully in the middle. It looks warm, soft, handmade, and charming without requiring expert sewing skills, expensive supplies, or a craft room that looks like a small-town fabric store exploded.
This project is exactly what it sounds like: you take a thrifted sweater, wrap it around a wreath form, secure it neatly, and decorate it with ribbons, greenery, bells, pinecones, felt flowers, ornaments, or whatever seasonal sparkle makes your heart do a tiny cartwheel. The result is a budget-friendly DIY sweater wreath that feels perfect for winter, Christmas, fall, farmhouse decor, cozy cottage style, or any doorway that needs a little “come inside, there may be cookies” energy.
Even better, this is an upcycled craft. Instead of buying all-new decorative fabric, you can give an old knit sweater a second life. A cable-knit cardigan with a stain near the hem? Perfect. A wool-blend pullover that shrank in the wash and now fits nobody except possibly a decorative gourd? Also perfect. The beauty of a thrifted sweater wreath DIY is that imperfections disappear once the fabric is wrapped, tucked, and styled.
Why a Thrifted Sweater Wreath Is the Cozy DIY You Need
A sweater wreath has texture, and texture is the secret sauce of home decor. Smooth plastic ornaments can look festive, but soft knit fabric adds warmth. Cable knits, ribbed cuffs, chunky yarns, and neutral sweater patterns create a handmade look that feels more expensive than it is. In fact, this project is one of those rare crafts where the cheaper materials often look better. A thrift-store sweater with a worn-in knit has character. A brand-new sweater sometimes looks too perfect, like it has never experienced soup season.
This DIY wreath also works for many decorating styles. Use a cream cable-knit sweater with velvet ribbon for a classic winter wreath. Try a red cardigan with tiny ornaments for a Christmas sweater wreath. Use an oatmeal, gray, or tan knit with eucalyptus for modern farmhouse decor. Choose a burnt orange sweater and dried florals for fall. Once you understand the basic wrapping method, you can make a wreath for nearly any season.
Supplies You’ll Need
The supply list is refreshingly simple. You do not need a sewing machine, a degree in textile engineering, or the emotional stamina to untangle twelve rolls of ribbon.
Basic Materials
- One thrifted sweater, preferably cable-knit, ribbed, chunky knit, or textured
- Foam wreath form, straw wreath form, wire wreath frame, or pool noodle wreath base
- Sharp fabric scissors
- Hot glue gun and glue sticks
- Straight pins, floral pins, or sewing clips
- Ribbon, twine, or yarn for hanging
- Optional embellishments: faux greenery, pinecones, bells, ornaments, felt flowers, berries, pom-poms, buttons, or mini signs
Best Wreath Form to Use
A foam wreath form is the easiest base for beginners because it is lightweight, smooth, and simple to wrap. A straw wreath form gives a rustic shape but can be lumpy under thinner sweaters, so it works best with chunky knits. A wire wreath frame is inexpensive, but you may want to wrap it with batting, scrap fabric, or a towel first so the sweater has something soft to hug. A pool noodle can also work if you tape the ends together securely, though it is better for larger, playful wreaths than elegant indoor designs.
How to Choose the Perfect Thrifted Sweater
The best sweater for a wreath is not necessarily the one you would wear. In fact, the ideal craft sweater may have a weird neckline, missing button, outdated shape, or mysterious shoulder pads from another era. What matters most is the fabric.
Look for Texture
Cable-knit sweaters are the gold standard because they create instant dimension. Ribbed knits also work well because they stretch smoothly around curves. Chunky knits look cozy and dramatic, especially on larger wreath forms. Fine knits can work, but they may show glue lines, wrinkles, or bumps more easily.
Choose Colors That Match Your Season
For a winter wreath, try cream, ivory, gray, oatmeal, forest green, burgundy, or navy. For Christmas, red and white are classics, but soft neutrals with gold accents can look more sophisticated. For fall, look for rust, mustard, olive, chocolate brown, or warm beige. For year-round decor, a neutral sweater with removable seasonal accents gives you the most flexibility.
Check the Stretch
A little stretch is helpful because it lets the sweater wrap smoothly around the wreath form. Too much stretch, however, can cause the fabric to sag. Before buying, gently pull the sweater in both directions. If it bounces back nicely, it is a good candidate. If it stretches out and gives up on life, leave it for another project.
Prep the Sweater Before Cutting
Always wash or freshen the sweater before crafting, especially if it came from a thrift store. Use the care label as your guide. If the sweater is wool, wash it gently or air it out carefully so it does not shrink more than expected. For acrylic or cotton blends, a normal gentle wash often works. Let it dry completely before cutting. Damp sweater fabric plus hot glue is not a cozy craft moment; it is a tiny household tragedy.
Once the sweater is clean, lay it flat and study the best sections. The body usually gives you the largest fabric pieces. Sleeves are excellent for smaller wreaths because they are already tube-shaped. Cuffs can become decorative bands, bows, or mini rolled flowers. Buttons from a cardigan can be saved as charming accents.
Step-by-Step: How to Make a Cozy Thrifted Sweater Wreath
Step 1: Plan the Front and Back
Place your wreath form on the table and decide which side will face forward. The back does not need to be perfect, but it should be tidy enough that the wreath hangs flat. Before cutting anything, hold the sweater over the form and imagine where the prettiest knit pattern will land. If the sweater has a cable design down the center, place that design on the front of the wreath.
Step 2: Cut the Sweater
Cut the sweater into wide strips or panels. For a foam wreath, strips that are about 5 to 8 inches wide usually work well, depending on the thickness of the wreath form. If you are using the body of the sweater, cut across the front or back in long sections. If you are using sleeves, cut along the seam to open them flat, or slide the sleeve over a cut foam wreath form if the size works.
Do not panic if the edges curl. Knit fabric enjoys curling because apparently it has opinions. You can manage curling by stretching the fabric gently and gluing or pinning it on the back of the wreath.
Step 3: Wrap the Wreath Form
Place one sweater strip over the front of the wreath and pull the edges toward the back. Keep the fabric snug but not overly tight. If you pull too hard, the knit pattern may distort. If you leave it too loose, the wreath may look baggy. Aim for the firmness of a neatly made bed, not a wrestling move.
Secure the fabric on the back with hot glue or floral pins. Continue wrapping until the wreath form is covered. Overlap pieces slightly so the base does not peek through. Keep checking the front as you go, because the front is what guests will see. Unless your guests are inspecting the back of your wreath, in which case you may need new guests.
Step 4: Hide the Seams
Seams are normal, especially when working with thrifted fabric. The trick is to place seams on the back or cover them with decorations. If a seam lands on the front, add a ribbon, greenery cluster, bow, pinecone group, or felt flower arrangement over it. This is not cheating. This is design strategy wearing a cute hat.
Step 5: Add a Hanging Loop
Cut a piece of ribbon, twine, yarn, or leather cord and create a loop around the top of the wreath. You can glue it to the back, pin it into a foam form, or tie it securely around the wreath. For a more polished look, use ribbon that coordinates with your embellishments. Velvet ribbon looks elegant, plaid ribbon feels farmhouse, and jute twine gives a rustic handmade finish.
Step 6: Decorate the Wreath
Now comes the fun part: making the wreath look intentional instead of like a sweater had a disagreement with a donut. Start with one focal area rather than spreading decorations evenly around the entire wreath. A cluster at the lower left or lower right often looks modern and balanced. Use greenery first, then layer smaller accents on top.
For a Christmas sweater wreath, add mini ornaments, bells, red berries, velvet ribbon, and faux pine. For a winter wreath, try eucalyptus, white berries, pinecones, wooden beads, and a cream bow. For a fall sweater wreath, use dried orange slices, faux leaves, wheat stems, cinnamon sticks, and warm-toned ribbon. For a Valentine’s Day version, add felt hearts and soft pink ribbon.
Step 7: Fluff, Trim, and Finish
After the glue dries, inspect the wreath from a few feet away. Trim stray threads, tuck loose fabric, and adjust embellishments. If the wreath looks too plain, add one more texture. If it looks too busy, remove one element. The best DIY wreaths usually have contrast: soft knit plus crisp ribbon, matte greenery plus shiny bells, neutral sweater plus colorful berries.
Design Ideas for Different Home Styles
Modern Farmhouse Sweater Wreath
Use a cream or oatmeal cable-knit sweater, black-and-white buffalo check ribbon, faux eucalyptus, and small pinecones. Keep the decoration cluster simple and slightly off-center. This style looks beautiful on a white door, wood entryway, or above a mantel.
Classic Christmas Sweater Wreath
Choose a red, green, or ivory sweater and add faux pine, berries, gold bells, and a velvet bow. If the sweater has buttons, leave a few visible for a cardigan-inspired look. This version feels nostalgic without becoming a full ugly-sweater party, unless that is your goal, in which case: add pom-poms immediately.
Minimalist Winter Wreath
Wrap the wreath in a soft gray or ivory sweater and add only a narrow satin ribbon or a small bundle of greenery. Minimalist wreaths work well indoors, especially above a console table, on a bedroom door, or layered over a mirror.
Playful Cottagecore Wreath
Use a pastel sweater and decorate it with felt flowers, embroidery hoops, lace scraps, or vintage buttons. This look is sweet, handmade, and a little whimsical, like your wreath might write poetry in a garden shed.
Common Mistakes and Easy Fixes
The Fabric Looks Lumpy
Lumps usually happen when the sweater is too thick in overlapping areas. Remove the section if possible and trim away excess fabric from the back. Use pins to hold the fabric in place before gluing so you can adjust it first.
The Wreath Looks Too Plain
Add contrast. A neutral sweater may need darker greenery, a bold bow, metallic bells, or textured pinecones. You can also wrap a narrow ribbon loosely around the wreath to create movement.
The Glue Shows
Use less glue and apply it only on the back. If glue appears on the front, cover it with a small embellishment. For delicate knits, floral pins may be cleaner than hot glue.
The Wreath Sags on the Door
Sagging means the fabric is too loose or the decorations are too heavy on one side. Tighten the sweater fabric at the back and balance heavier accents with a stronger hanging loop. If needed, add a small piece of felt to the back to stabilize the hanger.
Budget Tips for a Beautiful Sweater Wreath
This project can be wonderfully affordable if you shop smart. Look for sweaters on thrift store discount days, clearance racks, or in your own closet. A sweater with a small hole or stain is often cheaper and still works perfectly because you can cut around damaged areas. Save ribbon from gift packaging, reuse ornaments from previous years, and collect pinecones from the yard if they are clean and dry.
You can also make several mini wreaths from one large sweater. Use embroidery hoops, small foam forms, or cardboard rings as bases. Mini sweater wreaths look adorable on cabinet doors, chair backs, gallery walls, or gift packages. They also make thoughtful handmade gifts that say, “I care,” but not “I spent three weeks learning advanced woodworking.”
How to Store and Reuse Your Sweater Wreath
Store your wreath in a cool, dry place where the knit will not be crushed. A wreath storage box is ideal, but a shallow plastic bin works too. If your wreath has delicate embellishments, wrap it loosely in tissue paper. Avoid storing it in damp areas because moisture can make fabric smell musty and may damage natural decorations like pinecones or dried fruit.
One of the best parts of this DIY project is that you can refresh it. Remove the bow and greenery after Christmas, then add white berries for January. Swap winter accents for dried flowers in spring. Change ribbon colors for a new look. The sweater base becomes a cozy blank canvas, which is a fancy way of saying you get more decor from less money.
Extra Experience: What I Learned Making a Cozy Thrifted Sweater Wreath
The first thing I learned while making a thrifted sweater wreath is that the sweater chooses the mood. I originally thought I wanted a bright red holiday wreath with shiny bells and a dramatic bow. Then I found a soft cream cable-knit sweater at a thrift store, and suddenly my entire personality became “quiet winter cottage with soup on the stove.” That is the power of texture. The right sweater can completely change the direction of the project.
My best advice is to buy more sweater than you think you need. A small sweater can work, especially for a small wreath form, but a larger sweater gives you options. You can choose the best cable-knit sections, avoid worn areas, and use leftover cuffs or sleeves for accents. On one wreath, I used the ribbed waistband as a decorative band across the lower section, and it looked surprisingly polished. It was the kind of happy accident that makes you feel like a craft genius, even if five minutes earlier you were covered in thread fuzz.
I also learned not to glue too early. Dry-fitting the sweater fabric around the wreath is worth the extra few minutes. Pin everything first, flip the wreath over, check the front, and then glue. Hot glue is helpful, but it is also very committed. Once it grabs knit fabric, it does not politely let go. Testing the placement first prevents awkward bunching and helps keep the knit pattern straight.
Another useful lesson: the decoration cluster matters more than the number of decorations. My first attempt had berries, ornaments, pinecones, ribbon, greenery, bells, and a tiny wooden sign. It looked festive, yes, but also like the wreath had packed for a holiday vacation and refused to leave anything behind. The improved version had faux pine, three pinecones, two bells, and a velvet bow. Much better. A sweater wreath already has strong texture, so the accents should support it rather than compete with it.
Hanging location also makes a difference. A sweater wreath can work on a covered front door, but it is happiest indoors or in a protected entryway. Fabric does not love rain, snow, or direct harsh weather. Mine looked best above a mantel, where the knit texture played nicely with candles, books, and greenery. It also looked charming on an interior pantry door, which made the kitchen feel more seasonal without taking up counter space.
Finally, this project reminded me why handmade decor is so satisfying. It does not need to be flawless. A slightly uneven seam, a hidden glue spot, or a bow that took six attempts is part of the story. Store-bought wreaths can be beautiful, but a thrifted sweater wreath has personality. It has a past life, a new purpose, and just enough cozy charm to make people ask, “Wait, did you make that?” That question alone is worth the glue strings.
Conclusion
A cozy thrifted sweater wreath DIY is simple, affordable, and full of personality. With one secondhand sweater, a wreath form, a little glue, and a few seasonal accents, you can create decor that feels warm, custom, and far more expensive than it really is. The key is choosing a sweater with great texture, wrapping it neatly, hiding seams creatively, and decorating with balance.
Whether you make a classic Christmas wreath, a minimalist winter wreath, a farmhouse-style door accent, or a playful cottagecore design, this project proves that beautiful home decor does not have to start in the new-arrivals aisle. Sometimes it starts with an old sweater, a pair of scissors, and the bold belief that your front door deserves knitwear too.