
Popsicle sticks are the underdogs of the craft world. They sit quietly in drawers, craft bins, classroom cabinets, and the mysterious “I’ll use this someday” box until one brave DIYer realizes they can become something surprisingly stylish. Yes, those little wooden sticks can go from snack-handle energy to “Wait, you made that?” wall decor with nothing more than a bit of glue, paint, patience, and a healthy respect for geometry.
If you love budget-friendly DIY wall decor, craft stick wall art is a perfect weekend project. It is inexpensive, lightweight, renter-friendly, easy to customize, and forgiving enough for beginners. You do not need a professional workshop, a laser cutter, or a dramatic renovation montage. You need popsicle sticks, a backing board, glue, paint or stain, and a design plan that keeps your wall from looking like a summer camp table exploded.
This guide will walk you through how to use popsicle sticks to make gorgeous decor for your wall, including modern geometric art, boho-style hangings, sunburst designs, mini shelves, and dimensional wood panels. We will cover materials, layout ideas, finishing tips, hanging methods, mistakes to avoid, and real-world experience from making these projects look intentional instead of accidental. Spoiler: spacing matters, glue strings are sneaky, and gold paint can fix almost anything.
Why Popsicle Stick Wall Decor Works So Well
The magic of popsicle stick decor is that the material is simple, but the pattern can look sophisticated. A single craft stick is not glamorous. A hundred craft sticks arranged into a chevron, herringbone, sunburst, honeycomb, or layered diamond pattern can look like boutique wall art. That is the beauty of repetition: one stick says “snack time,” but many sticks say “custom wood installation.”
Craft sticks are also lightweight, which makes them useful for wall projects. Unlike heavy wood panels, mirrors, or framed artwork, a popsicle stick piece can often be hung with small nails, sawtooth hangers, removable strips, or twine depending on its size and weight. This is especially helpful for renters, dorm rooms, apartments, small bedrooms, home offices, entryways, and gallery walls where you want visual impact without drilling a hole large enough to start a construction dispute.
Another advantage is flexibility. You can paint craft sticks matte black for a modern look, stain them walnut for rustic warmth, dry-brush them white for farmhouse charm, or use metallic paint for a glam accent. You can keep the rounded ends for a playful handcrafted feel or trim them for sharp, clean lines. You can even mix natural wood with painted sticks to create contrast.
Best Materials for Popsicle Stick Wall Art
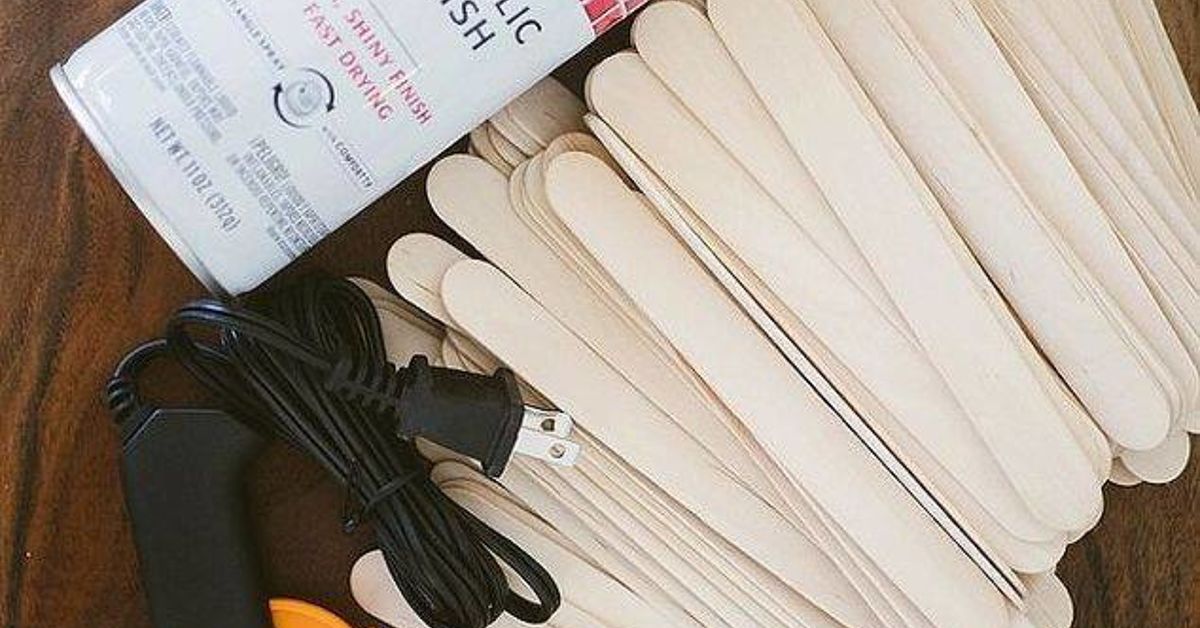
Before you start gluing with the confidence of a craft-store superhero, gather the right supplies. Good materials make the project easier and help the finished wall decor last longer.
Basic Supplies
- Natural wood craft sticks or jumbo craft sticks
- Hot glue gun or strong craft glue
- Foam board, cardboard, canvas board, plywood, or a wooden embroidery hoop for backing
- Acrylic paint, wood stain, spray paint, or craft sealer
- Pencil, ruler, and painter’s tape
- Scissors, craft knife, or small hand saw for trimming
- Sandpaper or a sanding sponge
- Hanging hardware, twine, adhesive strips, or picture hangers
Standard craft sticks are great for small patterns and tighter details, while jumbo craft sticks are better for statement pieces. If you want a large wall panel, jumbo sticks save time because they cover more surface area. If you are making a mandala, mosaic, or small geometric design, regular sticks give you more control.
Choosing the Right Backing
Your backing determines how sturdy and professional the project feels. Foam board is light and easy to cut, making it ideal for renters or temporary decor. Cardboard works for practice pieces, but it can warp if you use too much paint or glue. Canvas board gives a cleaner finish and is easy to hang. Thin plywood is the strongest choice for larger decor, especially if you want a piece that feels like real wood art rather than a school project that grew up and got a mortgage.
For round wall decor, try using an embroidery hoop, pizza pan, wood circle, or cardboard circle as the base. For a modern rectangular piece, use a canvas panel or thin wood board. For boho decor, you can attach sticks to a dowel and add yarn, beads, tassels, or macrame cord.
Project Idea 1: Geometric Popsicle Stick Wall Art
Geometric wall art is one of the easiest ways to make popsicle sticks look expensive. The trick is to repeat a simple shape until it creates movement. Triangles, diamonds, hexagons, arrows, and chevrons all work beautifully.
How to Make It
- Choose a backing board in your preferred size.
- Draw a light pencil grid to guide your pattern.
- Arrange craft sticks before gluing so you can adjust spacing.
- Glue the sticks down one section at a time.
- Trim any pieces that extend beyond the edge.
- Paint, stain, or seal the finished design.
- Add hanging hardware to the back.
A good beginner pattern is a repeating triangle layout. Place three sticks into a triangle, glue them together, then repeat until the board is filled. You can paint each triangle a different neutral shade, such as white, beige, tan, and soft gray, for a Scandinavian-inspired look. For a bolder style, use navy, terracotta, mustard, and forest green.
For a more polished result, paint the backing board before adding the sticks. A black background makes natural wood pop. A white background feels clean and airy. A deep green or charcoal background can turn simple craft sticks into dramatic modern wall decor.
Project Idea 2: Popsicle Stick Sunburst Wall Decor
A sunburst design is a classic wall decor idea, and craft sticks are perfect for it because they naturally create rays. You can make a sunburst mirror, a faux mirror, or a decorative medallion. It looks fancy, but the process is basically “glue sticks in a circle and pretend you planned it all along.”
How to Make It
Start with a round base, such as a cardboard circle, wood round, or embroidery hoop. Mark the center point. Arrange popsicle sticks around the circle like sun rays, alternating lengths if you want more depth. Glue the first layer down, then add a second layer between the gaps. For extra dimension, place shorter sticks on top of longer ones.
Once the glue dries, paint the entire piece. Metallic gold creates a glam look, matte black gives it a modern edge, and whitewash creates coastal charm. If you want a mirror effect, glue a small round mirror to the center. If you prefer a safer or lighter option, use reflective craft paper or a painted wooden circle.
This project works beautifully above a console table, in a hallway, over a desk, or as part of a gallery wall. Keep the size proportional to the wall. A tiny sunburst on a huge blank wall can look lonely, like it missed the group chat.
Project Idea 3: Boho Popsicle Stick Wall Hanging
Boho wall decor often combines natural textures, soft colors, hanging elements, and handmade details. Popsicle sticks can become the structured top layer of a boho wall hanging when paired with yarn, cotton rope, twine, beads, feathers, or tassels.
How to Make It
Glue craft sticks into a fan shape, triangle, arch, or layered diamond. Attach the top to a wooden dowel or small branch. Then tie yarn strands, macrame cord, or tassels along the bottom edge. You can paint the sticks in warm neutrals, leave them natural, or stain them for a richer look.
For a modern boho palette, try cream, sand, clay, muted olive, and soft black. For a nursery or cheerful bedroom, use blush, peach, mint, and pale yellow. The key is to keep the colors coordinated so the finished piece looks designed, not like the craft drawer had a confetti incident.
This project is especially good for narrow wall spaces, such as beside a bed, near a reading chair, or in a small entryway. It adds texture without taking up floor space, which is basically interior design’s version of finding money in a jacket pocket.
Project Idea 4: Mini Popsicle Stick Wall Shelf
If you want wall decor that also holds something tiny and adorable, make a mini wall shelf. Popsicle sticks can be stacked and glued into a small ledge for lightweight items like a mini faux plant, a small candle holder without a flame, a tiny framed quote, or decorative figurines.
How to Make It
Layer craft sticks horizontally to create a small platform. Add side supports by gluing sticks vertically or diagonally underneath. Reinforce the back with extra sticks or a small piece of wood. Paint or stain the shelf before hanging. Use it only for lightweight decor, not heavy objects, glass items, or anything fragile.
This is a great project for a kids’ room, craft room, or office nook. It is also a smart way to use leftover sticks from a larger project. Just remember: popsicle stick shelves are cute, not load-bearing architecture. Do not ask them to hold your ceramic mug collection, your emotional baggage, or a ten-pound plant.
Project Idea 5: Herringbone Craft Stick Wall Panel
A herringbone pattern instantly makes craft sticks look more refined. It mimics wood flooring and tile layouts, which gives your wall decor a designer-inspired feel. This project takes more measuring than a sunburst or boho hanging, but the result is worth it.
How to Make It
Paint or stain your craft sticks first. Once dry, draw a vertical center line on your backing board. Place two sticks at an angle to create a V shape, then continue the pattern outward. Keep the angle consistent. Use a ruler or scrap guide to maintain spacing. Glue slowly and check alignment often.
When the board is filled, trim the edges carefully. Sand rough spots, touch up paint, and seal the surface if needed. A herringbone popsicle stick panel looks beautiful in natural wood tones, black and white, or a gradient of warm browns. It can stand alone as wall art or serve as a textured background for a small mirror, quote, or family initial.
Painting and Finishing Tips for a Professional Look
Paint can transform craft sticks from “elementary school supply” to “handmade boutique accent.” Acrylic paint is beginner-friendly because it dries quickly, comes in many colors, and works well on wood craft surfaces. Wood stain creates a more natural look, but test it first because craft sticks can absorb stain unevenly.
For the cleanest finish, paint sticks before gluing them down. This prevents unpainted gaps from showing between the sticks. However, if you are making a single-color piece, it may be easier to glue first and paint afterward. Use thin coats instead of one heavy coat. Heavy paint can pool around edges and make the sticks look bulky.
If you want a distressed look, paint the sticks, let them dry, and lightly sand the edges. If you want a glossy finish, use a clear acrylic sealer. If you prefer a modern matte finish, choose matte craft paint or matte spray sealer. For wall decor in kitchens, bathrooms, or humid areas, sealing is especially helpful.
How to Hang Popsicle Stick Wall Decor Safely
Because popsicle stick wall art is usually lightweight, it is often easier to hang than traditional framed art. Still, the right method depends on the wall surface, the size of the piece, and the total weight. Smooth walls may work with removable picture hanging strips for lightweight projects. Small nails or picture hooks are reliable for canvas-backed or plywood-backed pieces. Twine works well for boho wall hangings, but it should be securely attached to the back or top dowel.
Before hanging, weigh the finished piece. Do not guess. DIY confidence is wonderful, but gravity is undefeated. Choose hanging hardware rated above the actual weight of your decor. If you use adhesive strips, follow the product directions carefully and avoid hanging valuable, fragile, or heavy items with them.
For larger pieces, attach a sawtooth hanger, D-rings, or a lightweight picture wire to the backing board. If your wall is textured, brick, or plaster, adhesive strips may not perform as well. In that case, use hardware appropriate for the wall type.
Common Mistakes to Avoid
The first mistake is skipping the layout stage. Always arrange the sticks before gluing. A pattern that looks good in your imagination may become suspiciously crooked in real life. Dry-fitting gives you a chance to adjust before glue makes the decision permanent.
The second mistake is using too much glue. Hot glue is convenient, but thick blobs can create bumps and visible gaps. Use small dots or thin lines. Remove glue strings as you go. Those little strings are craft cobwebs, and they somehow appear even when you swear you were careful.
The third mistake is ignoring warped sticks. Craft sticks are inexpensive, so some may be bent, chipped, or uneven. Sort them before starting. Use the straightest sticks for visible areas and save imperfect ones for backing support.
The fourth mistake is choosing too many colors. Unless you are making playful kids’ decor, limit your palette to three to five colors. A controlled palette makes the piece look intentional and helps it blend with your room.
The fifth mistake is hanging too high. Wall art should relate to the furniture or space around it. Above a sofa, console, or bed, keep the piece visually connected to the furniture. In a hallway or gallery wall, aim for eye-level placement.
Design Ideas for Different Home Styles
Modern Minimalist
Use straight lines, black paint, natural wood, and simple geometric shapes. Try a black backing board with natural sticks arranged in a diamond pattern. Keep the finish matte and avoid extra embellishments.
Farmhouse
Use whitewashed sticks, distressed edges, twine, and a soft neutral palette. A herringbone panel in white, beige, and light brown works well in farmhouse kitchens, entryways, or laundry rooms.
Boho
Combine natural sticks with yarn, tassels, beads, and earthy colors. A fan-shaped wall hanging with cream macrame cord adds warmth and texture to bedrooms and reading corners.
Coastal
Choose white, driftwood gray, pale blue, and sandy beige. Arrange sticks into a wave-like pattern or sunburst medallion. A lightly distressed finish makes the piece feel breezy and beachy.
Glam
Use metallic gold, champagne, bronze, or glossy black. A gold sunburst mirror made from craft sticks can add sparkle without the designer price tag.
Budget Breakdown: What It Might Cost
One of the best things about popsicle stick wall decor is the price. A pack of craft sticks is usually inexpensive, and many people already own paint, glue, scissors, and a ruler. A small project may cost only a few dollars. A larger piece may require several packs of sticks, a better backing board, sealer, and hanging hardware, but it is still typically cheaper than buying similar wood wall decor from a home store.
To save money, use recycled cardboard for practice, leftover wall paint for color, and thrifted frames or old canvas panels as the base. You can also reuse sticks from frozen treats if they are washed, dried, and clean. However, packaged craft sticks are more consistent in size and easier for polished wall art.
Extra Experience: What I Learned Making Popsicle Stick Wall Decor
The biggest lesson from making popsicle stick wall decor is that the project looks simple, but the details decide whether it feels handmade in a charming way or handmade in a “please do not zoom in” way. The first time I arranged craft sticks into a geometric pattern, I thought I could eyeball everything. This was bold. It was also wrong. After about fifteen minutes, the left side of the design looked like modern art, and the right side looked like it had received upsetting news. A ruler fixed what confidence could not.
Dry-fitting the pattern before gluing is the habit that changes everything. Lay out the entire design first, step back, and look at it from across the room. Take a phone photo too. Photos reveal crooked lines faster than your eyes do when you are sitting three inches from the project, whispering, “It’s fine.” If the design looks balanced in a photo, it will usually look good on the wall.
Another experience worth sharing is that paint changes the personality of the project dramatically. Natural sticks look casual and warm. Black paint makes the piece look modern. White paint makes it fresh and simple. Metallic paint makes it look more expensive than it is, which is deeply satisfying. But paint also highlights glue mistakes, so clean up excess glue before painting. Once paint lands on a glue blob, that blob becomes a permanent decorative feature whether you invited it or not.
Hot glue is fast, but it can be messy. A low-temperature glue gun is easier to manage for small projects, while stronger craft glue may give a cleaner finish if you can wait for it to dry. For larger wall panels, I prefer using a combination: a few dots of hot glue to hold the stick in place quickly, plus a stronger adhesive where durability matters. This gives you speed and stability without requiring Olympic-level patience.
I also learned that not every stick deserves a starring role. Some craft sticks are slightly curved, rough, or uneven. Do not fight them. Sort them into piles before starting. Use the straightest sticks for front-facing patterns and the imperfect ones for hidden reinforcement. This one step makes the final project look much cleaner.
When it comes to hanging the finished decor, lighter is better. Foam board and canvas board are great for small and medium pieces because they keep the project easy to mount. Thin plywood feels more professional, but it adds weight, so the hanging method matters more. Always test the hanger before placing the decor above a bed, desk, or anything breakable. A beautiful DIY piece should not become a surprise midnight guest.
The best part of this project is how customizable it is. You can create wall decor that matches your exact room colors, fills an awkward blank space, and costs far less than store-bought art. More importantly, it gives you that wonderful DIY moment when someone asks where you bought it and you get to say, with heroic restraint, “Oh, I made it.” Then you wait two seconds before explaining the whole process anyway, because let’s be honest, that is the real reward.
Conclusion
Popsicle stick wall decor proves that beautiful home design does not always need expensive materials. With craft sticks, glue, paint, and a smart pattern, you can create geometric art, sunburst accents, boho hangings, herringbone panels, and small decorative shelves that add warmth and personality to your space. The key is planning your layout, choosing a color palette, using glue carefully, finishing the surface well, and hanging the piece safely.
Whether your style is modern, rustic, coastal, farmhouse, boho, or glam, popsicle sticks can be shaped into wall decor that feels personal and surprisingly polished. Start small, test your pattern, and let the humble craft stick have its main-character moment. It has been waiting patiently in the drawer long enough.