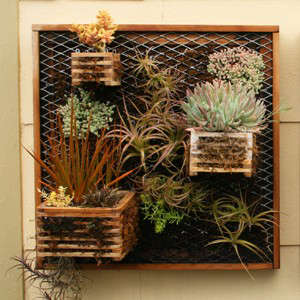

A DIY hanging garden kit is the gardening world’s answer to small spaces, blank walls, boring balconies, and that suspiciously empty corner of your patio that has been quietly judging you since last spring. Instead of waiting for a big backyard, perfect soil, or a fairy godmother with a greenhouse, you can build a compact vertical garden using a few smart materials: hanging planters, strong hooks, lightweight potting mix, drainage-friendly containers, and plants that actually enjoy life above ground level.
The beauty of a DIY hanging garden kit is that it can be as simple or stylish as you want. It can hold cascading flowers, kitchen herbs, strawberries, succulents, ferns, leafy greens, or compact vegetables. It can live on a balcony railing, under a porch, near a sunny kitchen window, or on a fence that has been begging for a makeover. Best of all, it turns unused air into growing space. That is right: even your vertical space has rent due.
This guide breaks down how to plan, build, plant, and maintain a DIY hanging garden kit that looks good, grows well, and does not dramatically collapse during a windy afternoon. Whether you are a renter, a beginner gardener, a weekend DIY fan, or someone who keeps buying basil and watching it turn into a tiny brown skeleton, this article will help you create a hanging garden that is practical, affordable, and surprisingly fun.
What Is a DIY Hanging Garden Kit?
A DIY hanging garden kit is a custom set of supplies used to create a suspended or wall-mounted garden. Unlike a store-bought kit that arrives with fixed parts, a DIY version lets you choose the containers, hooks, soil, plants, layout, and style that match your home and growing conditions.
At its core, the kit usually includes hanging baskets, wall pockets, macramé hangers, rail planters, chains, S-hooks, ceiling hooks, brackets, potting mix, fertilizer, a watering can, and suitable plants. More advanced versions may include drip irrigation, self-watering reservoirs, grow lights, trellises, coco liners, moisture meters, or decorative labels.
The goal is simple: grow plants vertically instead of horizontally. This makes a hanging garden especially useful for apartments, townhomes, condos, patios, decks, porches, fences, and compact yards. It is also a clever way to keep herbs close to the kitchen, brighten a dull wall, or protect tender plants from curious pets who believe every leaf is a salad bar.
Why Build a DIY Hanging Garden Kit?
It Saves Space
The biggest advantage of a hanging garden is obvious: it does not need much floor space. Instead of spreading pots across a patio like a botanical obstacle course, you can use walls, beams, railings, pergolas, fences, and ceiling hooks. For small-space gardeners, vertical gardening is not just cute. It is survival.
It Adds Instant Style
A hanging garden softens hard surfaces and makes plain areas feel alive. A row of trailing petunias, a cluster of ferns, or a wall of herbs can change the mood of a space faster than a new throw pillow and with far more oxygen. Hanging plants also add height, texture, movement, and color, which makes a patio or balcony feel layered and intentional.
It Can Grow Food
A DIY hanging garden kit is not only decorative. With the right containers and sunlight, it can grow basil, thyme, mint, cilantro, parsley, lettuce, spinach, strawberries, cherry tomatoes, peppers, and compact cucumber varieties. For beginners, herbs and leafy greens are usually the easiest edible plants to start with because they grow quickly and do not require giant containers.
It Is Budget-Friendly
You can buy polished hanging garden systems, but a DIY version can be much cheaper. Repurposed buckets, baskets, wooden crates, food-safe containers, old colanders, and fabric grow bags can all work if they are clean, sturdy, and have drainage. The trick is not to use anything toxic, flimsy, or too heavy once filled with wet soil.
What to Include in Your DIY Hanging Garden Kit
1. Lightweight Containers
Choose containers that are strong but not excessively heavy. Plastic hanging baskets, fabric grow bags, wire baskets with coco liners, resin planters, metal buckets, and lightweight wall pockets are popular options. Avoid heavy ceramic or thick terra-cotta pots for overhead hanging unless you have serious structural support. Wet soil adds more weight than most people expect, and gravity has a strict no-refund policy.
2. Drainage Holes
Drainage is non-negotiable. Containers need holes so extra water can escape and roots can access oxygen. Without drainage, roots may sit in stagnant water, which can lead to rot, weak growth, fungus problems, and the mysterious sadness gardeners call “it looked fine yesterday.” If a container has no holes, drill several before planting.
3. Quality Potting Mix
Do not use heavy garden soil in hanging planters. It can compact, drain poorly, and become too heavy. Use a lightweight potting mix designed for containers. A good mix usually contains ingredients such as peat moss or coconut coir, perlite, vermiculite, composted bark, or compost. It should hold moisture while still draining well.
4. Secure Hanging Hardware
Your kit should include hardware that matches the installation surface. For wood beams, use screw hooks or eye hooks rated for the expected weight. For masonry, use anchors designed for brick or concrete. For railings, use strong railing brackets or adjustable hooks. For ceilings, always screw into a joist or use a properly rated anchor. When in doubt, choose stronger hardware than you think you need. Plants are charming; falling planters are not.
5. Liners and Moisture Helpers
Wire baskets often need coco liners, moss liners, burlap, or landscape fabric to hold potting mix in place. In hot climates, moisture-retaining crystals, self-watering inserts, or drip trays may help reduce watering stress. However, avoid creating soggy conditions. The goal is moist, not swampy.
6. Fertilizer
Container plants depend on you for nutrients because regular watering can wash nutrients out of the potting mix. A slow-release fertilizer mixed into the soil at planting is convenient. Liquid fertilizer can also be used during the growing season, especially for flowers, herbs, and vegetables in active growth. Always follow label directions; more fertilizer does not mean more magic.
7. Watering Tools
A narrow-spout watering can, hose wand, squeeze bottle, or small indoor watering can makes care easier. If your hanging garden is high, use a watering wand so you do not have to perform circus-level balancing acts. For multiple baskets, a simple drip irrigation line or self-watering planter system can save time.
8. Plant Labels
Labels are optional until you plant five herbs and suddenly cannot tell cilantro from parsley. Add waterproof plant markers, especially for edible gardens. Future you will be grateful, and dinner will be less confusing.
Best Plants for a DIY Hanging Garden Kit
Best Herbs
Herbs are excellent for hanging gardens because many stay compact and tolerate container life well. Great choices include basil, thyme, oregano, mint, parsley, cilantro, chives, marjoram, and trailing rosemary. Mint is vigorous and should usually get its own container unless you want it to stage a leafy takeover.
Best Flowers
For color, try petunias, calibrachoa, lobelia, verbena, nasturtiums, begonias, impatiens, scaevola, sweet alyssum, and trailing lantana. Use sun-loving flowers for bright patios and shade-friendly flowers for covered porches. A classic container design formula is “thriller, filler, spiller”: one upright focal plant, several bushy plants, and trailing plants that spill over the edge.
Best Vegetables and Fruits
Compact edibles work best. Try lettuce, spinach, arugula, radishes, dwarf tomatoes, bush beans, compact peppers, strawberries, and small cucumber varieties with support. Look for seed packets or plant tags that say “bush,” “dwarf,” “compact,” “patio,” or “container.” These words are basically the plant world saying, “I promise not to become a jungle.”
Best Indoor Hanging Plants
For indoor hanging gardens, consider pothos, philodendron, spider plants, string of hearts, hoya, ferns, peperomia, and trailing succulents. Indoor edible herbs can work near a bright window, but many need strong light. If your window is dim, a small grow light can make a big difference.
How to Build a DIY Hanging Garden Kit Step by Step
Step 1: Choose the Location
Before buying plants, study your light. Most vegetables, herbs, and flowering annuals need at least six hours of sunlight per day. Shade-loving plants can handle less light, especially in hot climates. Watch the space for a full day if possible. Morning sun is gentler, afternoon sun is stronger, and deep shade is where basil dreams go to retire.
Step 2: Measure the Area
Measure width, height, and available clearance. Make sure hanging baskets will not block doors, windows, walkways, ceiling fans, or your forehead. Leave enough room for plants to grow outward and downward. A tiny starter plant can become a dramatic trailing waterfall by midsummer.
Step 3: Choose Your System
Select the hanging style that fits your space. Ceiling hooks work well for porches and indoor corners. Wall-mounted rails are great for fences and balconies. Macramé hangers add a softer decorative look. Vertical pocket planters work well for herbs and small greens. Rail planters are ideal for apartments and decks. Tiered hanging baskets create a stacked effect and are perfect for strawberries or trailing flowers.
Step 4: Install Hardware Securely
Install hooks, brackets, rails, or anchors according to the surface type and weight rating. Remember to calculate the weight of the container after watering, not when empty. A small hanging basket can become surprisingly heavy once filled with wet potting mix and mature plants.
Step 5: Add Potting Mix
Fill containers with lightweight potting mix, leaving about one inch of space at the top so water does not spill over every time you water. If using slow-release fertilizer, mix it in according to the label. Do not pack the mix too tightly. Roots need air as much as they need moisture.
Step 6: Plant Thoughtfully
Place taller or upright plants near the center or back. Put trailing plants near edges. For herbs, group plants with similar water and light needs. For example, Mediterranean herbs such as thyme, oregano, and rosemary prefer brighter light and slightly drier conditions, while basil, parsley, and cilantro like more consistent moisture.
Step 7: Water Deeply
After planting, water until moisture runs out of the drainage holes. This settles the potting mix around the roots. Check again the next day because new containers can dry faster than expected, especially in wind or warm weather.
Step 8: Hang and Adjust
Hang each planter and step back. Look at spacing, height, light, and balance. Rotate containers occasionally so plants grow evenly. If a plant looks stretched or pale, it may need more light. If leaves scorch, it may need afternoon shade.
Maintenance Tips for a Healthy Hanging Garden
Water Often, But Do Not Drown the Plants
Hanging baskets dry out faster than in-ground beds because they have limited soil volume and more air exposure. In hot weather, some may need daily watering. Check moisture by sticking a finger about one inch into the soil. If it feels dry, water thoroughly. If it feels wet, wait.
Feed Regularly
Because nutrients wash out of containers, hanging gardens benefit from regular feeding. Use slow-release fertilizer at planting or a diluted liquid fertilizer during active growth. Flowering annuals and vegetables usually need more nutrients than succulents or low-maintenance foliage plants.
Trim and Harvest
Pinch herbs often to encourage bushier growth. Remove yellow leaves and spent flowers. Harvest lettuce and herbs regularly so plants stay productive. Deadheading flowers can encourage more blooms, although some modern varieties are self-cleaning and do not need much help.
Watch for Pests
Inspect leaves weekly for aphids, spider mites, whiteflies, caterpillars, and fungal issues. Catching problems early is easier than negotiating with an insect army later. A strong spray of water, insecticidal soap, or hand removal can handle many minor pest issues.
Refresh Tired Plants
Annual flowers may get leggy in midsummer. Trim them back lightly and feed them. If a plant is truly finished, replace it. A hanging garden is not a museum. You are allowed to edit the cast.
Common DIY Hanging Garden Mistakes
Using Containers That Are Too Small
Small containers dry quickly and limit root growth. They can work for succulents or small herbs, but vegetables and thirsty annuals need more room. Bigger containers hold moisture longer and give roots more space.
Ignoring Weight
Always consider the total weight of the planter, wet soil, mature plants, and hardware. If hanging indoors, protect floors and furniture from drips. If hanging outdoors, account for wind. A swinging basket can damage walls, windows, and your faith in DIY projects.
Mixing Plants With Different Needs
Do not put drought-loving succulents in the same basket as moisture-loving herbs. Do not pair shade plants with sun-hungry tomatoes. Group plants by light, water, and growth habit to prevent one plant from thriving while another files a complaint.
Forgetting Drainage
Decorative containers without holes may look elegant, but they can trap water. If you love a no-hole container, use it as a cachepot: place a smaller draining pot inside and remove it for watering.
Budget-Friendly DIY Hanging Garden Ideas
You do not need a luxury garden budget to create a beautiful hanging garden. Try repurposed colanders for herbs, painted tin cans for small flowers, wooden crates mounted to a fence, fabric shoe organizers for lettuce, hanging baskets lined with coco fiber, mason jars for water-rooted cuttings, or thrift-store baskets fitted with liners. Use caution with edible plants: containers should be clean, food-safe, and free of old chemicals, paint flakes, or unknown residues.
For a polished look, repeat materials. For example, use three matching black hanging baskets, five terracotta-colored resin pots, or a row of identical metal buckets. Repetition makes a DIY garden look designed instead of accidentally assembled during a caffeine episode.
Indoor vs. Outdoor Hanging Garden Kits
Indoor Kits
Indoor hanging garden kits should focus on lightweight planters, drip protection, bright indirect light, and humidity-friendly plants. Use saucers or inner nursery pots to prevent water damage. For edible herbs, place the garden near a sunny window or add a grow light. Indoor gardens also benefit from good air circulation, but avoid placing plants directly in front of heating or cooling vents.
Outdoor Kits
Outdoor hanging garden kits can support more sun-loving flowers, herbs, and vegetables. They also need stronger hardware, weather-resistant materials, and a more consistent watering plan. Wind, heat, rain, and summer sun can dry baskets quickly. Outdoor containers may need watering once a day during hot spells, especially smaller baskets.
DIY Hanging Garden Kit Experience: Real Lessons From the Balcony, Porch, and Patio
The first thing you learn from building a DIY hanging garden kit is that plants have personalities. Basil is dramatic but useful, mint is cheerful but slightly power-hungry, petunias are generous when fed, and strawberries behave like tiny celebrities that need attention but reward you with charm. A hanging garden sounds simple on paper, yet the real experience teaches you practical details no product label can fully explain.
One of the most important lessons is to start smaller than your ambition. It is tempting to build a full vertical jungle on day one, especially after seeing perfect garden photos online. But a beginner-friendly setup of three to five containers is often better. You can learn how quickly your baskets dry out, which plants like your light, and whether your watering routine fits your schedule. Once the first set is thriving, expanding feels exciting instead of overwhelming.
Another real-world lesson is that watering is the heartbeat of a hanging garden. Containers hanging in the air dry faster than pots sitting on the ground. Wind moves around them, sun warms them from multiple angles, and the smaller soil volume leaves less moisture reserve. A basket that looks happy in the morning can look like it is auditioning for a tragedy by late afternoon. Checking soil moisture daily during hot weather becomes a habit, like brushing your teeth or wondering where you left your pruning shears.
Plant choice also matters more than beginners expect. Trailing flowers such as calibrachoa, sweet alyssum, and verbena create quick beauty, while herbs provide everyday usefulness. A small hanging herb kit near the kitchen can change how you cook. Fresh basil on pasta, mint in iced tea, parsley over roasted vegetables, and thyme in soup make the garden feel valuable every week. It is not just decoration; it is dinner with better posture.
The best DIY kits are flexible. Maybe your first wall pocket planter dries out too quickly, so you switch to deeper baskets. Maybe your balcony gets less sun than expected, so you replace tomatoes with ferns or shade-tolerant flowers. Maybe birds discover your strawberries before you do, which is rude but educational. Each adjustment improves the system.
Hardware is another lesson worth respecting. A hanging planter should feel secure, not “probably fine.” Use hooks and anchors rated for more weight than the planter’s dry weight. After watering, soil becomes much heavier. If the basket hangs over a seating area, walkway, or balcony edge, double-check the installation. Beauty is wonderful, but safety is prettier.
Over time, a DIY hanging garden becomes part of the home routine. You notice new buds, trim leggy stems, rotate baskets, harvest herbs, and replace tired annuals. The space starts to feel more personal. Even a tiny balcony can become a green escape with the right hanging garden kit. And yes, you may eventually become the kind of person who says things like, “My oregano is doing great this week.” Do not worry. That is not a problem. That is growth.
Conclusion
A DIY hanging garden kit is one of the easiest ways to turn limited space into a living, useful, and beautiful garden. By choosing lightweight containers, strong hardware, proper drainage, quality potting mix, and plants suited to your light conditions, you can create a vertical garden that thrives on a porch, balcony, fence, patio, or sunny indoor wall.
The best hanging gardens are not complicated. They are well planned, easy to water, safe to hang, and filled with plants that match the space. Start with a few reliable choices, learn from the first season, and upgrade as you go. Whether your goal is fresh herbs, colorful flowers, compact vegetables, or a peaceful green corner, a DIY hanging garden kit gives you a practical path from empty wall to leafy little paradise.
Note: This article is original web content synthesized from reputable U.S. gardening and extension-based best practices on container gardening, hanging baskets, drainage, lightweight growing media, watering, fertilizing, plant selection, and small-space vertical gardening.