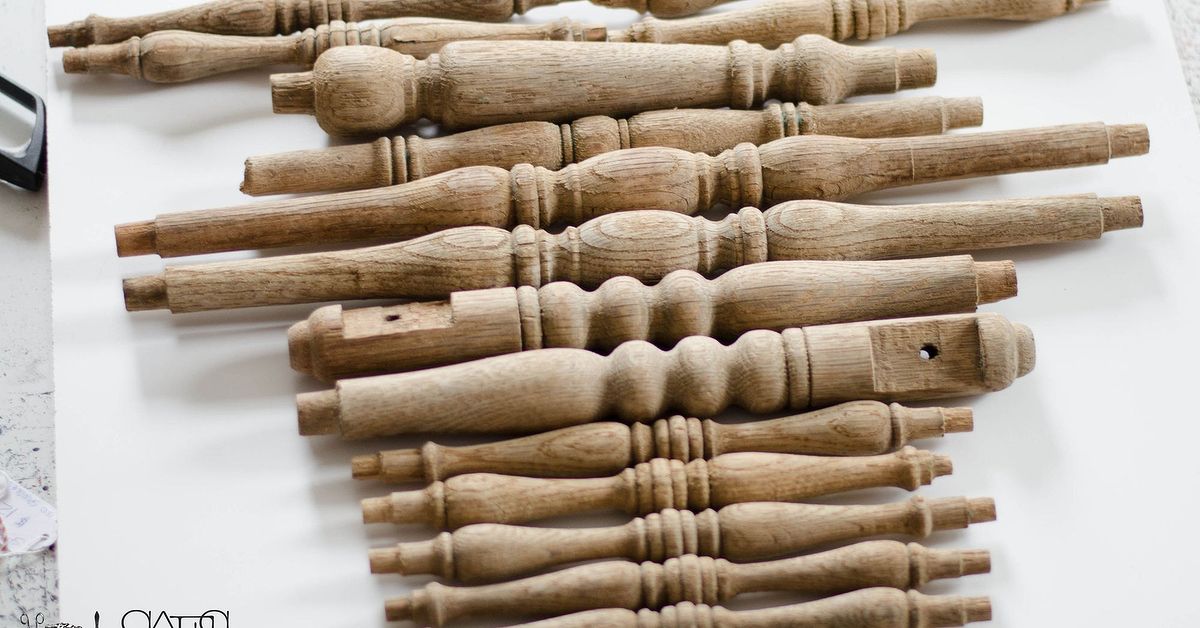

Old spindles have a funny way of looking useless right up until the moment they become the most charming thing on the wall. One day they are dusty stair parts, porch balusters, broken chair legs, or lonely bed posts sitting in a garage corner like they missed the bus. The next day, with a little cutting, sanding, arranging, and creative confidence, they become rustic heart art full of texture, history, and handmade personality.
Heart art from old spindles is the kind of DIY project that checks all the best boxes: affordable, customizable, eco-friendly, beginner-friendly, and just sentimental enough to make your wall look like it has stories to tell. It is perfect for Valentine’s Day decor, farmhouse wall art, wedding displays, anniversary gifts, nursery accents, or year-round home decor for anyone who believes a house should have at least one piece that makes guests say, “Wait, did you make that?”
Why Old Spindles Make Beautiful Heart Art
The magic of old spindles is in their shape. Unlike flat boards, spindles have curves, beads, ridges, and turned details that instantly add dimension. When several pieces are lined up or arranged across a heart-shaped backing, the result feels sculptural without requiring advanced woodworking skills. In other words, you get a high-end handmade look without needing to become best friends with a table saw.
Reclaimed wood is especially popular in American DIY home decor because it brings warmth and character into a room. Each nick, stain, paint layer, and worn edge adds visual interest. With old spindle crafts, those imperfections are not flaws; they are the seasoning. A brand-new board can look nice, but an old spindle looks like it has survived three remodels, one yard sale, and at least two questionable paint colors. That is character money cannot easily buy.
A spindle heart can be rustic, romantic, modern, coastal, cottage-style, shabby chic, or bold and colorful. The same project can look completely different depending on whether you leave the wood weathered, paint it white, dry-brush it red, stain it walnut, or add metallic wax to the raised details. That flexibility makes this project useful for more than Valentine’s Day. A neutral wood heart can stay up all year without screaming “February craft bin.”
What You Need to Make Heart Art From Old Spindles
Before starting, gather your materials and give yourself a workspace where sawdust will not cause a family meeting. A garage, covered patio, or sturdy craft table works well. The project is simple, but a little preparation makes the finished heart cleaner, safer, and easier to hang.
Materials
- Old wooden spindles, stair balusters, porch spindles, chair parts, or bed posts
- A heart-shaped wood backing, plywood panel, reclaimed pallet wood, or sturdy craft board
- Wood glue or construction adhesive
- Small brad nails, finishing nails, or screws, depending on thickness
- Sandpaper in medium and fine grit
- Paint, wood stain, chalk-style paint, milk paint, or clear sealer
- Sawtooth hanger, D-ring hangers, keyhole hanger, or picture wire
- Pencil, measuring tape, clamps, and painter’s tape
Tools
- Miter saw, hand saw, jigsaw, or oscillating tool
- Drill or nail gun
- Safety glasses and dust mask
- Paintbrush, rag, or foam brush
If your spindles came from an older home, be careful with old paint. Homes and painted surfaces from before 1978 may contain lead-based paint. Do not sand, scrape, or cut questionable painted pieces until they have been tested and handled safely. A charming craft is not worth turning your workshop into a dust storm with bad manners.
Choosing the Right Spindles for the Project
The best spindles for heart wall art are straight enough to attach securely but interesting enough to add texture. Look for pieces with turned details, rounded sections, carved rings, or layered old paint. You do not need a matching set. In fact, mismatched spindles often create the most beautiful design because the finished piece looks collected rather than manufactured.
Great places to find old spindles include architectural salvage stores, Habitat ReStore locations, flea markets, estate sales, thrift shops, garage sales, and leftover renovation piles. Sometimes old chairs, broken cribs, discarded headboards, porch railings, or stair remodels can provide usable parts. Always ask permission before taking materials from a renovation site. “But it looked lonely” is not a legal acquisition strategy.
For a small heart, you may need only three to six spindle pieces. For a larger statement piece, collect eight to twelve or more. Thicker porch balusters create a chunky farmhouse look, while delicate chair spindles feel lighter and more vintage. Mixing thick and thin pieces can work beautifully if you balance them across the heart shape.
Planning the Heart Shape
There are two easy ways to design heart art from old spindles. The first method is to attach cut spindle pieces onto a solid heart-shaped backing. The second method is to cut the spindles themselves into different lengths and arrange them so their ends form a heart silhouette. Both styles look handmade and decorative, but the backing method is more beginner-friendly.
Option 1: Spindles on a Heart Backing
Start with a plywood or reclaimed wood heart. You can buy a plain wood heart from a craft store or cut one yourself using a printed template. Lay the spindles across the heart horizontally, vertically, or diagonally. Mark where each piece overhangs the edge, then cut them to fit the outline. This creates a clean heart shape while allowing the spindle details to become the star.
Option 2: Free-Form Spindle Heart
For a more sculptural design, cut spindles into graduated lengths and arrange them side by side so the top and bottom form a heart. This method takes more measuring and patience, but the result can look like a boutique wall sculpture. Use painter’s tape on the table to sketch a heart outline before placing the pieces. It is much easier to rearrange wood before glue gets involved and starts acting permanent.
Step-by-Step: How to Make Heart Art From Old Spindles
Step 1: Clean the Spindles
Wipe each spindle with a damp cloth to remove dust and grime. If the wood is greasy or heavily soiled, use a mild soap solution and let the pieces dry completely. Avoid soaking old wood, especially if it is already cracked or peeling. You want clean character, not swollen character.
Step 2: Inspect for Safety
Check for loose paint, splinters, nails, staples, or insect damage. Remove any exposed metal carefully. If the finish is suspiciously old, test before sanding or cutting. When in doubt, seal the piece as-is or choose safer unfinished wood. This is especially important if the finished heart will hang in a child’s room, kitchen, or high-touch area.
Step 3: Create or Choose the Backing
A plywood heart backing gives the project structure. Cut a heart from quarter-inch or half-inch plywood, depending on the size and weight of your spindles. If you prefer a rustic look, you can join several reclaimed boards together, trace a heart, and cut the shape with a jigsaw. Lightly sand the edges so the heart looks finished rather than attacked by a beaver.
Step 4: Arrange the Spindles
Lay the heart backing flat and experiment with placement. Try putting the most decorative spindle in the center, then balance simpler pieces around it. If the spindles have different colors, spread them evenly so one side does not look visually heavier. Take a photo before moving anything. This tiny step can save you from the classic DIY mystery: “Why did this look better five minutes ago?”
Step 5: Mark and Cut
Use a pencil to mark where each spindle should be cut to follow the heart outline. Number the back of each piece and mark its location on the backing. Cut slowly, especially on rounded spindles that may roll. Clamp pieces securely when possible, wear safety glasses, and keep fingers away from the blade path. After cutting, dry-fit everything again.
Step 6: Sand the Edges
Sand the freshly cut ends and any rough areas. Fine-grit sandpaper can smooth the surface without removing too much patina. If you love the aged look, do not over-sand. A few scuffs and worn edges are part of the charm. The goal is “pleasantly rustic,” not “newly manufactured by a nervous robot.”
Step 7: Attach the Spindles
Apply wood glue or construction adhesive to the back of each spindle and press it into place. For extra strength, add small brad nails or screws from the back if the backing is thick enough. Clamps or heavy books can help hold everything while the adhesive cures. Just do not use your favorite cookbook unless you enjoy explaining why it now has glue on page 47.
Step 8: Paint, Stain, or Seal
You can finish the heart before or after assembly, depending on the look you want. Painting after assembly helps unify mismatched pieces. Staining before assembly can make it easier to reach every groove. For a weathered farmhouse style, dry-brush white or cream paint over darker wood. For Valentine’s Day, try muted red, dusty pink, cranberry, or burgundy rather than bright candy red if you want a more grown-up look.
Step 9: Add a Hanger
Attach hardware that matches the weight of the piece. Small hearts may need only a sawtooth hanger. Larger or heavier spindle hearts should use D-rings and picture wire or a keyhole hanger. Always test the balance before hanging. Because spindles are dimensional, the heart may sit slightly away from the wall, which creates attractive shadow lines.
Design Ideas for Spindle Heart Wall Art
The basic project is easy to personalize. For a farmhouse look, use distressed white paint over reclaimed wood and lightly sand the raised spindle details. For a cottage style, paint the backing pale blue, sage green, or warm cream, then leave the spindles natural. For a romantic Valentine’s Day display, combine blush, ivory, and deep red with a satin ribbon hanger.
If you prefer a modern rustic style, stain all pieces the same rich walnut shade and mount the heart on a clean white wall. The shape keeps it sweet, while the darker wood makes it feel more sophisticated. For a coastal version, use weathered gray, soft white, and driftwood tones. Add a small rope hanger if you like a beach-house touch.
You can also add embellishments, but keep them controlled. A small metal key, vintage button cluster, carved initials, tiny wooden tag, or simple bow can work well. Too many extras can overwhelm the spindle texture. Let the wood do most of the talking. It has been waiting years for its dramatic monologue.
Where to Display Heart Art From Old Spindles
A spindle heart looks lovely in an entryway because it gives guests an immediate handmade welcome. It also works over a mantel, above a console table, in a bedroom gallery wall, near a dining room hutch, or on a covered porch if properly sealed. For Valentine’s Day, hang it with greenery, candles, or a simple garland. After the holiday, remove the seasonal accents and let the heart stand alone as rustic wall decor.
Smaller versions make thoughtful handmade gifts. A heart made from spindles from a family home, old crib, porch railing, or inherited chair can become a meaningful keepsake. That is one reason reclaimed wood projects are so appealing: they preserve material memories. A new decoration says, “I bought this.” A reclaimed spindle heart says, “This used to be part of something, and now it gets a second act.”
Common Mistakes to Avoid
One common mistake is using spindles that are too heavy for the backing. If the heart feels bulky before hanging, upgrade the backing and hardware. Another mistake is skipping the dry-fit stage. Once adhesive is applied, small alignment problems become much more annoying. Lay out the entire design first, photograph it, mark each piece, and then assemble.
A third mistake is over-decorating. Spindles already have depth and pattern, so they rarely need much extra ornamentation. If every inch gets ribbon, glitter, flowers, and signs, the heart can start looking like it lost a fight with a craft drawer. Choose one or two accents and let the reclaimed wood remain the focus.
Finally, do not ignore the wall where it will hang. A large spindle heart needs breathing room. If the wall is already crowded, choose a simple finish. If the wall is plain, you can go bolder with color or size. Good DIY decor is not just about making the object; it is about helping the object get along with the room.
Budget-Friendly Tips
This project can be very inexpensive if you use salvaged materials. Check your own garage first. Many people have leftover chair parts, old railing pieces, bed frame scraps, or wood trim hiding in storage. If you need supplies, look for damaged furniture at thrift stores. A wobbly chair with pretty spindles may be useless as seating but perfect as wall art.
You can also use scrap plywood for the backing and leftover paint from previous home projects. Mixing paint colors can create custom shades, especially for muted farmhouse tones. A little brown or gray mixed into red can make a softer vintage Valentine color. A bit of white mixed into dark paint can create a chalky, aged effect.
If you do not own power tools, keep the design simple. Ask a home improvement store whether they can make basic cuts for purchased lumber, or choose thinner craft spindles that can be cut with a hand saw. The goal is not to build a museum artifact. The goal is to make something charming, sturdy, and proudly handmade.
Experience Notes: What Making Spindle Heart Art Teaches You
Making heart art from old spindles is one of those projects that teaches patience in the most sneaky way. At first, it looks like a simple idea: find old wood, cut it, glue it, hang it. Easy. Then you lay out the spindles and realize every piece has its own personality. One is slightly bowed. One has a thick decorative knob exactly where you wanted a clean cut. One looks perfect until you flip it over and discover a nail hole the size of a tiny crater. This is where the project becomes less about perfection and more about composition.
The most helpful experience is learning to arrange before committing. When the pieces are placed on the backing, the heart shape slowly appears, and small adjustments make a huge difference. Moving one decorative spindle from the edge to the center can suddenly make the whole piece feel balanced. Rotating a piece so the turned detail faces outward can add movement. Leaving a little uneven texture can make the finished heart look warmer than a perfectly smooth design.
Another lesson is that old materials often decide part of the design for you. A spindle with chipped white paint might become the focal point. A darker piece may look best near the bottom to visually anchor the heart. A cracked but stable section can add rustic charm if sealed properly. Instead of forcing every spindle to match, it often works better to create harmony through repetition: similar spacing, a shared paint wash, or a consistent outline.
The finishing stage is where many DIYers gain confidence. Dry-brushing is especially forgiving. If you apply too much paint, sand a little back. If the color feels too flat, add a second shade. If the wood looks too raw, seal it with a matte clear coat. The raised details on spindles catch paint beautifully, which means even beginners can create depth without advanced techniques. It is the craft equivalent of good lighting: suddenly everything looks more intentional.
Hanging the final piece also brings a small but satisfying lesson in practicality. Handmade wall art has weight, and weight needs respect. Using proper hanging hardware makes the difference between “beautiful rustic decor” and “mysterious midnight crash in the hallway.” Always choose hardware based on the finished piece, not on optimism. Optimism is lovely, but D-rings are better.
Perhaps the best part of this project is the story it creates. A spindle heart does not look like something pulled from a warehouse shelf. It looks collected, made, touched, and considered. It can carry memories from an old porch, a family staircase, a thrifted chair, or a weekend treasure hunt. Even when the materials are humble, the finished piece feels personal. That is the real appeal of heart art from old spindles: it turns leftover wood into something with warmth, shape, and meaning. Also, it gives you a very reasonable excuse to keep that odd spindle in the garage. Finally, vindication.
Conclusion
Heart art from old spindles is a beautiful example of what happens when creativity meets reclaimed materials. With a few basic tools, a thoughtful layout, and a safe approach to old finishes, you can transform forgotten wood pieces into rustic wall decor with charm and personality. Whether you make a small Valentine’s Day heart, a large farmhouse statement piece, or a sentimental keepsake from family materials, the project offers something store-bought decor rarely can: a story.
The best designs do not hide the age of the spindles. They celebrate it. The curves, chips, grooves, and worn edges all help create a handmade piece that feels warm, authentic, and full of character. So the next time you see old spindles at a salvage shop or tucked behind someone’s garage sale table, do not walk past too quickly. They may be waiting to become the heart of your home decor.
SEO Tags
Note: This article is written in original American English for web publishing and is based on practical DIY woodworking, reclaimed wood decor, upcycling, and safe handling principles.