
Note: This article is written for educational publishing. Any hands-on neon lamp demonstration should be performed only with a properly current-limited, enclosed, low-energy supply under qualified supervision. High voltage is not a personality trait; it is a hazard.
Introduction: When a Tiny Orange Bulb Teaches Big Quantum Physics
The photoelectric effect is one of those physics ideas that sounds like it belongs in a marble-floored university lecture hall, guarded by equations and someone wearing tweed. But with a small neon lamp, a careful circuit, and the right light source, the same concept can step out of the textbook and glowliterallyon a benchtop.
Demonstrating the photoelectric effect using neon lamps is a clever, low-cost way to show that light is not just a smooth wave washing over matter. Light also behaves as packets of energy called photons. When photons have enough energy, they can help free electrons. Those freed electrons can start an electrical discharge inside a neon bulb that is already biased just below its firing voltage. Suddenly, a quiet glass capsule flashes orange like it just remembered it had a job.
This demonstration is especially satisfying because it connects several big ideas at once: quantum mechanics, photon energy, threshold frequency, gas discharge, electrode behavior, and practical electronics. It also gives students and hobbyists a visual “aha!” moment. Instead of simply hearing that blue or violet light has more energy than red light, they can see certain colors trigger a lamp while lower-energy light may do little or nothing under the same conditions.
What Is the Photoelectric Effect?
The photoelectric effect occurs when light strikes a material and causes electrons to be emitted or released from that material. The key idea is that light energy arrives in discrete packets called photons. Each photon carries energy proportional to its frequency. Higher-frequency light, such as violet or ultraviolet light, has more energy per photon than lower-frequency red or infrared light.
The simplified equation is:
E = hf
In this equation, E is photon energy, h is Planck’s constant, and f is frequency. The equation may look small, but it kicked open the door to modern quantum physics. It explains why increasing the brightness of low-frequency light does not necessarily eject electrons. If each individual photon lacks enough energy, sending more of them is like throwing more marshmallows at a locked door. Entertaining, yes. Effective, no.
For electrons to escape from a material, the incoming photon must meet or exceed a minimum energy requirement called the work function. Different materials have different work functions. If the photon energy is below that threshold, electrons stay put. If the photon energy is high enough, electrons can be freed, and any extra energy becomes kinetic energy.
Why Use a Neon Lamp?
A neon indicator lamp is a small gas-discharge device. Inside the glass envelope are two metal electrodes surrounded by low-pressure neon gas, often with a small amount of another gas depending on the lamp design. When enough voltage is applied across the electrodes, the gas ionizes. Electrons accelerate through the gas, collide with atoms, and create more charged particles. This avalanche produces the familiar orange glow.
Many small neon bulbs have a firing, striking, or breakdown voltage somewhere around 60 to 90 volts, although the exact number depends on the lamp, age, gas pressure, electrode material, and surrounding light. Once glowing, the lamp often stays lit at a lower sustaining voltage. That little difference between firing and sustaining voltage is part of what makes neon lamps useful for demonstrations.
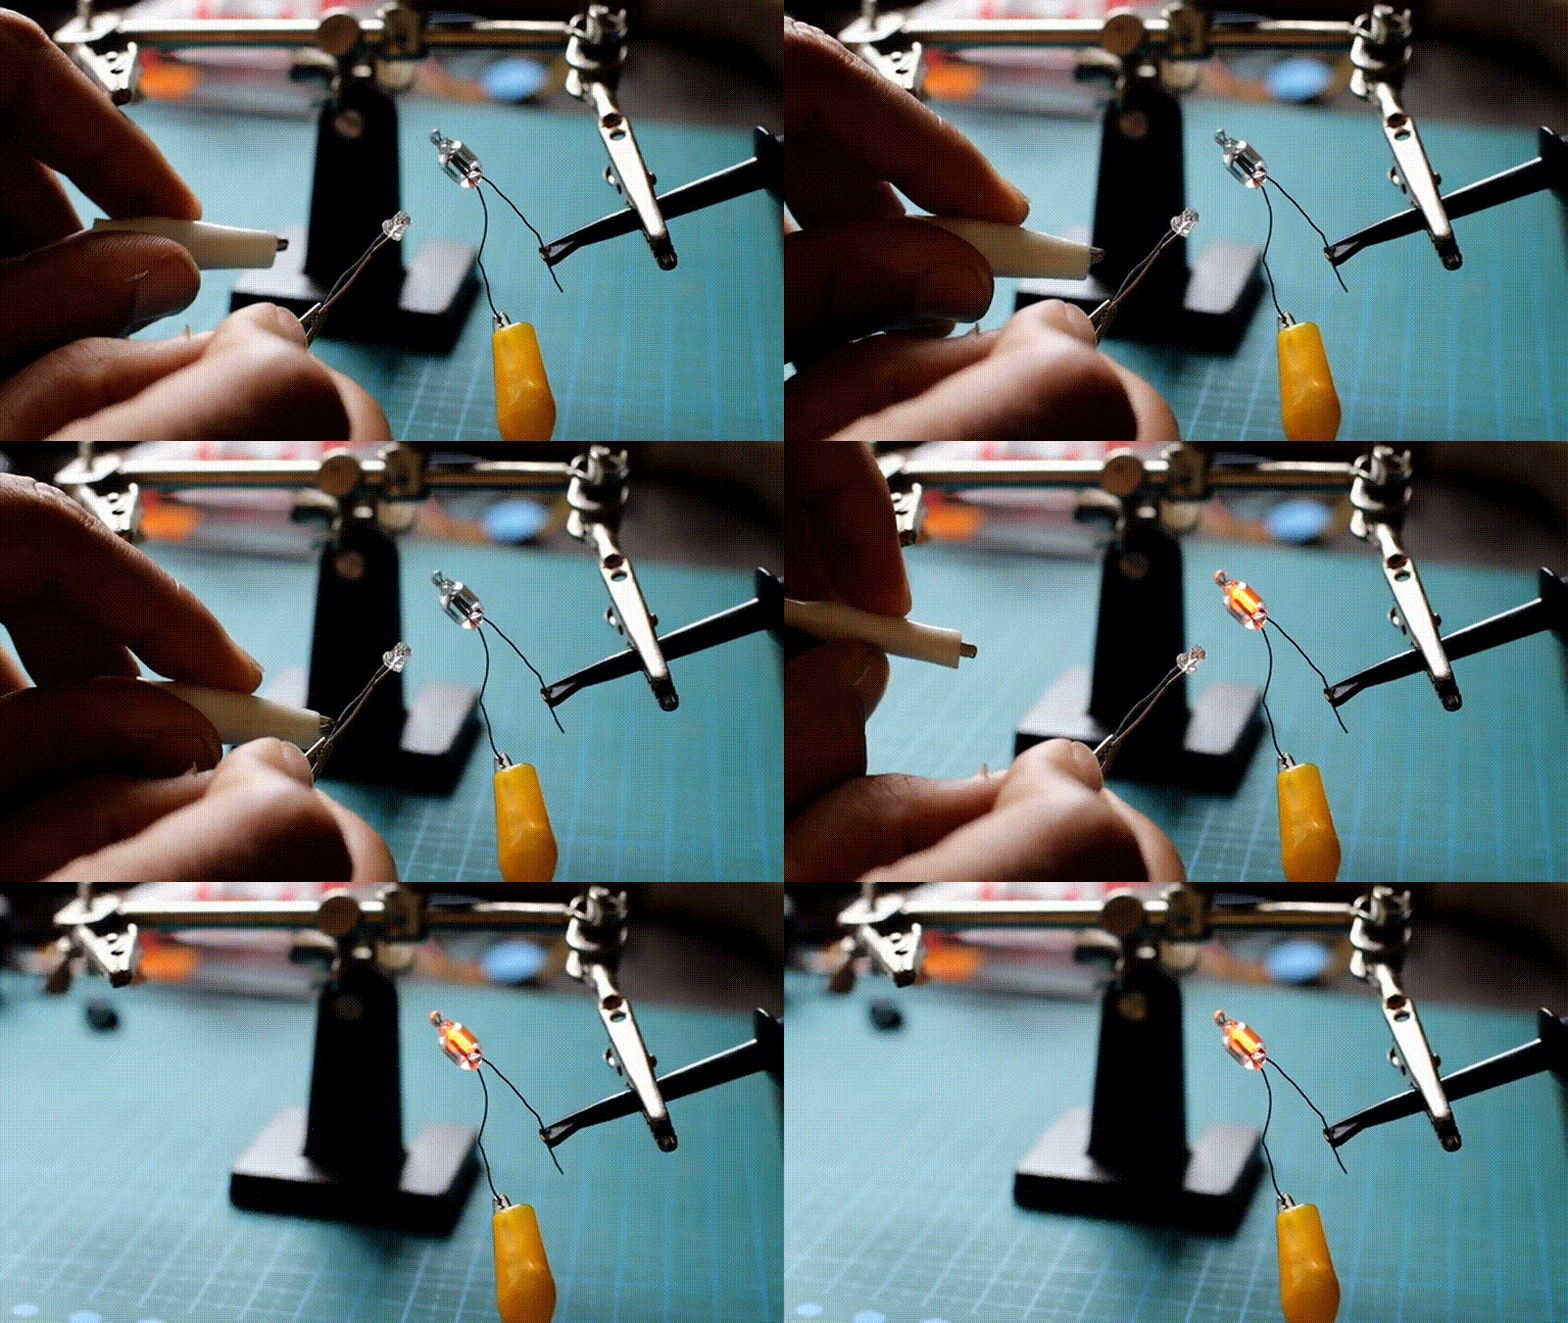
To demonstrate the photoelectric effect, the lamp is connected to a current-limited DC supply and adjusted just below the voltage at which it would normally ignite. At this point, the gas is ready for action but lacks the initial free electrons needed to begin a discharge. Then light is aimed at the lamp, especially at the electrode region. If the light provides enough photon energy or otherwise helps free seed electrons, the lamp can fire. The result is a visible glow that feels almost magical, except the wizard is quantum physics wearing safety glasses.
How the Neon Lamp Demonstration Works
1. The Lamp Is Biased Just Below Breakdown
The first step is to apply a DC voltage across the neon lamp that is slightly below its natural firing point. The circuit must include a properly sized current-limiting resistor or current-limited power supply. Without current limiting, a gas discharge can draw too much current and damage the lamp, the supply, or the day of anyone standing nearby.
At this sub-threshold voltage, the electric field inside the lamp is strong. The system is almost ready to conduct, but not quite. Think of it as a mousetrap set with extreme politeness: it will not spring until something gives it the tiniest nudge.
2. Light Strikes the Electrodes
When a light source such as a violet laser, blue LED, or ultraviolet source shines on the lamp, photons strike the metal electrodes and nearby surfaces. In many demonstrations, shorter-wavelength light is more effective because each photon carries more energy. This is why violet or ultraviolet light tends to be more dramatic than red light.
The important point is that the light does not directly “power” the lamp. The external supply provides the voltage needed for the discharge. The light supplies the trigger: seed electrons. Once a few electrons are available, the electric field accelerates them through the gas.
3. A Discharge Avalanche Begins
The newly freed electrons collide with neon atoms. Some collisions excite atoms; others ionize them. Excited neon atoms eventually return to lower-energy states and emit orange-red light. That is the glow we see. As the process continues, more electrons and ions are created, and the lamp turns on.
This is the charming part of the experiment. A light beam that appears weak compared with the high-voltage supply can decide whether the lamp remains dark or bursts into glow. In reality, the light is not doing all the work. It is simply pushing the first domino.
What Students Can Learn From the Demonstration
Photon Energy Matters More Than Brightness
One of the most important lessons is that color matters. A bright red light may fail to trigger the bulb, while a dimmer violet source may succeed. That observation supports the photon model of light. If light behaved only as a classical wave, one might expect that making any color intense enough should eventually free electrons. The photoelectric effect shows that frequency sets the energy of each photon.
Threshold Behavior Is Real
The demonstration also shows threshold behavior. Below a certain voltage, the lamp will not ignite even with illumination. Near the firing voltage, illumination may trigger the discharge. Above the firing voltage, the lamp glows without help. This makes the neon lamp a useful bridge between quantum behavior and practical electronics.
Small Effects Can Start Large Events
The freed electrons are tiny participants, but they start a large visible change. This is a powerful teaching moment. Many physical systems behave this way: a small trigger can initiate a larger process when conditions are near a threshold. Neon lamps, Geiger tubes, avalanche photodiodes, and even some semiconductor devices depend on similar “almost ready, then suddenly active” behavior.
A Practical Demonstration Setup
A typical classroom or hobby demonstration uses a small neon indicator lamp, a variable DC high-voltage source, a current-limiting resistor, and one or more light sources. The voltage is slowly increased until the lamp nearly fires, then backed down slightly. The experimenter then shines different colors of light on the lamp while watching for ignition.
A violet laser pointer or high-intensity blue LED may trigger the lamp more reliably than green or red light. Ultraviolet light can be effective, but it adds safety concerns for eyes and skin, so it should be handled with extra caution. Visible violet light is often preferable for demonstrations because it is easier to manage and easier for observers to understand.
Some variations use an Arduino or data acquisition system to measure the firing voltage under different illumination wavelengths. Students can compare how the turn-on voltage changes when the lamp is exposed to red, green, blue, violet, or ultraviolet light. With careful calibration and the right assumptions, such experiments can even connect to Planck’s constant and the relationship between photon energy and frequency.
Safety First: The Unfun Paragraph That Keeps the Fun Possible
Neon lamps may be small, but the voltage used to fire them is not something to treat casually. Demonstrations should use a properly designed current-limited supply, insulated connections, enclosed terminals, and supervision from someone who understands electrical safety. Do not connect loose neon bulbs directly to wall power. Do not poke live circuits. Do not assume “low current” means “no risk.” Electricity is extremely literal and does not care about your confidence.
Good practice includes using one hand when adjusting equipment, keeping the other hand away from the circuit, turning off power before changing connections, discharging capacitors, and placing the circuit behind a transparent shield when possible. Students should observe rather than touch. If ultraviolet light is used, eye and skin protection are essential, and the beam should never be aimed at people or reflective surfaces.
The safest educational version is often a prebuilt, enclosed apparatus designed for physics instruction. For hobbyists, battery-powered high-voltage modules can still be dangerous if poorly designed, so current limiting and insulation remain mandatory. The goal is to demonstrate quantum physics, not to demonstrate why safety manuals exist.
Common Questions About the Neon Lamp Photoelectric Effect Demo
Does the light ionize the neon gas directly?
Usually, no. Visible photons generally do not have enough energy to ionize neon atoms directly. The ionization energy of neon is far above the energy of visible light. In this demonstration, the light more plausibly helps release seed electrons from electrode surfaces or nearby materials. Those electrons are then accelerated by the electric field, and the electrical discharge takes over.
Why does blue or violet light work better than red light?
Blue and violet light have higher frequencies than red light, so their photons carry more energy. If the demonstration is adjusted correctly, higher-energy photons are more likely to provide the needed trigger. Red photons may simply lack enough energy to help release electrons under the same conditions.
Why does the lamp sometimes stay lit after the light is removed?
Once the gas discharge begins, the lamp may continue glowing at a lower sustaining voltage. The discharge itself keeps producing charged particles. This is why the lamp can remain on even after the original light trigger disappears. It is not haunted. It is hysteresis.
Can this experiment prove Einstein’s photoelectric equation?
As a simple visual demonstration, it strongly illustrates the photon-energy concept, but it is not automatically a precision measurement. With careful control of lamp voltage, wavelength, geometry, electrode conditions, and data collection, more advanced versions can be used to explore quantitative relationships. For most classrooms, however, its greatest value is conceptual: it makes the threshold nature of photon energy visible.
Why This Demonstration Still Feels Fresh
The photoelectric effect is more than a historical curiosity. It sits behind technologies we use every day, including solar cells, photodiodes, light sensors, image sensors, and some spectroscopy tools. Every time a device converts light into electrical information, it owes a little thank-you note to the same quantum logic.
Neon lamps are also wonderfully old-school components. They were once common in indicator lights, relaxation oscillators, voltage testers, night lights, and appliance panels. In an era of microcontrollers and addressable LEDs, a neon bulb feels like a tiny museum exhibit that still has excellent stage presence.
That combination makes this demonstration special. It uses a humble component to reveal a profound principle. Students can see a lamp respond not merely to “more light,” but to the right kind of light under the right electrical conditions. It is a reminder that physics is not always hidden in billion-dollar laboratories. Sometimes it is sitting in a parts drawer, waiting for someone to shine violet light on it.
Troubleshooting the Demonstration
The lamp does not turn on with any light source.
The bias voltage may be too low, the light may not be intense enough at the electrode, or the lamp may have an unusually high firing voltage. Slowly increase the supply voltage while staying within safe limits and watching carefully. Make sure the beam is actually hitting the electrode area, not just the glass envelope.
The lamp turns on before the light is applied.
The voltage is too high. Reduce the voltage until the lamp remains dark, then bring it close to firing again. The sweet spot is just below breakdown. Finding it can feel like tuning an old radio, except instead of jazz you get quantum mechanics.
Red light triggers the lamp too.
This can happen if the lamp is biased extremely close to firing. At that point, even a small disturbance, stray light, electrical noise, or cosmic-ray event may help start the discharge. Lower the bias slightly and compare colors again. The demonstration works best when there is a clear difference between lower-energy and higher-energy light.
The results vary from bulb to bulb.
That is normal. Neon lamps are inexpensive gas-discharge devices, not precision scientific instruments. Electrode condition, gas fill, manufacturing variation, and age can all affect firing voltage and sensitivity to light. For a classroom, this variability can become part of the lesson: real components are wonderfully imperfect.
Specific Example: Comparing Red, Green, and Violet Light
Imagine setting a neon lamp so that it remains dark at 62 volts, while its unaided firing voltage is around 70 volts. A red LED is aimed at the electrode. Nothing happens. A green laser is aimed next. Still nothing, or perhaps only an occasional flicker if the lamp is extremely close to breakdown. Then a violet laser or bright violet LED is aimed at the same region, and the lamp glows.
Now increase the bias voltage slightly, perhaps to 66 or 67 volts. The green light may begin to trigger the discharge, while red still struggles. This teaches two things at once. First, shorter-wavelength light has higher photon energy. Second, the electrical field supplies much of the energy needed for avalanche breakdown. Light and voltage work together, but they play different roles.
Students can record the approximate voltage at which each color first triggers the lamp. A simple table of wavelength versus triggering voltage can lead to discussion about photon energy, threshold effects, experimental uncertainty, and why real demonstrations rarely behave like perfectly polished textbook diagrams.
Experience Notes: What It Is Like to Demonstrate the Photoelectric Effect Using Neon Lamps
The first experience many people have with this demonstration is surprise. A neon lamp looks too ordinary to teach quantum physics. It resembles the tiny orange indicator lights found in old power strips, vintage appliances, and dusty boxes of electronic parts labeled “miscellaneous,” which is usually Latin for “future confusion.” Yet once the lamp is connected to a controlled circuit and balanced just below firing voltage, it becomes unusually sensitive. The room lights dim, a violet beam touches the glass, and the lamp suddenly flashes. That moment tends to pull everyone forward.
One practical experience is that patience matters. The demonstration is not always plug-and-play. The firing point can drift. A bulb that behaved beautifully five minutes ago may decide to become shy. Small changes in ambient light, temperature, electrode condition, and supply stability can affect the result. This is not a failure; it is an invitation to talk about real experiments. Physics is not only equations. It is also knobs, tolerances, dust, and the occasional component with theatrical timing.
Another useful experience is that the demonstration becomes more powerful when students predict the outcome before seeing it. Ask them what they expect from red, green, blue, and violet light. Many will assume brightness is the main factor. When a bright red source fails and a less dramatic violet source succeeds, the room gets quieter in the best way. The observation forces a conceptual shift: energy per photon matters. That is the heart of the photoelectric effect.
It also helps to let students see the voltage adjustment process from a safe distance. When the lamp fires by itself, the voltage is too high. When no light can trigger it, the voltage is too low. When the right color causes ignition, the setup is in the interesting zone. This tuning process gives students a feel for threshold systems. They begin to understand why the lamp is not measuring light in a simple “more brightness equals more glow” way. It is responding to a combination of electric field, photon energy, and available seed electrons.
A good demonstration also benefits from comparison. Use more than one neon lamp if possible. Some bulbs trigger easily; others are stubborn little glass philosophers. Comparing them shows why experimental data should be repeated and why one observation is rarely enough. It also opens a discussion about manufacturing tolerances, electrode materials, gas pressure, and surface contamination.
Finally, the best experience comes when the demonstration is connected to modern technology. Students may begin with a glowing neon bulb, but the conversation can move to solar panels, camera sensors, automatic doors, barcode scanners, flame detectors, and optical communication. The humble neon lamp becomes a doorway. On one side is an orange glow. On the other side is the quantum structure of the modern world.
Conclusion: A Small Lamp With a Big Quantum Lesson
Demonstrating the photoelectric effect using neon lamps is a memorable way to turn abstract quantum physics into a visible event. By biasing a neon lamp just below its firing voltage and illuminating it with higher-energy light, educators and experimenters can show how photons help release seed electrons that trigger a gas discharge. The result is simple to see but rich in meaning.
This experiment teaches that photon energy depends on frequency, that threshold effects are real, and that tiny electron-level events can produce dramatic macroscopic results. It also reminds us that old electronic components still have educational sparkle. A neon lamp may be small, inexpensive, and slightly retro, but in the right setup it can demonstrate one of the most important ideas in modern physics.
Used carefully, safely, and thoughtfully, this demonstration gives students more than a glowing bulb. It gives them a direct encounter with the quantum idea that changed science: light comes in packets, electrons respond to energy thresholds, and the universe is strangerand more interestingthan it first appears.