
A pondless waterfall build is one of those backyard projects that feels suspiciously fancy for something you can actually pull off yourself. You get moving water, relaxing sound, and a natural focal point without committing to a full-blown pond with fish, algae, and a social calendar for frogs. In plain English, water flows down a stream or waterfall, disappears into a hidden underground reservoir, and gets pumped right back to the top. It is clever, practical, and just dramatic enough to make your yard look like it has its own spa soundtrack.
That combination is exactly why so many homeowners love a pondless waterfall. It is lower maintenance than a traditional pond, safer for households with kids and pets, easier to fit into small yards, and flexible enough to look rustic, modern, or delightfully “I definitely hired a landscape designer,” even when you did not. The trick is building it in the right order: layout, excavation, liner, reservoir, plumbing, spillway, rock work, and final tuning. Skip a step and the waterfall may still run, but it might also leak, gurgle, or disappear behind rocks like a shy magician.
What Is a Pondless Waterfall, Exactly?
A pondless waterfall is a recirculating water feature with no exposed pond at the bottom. Instead of splashing into an open basin, the water flows into gravel and stone that hide a reservoir underneath. A pump inside a vault sends the water back uphill through tubing or PVC pipe to a spillway or stream head. Then gravity does what gravity does best: it makes the whole thing look expensive.
The hidden reservoir is the real hero here. It stores water below grade, keeps the visual profile clean, and lets you enjoy the sound of moving water without a big pool of standing water at the bottom. That is why a DIY pondless waterfall is often the first choice for homeowners who want the beauty of a backyard waterfall without the long-term commitment of a pond ecosystem.
Why a Pondless Waterfall Build Makes Sense
The biggest advantage is maintenance. With a traditional pond, you are managing more open water, more debris, and usually more biological balancing. A backyard pondless waterfall simplifies the equation. You still need to top off water, clear leaves, and check the pump, but you avoid a lot of the mess and fuss that come with a visible pond.
Safety matters, too. Since the water disappears into a stone-covered basin, there is no open body of water at the bottom. That can make the feature more comfortable for families with curious children, energetic dogs, or one neighbor who thinks every yard improvement should double as a lawsuit.
It is also versatile. Small kits can create a compact feature near a patio, while larger systems can support a stream that winds through a slope for a more dramatic landscape statement. Some ready-made kits are designed for features around 3 feet, while larger systems can support streams around 16 to 26 feet long. That range makes pondless designs work in everything from modest suburban yards to larger gardens.
Plan Before You Dig
Choose the right location
Place the waterfall where you can actually enjoy it. Near a deck, patio, or window is ideal. The best pondless waterfall builds are not hidden in the far corner of the yard where only the squirrels appreciate them. Think about sight lines from inside your home and from your main outdoor seating area.
Work with the slope you have
If your yard already slopes, congratulations, nature has saved you some labor. If it does not, you can still build one by creating a berm with excavated soil. You do not need a mountain. A gentle drop is enough to make moving water look natural. For stream-style designs, even a modest pitch can work, and many DIY guides suggest a small drop over distance rather than a giant dramatic plunge that looks like Niagara moved into the suburbs.
Think about sun, leaves, and runoff
Some sun is fine, but too much direct sun can increase evaporation and encourage algae. Too many nearby trees can mean constant leaf cleanup. You also want the basin slightly protected from runoff so lawn chemicals, mulch, and soil do not wash into the feature after every storm. Slightly raised edges and good grading go a long way here.
Plan your power source early
Your pump needs reliable outdoor power. A GFCI-protected outlet is the smart move, and local code should guide final placement and installation. This is not the moment for a flimsy extension cord and optimism.
Materials You Will Likely Need
A solid pondless waterfall build usually includes these core components:
- EPDM liner or waterproof rubber membrane
- Underlayment or landscape fabric to protect the liner
- Pump vault
- Structural reservoir blocks or equivalent load-bearing void space components
- Submersible pump
- Flexible PVC pipe or kink-free tubing
- Waterfall spillway or stream starter
- River rock, gravel, cobbles, and larger boulders
- Black waterfall foam
- Shovel, tamper, level, utility knife, and hose clamps
If you are using a kit, many of these pieces are bundled together. That can save time and reduce bad math, which is helpful because backyard math has a way of turning into “Why do I have three extra fittings and no correct hose clamp?”
Step-by-Step Pondless Waterfall Build
1. Mark the basin and stream
Start by placing your vault and reservoir components where the hidden basin will go. Use spray paint, a hose, or rope to sketch the footprint. Then map the stream and waterfall path up the slope or berm. Stand back and look at it from several angles. This is the cheapest point in the whole project to change your mind.
2. Excavate the reservoir basin
Dig the basin deep enough for the vault and structural blocks, with extra room around the edges for backfill and compaction. The bottom should be level, smooth, and free of roots or sharp stones. A lumpy base creates future headaches, and those headaches usually leak.
Keep the excavated soil nearby. You can use it to build elevation for the waterfall and shape the stream. That “pile of dirt” quickly graduates into “engineered terrain” once the water starts flowing.
3. Compact and level everything
Tamp the soil well. A level basin matters because the reservoir needs to store water evenly and support the load above it. If the soil is soft or irregular, add compactable material such as sand where needed. A crooked base now becomes a crooked water feature forever.
4. Install underlayment and liner
Before the liner goes in, remove every sharp object you can find. Then lay underlayment or landscape fabric first. This protective layer keeps rocks and roots from puncturing the liner over time. After that, drape the EPDM liner across the basin and up the stream path, leaving generous overlap at the edges. Do not get stingy here. A waterfall is not the place for “close enough.”
Try to smooth major folds, but do not obsess over making the liner look perfect at this stage. Rock and gravel will hide a lot. The important part is preserving a watertight path from the top spillway all the way down into the hidden basin.
5. Set the vault and reservoir blocks
Place the pump vault in its deeper section and set the structural blocks in the basin. These components create water storage space while supporting the weight of gravel and stone above. Leave maintenance access to the pump vault, because one day you will absolutely need it, and Future You deserves kindness.
For sizing, do not treat reservoir volume like an afterthought. The system needs enough stored water to maintain the desired flow and keep the pump operating properly. Small reservoirs are a common beginner mistake because they seem cheaper until the feature loses water to splash and evaporation and starts sounding like it is sipping the last drops of a milkshake.
6. Run the plumbing
Lay flexible PVC or kink-free tubing from the pump vault to the spillway location. Bury the line in a trench or conceal it under soil, mulch, or rock. Keep the route efficient. Fewer weird bends usually mean better flow and less frustration. Secure fittings properly, and make sure the pump connection is snug and leak-free.
7. Build the waterfall structure
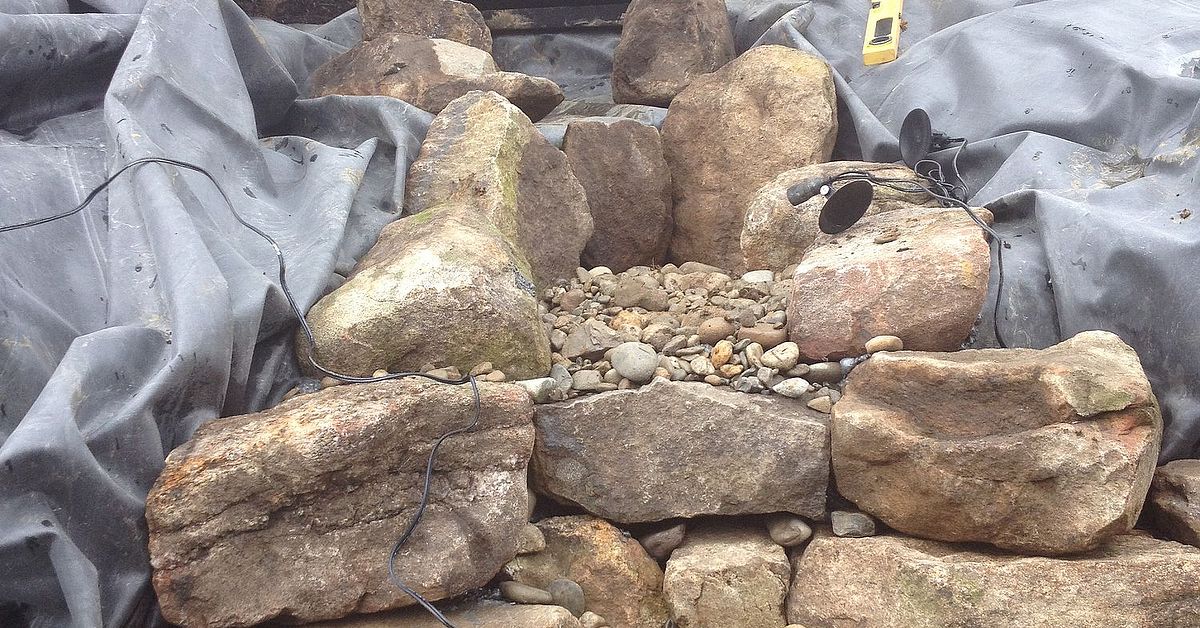
Now comes the part everybody loves: rocks. Start with larger boulders to form the waterfall’s skeleton. Place bigger stones first, especially where water will drop or change direction. Then use medium stones and gravel to fill gaps and shape the stream edges.
The best waterfalls are layered, not stacked like a rushed geology project. Aim for ledges, shelves, and small twists that make the water move with variety. Too neat and it looks artificial. Too chaotic and the water vanishes into random cracks.
8. Install and level the spillway
Set the spillway at the top of the feature, connect the plumbing, and make sure it is level. An uneven spillway gives you an uneven sheet of water, which can be charming in nature and maddening in DIY construction. Seal the liner to the spillway carefully according to the product instructions.
9. Use waterfall foam the smart way
Black waterfall foam is not just decorative filler. It directs water over the rock face instead of behind it. Use it in strategic voids between spill stones and along hidden channels where water might otherwise disappear. Once cured, it helps keep the visible cascade on the front of the waterfall where it belongs.
10. Add gravel and finish the basin
Place larger rock around the basin perimeter to support edges, then cover the reservoir structure with gravel. Decorative gravel on top helps the hidden basin blend into the landscape. Make sure the inspection or access point for the vault remains reachable. Hiding it completely is a classic DIY move and a terrible maintenance plan.
11. Fill, test, and tweak
Fill the basin, start the pump, and watch the water move. This is where you fine-tune the feature by adjusting rocks, adding gravel, and redirecting flow. Small changes make a huge difference in sound and appearance. One pebble can turn “sad dribble” into “mountain retreat.”
Do not trim excess liner too early. Run the feature first, watch splash patterns, and then trim carefully while leaving several extra inches above the high-water or splash zone. After that, hide the liner with gravel and planting.
Common Mistakes to Avoid
- Undersizing the reservoir: leads to frequent top-offs and pump issues.
- Rushing the rock work: the water path matters as much as the plumbing.
- Skipping underlayment: liners need protection from punctures.
- Ignoring maintenance access: the pump vault should stay reachable.
- Building in the wrong spot: poor visibility or too much debris can make the feature less enjoyable.
- Trimming liner too soon: test first, cut later.
How Much Does a Pondless Waterfall Cost?
A DIY pondless waterfall can vary widely depending on size, stone choice, pump quality, and whether you use a kit. Small features can be relatively budget-friendly, while larger custom builds climb fast once you add more liner, bigger pumps, more stone, and nicer finishing details. Professionally installed pondless waterfalls often land in the mid-thousands, with many projects commonly falling in the several-thousand-dollar range. The good news is that DIY labor can save a meaningful chunk of that total, provided you are willing to sweat for your serenity.
Maintenance After the Build
Once the waterfall is running, the job is not over, but it does get easier. Check the water level regularly, especially in hot weather. Evaporation and splash loss are normal. Remove leaves and debris from the stream and basin surface. Inspect the pump occasionally and clean the intake when needed. In colder climates, winterizing may mean draining the system or removing and storing the pump indoors.
You can also add lighting, native plants, or decorative stone around the build to help it settle into the landscape. A pondless waterfall looks best when it seems like it belongs there, not like someone dropped a pile of rocks next to the patio and hoped for the best.
Design Ideas That Make It Look More Natural
For a more natural style, vary the size of stone and avoid perfect symmetry. Let the stream bend slightly. Mix flatter spill stones with rounded edge rock. Tuck in moisture-loving plants around the stream margins. If you want a cleaner, more contemporary design, keep the waterfall short, use a defined spillway, and frame it with consistent gravel and fewer plant varieties. Either direction works; the secret is choosing one on purpose.
The Real-World Experience of Building a Pondless Waterfall
Here is the part many how-to guides skip: the actual experience of building a pondless waterfall is half landscaping project, half puzzle, and half accidental leg workout. Yes, that is three halves. That is because it feels bigger while you are doing it than it looked in the sketch.
Most first-time builders begin with excitement, then hit the excavation stage and immediately develop a very intimate relationship with dirt. What seemed like a modest hidden basin turns out to be a serious hole. Then the rock arrives, and suddenly you realize that stone is both beautiful and deeply committed to being heavy. This is normal. Every successful pondless waterfall build has a brief middle chapter called, “Why did I decide to move geology by hand?”
Then something interesting happens. The basin gets lined, the vault drops in, and the project starts looking real. Once the first boulders are placed, the fear fades a bit. You stop staring at parts and begin seeing a landscape. The spillway goes in, the gravel starts covering the structural pieces, and your backyard transforms from construction zone into potential oasis.
The most memorable moment is usually the first pump test. You flip the switch, wait a second, and water begins climbing the pipe. Then it spills out at the top and starts moving through the rock work. It will not be perfect the first time. It almost never is. The water may slip behind a stone, splash too far forward, or ignore your artistic vision completely. But that first run is still magic. It turns a pile of liner, stone, tubing, and weekend ambition into something alive.
After that, the project becomes more creative than mechanical. You start nudging rocks an inch to the left, adding a fist-sized stone here, pulling one out there, and listening to how the sound changes. A narrow chute sounds sharper and livelier. A wider spill sounds softer and calmer. This stage teaches you that a pondless waterfall is not just built; it is tuned.
There is also a quiet satisfaction in the maintenance rhythm once the build is done. Topping off the reservoir, clearing a few leaves, and checking the pump feels very manageable compared with the care a full pond can demand. And because the basin is hidden, the whole feature stays visually tidy. Guests hear the water before they figure out where it disappears, which gives the build a little mystery and a lot of charm.
Over time, the best experience is not even the waterfall itself. It is how people use the space around it. A chair gets moved closer. Coffee tastes better nearby. Conversations slow down. Birds show up. The corner of the yard that used to be ignored starts acting like the destination. That is why so many homeowners become unexpectedly attached to their pondless waterfall. It is not just a DIY water feature. It is a mood upgrade with plumbing.
Final Thoughts
A well-planned pondless waterfall build delivers the beauty of moving water without the maintenance load of a traditional pond. The key is respecting the structure beneath the pretty part: reservoir sizing, liner protection, pump access, good grading, and smart rock placement. Get those fundamentals right, and the feature will look natural, sound fantastic, and keep working long after the shovel blisters become a funny story.
If your goal is a backyard feature that feels relaxing, polished, and surprisingly achievable, a DIY pondless waterfall is one of the smartest projects you can tackle. Just remember: water always wins the argument, so build carefully, test patiently, and let the rocks do some of the talking.