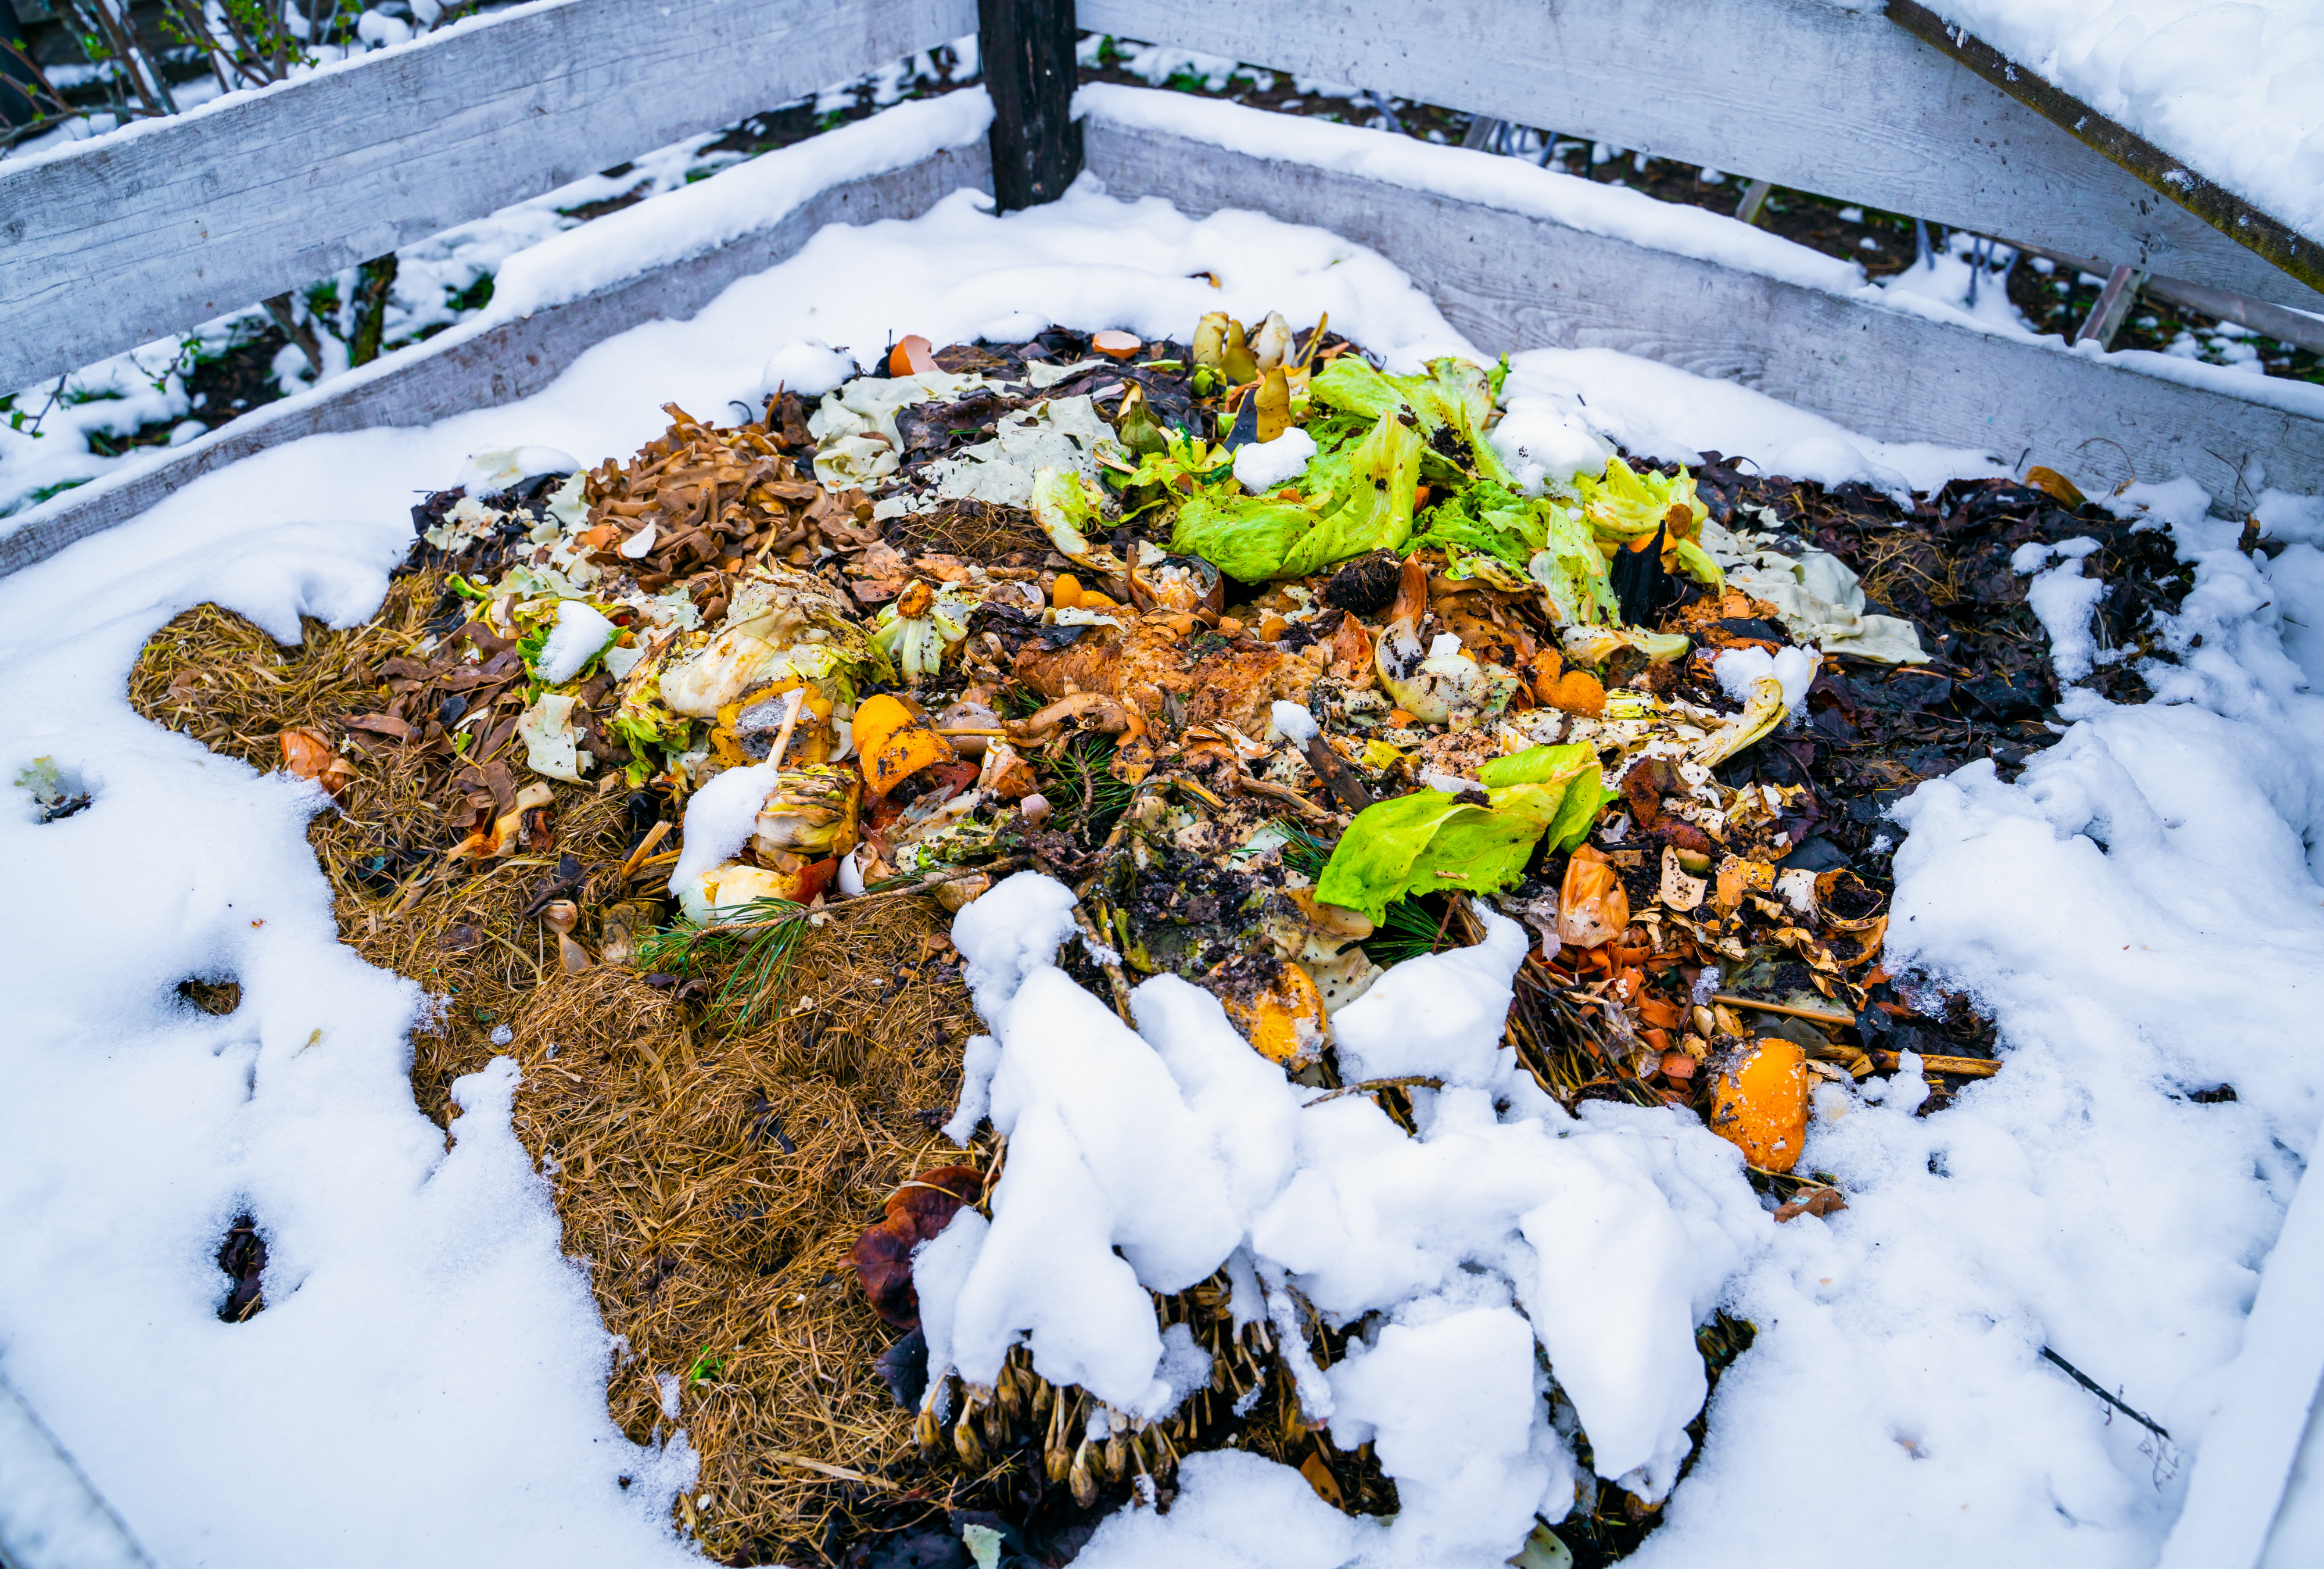

Winter has a way of making every outdoor chore feel like a personal attack. The hose freezes, the garden sulks, and your compost pile can look less like “black gold in progress” and more like a frosty lasagna of onion peels and regret. But here is the good news: cold-weather composting is absolutely doable. It may slow down, but it does not have to stop.
If you want to keep composting through winter, the goal is not to force your pile into a tropical vacation. The goal is to help it hold heat, keep a decent balance of materials, avoid soggy messes, and stay manageable until spring. Think of winter composting as less of a sprint and more of a cozy jog in a heavy sweater.
This guide breaks down 10 simple, practical ways to keep your compost pile working through the cold months, plus a longer section at the end with real-world experience and lessons learned. Whether you use a backyard bin, an open pile, or a worm setup indoors, these winter composting tips can help you keep food scraps out of the trash and turn them into rich compost for spring.
Why Composting in Winter Still Matters
Even when outdoor temperatures drop, composting remains one of the easiest ways to reduce household waste and build healthier soil. Microbes do slow down in the cold, and smaller piles may partially freeze, but a well-built pile can still hold warmth in the center. That means decomposition may continue quietly all winter, even if the outside looks like it has given up on life.
And here is the part many gardeners love: winter composting sets you up beautifully for spring. By the time seed catalogs are whispering sweet promises in your ear, you can already have a pile of partially finished material ready to wake up fast once temperatures rise.
1. Build a Bigger Pile Before Winter Really Hits
If you want your compost pile to stay active in winter, size matters. A larger pile holds heat better than a small one, which means the center is less likely to freeze solid. That is why fall is the perfect time to bulk things up with leaves, spent annuals, and chopped garden debris.
A good rule of thumb is to aim for a pile that is at least about 3 feet by 3 feet by 3 feet. That gives the compost enough mass to generate and retain heat. Tiny piles tend to freeze faster, cool down sooner, and act offended when you expect results.
Simple move:
Before the first hard freeze, combine summer leftovers, fall leaves, and kitchen scraps into one larger, well-layered pile instead of spreading materials among several small bins.
2. Stockpile Browns Like They Are Winter Emergency Supplies
Winter compost piles get into trouble when people keep adding kitchen scraps but run out of dry, carbon-rich materials. That is how you end up with a wet, smelly pile that greets spring like a swamp monster.
Save bags of dry leaves in the fall. Store shredded paper, straw, pine needles, sawdust, or wood shavings in a dry spot. These “browns” help absorb moisture, improve airflow, reduce odor, and balance out “greens” like fruit peels, coffee grounds, and vegetable scraps.
Simple move:
Keep a stash of dry browns right next to your bin so every winter addition gets covered immediately. Your future self will be wildly impressed.
3. Keep Layering Greens and Browns, Even in January
Winter does not cancel the basic rules of composting. You still need a good balance of nitrogen-rich greens and carbon-rich browns. If you dump a month of food scraps into the pile without enough dry material, the spring thaw can reveal a soggy, anaerobic science experiment no one asked for.
For home composting, a simple and practical approach is to add roughly two to three parts browns for every one part greens by volume. Cover fresh food scraps well so they stay tucked into the warmer center of the pile and are less likely to attract pests.
Simple move:
Every time you add kitchen scraps, add a generous scoop of dry leaves or shredded paper on top. Think sandwich, not sludge.
4. Chop Materials Smaller to Speed Things Up
Cold weather slows decomposition, so it helps to give your compost microbes easier work. Smaller pieces break down faster because they offer more surface area. Big chunks of squash, thick kale stems, and whole corn stalks may eventually decompose, but “eventually” is doing a lot of work in that sentence.
Shred leaves with a mower, tear cardboard into smaller pieces, and chop food scraps before adding them. You do not need to dice banana peels with surgical precision, but a little size reduction can make a noticeable difference.
Simple move:
Keep a dedicated cutting board or countertop scrap bowl for compost prep. Five extra seconds of chopping now can save you months later.
5. Insulate the Pile So the Center Stays Cozy
Compost piles lose heat from the outside in, so insulation helps protect the warmer center. The goal is not to make your pile tropical. It is to keep cold winds and deep freezes from stripping away every bit of warmth the microbes create.
Good insulation materials include straw, hay, bags of leaves, wood chips, or extra dry leaves piled around the bin. Some gardeners also add a thick insulating cap on top. If you are using a bin, you can create a windbreak nearby with a tarp or place the setup in a more sheltered location.
Simple move:
Surround the outside of your compost bin with leaf bags or straw bales and add a thick brown layer over the top once winter settles in.
6. Cover the Pile to Manage Snow, Rain, and Slush
Winter moisture is sneaky. Snowmelt and cold rain can soak a pile, squeeze out air, and create anaerobic conditions. A compost pile that is too wet tends to smell bad, lose heat, and decompose more slowly.
That is why covering the pile matters. A tarp, lid, or breathable top cover can help shed excess moisture while protecting the compost from cold air. You still want airflow in the system, but you do not want the pile marinating in icy runoff.
Simple move:
Use a loose tarp, fitted lid, or top cover that keeps out heavy moisture without sealing the pile so tightly that it cannot breathe.
7. Turn Strategically, Not Constantly
Here is where winter composting gets nuanced. In many backyard setups, frequent turning during freezing weather can dump precious heat and slow the pile down. That is why plenty of home compost guides recommend reducing turning or waiting until the pile thaws in spring.
At the same time, actively managed hot piles still need oxygen. If you are monitoring temperature and maintaining a large, insulated pile, occasional turning may help keep decomposition going. The key word is occasional. Winter is not the season for aggressive fork-based enthusiasm.
Simple move:
If your pile is small or partially frozen, leave it mostly alone. If it is large, warm, and actively composting, turn it only when needed and do it quickly so you do not lose all the heat.
8. Watch Moisture Like a Hawk in a Knit Hat
A winter compost pile can get too wet from snowmelt, too dry from cold winds, or both within the same month depending on your setup. The sweet spot is the classic “wrung-out sponge” feel: moist, but not soggy.
If the pile is too wet, add more dry browns and consider improving the cover. If it is too dry, add a little water during a milder stretch and make sure the pile is not exposed to strong drying winds.
Simple move:
Check the pile every week or two during winter. Grab a handful from the middle if possible. If it drips, it is too wet. If it feels crispy and lifeless, it likely needs moisture.
9. Be Picky About What You Add in Cold Weather
Winter is not the time to get adventurous with your compost ingredients. In a basic home compost system, stick with fruit and vegetable scraps, coffee grounds, tea, crushed eggshells, dry leaves, shredded paper, and yard waste. Skip meat, dairy, oily foods, and pet waste, especially when decomposition is slow and pests are more than happy to investigate.
This is also a smart season to avoid overdoing materials that can throw off the pile. For example, large amounts of wood ash can raise pH too much and interfere with microbial activity. Winter composting works best when you keep inputs simple and predictable.
Simple move:
Create a “winter-safe compost list” on your fridge so everyone in the house knows what goes into the bin and what absolutely does not.
10. Use a Pre-Compost Bucket or Indoor Worm Bin
When the backyard is icy and the bin is buried under snow, convenience matters. A covered kitchen bucket or small pre-compost container makes it easier to collect scraps without trudging outside every hour in slippers and poor decision-making.
If winter outdoor composting becomes impractical, vermicomposting is a smart backup. A worm bin kept indoors or in a protected basement, laundry room, or heated garage can process food scraps all winter long. Red wigglers do best in moderate temperatures, and many extension sources recommend keeping worm bins above about 55 degrees Fahrenheit for steady activity.
Simple move:
Use an indoor scrap bucket for short-term storage and switch to a worm bin if your outdoor compost system becomes frozen, waterlogged, or inaccessible.
Common Winter Composting Mistakes to Avoid
- Adding scraps without enough browns: This is the fastest route to spring stink.
- Using a pile that is too small: Small piles lose heat fast and freeze easily.
- Letting the pile get drenched: Excess moisture can turn a compost pile anaerobic.
- Turning too often in deep cold: You may release more heat than you gain.
- Expecting summer speed in winter: Composting continues, but usually at a slower pace.
- Panic when you see steam: Warm compost meeting cold air often steams. It is not automatically a sign of trouble.
What to Expect by Spring
By the end of winter, your compost may not look perfectly finished, and that is fine. Some materials may still be recognizable, especially if your pile froze periodically. But that does not mean the effort was wasted. Freeze-thaw cycles can help break down cell structure, and once spring warmth returns, the pile often wakes up fast.
If the compost is wet and matted in early spring, turn it, add dry browns, and let air back in. If it looks dark, crumbly, and earthy, congratulations: you have made garden treasure while everybody else was busy complaining about the weather.
Cold-Weather Composting Experience: What It Really Feels Like in Practice
Anyone can read a composting checklist and nod along like a polite student. The real education begins the first time you step outside in January with a bowl of carrot peels, hit a patch of invisible ice, and wonder whether modern civilization has perhaps gone too far. Winter composting is practical, but it is also deeply humbling. The pile has opinions. The weather has stronger opinions. And your grand plan to create perfect compost with scientific elegance may collapse the second your tarp fills with sleet.
One of the most common experiences is realizing that winter composting is less about speed and more about continuity. In summer, a pile can feel responsive. You turn it, it heats. You add the right mix, it shrinks. In winter, the feedback loop is slower and much quieter. A pile may look unchanged for weeks, yet still be doing useful work in the center. That can be hard for beginners because it feels like nothing is happening. But winter composting teaches patience in a very direct way. It asks you to trust the process even when the process is dressed like a snowbank.
Another real-world lesson is that preparation makes almost everything easier. Gardeners who save bags of shredded leaves in the fall usually have a much smoother season than those who figure they will “just wing it.” Winging it in winter often means piling wet kitchen scraps into a bin and discovering in March that you accidentally created a compost-themed bog. The simple habit of storing browns, keeping a bucket near the door, and topping scraps right away is not glamorous, but it is the difference between a functional system and a frozen vegetable soup with eggshell garnish.
There is also a mental shift that happens once you stop trying to dominate winter and start working with it. You may turn the pile less. You may accept that the outside layer freezes. You may rely on a worm bin for part of the season. You may treat the compost more like a long-term project than a weekly performance review. Oddly enough, that tends to make the whole practice more enjoyable. It becomes less about hitting perfect temperatures every week and more about building a steady household rhythm that keeps organic waste out of the trash.
And then spring arrives. You peel back the cover, poke the pile, and discover that beneath the scruffy exterior is dark, earthy material that smells like honest work and future tomatoes. That is the payoff winter composters know well. You did not quit when the garden looked dead. You kept feeding the soil story in the background. And now, while everyone else is just getting started, you already have momentum, partially finished compost, and the quiet satisfaction of having pulled off one of gardening’s least flashy but most rewarding tricks.
Final Thoughts
Composting through the cold months is not about creating a blazing-hot pile every single week. It is about protecting the biology you already have, managing moisture, maintaining a smart browns-to-greens balance, and making the system easy enough that you will actually keep using it. That is the secret. Not perfection. Not heroics. Just consistency.
Do that, and by the time warmer days return, your winter compost pile will be ready to get back to work fast. Your soil will thank you, your trash can will feel a little lighter, and your garden will benefit from a steady supply of that crumbly, earthy, homegrown magic gardeners never get tired of calling black gold.
Note: If your compost pile seems sleepy in winter, that is normal. Cold-weather composting is often about preserving momentum until spring, not forcing summer-style speed in freezing weather.
SEO Tags