
That forgotten pair of pants in the back of your closet may not be ready for retirement. Maybe the knees are worn, the cuffs are stained, or the legs simply belong to a fashion era you would rather not discuss in public. Whatever the reason, turning pants into shorts is an easy clothing-upcycling project that requires only basic tools and a little patience.
The process works for jeans, chinos, cargo pants, linen trousers, sweatpants, and many other styles. The main challenge is not cutting the fabric; scissors have been confidently doing that job for centuries. The challenge is choosing the right length, keeping both legs even, and finishing the edges so your new shorts look intentional rather than like the result of an argument with a lawn mower.
This guide explains how to make shorts out of pants in 10 practical steps, with options for a clean sewn hem, folded cuff, raw denim edge, or no-sew finish.
What You Will Need
- A pair of pants that fits comfortably through the waist, hips, and rise
- Sharp fabric scissors
- A flexible measuring tape or ruler
- Tailor’s chalk, washable fabric marker, or pins
- An existing pair of shorts for reference, if available
- Straight pins or sewing clips
- An iron and ironing board
- A sewing machine or hand-sewing needle
- Thread that matches or complements the pants
- A denim or heavy-duty needle for thick fabric
- Optional seam ripper, sandpaper, tweezers, patches, or trim
Use fabric scissors rather than household scissors. Paper and packaging can dull blades, and dull scissors tend to chew through fabric instead of producing a clean line. Your pants have already survived years of laundry. They deserve a dignified haircut.
How to Make Shorts out of Pants in 10 Steps
Step 1: Choose the Right Pair of Pants
Begin with pants that fit well above the knees. Turning pants into shorts will not correct a waistband that pinches, a rise that pulls, or hips that are too tight. The waist, seat, zipper, pockets, and upper thighs should already feel comfortable.
Inspect the garment for stains, holes, and fabric weakness. Damage below your planned cutting line does not matter because that section will be removed. Damage near the seat, crotch, or pockets may require mending before you begin.
Jeans and cotton chinos are the easiest choices for beginners because their woven fabrics are stable and predictable. Stretch denim, knit sweatpants, rayon blends, and lightweight linen can also work, although they may require different stitches or additional stabilization.
Step 2: Wash, Dry, and Press the Pants
Wash and dry the pants using the method you plan to use in the future. Cotton and denim can shrink, and cutting unwashed pants may leave you with shorts that become unexpectedly brief after laundry day.
Once clean, press the legs flat. Pay special attention to wrinkles around the knees and side seams. Smooth fabric is easier to measure, mark, and cut accurately. Confirm that the pant legs are not twisted before placing them on your work surface.
Check the care label before applying heat. A hot iron may be suitable for sturdy cotton denim but risky for synthetic fibers. When uncertain, begin with a lower temperature and test an inconspicuous area.
Step 3: Decide on the Finished Length
Put on the pants and stand naturally in front of a full-length mirror. Wear the shoes you are likely to pair with the finished shorts because footwear can change how the proportions look.
Fold one pant leg upward until you find a flattering length. Common options include:
- Short shorts: usually ending several inches below the crotch
- Mid-thigh shorts: a versatile everyday length
- Bermuda shorts: ending just above the knee
- Knee-length shorts: useful for workwear, hiking, or cargo styles
Sit down, bend, and walk around before committing. Shorts ride up during movement, so a length that looks perfect while standing may feel much shorter in a chair. When in doubt, start longer. You can always remove another inch; persuading fabric to grow back is considerably more difficult.
Step 4: Mark the Finished Hemline
Use tailor’s chalk, a washable marker, or a pin to mark where you want the finished bottom edge to sit. Mark both the front and back of one leg while wearing the pants.
Ask someone to help when possible, especially for knee-length or tailored shorts. Looking down or bending to mark your own hem can distort the fabric and change the apparent length.
After marking, remove the pants carefully and place them on a flat surface. Measure from a fixed point, such as the waistband or crotch seam, to your mark. Check several positions around the leg to make sure the intended hemline is level.
Step 5: Add the Hem or Cuff Allowance
Do not cut directly on the finished hemline unless you want a raw edge. A sewn hem or folded cuff requires extra fabric below the final length.
Use these allowances as practical starting points:
- Raw edge: add about 1/2 inch for controlled fraying
- Narrow double-fold hem: add 1 to 1 1/4 inches
- Standard denim hem: add approximately 1 to 1 1/2 inches
- Single folded cuff: add twice the visible cuff depth
- Double rolled cuff: add three to four times the planned cuff depth
For example, if you want a 1-inch double cuff, leave approximately 3 to 4 inches below the finished length. Draw a second line below the original hem mark. This lower line is your cutting line.
Step 6: Align and Secure the Pant Legs
Button or zip the pants, then lay them flat with the side seams aligned. Smooth the fabric from the waistband downward without stretching it. Make sure the inseams, outer seams, and hems sit naturally.
For the greatest accuracy, work on one leg first rather than cutting through both legs at once. Multiple layers can shift, particularly when the pants are thick or tapered. Pin the fabric near the cutting line to keep the layers from moving.
If the legs are very wide, check whether a perfectly straight horizontal cut will produce the appearance you want. Some shorts look better with a slight upward angle toward the outer seam, while tailored designs may need a subtly longer back hem for coverage.
Step 7: Cut the First Pant Leg
Cut slowly along the marked cutting line using long, smooth strokes. Avoid making dozens of tiny snips because they can produce a jagged edge that is difficult to fold evenly.
Keep the scissors resting against the work surface when possible. Lifting the fabric into the air can cause it to shift, stretch, or curve. Be especially careful around thick side seams, where the scissors may require extra pressure.
Once the first leg is cut, stop and inspect it. Do not rush directly into the second leg. Confirm that you cut below the finished-length mark and that enough fabric remains for your chosen hem or cuff.
Step 8: Use the First Leg to Mark the Second
Fold the pants in half vertically so the cut leg rests directly over the uncut leg. Match the waistband, crotch, inseams, and outer seams. Smooth both layers without pulling.
Use the cut edge as a template and mark the second leg. Then unfold the pants and cut the second leg separately. This method is generally more reliable than trusting two independent measurements.
After cutting, place the shorts flat and compare both legs. Measure from the crotch seam to the lower edge along each inseam. Also compare the outer seams. Correct small differences now, removing only tiny amounts at a time.
Step 9: Finish the Raw Edges
The best edge treatment depends on the fabric and the look you want.
Option 1: Sew a Double-Fold Hem
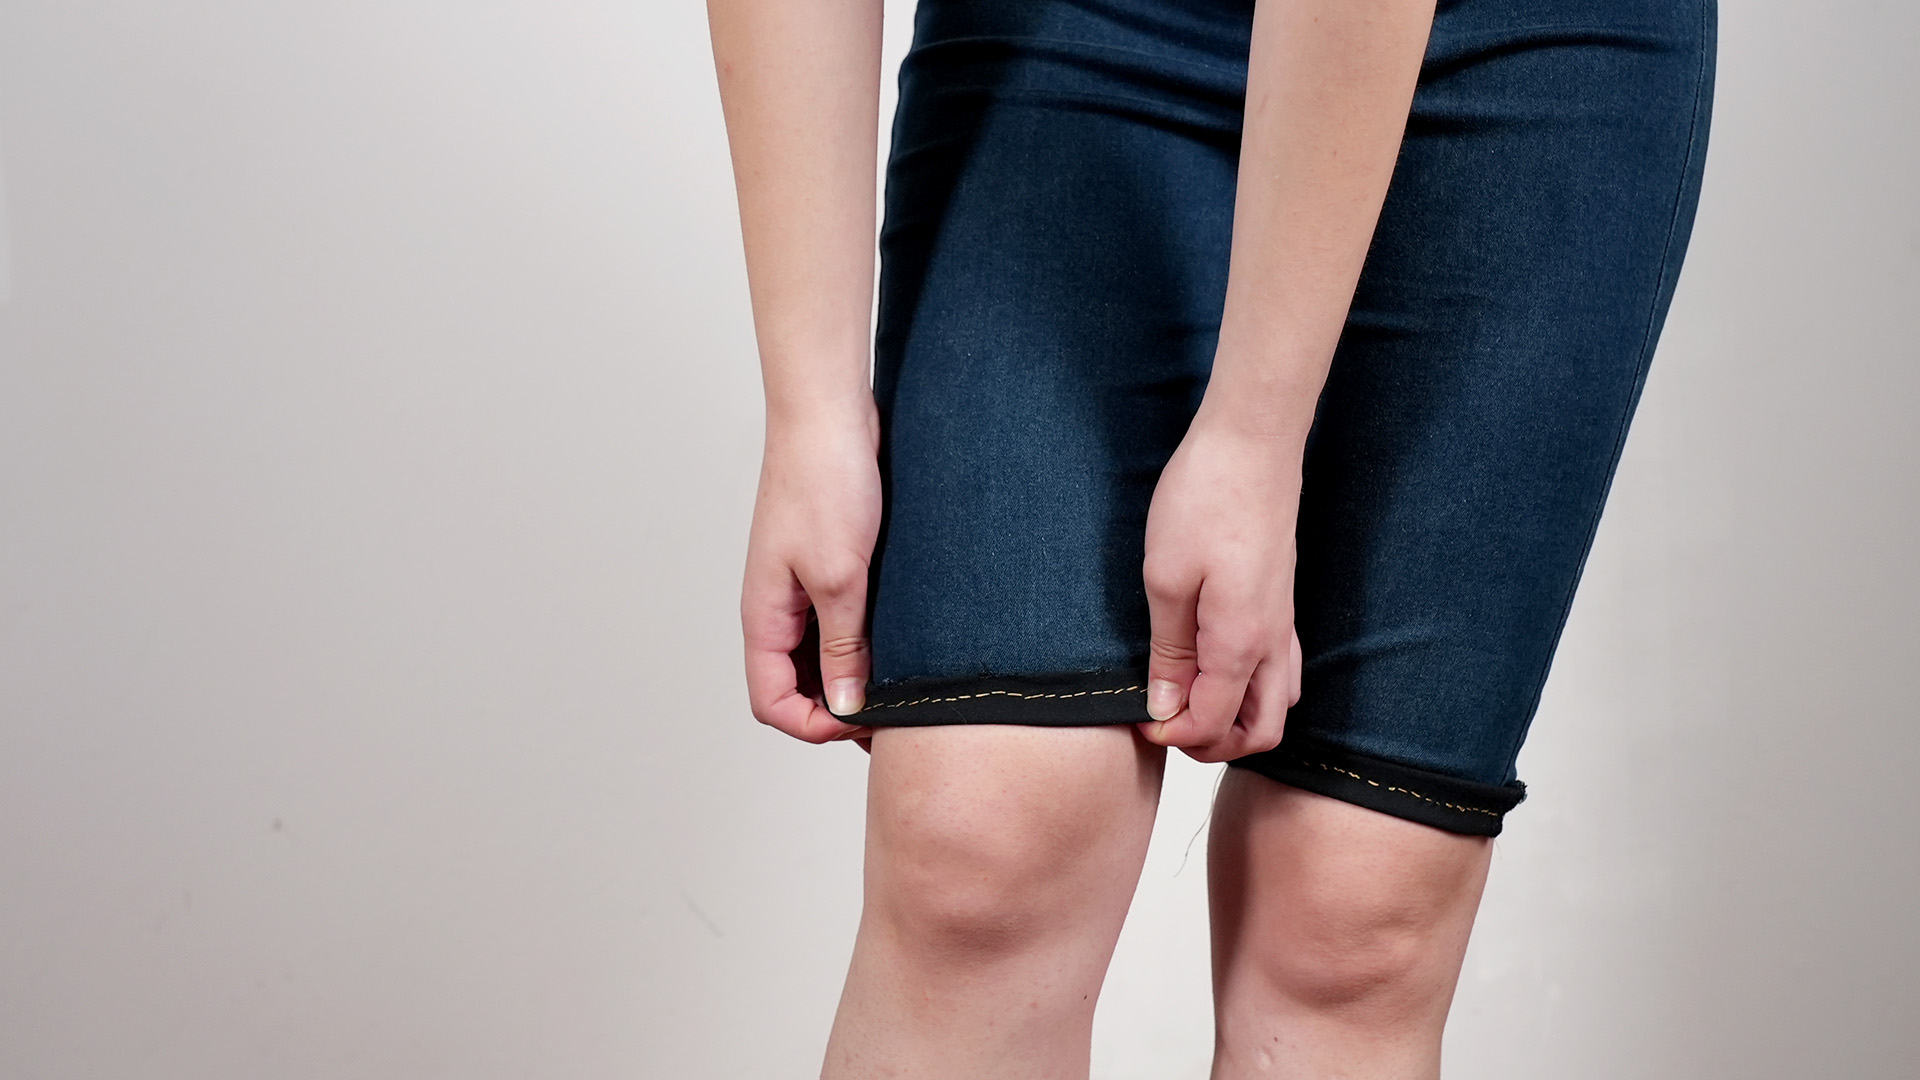
Turn the raw edge toward the inside by about 1/2 inch and press. Fold it inward again by another 1/2 inch so the raw edge is completely enclosed. Press, pin, and stitch close to the upper folded edge.
A double-fold hem is durable and works well for cotton pants, chinos, lightweight denim, and casual trousers. Keep the fold width consistent around each leg to prevent a wavy result.
Option 2: Make a Folded Cuff
Finish the raw edge with a zigzag stitch, overcasting stitch, or serger if the fabric frays easily. Fold the edge upward to the outside, press, and fold again if you want a double cuff.
Secure the cuff with a few discreet stitches at the inseam and outer seam. This keeps it from unrolling in the washing machine or during an unusually energetic afternoon.
Option 3: Create a Raw Denim Hem
For distressed cut-off shorts, sew a straight line approximately 1/4 to 1/2 inch above the raw edge. This line acts as a barrier that limits how far the fabric can unravel.
Wash and dry the shorts to encourage natural fraying. Trim excessively long threads, or use tweezers to pull a few horizontal threads for a more deliberate distressed effect. Do not cut too close to the stabilizing stitch line.
Option 4: Use a No-Sew Finish
Fold and press the hem, then insert fusible hem tape between the layers and apply heat according to the product instructions. This is useful for temporary projects or anyone without sewing equipment.
However, sewn hems usually tolerate repeated washing better than adhesive-only finishes. Test fusible products on a hidden scrap because glue may show through lightweight fabric.
Step 10: Press, Stitch, and Inspect the Finished Shorts
Press the completed hem or cuff before final stitching. Heat helps set the folds and produces a cleaner, more professional edge.
When sewing denim, use a jeans needle suited to the fabric weight. A slightly longer straight stitch can create attractive topstitching, especially when paired with heavier thread. Sew slowly over thick side seams. If the presser foot tilts sharply, use a folded scrap of fabric or a height-compensation tool behind the foot to keep it level.
Backstitch at the beginning and end, trim loose threads, and press the hem once more. Try on the shorts and check the length while standing, walking, and sitting. Confirm that both legs hang evenly and that the hem does not twist or pull.
How to Customize Your Upcycled Shorts
Once the construction is complete, you can personalize the shorts without changing their fit. Add iron-on patches, embroidery, fabric paint, lace trim, studs, or visible mending. A strip of patterned fabric inside a rolled cuff creates a subtle detail that appears only when the cuff is turned upward.
For distressed denim shorts, place a small cutting board or piece of cardboard inside the leg before using sandpaper or a seam ripper. This prevents accidental damage to the back layer. Distress high-wear areas lightly and gradually. Manufactured-looking distressing usually comes from restraint, not from attacking the garment as though it owes you money.
Save the removed pant legs. The fabric can become patches, tool pouches, coasters, small bags, or test scraps for checking thread tension and iron temperature.
Common Mistakes to Avoid
Cutting Both Legs at the Same Time
Thick or slippery layers can shift, leaving one leg shorter or angled differently. Cut one leg first, then use it as a template for the second.
Forgetting the Hem Allowance
The finished-length mark and cutting line are not necessarily the same. Add enough fabric for the planned fold, cuff, or frayed edge before touching the scissors.
Measuring Only While the Pants Are Flat
The body changes how fabric hangs. Mark the desired length while wearing the pants, then refine the line on a flat surface.
Using the Wrong Machine Needle
A fine universal needle may struggle with heavy denim and bulky intersections. Match the needle type and size to the fabric, and replace a bent or dull needle before sewing.
Skipping the Iron
Pressing is not decorative busywork. It sets accurate folds, controls bulk, and helps the hem lie flat. A project can be measured perfectly and still look homemade in the least flattering sense if the hem is never pressed.
Real-World Experience: Lessons Learned from Turning Pants into Shorts
The first lesson most people learn is that the safest starting length feels surprisingly long. When pants are laid flat on a table, a mid-thigh cutting line can look conservative. Once the garment is worn, however, the fabric curves over the seat and thighs, causing the hem to appear shorter. Sitting may raise it another inch or more. Starting long and performing a second fitting avoids the classic experience of creating beach shorts when you intended to make something suitable for the grocery store.
Another useful lesson is that the two legs of a pair of pants are not always perfectly identical. Wear, washing, previous alterations, and natural body asymmetry can create small differences. Measuring each leg from the waistband alone may therefore produce uneven inseams. Using the first cut leg as a template generally gives a more balanced visual result, but checking both inseams before hemming is still worthwhile.
Denim introduces its own personality. The flat sections may glide smoothly through the sewing machine, while the thick side seams behave like tiny speed bumps made of concrete. Sewing faster rarely solves the problem. Better results come from slowing down, using a fresh jeans needle, reducing excess bulk inside the hem, and keeping the presser foot level as it crosses the seam. Turning the handwheel manually for a few stitches can also provide control over the thickest section.
Stretch fabric requires a different approach. Pulling the material while cutting or sewing can create a flared, rippled hem. Let the fabric rest naturally on the table, support its weight near the machine, and test the selected stitch on one of the removed pant-leg scraps. A narrow zigzag or stretch-compatible stitch may perform better than a rigid straight stitch on highly elastic material.
Pressing usually makes the biggest visible difference. A folded cuff that seems bulky and uneven can become crisp after careful pressing. A double-fold hem that refuses to stay in place becomes much easier to pin and stitch once each fold has been set with heat. For dark or delicate fabric, using a pressing cloth helps reduce shine and protects the surface.
Raw hems also benefit from planning. Simply cutting denim and wearing it may create a charming frayed edge, but repeated washing can cause the unraveling to travel farther than expected. A hidden row of stitching above the cut edge gives the fraying a stopping point. After the first wash, the hem may look chaotic, but trimming long threads and separating the fringe with your fingers usually produces a more controlled finish.
The final lesson is to judge the project as clothing, not merely as a sewing exercise. Try the shorts with different shirts and shoes. Check the pockets, proportions, and cuff depth. Cargo pants may look balanced near the knee because of their large pockets, while slim jeans often work better at mid-thigh. A small adjustment of half an inch can dramatically improve the silhouette.
Most first attempts are wearable even when they are not perfect. Slightly crooked topstitching is usually less noticeable than it appears from six inches away. The project teaches measuring, cutting, pressing, hemming, and fabric handling while rescuing clothing that might otherwise go unused. That is a generous return from one pair of old pants and an afternoon with scissors.
Conclusion
Learning how to make shorts out of pants is a practical way to update your wardrobe, reduce textile waste, and practice basic sewing skills. The most important rules are simple: wash the pants first, mark the length while wearing them, leave enough fabric for the finish, cut one leg at a time, and press every fold before sewing.
Whether you choose a polished double-fold hem, a casual cuff, or a deliberately frayed denim edge, careful measuring will make the finished shorts look intentional. Begin longer than you think necessary, work slowly, and remember that scissors are enthusiastic but not known for offering refunds.