
If your iPhone or iPad feels a little too eager, a little too sleepy, or just plain weird when you tap and hold the screen, you are not imagining things. Apple does let you change how touch input feels, but the settings are tucked away in Accessibility, where they hide like shy raccoons behind a recycling bin. The good news is that once you know where to look, you can make your device respond faster, ignore accidental taps, or become more forgiving if you have trouble with quick gestures.
There is one important thing to understand before diving in: Apple does not offer a single giant slider labeled Touch Sensitivity for every iPhone and iPad. Instead, the company gives you a few different controls that affect how the screen responds. That means the best setting depends on what is actually bothering you. Are long presses taking too long? Are repeated taps getting misread? Are you using an older iPhone with 3D Touch and want it to react to lighter pressure? Each problem has its own fix.
In this guide, we will walk through the three real ways to change touch sensitivity on an iPhone or iPad, explain what each option actually does, and help you decide which one fits your daily use. No fluff, no mystery, and no need to threaten your phone with retirement.
What “touch sensitivity” means on Apple devices
When people say they want to change touch sensitivity, they usually mean one of three things. First, they want long-press actions like app menus or previews to appear faster or slower. Second, they want the screen to stop reacting to accidental taps, repeated touches, or shaky finger movements. Third, on some older iPhones, they want the screen to react to lighter or firmer pressure when using 3D Touch.
That is why this topic can feel confusing. One person wants their iPhone to stop opening shortcut menus every time they rest a thumb on an icon. Another wants their iPad to register taps more reliably because their hand movement is less precise. Another is holding onto an older iPhone and misses the days when pressing a little harder felt like a superpower. Same complaint, different solution.
So let us break it down the practical way: three settings paths, three kinds of touch behavior, and a clear idea of when to use each one.
Method 1: Change Haptic Touch duration
This is the most useful option for most people. Haptic Touch controls how long you must press and hold before your iPhone or iPad shows a contextual menu, preview, or extra action. If your device feels sluggish when you long-press, this is the setting to change. If it opens menus too quickly and drives you slightly bananas, this is also the setting to change.
How to change Haptic Touch on iPhone
- Open Settings.
- Tap Accessibility.
- Tap Touch.
- Select Haptic Touch or 3D & Haptic Touch.
- Choose your preferred touch duration.
Depending on your iPhone model and software version, you may see Fast and Slow, or you may see Fast, Default, and Slow. If your long presses feel delayed, choose Fast. If you keep triggering menus accidentally while trying to move icons or scroll, try Slow.
Apple also includes a little test area on that screen so you can try the setting immediately. Use it. This is one of those rare moments in tech where the company actually lets you feel the difference before committing. It is like test-driving a sofa, except the sofa is inside your phone and far less comfortable.
How to change Haptic Touch on iPad
- Open Settings.
- Tap Accessibility.
- Tap Touch.
- Tap Haptic Touch.
- Choose Fast or Slow, then test it.
On iPad, this setting is especially helpful if you use touch-and-hold gestures for text editing, preview menus, or working with files. A faster setting can make the tablet feel more responsive. A slower setting can reduce accidental long presses, which is handy if you often brush the screen while drawing, reading, or juggling ten browser tabs like a digital circus performer.
When Haptic Touch is the right fix
Use this setting if your complaint sounds like one of these:
“It takes too long for menus to pop up.”
“I keep opening a shortcut menu when I did not mean to.”
“My phone feels slow when I press and hold.”
“My iPad reacts fine to taps, but long presses feel off.”
For most users, this is the closest thing to a general touch sensitivity adjustment on modern Apple devices.
Method 2: Turn on Touch Accommodations
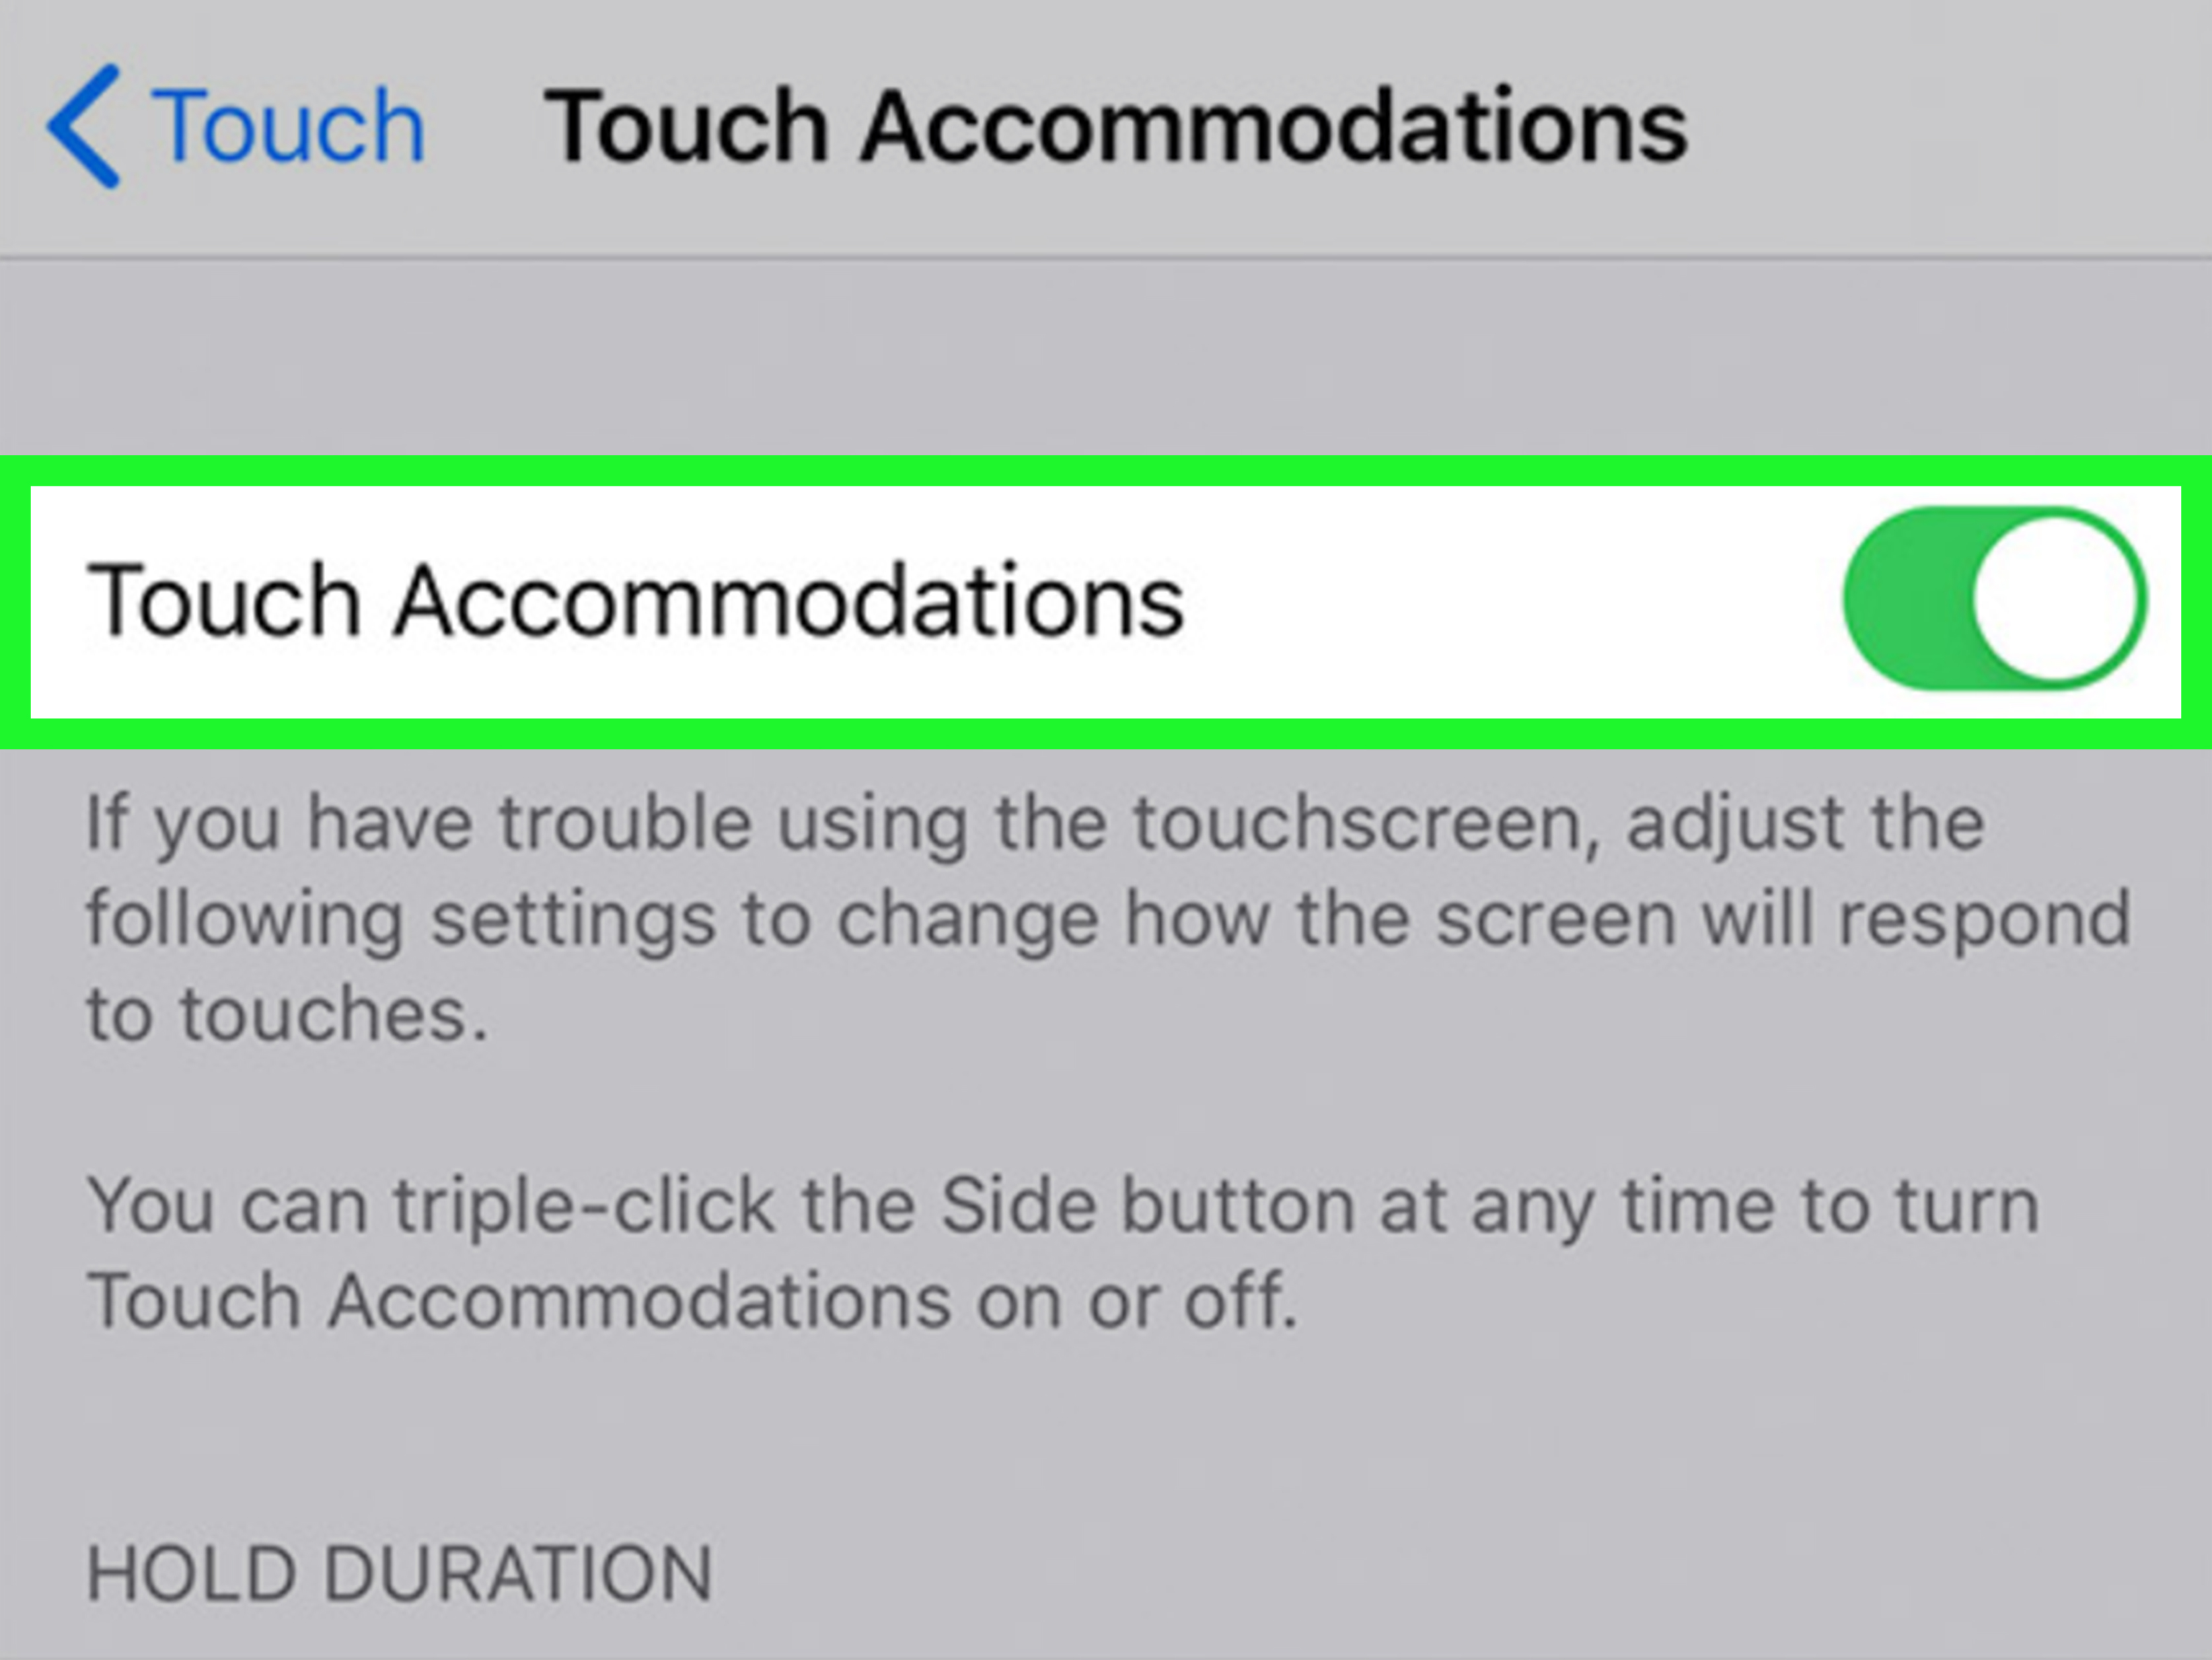
If Haptic Touch is the quick fix, Touch Accommodations is the deep-control toolbox. This feature changes how the screen handles taps, swipes, repeated touches, and finger placement. It is designed for accessibility, but it is useful for anyone whose device feels too twitchy, too picky, or too easily confused by imperfect input.
To find it on either an iPhone or iPad:
- Open Settings.
- Tap Accessibility.
- Tap Touch.
- Tap Touch Accommodations.
- Turn it on and customize the options below.
Once enabled, you will see several settings. The three most important are Hold Duration, Ignore Repeat, and Tap Assistance. These are not cosmetic changes. They can dramatically change how your device reads your hands.
Hold Duration
Hold Duration determines how long you must touch the screen before the device recognizes your input. In plain English, it makes your phone or tablet wait a moment before accepting a tap.
This is useful if you tend to brush the screen accidentally, tap by mistake, or have tremors or involuntary movements that cause unintentional input. Increase the duration, and the device becomes more selective. It stops treating every tiny contact like a life-changing command from the heavens.
Example: If your iPhone keeps opening apps when your thumb merely grazes the screen, adding a small Hold Duration can make it feel calmer and more deliberate.
Ignore Repeat
Ignore Repeat tells the device to treat several quick taps as a single touch. This is excellent if you often double-tap by accident or your finger lands more than once in rapid succession.
Example: Suppose you are trying to tap a small button once, but the device thinks you tapped it two or three times. Turning on Ignore Repeat can clean that up nicely. It is especially helpful for users who find repeated involuntary taps frustrating.
Tap Assistance
Tap Assistance helps the device decide where your intended tap should register if your finger moves during the gesture. You can tell it to use either the Initial Touch Location or the Final Touch Location.
This is more useful than it sounds. If you place a finger down and then drift slightly before lifting it, your iPhone or iPad can either register the first spot you touched or the place where your finger ended. That makes a huge difference for users who drag a bit while trying to tap precisely.
Use Initial Touch Location is usually better if you tend to slide by accident after touching the screen. Use Final Touch Location can be better if you intentionally rest your finger and adjust before lifting.
Who should use Touch Accommodations?
This method is best for people who deal with accidental touches, shaky input, repeated taps, or inconsistent finger placement. It is also great for parents setting up a device for a child, for older adults who want easier screen control, or for anyone who has ever said, “Why does this thing keep doing stuff I did not ask it to do?”
If your issue is not speed but control, Touch Accommodations is the star of the show.
Method 3: Adjust 3D Touch sensitivity on older iPhones
This method applies only to certain older iPhones that support 3D Touch. If you are using a newer iPhone or any iPad, you can skip this section because your device uses Haptic Touch instead. iPads do not have 3D Touch pressure sensitivity in the same way older iPhones did.
If you do have a supported older iPhone, you may see a 3D & Haptic Touch menu with an extra pressure setting. That lets you choose how firm a press is required before the device reacts.
- Open Settings.
- Tap Accessibility.
- Tap Touch.
- Tap 3D & Haptic Touch.
- Choose a pressure level such as Light, Medium, or Firm.
If 3D Touch feels too hard to activate, choose Light. If it triggers too easily, move toward Firm. This setting was a favorite among users who liked “Peek and Pop” style interactions because it let the device respond to pressure, not just press duration.
Here is the simple rule: if your device has no 3D Touch option, you are not missing it; your hardware just uses the newer Haptic Touch system. In that case, Method 1 and Method 2 are the settings that matter.
Which touch setting should you pick?
If you want your iPhone or iPad to feel faster when you press and hold, start with Haptic Touch. If you want to reduce accidental taps or repeated input, move to Touch Accommodations. If you use an older iPhone and want the screen to react to lighter or firmer pressure, adjust 3D Touch.
Here is the practical cheat sheet:
Pick Haptic Touch if long-press menus feel too slow or too jumpy.
Pick Touch Accommodations if tapping accuracy is the problem.
Pick 3D Touch sensitivity if you own an older iPhone and pressure itself is the issue.
And yes, it is perfectly normal to test one setting, hate it instantly, and switch back 30 seconds later. That is not failure. That is called “using settings as intended,” which is a sentence rarely spoken with a straight face.
What if your screen still feels wrong?
If none of these settings solve the problem, the issue may not be touch sensitivity at all. Sometimes the screen is reacting badly because it is dirty, wet, blocked by a thick or poorly fitted screen protector, affected by a case, or glitching because of software or accessories.
Before assuming the hardware is failing, try a few basics: clean the display, remove the case or screen protector temporarily, disconnect charging accessories, and restart the device. If the touch response is still inconsistent, patchy, or dead in certain areas, you may be dealing with a screen problem rather than a settings problem.
That distinction matters. Accessibility settings can improve how the device interprets touch, but they cannot fix a physically damaged display. In other words, settings can help with your fingers; they cannot negotiate with broken glass.
Real-world experiences: what changing touch sensitivity actually feels like
In day-to-day use, changing touch sensitivity on an iPhone or iPad is one of those tiny adjustments that can make the whole device feel either smoother or wildly annoying. The difference is subtle on paper but obvious in your hand. That is why people often struggle to describe the problem. They do not always say, “My Haptic Touch duration is poorly configured.” They say things like, “Why does my phone suddenly feel weird?” which is honestly fair.
Take the classic long-press issue. Some users switch to a faster Haptic Touch setting and immediately feel like their iPhone got younger, caffeinated, and maybe a little smug. App menus appear faster, shortcuts feel snappier, and the device seems more responsive overall. This is especially noticeable if you use long-press actions all the time for photos, links, text selection, or quick app options. The phone is not actually smarter, of course, but it suddenly stops acting like it needs a formal written request before opening a menu.
On the flip side, people who accidentally trigger long-press menus often have the opposite experience. They try to move an app icon, rest a thumb for half a second too long, and boom, a context menu jumps out like it has been waiting backstage all day. For those users, slowing Haptic Touch down can make the device feel less fussy and more predictable. It removes that sense that the screen is always one misunderstanding away from chaos.
Touch Accommodations creates an even bigger difference for people who struggle with precise taps. Someone with shaky hands, temporary hand fatigue, or limited fine-motor control may find the standard touch settings too unforgiving. After turning on Hold Duration or Ignore Repeat, the same device can suddenly feel calmer, more patient, and far less likely to misread intent. That is not just a technical improvement. It can reduce frustration in a very real way, especially during texting, web browsing, reading, or using small interface buttons.
There is also the older-iPhone crowd, the loyal 3D Touch fans who still remember when pressing lightly versus firmly actually meant something. For them, adjusting pressure sensitivity can feel surprisingly personal. A lighter setting makes the screen feel more responsive, while a firmer setting cuts down on accidental triggers. It is a reminder that “touch” on Apple devices has never been just one thing. It is speed, pressure, timing, and interpretation all working together.
The best experience usually comes from matching the setting to the problem instead of randomly flipping switches and hoping for enlightenment. Faster is not always better. More sensitive is not always more accurate. Sometimes the perfect setup is simply the one that makes your device disappear into the background so you can stop thinking about it and just use it.
Conclusion
If you want to change touch sensitivity on an iPhone or iPad, the trick is knowing which kind of sensitivity you actually want to change. Haptic Touch controls how quickly press-and-hold actions appear. Touch Accommodations helps with accidental taps, repeated touches, and finger movement. 3D Touch sensitivity, when available on older iPhones, changes how much pressure the screen needs. Once you match the setting to the problem, your device can feel faster, calmer, and much easier to use. Small tweak, big difference, fewer arguments with glass.