
If there is one craft that managed to become practical, political, personal, and weirdly emotional all at once, it is mask-making. One minute you are folding fabric at the kitchen table, and the next minute you are debating nose wires like you are designing equipment for NASA. That is the strange magic of a good homemade mask: simple to make, surprisingly useful, and capable of turning a pile of cotton into something that feels downright heroic.
This guide walks through a surefire way to make masks that are reusable, comfortable, and more thoughtfully designed than the sad, floppy fabric rectangles that seem to have been sewn in a hurry during a power outage. We will cover what materials work best, how to improve fit, how to make a basic sewn version, how to make a quick no-sew option, and how to care for your finished masks so they do not become glorified pocket lint collectors.
Let us be clear from the jump: a homemade cloth mask is useful, but it is not a magic shield. Today’s public health guidance makes an important distinction between reusable cloth masks and higher-filtration options like N95 respirators. Still, a well-made cloth mask can be practical for everyday source control, courtesy in crowded spaces, layering over another mask in some situations, or simply keeping a reusable option in your bag, car, or travel kit. In other words, it still pays to make one well.
Why a Homemade Mask Can Still Be Worth Making
The smartest reason to make a mask is not nostalgia. It is control. When you make your own, you get to choose the fabric, the size, the ear loops, the shape, the nose fit, and the number of layers. Store-bought masks can be great, but many are either too loose, too stiff, too scratchy, too tiny, or apparently designed for a mannequin with no ears.
A good DIY mask solves real problems. It can fit your face better. It can be washed and reused. It can be made from breathable materials you already trust. It can be adjusted for kids, adults, glasses wearers, and anyone who has ever fogged up their lenses and briefly lost faith in civilization.
And perhaps most importantly, making masks gives you options. You can keep a few in rotation, stash one in your backpack, pack extras for travel, or make a batch for family members who somehow still “forget” theirs every time they leave the house.
What Makes a Good Mask?
A good mask is not just fabric with ambition. It needs four things: decent material, multiple layers, a close fit, and enough comfort that a human being will actually wear it.
1. Choose tightly woven, breathable fabric
If you are making a cloth mask, tightly woven cotton is the gold-standard starting point for most home sewers. Quilting cotton, cotton sheets, or cotton blends work well. The fabric should feel substantial without turning breathing into an Olympic event. If you hold it up to bright light and it looks like a fishnet curtain, that is your fabric politely telling you, “Absolutely not.”
2. Use multiple layers
One layer is not enough. Two layers are the baseline, and more structure can improve performance if breathability remains reasonable. The point is to block more particles while still allowing normal wear. Think of it as building a screen door for your face: sturdy enough to do the job, breathable enough not to inspire panic.
3. Prioritize fit
Fit is where many homemade masks either shine or completely fall apart. Gaps around the cheeks and nose let air leak around the edges, which defeats much of the purpose. Your mask should cover your nose and mouth completely, sit securely under your chin, and lie fairly close to the face without leaving you feeling like you are being vacuum-sealed for leftovers.
4. Add details that improve performance
A nose wire can help reduce top-edge leaks and keep glasses from fogging. Adjustable ear loops or head ties can make a massive difference. Pleats or a curved center seam can help the mask sit better across different face shapes. Tiny improvements add up fast.
The Best Materials to Gather Before You Start
For a reliable sewn mask, gather the following:
- Tightly woven cotton fabric
- Scissors
- Needle and thread or a sewing machine
- Elastic, hair ties, fabric ties, or soft cord for loops
- Pins or clips
- A flexible nose wire if you want a better fit
If you want a quick no-sew mask, you can start with a bandana, an old T-shirt, or a square cotton cloth, plus two rubber bands or hair ties. That is the “I need something practical in five minutes” version, and yes, it has saved many people from last-minute scrambling.
A Surefire Sewn Method That Actually Works
Here is a straightforward, proven approach for making a reusable cloth mask that is simple enough for beginners and solid enough for repeat use.
Step 1: Cut your fabric
Cut two rectangles of tightly woven cotton, about 10 inches by 6 inches each for an adult-sized mask. If you are making one for a child or for a smaller face, trim the dimensions down a bit. You want coverage, not a tiny decorative postage stamp.
Step 2: Stack the layers
Place the two cotton rectangles together so they behave like one piece. This creates the double-layer structure that gives a basic cloth mask more substance and usefulness than a single flimsy layer.
Step 3: Hem the long edges
Fold over the longer sides slightly and stitch them down. This cleans up the edges and helps the mask hold up after repeated washing. A mask that unravels after two laundry cycles is not a craft; it is a cry for help.
Step 4: Create side channels
Fold over the shorter sides more generously and stitch them to create channels for elastic or ties. These channels are what make the mask adjustable and wearable instead of just technically sewn.
Step 5: Add ear loops or ties
Thread elastic through each side channel to create ear loops. If you do not have elastic, use hair ties, fabric strips, or longer ties that can be secured behind the head. Soft materials matter here because nothing ruins good intentions faster than ears that feel like they are in a hostage situation.
Step 6: Adjust the fit
Gently pull the loops so the mask gathers slightly at the sides. Tie the elastic securely, tuck knots inside the channels if possible, and try it on. The mask should sit snugly over your nose and mouth and extend under your chin without obvious gaps.
Step 7: Optional but excellent upgrades
Add a nose wire along the top edge if you want a more tailored fit. You can also make the loops adjustable with small cord locks or sliding knots. If you are sewing several masks, try one pleated style and one contoured style to see which shape fits your face best. Your cheekbones may have opinions.
A No-Sew Mask for the Rest of Us
Not everyone wants to break out a sewing machine. Some people do not own one. Some people are afraid of them. Some people own one but have a long and complicated emotional history with bobbins. Fair enough.
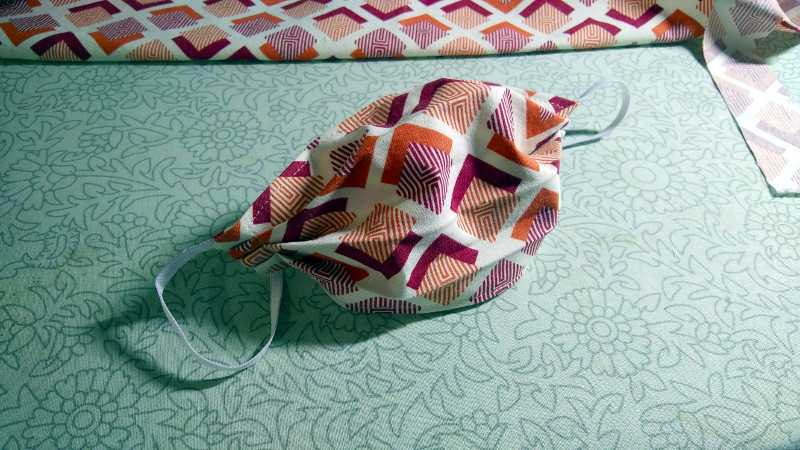
A no-sew mask can still be useful for quick, temporary use. Lay out a bandana, square cloth, or cut piece of old T-shirt. Fold the top and bottom inward toward the center, place a rubber band or hair tie on each end, fold the ends inward, and secure the folds so the loops sit around your ears. It is fast, accessible, and surprisingly decent when made from breathable, tightly woven fabric.
The catch is that no-sew masks usually fit less precisely than sewn masks, and fit matters. If the sides gape like saloon doors, adjust the folds, rework the placement of the ties, or start again with a different cloth. Five extra minutes can turn “better than nothing” into “actually wearable.”
How To Improve Fit Without Starting Over
A mask can be made from good materials and still underperform if it fits poorly. That is the annoying truth. The good news is that fit problems are often fixable.
- Add a nose wire if air leaks upward.
- Use adjustable ear loops if the mask feels loose around the cheeks.
- Choose a style that covers under the chin instead of hovering awkwardly above it.
- Make sure the mask covers both the nose and the mouth. Wearing it under the nose is not a style choice. It is just a mistake.
- If layering, a cloth mask over a disposable procedure mask can improve fit in some cases.
The simplest rule is this: if warm air is escaping all around the edges, your mask needs work. A snug fit is not about perfection. It is about reducing obvious leakage and making the mask behave more like a barrier and less like a decorative napkin.
What To Avoid
Mask-making gets much easier when you know what not to do.
Do not use single thin layers
One thin layer of fabric may be easy to breathe through, but it is not your best bet for a dependable reusable mask.
Do not use masks with valves or vents
Those features may make exhaling easier, but they also let unfiltered air move out more freely. That works against the goal of source control.
Do not keep wearing a wet or dirty mask
If your mask is damp, visibly dirty, or stretched out to the point that it hangs sadly off your face, retire it until it is washed or replaced.
Do not mistake cloth for a respirator
Homemade cloth masks can be practical, but they are not substitutes for properly fitted respirators in high-risk environments. That is an important distinction, especially when better-protection options are available and appropriate.
How To Wash, Store, and Reuse Your Mask
The easiest part of owning a cloth mask should be caring for it. Wash it regularly, ideally after a day of use. Machine washing with standard detergent works, and hand washing can also do the job. Hot water is commonly recommended for cloth mask cleaning, and letting the mask dry fully before reuse matters.
If you need to remove it temporarily, do not just cram it into a pocket, the bottom of a tote bag, or your car’s cup holder where old receipts go to die. Fold the outside inward and place it in a clean paper bag or other clean storage spot until you can wash or reuse it appropriately.
It is also smart to keep several masks in rotation. A small stack saves time, keeps you from reusing one before it is clean, and spares you from the classic household drama of everyone asking, “Has anyone seen my good mask?” as though it is a beloved family heirloom.
Why This Method Is “Surefire”
The reason this approach works is simple: it respects the basics. It uses tightly woven fabric. It includes more than one layer. It focuses on fit. It allows repeat washing. It can be made with ordinary materials. And it is easy enough that an average person can actually finish the project instead of abandoning it halfway through and converting the fabric into “future craft supplies.”
A surefire way to make masks is not about chasing perfection. It is about using sound materials and sensible design so that the finished mask is comfortable enough to wear, sturdy enough to wash, and fitted enough to be useful. That combination is what separates a practical DIY mask from a well-meaning fabric rectangle with identity issues.
Experiences and Lessons From Making Masks at Home
Anyone who has made masks at home for any length of time learns very quickly that the first one is never the masterpiece. The first one is the “learning opportunity.” It is the mask with one ear loop slightly shorter than the other, the top edge that somehow became the bottom edge, and the fit that says, “I tried my best.” Then the second mask gets better. The third one suddenly looks respectable. By the fifth, you start giving advice to other people with the confidence of someone who has been through battle and owns matching thread.
One of the most common experiences is realizing that fabric matters more than expected. A print may look adorable on the table, but if the cloth is too flimsy, too stiff, or too hot, the mask becomes decorative rather than wearable. Many people discover that soft, tightly woven cotton works not because it is glamorous, but because it behaves itself. It washes well, breathes reasonably, and does not turn your face into a sauna after ten minutes.
Another lesson is that fit is personal. The same mask pattern that works beautifully for one person can sit awkwardly on another. Some people need extra room over the nose. Others need more depth under the chin. Glasses wearers become amateur engineers overnight, experimenting with nose wires, pleats, and loop tension like they are tuning a race car. That trial-and-error process is not failure. It is how good mask-making happens.
There is also a surprisingly emotional side to making masks. During stressful times, the act of measuring, cutting, pinning, and stitching can feel calming. It is useful work. Tangible work. The kind where you can look down after an hour and say, “Well, at least this exists now.” For many people, making masks was never just about fabric. It was about doing something practical when life felt uncertain.
Then there is the social experience. Someone always asks for one in a different size. Someone else wants a softer loop. Someone insists on a particular color. Before long, your dining table starts to resemble a tiny manufacturing department with strong opinions about plaid. It is funny, but it also reveals something important: people will actually wear masks more consistently when those masks fit well and feel comfortable. Convenience is not trivial. It is the whole ballgame.
And finally, mask-making teaches a lesson every good DIY project teaches: small design choices matter. A quarter-inch seam matters. A slightly better fabric matters. A better top edge matters. Comfort matters. Washability matters. The difference between an annoying mask and a dependable one is usually not dramatic. It is made up of little improvements that work together. That is what makes the process so satisfying. You are not just making a mask. You are solving a problem one practical choice at a time.
Note: This article is a fully original rewrite based on real public-health guidance and practical mask-making information from reputable U.S. sources, adapted into publication-ready copy without source links or citation artifacts.