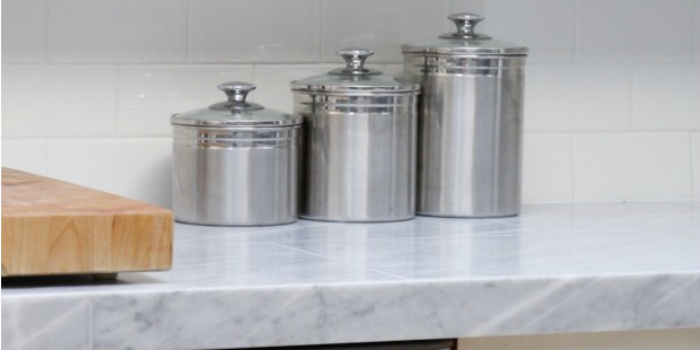
Kitchen Mini-Makeover with Affordable Tiled DIY Marble Countertops and Aged Copper Light Fixture

A kitchen does not need demolition dust, a six-figure budget, or a designer who says “visual dialogue” with a perfectly straight face. Two focused upgrades can change the room: affordable tiled DIY marble countertops and an aged copper light fixture. Marble brings pale color, natural movement, and reflected light. Copper adds warmth, texture, and the convincing suggestion that the kitchen has collected stories instead of receipts.
This pairing works because it balances cool and warm materials. It can refresh old cabinets, make basic appliances feel more intentional, and create a focal point without moving plumbing or changing the layout. The project is approachable for a careful DIYer, but it rewards planning. Mortar is patient; marble is not.
Why This Mini-Makeover Makes a Major Difference
Countertops form one of the largest visual surfaces in a kitchen, while a pendant or ceiling fixture naturally attracts attention above eye level. Updating both creates a coordinated transformation from top to bottom. The marble becomes the bright foundation, and the copper fixture prevents the room from feeling cold or overly polished.
Marble tile is often more attainable than a fabricated slab because the material comes in manageable pieces and can be installed with tile-setting tools. Large-format tiles are especially useful on counters because fewer pieces mean fewer grout joints. Fewer joints produce a calmer, more slab-like appearance and leave fewer places for crumbs to begin a new civilization.
Real marble offers unmatched variation, but marble-look porcelain is a practical alternative for busy households. Porcelain generally handles kitchen acids more easily and does not require stone sealing, although its grout still needs proper care. The choice depends on whether you prefer authentic patina or lower maintenance.
Plan the Countertop Before Mixing Anything
Measure the countertop, sink, cooktop, exposed ends, front edge, and backsplash returns. Sketch the tile layout before buying. Avoid narrow cuts in prominent areas and calculate extra tile for trimming, breakage, and future repairs.
Open several boxes and dry-lay the tiles. Natural marble varies, so mix lighter and darker pieces rather than installing one box at a time. Rotate tiles until the veins flow naturally. Photograph the arrangement and number the backs with painter’s tape. This tiny step can save the pattern from becoming an archaeological puzzle later.
Check the finished thickness of the new assembly. Plywood, backer board, mortar, and tile can raise the counter. Confirm that the dishwasher can still be removed, the range will sit at a comfortable height, and the faucet has adequate clearance.
Essential Countertop Materials
- A manufacturer-approved plywood base and cement backer board
- Backer-board screws, alkali-resistant mesh tape, and compatible mortar
- Marble tile or marble-look porcelain tile
- Spacers, level, straightedge, notched trowel, grout float, and wet saw
- Grout, flexible color-matched sealant, and appropriate sealer
- Bullnose tile, stone trim, metal profile, or sealed wood for the front edge
How to Install Affordable Tiled DIY Marble Countertops
1. Build a Rigid, Flat Base
Tile needs support. Flexing substrates can cause cracked grout, loose tiles, or fractured stone. Remove swollen particleboard, failing laminate, and water-damaged material instead of hiding it under an expensive-looking surface.
Install a sturdy base and cement backer board according to the board manufacturer’s countertop instructions. Bed the backer board in the recommended mortar, fasten it with approved screws, and reinforce its seams with alkali-resistant mesh tape. Keep the surface flat; tile cannot politely ignore a roller-coaster foundation.
2. Decide the Edge and Sink Details Early
Plan the front edge before setting the field tile. Matching bullnose, stone trim, a metal profile, or sealed hardwood can protect the layers and create a finished appearance. A drop-in sink is usually easier for a tiled counter because its rim covers the cut edge. Seal the sink opening carefully and follow the sink manufacturer’s support requirements.
3. Set the Marble with the Right Mortar
Use white thinset mortar approved for natural stone. Dark mortar may affect the appearance of pale or slightly translucent marble. Spread mortar with the flat side of the trowel first, then comb straight, even ridges with the notched side.
Press each tile into place with a slight sliding motion. Use a straightedge often to minimize lippage, the height difference between neighboring tiles. A countertop should be as even as practical so glasses stay upright and rolling pins do not develop travel plans.
4. Keep Grout Joints Narrow and Visually Quiet
Choose a grout color close to the marble’s main tone when you want a continuous look. Contrasting grout emphasizes the grid and can suit a retro design, but it makes the tiled construction more obvious.
Use the grout type recommended for the joint width and stone finish. Test it on spare tile because pigments can affect porous marble. Pre-seal the stone when required, work in small sections, and avoid flooding the joints with an overly wet sponge.
5. Caulk Movement Joints and Seal Correctly
Use flexible sealant where the countertop meets the backsplash, wall, sink, or another change of plane. Rigid grout in these locations is more likely to crack as materials move slightly.
After the installation has cured, apply a penetrating sealer suitable for the marble, grout, and food-preparation area. Sealing improves stain resistance; it does not make marble stain-proof or prevent acid etching.
Living with Marble Without Becoming Its Full-Time Assistant
Marble reacts with acids. Lemon juice, vinegar, tomato sauce, wine, and some household cleaners can dull the finish. Wipe spills promptly, use cutting boards, and clean with a soft cloth and a pH-neutral stone cleaner or approved mild soap.
Resealing frequency depends on the stone, product, and amount of use. Follow the manufacturer’s directions and watch how water behaves. If water darkens the stone quickly instead of remaining on the surface, protection may need refreshing.
How to Make an Aged Copper Light Fixture
Start with a Safe Fixture
Use a listed light fixture or pendant kit in good condition. The safest makeover is to age only a removable copper shade or decorative metal component. Do not apply patina liquid, paint, or clear coating to sockets, wiring, insulation, connectors, labels, or internal electrical parts.
If the shade is plated rather than solid copper, test the finish first. A layered faux treatment using copper paint, darker glaze, and selective highlights may be more predictable than a chemical patina.
Create an Irregular, Believable Patina
Remove the shade, wash away grease, and handle the clean surface with gloves. Lightly scuff it if the chosen finish requires better adhesion. A vinegar-and-salt method can encourage blue-green color on real copper, while commercial products offer darker or more controlled effects. Follow product instructions, ventilate the area, wear appropriate protection, and test a hidden spot.
Build color gradually. Darken recesses and leave some warm copper visible on edges. Perfectly even aging looks suspiciously new. Once the finish is dry, add a compatible clear coat if you want to slow further change and reduce residue.
Install It with Electricity Fully Off
Turn off the circuit at the breaker and confirm that power is absent with a voltage tester. Make sure the electrical box is secure and rated for the fixture. Follow the manufacturer’s wiring, grounding, hardware, bulb, and wattage instructions.
Call a licensed electrician if the box is loose, the wiring is damaged, grounding is unclear, or a new circuit is required. A moody copper pendant is charming. A moody copper pendant that makes the ceiling buzz is a plot twist nobody ordered.
Make Marble and Copper Look Intentional
Repeat each finish once or twice rather than everywhere. Copper cabinet knobs, a utensil rail, or a warm-toned frame can connect the light to the lower half of the room. A small marble tray can echo the countertop. Warm white bulbs flatter copper and keep pale stone from appearing icy.
Soft white, putty, charcoal, muted green, navy, and natural oak all work well with this combination. If the marble has strong veining, keep the backsplash and accessories restrained. The toaster does not need to compete for the lead role.
Common Mistakes Worth Avoiding
- Skipping the dry layout and ending with tiny, visible cuts
- Installing tile over a flexible or moisture-damaged base
- Using too many small tiles and creating excessive grout lines
- Choosing dark mortar beneath pale natural stone
- Using grout instead of flexible sealant at changes of plane
- Assuming sealer protects marble from acidic etching
- Applying aging chemicals while the light is assembled
- Ignoring appliance clearance after increasing counter thickness
Experience Notes from a Typical DIY Mini-Makeover
The first lesson is that “mini” describes the kitchen, not the number of hardware-store visits. A representative project often begins with a confident weekend schedule. Then the old counter comes off and reveals a warped corner beside the sink. Fixing that problem feels like a delay, but it is cheaper and easier than repairing cracked grout after the new surface is finished.
Dry-laying the marble becomes the creative highlight. At first, the tiles seem interchangeable. Soon, one piece clearly belongs beside the sink, two veins connect beautifully, and another tile looks as if a gray lightning bolt became trapped inside it. Photographing and numbering the arrangement preserves those decisions once mortar is mixed and enthusiasm becomes less organized.
Cutting natural stone provides another reality check. The first cut may chip because it was rushed. The next is slower and cleaner. Extra tile turns mistakes into practice rather than emergencies. It also helps to accept that wet-saw slurry possesses mysterious powers and will reach clothing that was nowhere near the blade.
Grouting creates the project’s brief crisis. The marble looks cloudy, the joints seem darker than expected, and the sponge appears to move grout around without removing it. Working in small sections, wringing the sponge thoroughly, and respecting the manufacturer’s timing usually restores order. Once the haze is polished away, the separate tiles finally read as a unified counter.
The copper fixture delivers faster gratification. A plain shade gains depth after selective aging, but the strongest result often comes from stopping early. Leaving bright copper on the rim and high points suggests natural wear. Overworking the finish can make the shade look painted rather than old, much like adding so many filters to a photograph that everyone resembles a decorative candle.
Centering and bulb choice matter more than expected. A fixture that sits a few inches off-center over a sink can look accidental, while a warm bulb brings out amber tones in the copper and softens the marble. When the light is switched on, the two projects begin to feel like one design rather than unrelated weekend activities.
Living with the makeover teaches the final lesson: habits protect the work. A cutting board near the coffee station catches drips. A soft towel handles spills before they settle into grout. The marble may develop subtle signs of use, and unsealed copper may continue changing. For many homeowners, that evolution is part of the reward. The kitchen feels personal, collected, and comfortably imperfect.
Conclusion
Affordable tiled DIY marble countertops and an aged copper light fixture can transform a kitchen without changing its footprint. The countertop adds brightness and natural movement; the fixture supplies warmth and a focal point. A durable result depends on a rigid substrate, thoughtful tile layout, compatible materials, realistic marble care, controlled patina work, and careful electrical safety.
Note: Follow every product manufacturer’s instructions. Requirements vary for tile, mortar, grout, sealer, backer board, sinks, patina products, coatings, and light fixtures. Use a licensed electrician whenever existing wiring or fixture support is uncertain.