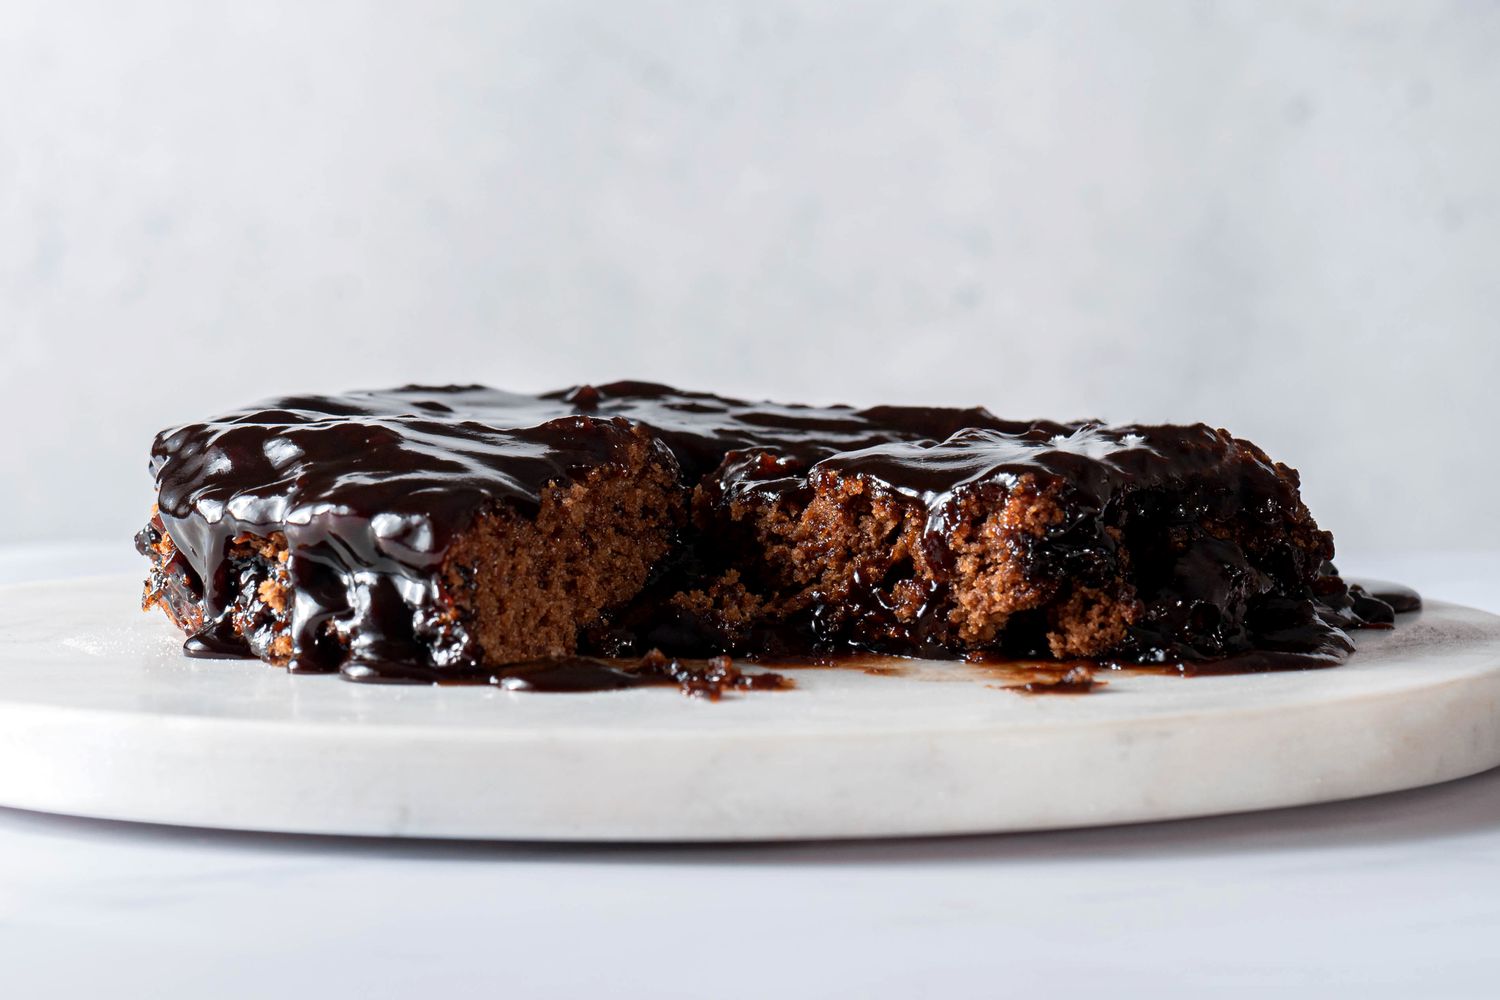

Chocolate upside down cake is what happens when a classic chocolate cake decides to put on a dramatic cape, flip itself over, and reveal a glossy, gooey, caramel-like topping that was hiding underneath the whole time. It has the charm of an old-fashioned upside-down cake, the richness of a homemade chocolate dessert, and the satisfying “ta-da!” moment of turning a pan over and hoping the cake gods are in a generous mood.
This recipe gives you a soft, moist chocolate cake baked over a buttery brown sugar topping with coconut, pecans, and chocolate chips. When inverted, the bottom becomes the top, creating a fudgy, slightly chewy, candy-like layer that makes frosting unnecessary. Translation: less decorating, more eating. That is the kind of kitchen math we can all support.
Whether you are baking for a birthday, Sunday dinner, potluck, holiday table, or a random Tuesday when your sweet tooth is filing formal complaints, this chocolate upside down cake recipe delivers big flavor with simple pantry ingredients. It is easy enough for beginners but impressive enough to make guests ask, “Did you buy this?” Say no. Say it proudly. Maybe toss a little flour on your cheek for effect.
What Is Chocolate Upside Down Cake?
A chocolate upside down cake is a one-pan dessert where the topping is placed in the bottom of the pan before the cake batter goes in. As the cake bakes, butter and brown sugar melt into a syrupy layer, nuts toast gently, coconut becomes chewy, and chocolate chips soften into little pockets of richness. After a short cooling time, the cake is flipped onto a platter so the topping becomes the glossy top.
Classic pineapple upside-down cake uses fruit, butter, and brown sugar. This chocolate version follows the same basic idea but swaps the tropical fruit topping for a deeper, dessert-shop flavor profile. Think German chocolate cake energy, brownie sundae confidence, and sheet cake convenience all sharing the same delicious parking space.
Why You Will Love This Chocolate Upside Down Cake Recipe
It Does Not Need Frosting
The topping creates its own rich finish, so there is no need to make buttercream, ganache, or a fancy glaze. Once flipped, the cake already looks dressed for the party.
It Uses Simple Ingredients
You do not need rare chocolate, specialty flour, or a stand mixer powerful enough to launch a satellite. Flour, cocoa powder, sugar, eggs, milk, oil, butter, brown sugar, coconut, pecans, and chocolate chips do the work beautifully.
It Is Moist, Gooey, and Crowd-Friendly
The cake layer is tender and chocolatey, while the topping adds texture and sweetness. It slices well, travels well, and tastes like something Grandma might have made if Grandma had a flair for dessert drama.
Ingredients for Chocolate Upside Down Cake
For the Topping
- 1/2 cup unsalted butter, melted
- 1 cup packed light brown sugar
- 1/4 cup hot water
- 1 cup sweetened shredded coconut
- 3/4 cup chopped pecans or walnuts
- 1 cup semisweet chocolate chips
- 1/4 teaspoon salt
For the Chocolate Cake Batter
- 1 3/4 cups all-purpose flour
- 3/4 cup unsweetened cocoa powder
- 1 1/2 cups granulated sugar
- 1 1/2 teaspoons baking powder
- 1 teaspoon baking soda
- 1/2 teaspoon salt
- 2 large eggs, room temperature
- 1 cup whole milk or buttermilk
- 1/2 cup vegetable oil
- 2 teaspoons vanilla extract
- 3/4 cup hot coffee or hot water
Ingredient Notes and Smart Substitutions
Cocoa Powder
Unsweetened cocoa powder gives the cake its deep chocolate flavor. Natural cocoa powder works well, but Dutch-process cocoa can give the cake a darker color and smoother flavor. If you use Dutch-process cocoa, keep the baking powder and baking soda in the recipe because the combination helps support the cake’s rise.
Hot Coffee or Hot Water
Hot liquid helps cocoa powder dissolve and bloom, which makes the chocolate flavor more intense. Coffee is a classic trick because it makes chocolate taste richer without making the cake taste like a cup of morning motivation. If you are baking for kids or caffeine-sensitive guests, use hot water or decaf coffee.
Oil Instead of Only Butter
Vegetable oil keeps chocolate cake moist because it stays liquid at room temperature. Butter brings flavor, but oil gives the crumb that soft, plush texture people secretly judge cakes by. In this recipe, butter shines in the topping while oil keeps the cake tender.
Coconut and Nuts
Sweetened shredded coconut creates chewiness and a slight toasted flavor. Pecans or walnuts add crunch and balance the sweetness. If you need a nut-free version, simply leave out the nuts and add an extra 1/2 cup coconut or 1/2 cup chocolate chips.
Recommended Equipment
- 9-by-13-inch baking pan
- Large mixing bowl
- Medium mixing bowl
- Whisk or hand mixer
- Rubber spatula
- Rimmed serving platter or baking sheet for flipping
- Toothpick or cake tester
A 9-by-13-inch pan is ideal because it gives the cake room to bake evenly and makes enough servings for a group. Use a rimmed platter or tray when flipping because the topping can be glossy and slightly loose while warm. A flat plate with no rim is brave. Too brave.
How to Make Chocolate Upside Down Cake
Step 1: Prepare the Pan
Preheat the oven to 350°F. Grease a 9-by-13-inch baking pan well. For extra insurance, lightly dust the sides with cocoa powder instead of flour. Cocoa powder prevents pale flour streaks and keeps the chocolate appearance rich.
Step 2: Make the Gooey Topping
Pour the melted butter into the prepared pan. Sprinkle the brown sugar evenly over the butter. Add the hot water and gently tilt the pan to help everything spread. Sprinkle the coconut, chopped pecans, chocolate chips, and salt over the brown sugar mixture.
Do not stir everything into a paste. Layering helps the topping bake into different textures: syrupy sugar, chewy coconut, melty chocolate, and toasted nuts. Basically, the bottom of the pan becomes a tiny dessert construction site.
Step 3: Mix the Dry Ingredients
In a large bowl, whisk together the flour, cocoa powder, granulated sugar, baking powder, baking soda, and salt. Whisking matters because cocoa powder loves to clump. It is basically the glitter of the baking aisle: beautiful, dramatic, and somehow everywhere.
Step 4: Add the Wet Ingredients
Add the eggs, milk or buttermilk, vegetable oil, and vanilla extract to the dry ingredients. Mix on medium speed for about 1 to 2 minutes, or whisk by hand until the batter is mostly smooth. Scrape the sides and bottom of the bowl so no dry pockets remain.
Step 5: Add Hot Coffee or Hot Water
Slowly pour in the hot coffee or hot water while mixing on low speed. The batter will become thin. This is normal. A thin chocolate cake batter often bakes into a moist, tender crumb, so resist the urge to add more flour. Trust the process. The cake knows where it is going.
Step 6: Pour and Bake
Carefully pour the batter over the topping in the pan. Use a spatula to spread it evenly without disturbing the bottom layer too much. Bake for 38 to 45 minutes, or until a toothpick inserted into the cake layer comes out with a few moist crumbs but no wet batter.
Step 7: Cool Briefly, Then Flip
Let the cake cool in the pan for 8 to 10 minutes. This short rest allows the topping to settle while still staying warm enough to release. Run a thin knife around the edges. Place a large rimmed platter or baking sheet over the pan, hold both firmly, and flip in one confident motion.
Let the pan sit upside down for 1 minute before lifting it away. If a few bits of topping remain in the pan, spoon them back onto the cake. This is not a mistake. This is rustic charm with a spatula.
How to Know When the Cake Is Done
Chocolate cake can be tricky because the color does not change dramatically as it bakes. Look for these signs:
- The top of the cake springs back lightly when touched.
- The edges begin to pull slightly from the sides of the pan.
- A toothpick inserted into the cake layer comes out with moist crumbs.
- The center does not jiggle when the pan is gently moved.
Avoid overbaking. The topping will continue to thicken slightly as the cake cools, and the cake layer should stay soft. Dry chocolate cake is a tragedy, and we are not running a tragedy bakery today.
Expert Tips for the Best Chocolate Upside Down Cake
Use Room-Temperature Eggs
Room-temperature eggs blend more smoothly into the batter. If you forgot to take them out, place the eggs in a bowl of warm water for 5 minutes.
Measure Flour Correctly
Spoon flour into the measuring cup and level it off with a knife. Scooping directly from the bag can pack in too much flour, making the cake heavy.
Do Not Wait Too Long to Flip
If the cake cools completely in the pan, the brown sugar topping can firm up and stick. Flip while it is warm, usually after 8 to 10 minutes.
Use a Rimmed Platter
The topping may release a little syrup. A rimmed serving tray prevents a chocolate-caramel escape mission across your counter.
Add Salt to Balance Sweetness
A small amount of salt in both the cake and topping makes the chocolate taste deeper and keeps the dessert from becoming flatly sweet.
Flavor Variations
German Chocolate Upside Down Cake
Use coconut and pecans in the topping, then add 1/2 cup evaporated milk to the brown sugar mixture for a richer, German chocolate-inspired flavor. The result is gooey, nutty, and dangerously easy to eat with a fork directly from the pan.
Chocolate Cherry Upside Down Cake
Add 1 1/2 cups pitted cherries over the brown sugar layer before pouring in the batter. Cherries bring tartness and make the cake taste like a Black Forest dessert without the layer-cake workload.
Chocolate Pear Upside Down Cake
Arrange thinly sliced pears over the butter and brown sugar layer, then sprinkle with chocolate chips. Pears become soft and fragrant as they bake, adding an elegant twist.
Mocha Upside Down Cake
Use hot coffee in the batter and add 1 teaspoon espresso powder to the dry ingredients. This variation makes the chocolate flavor bolder without turning the cake into a coffee dessert.
Nut-Free Chocolate Upside Down Cake
Skip the pecans and use extra coconut, chocolate chips, or even crushed pretzels for crunch. Pretzels add a salty twist that works surprisingly well with the sweet topping.
Serving Ideas
Chocolate upside down cake is delicious warm, room temperature, or slightly chilled. For a classic presentation, serve it with a dollop of whipped cream. For a richer dessert, add vanilla ice cream and let it melt into the warm topping. If you want to be fancy without doing fancy work, dust the plate with cocoa powder or add fresh raspberries.
This cake also pairs beautifully with coffee, cold milk, hot tea, or a glass of red wine if you are serving it after dinner. For parties, cut the cake into squares and place each piece in a cupcake liner for easy serving. It is the kind of dessert that disappears quietly at first, then suddenly everyone is asking who took the last piece.
How to Store Chocolate Upside Down Cake
Store leftover cake in an airtight container at room temperature for up to 1 day if your kitchen is cool. For longer storage, refrigerate it for 3 to 4 days. Because the topping is moist and rich, refrigeration helps maintain quality and food safety.
To reheat, microwave individual slices for 10 to 15 seconds. You can also warm slices in a 300°F oven for about 8 minutes. If the cake seems dry after refrigeration, add a small scoop of ice cream and suddenly everyone will stop asking questions.
Can You Freeze Chocolate Upside Down Cake?
Yes, but the texture of the topping may change slightly after thawing. To freeze, cool the cake completely, cut it into individual portions, wrap each piece tightly, and place the slices in a freezer-safe container. Freeze for up to 2 months for the best flavor.
Thaw overnight in the refrigerator and warm gently before serving. Freezing individual slices is smart because it lets you enjoy one piece at a time instead of confronting an entire cake at midnight. We have all been there. No judgment, only storage advice.
Common Mistakes to Avoid
Using Too Small of a Pan
A smaller pan can overflow as the cake rises. Use a 9-by-13-inch pan unless you are adjusting the recipe carefully.
Overmixing the Batter
Mix until combined, then stop. Overmixing develops gluten, which can make the cake tough instead of tender.
Skipping the Cooling Window
Flipping immediately can make the topping run too much. Waiting too long can make it stick. The sweet spot is about 8 to 10 minutes.
Forgetting to Loosen the Edges
A quick pass around the pan with a knife helps the cake release cleanly. It takes 10 seconds and can save your dessert from looking like abstract art.
Frequently Asked Questions
Can I use boxed cake mix?
Yes. Prepare a chocolate cake mix according to the package directions, then pour it over the homemade topping. Bake according to the package timing, checking for doneness near the end. The scratch version has deeper flavor, but the boxed version is great when time is short.
Can I make this cake ahead of time?
Yes. Bake it earlier in the day, keep it covered, and serve at room temperature or lightly warmed. For the best texture, make it no more than one day ahead.
Can I leave out the coconut?
Absolutely. Replace it with more nuts, chocolate chips, crushed graham crackers, or leave the topping simpler with butter, brown sugar, and chocolate.
Why did my topping stick to the pan?
The cake may have cooled too long before flipping, or the pan may not have been greased well. Next time, grease the pan carefully and invert the cake while the topping is still warm.
Why is my cake too dense?
Dense cake can come from too much flour, expired leavening, or overmixing. Measure flour lightly, check your baking powder and baking soda, and mix only until the batter comes together.
Personal Baking Experience: What This Cake Teaches You
Making chocolate upside down cake is one of those baking experiences that feels more dramatic than it actually is. The first time you make it, the flip may feel like a tiny kitchen stunt. You stand there with the pan in one hand, the platter in the other, mentally reviewing every life choice that led to this moment. Then you flip it, lift the pan, and there it is: a shiny chocolate-coconut topping that looks like you worked much harder than you did.
One of the best lessons this recipe teaches is patience, but not too much patience. Most cakes want to cool before you touch them. Upside down cakes are different. They need a short rest, then action. Wait just long enough for the topping to settle, but not so long that the brown sugar turns into edible glue. Once you understand that timing, the recipe becomes much less intimidating.
This cake is also forgiving. If the topping does not release perfectly, you can patch it. Spoon the stuck bits back over the top, spread them gently, and call it homemade texture. In real kitchens, desserts rarely look like magazine covers without a food stylist hiding nearby with tweezers and suspiciously perfect lighting. What matters is flavor, and this cake has plenty.
The combination of chocolate cake, brown sugar, coconut, nuts, and chocolate chips creates a dessert that tastes nostalgic even if you did not grow up eating it. It has the comfort of a church supper cake, the richness of a bakery brownie, and the fun of a recipe that ends with a reveal. People enjoy desserts that feel interactive, and this one gives you a moment of suspense before the first slice is even served.
Another useful experience is learning how hot liquid changes chocolate cake batter. When hot coffee or water goes into the cocoa mixture, the batter may look thin, almost too thin. New bakers often panic here, but thin batter can produce a wonderfully moist cake. After baking, the crumb sets into a soft, tender layer that contrasts beautifully with the chewy topping. Once you see the result, you become less afraid of loose cake batter in future recipes.
This chocolate upside down cake is especially good for gatherings because it is casual but memorable. You do not need to pipe frosting, level layers, or transport a towering cake like it is a fragile museum exhibit. Bake it, flip it, slice it, and serve. It also holds well for a few hours, which makes it friendly for potlucks and family dinners where the exact dessert time depends on how long everyone talks after the main course.
From a flavor standpoint, the cake invites creativity. If you like a deeper chocolate profile, use coffee. If you prefer a sweeter, candy-like dessert, add extra chocolate chips. If you want a more grown-up version, try toasted pecans and a pinch of espresso powder. If you want something playful, serve it warm with vanilla ice cream and watch the topping melt into the scoop like a chocolate caramel sauce.
The biggest practical takeaway is this: prepare your serving platter before the cake comes out of the oven. Do not wait until the cake is cooling to start hunting for a tray while wearing oven mitts and whispering mild threats at your cabinets. Choose a platter larger than the pan, preferably with a rim, and keep it nearby. Future you will be grateful.
In the end, chocolate upside down cake is more than a recipe. It is a reminder that homemade desserts do not have to be perfect to be wonderful. A little gooey topping, a soft chocolate crumb, and a confident flip can turn basic ingredients into something that feels special. And if anyone asks for your secret, tell them it is courage, cocoa powder, and knowing exactly when to turn the cake upside down.
Conclusion
This chocolate upside down cake recipe is rich, moist, simple, and just dramatic enough to make baking feel exciting. The buttery brown sugar topping melts into coconut, pecans, and chocolate chips, while the soft chocolate cake bakes above it. Flip the cake while warm, and you get a glossy dessert that needs no frosting and very little fuss.
It is a great recipe for beginner bakers, chocolate lovers, potluck heroes, and anyone who wants a homemade cake that looks impressive without demanding a pastry degree. Serve it warm with whipped cream or ice cream, store leftovers properly, and do not be surprised when people ask for the recipe before they have finished chewing.
SEO Tags