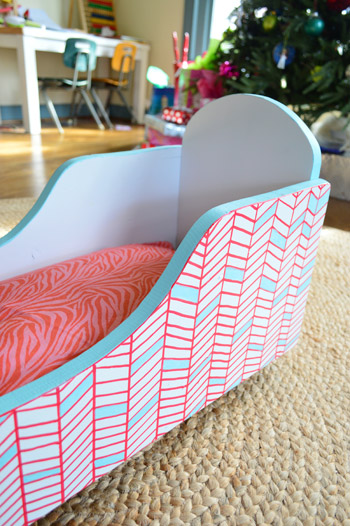

Painting a chevron pattern on wood is one of those DIY projects that looks fancy enough to make guests say, “Wait, you did that?” while secretly being very doable with painter’s tape, patience, and a healthy respect for measuring twice. Whether you are updating a wooden tray, dresser drawer, tabletop, headboard, cabinet panel, sign, or scrap-wood wall art, a chevron design can turn a plain surface into a bold, graphic focal point.
The magic of a painted chevron pattern is contrast. Those repeating V-shaped stripes add movement, rhythm, and just enough drama without requiring professional art skills. The trick is not having a “perfect painter’s hand.” The trick is good surface prep, accurate layout, clean tape lines, thin coats of paint, and not yanking off the tape like you are starting a lawn mower.
This guide walks you through how to paint a chevron pattern on wood from start to finish, including sanding, priming, measuring, taping, painting, sealing, troubleshooting, and real-world experience tips. Grab your ruler. The wood is about to get a personality.
What Is a Chevron Pattern?
A chevron pattern is a repeated zigzag made from connected V shapes. Unlike a simple stripe, chevron has angled points that meet in the middle, creating a sharp, energetic design. On wood, it works especially well because the pattern can either contrast with the natural grain or completely transform an old painted surface.
Chevron is often confused with herringbone. Both use angled lines, but they are not the same. Chevron pieces meet at clean points, forming a continuous V. Herringbone has staggered rectangular sections that break at the joints. For painting, chevron is usually easier because you can create it with straight painter’s tape lines across a measured grid.
Best Wood Projects for a Painted Chevron Design
You can paint a chevron pattern on many wood surfaces, but flat or mostly flat projects are easiest. A wooden tabletop, dresser front, tray, cabinet door, bookshelf back panel, wall sign, toy chest lid, stool top, or plank board makes a great beginner project. If the wood has heavy grooves, deep grain, raised trim, or carved details, you can still paint it, but expect more touch-ups because tape does not seal as neatly on uneven surfaces.
For your first attempt, choose a small or medium flat piece. A wooden tray is a forgiving starter project. If your first chevron line wiggles a little, you can call it “handcrafted character” and move on with your life.
Tools and Materials You Will Need
Before you start painting, gather everything in one place. Nothing ruins the DIY mood quite like walking around with wet paint on your fingers while searching for scissors.
Basic Supplies
- Wood piece or furniture surface
- Mild soap or cleaner/degreaser
- Clean rags or tack cloth
- Sandpaper or sanding sponge, usually 150- to 220-grit
- Wood filler, if needed
- Primer suitable for wood
- Interior acrylic latex paint, enamel paint, chalk-style paint, or furniture paint
- Painter’s tape, preferably a quality tape made for clean lines
- Ruler, yardstick, or measuring tape
- Pencil
- Level or straightedge
- Small foam roller or high-quality paintbrush
- Craft knife or utility knife
- Clear protective topcoat, such as water-based polyurethane or polycrylic
- Drop cloth
Choosing the Right Paint
For most indoor wood projects, acrylic latex paint, cabinet paint, furniture paint, or chalk-style paint works well. A satin or semi-gloss finish is easier to wipe clean than flat paint, which matters if you are painting a tabletop, tray, dresser, or anything that will be touched regularly. For outdoor wood, choose exterior-rated primer, paint, and sealer.
If your wood surface will see heavy use, such as a coffee table or desk, durability matters more than the cutest paint name on the shelf. “Moonlit Marshmallow” may sound delightful, but it still needs a protective clear coat if coffee mugs, keys, and daily life are going to attack it.
Step 1: Clean the Wood Surface
Start by cleaning the wood thoroughly. Paint does not stick well to dust, grease, wax, furniture polish, or mystery grime from the year 2009. Use mild soap and water for lightly dirty surfaces. For furniture, cabinets, or previously handled wood, use a cleaner or degreaser. Wipe the surface clean and let it dry completely.
This step is especially important for old furniture. Dressers, tables, and cabinet doors often hold oils from hands, cleaning sprays, and waxy residues. If you skip cleaning, your paint may peel later, and your beautiful chevron pattern may become a sad abstract flake festival.
Step 2: Sand for Better Paint Adhesion
Lightly sand the wood to dull glossy surfaces and smooth rough areas. For most painted or stained wood, 150- to 220-grit sandpaper is a good range. Sand with the grain when possible. You are not trying to grind the wood into dust; you are creating a slightly rough surface so primer and paint can grip.
If the wood has old peeling paint, remove loose areas first. If it has dents or holes, fill them with wood filler, let the filler dry, and sand smooth. After sanding, wipe everything with a tack cloth or damp rag and allow the surface to dry.
Step 3: Prime the Wood
Primer creates a stable base for your paint and helps prevent uneven absorption, especially on raw wood. It also improves coverage when you are painting over dark stain, old paint, or patchy surfaces. Apply a thin, even coat of primer with a brush or foam roller. Let it dry according to the product instructions.
For a smoother finish, lightly sand the dried primer with fine-grit sandpaper, then wipe away the dust. This small extra step can make the final chevron pattern look cleaner and more professional. It is not glamorous, but neither is flossing, and both are worth doing.
Step 4: Paint the Base Color
Choose one color as your base. This is the color that will show between the painted chevron stripes. Apply one or two thin coats, allowing each coat to dry fully. Thin coats are better than thick coats because they dry more evenly and reduce brush marks.
White, cream, gray, black, navy, and natural wood tones all work beautifully as base colors. For a rustic farmhouse look, use white and gray. For a modern look, try black and warm wood. For a kids’ room or craft project, go bright with coral, teal, yellow, or green.
Let the base coat cure long enough before taping. Dry paint is not always cured paint. If you tape too soon, the painter’s tape may pull up the base color. When in doubt, wait at least 24 hours before taping, especially on furniture or glossy surfaces.
Step 5: Plan the Chevron Layout
This is where many DIYers start sweating, but the layout is simpler than it looks. A chevron pattern is built from a grid. The grid helps you keep the V shapes consistent.
Simple Chevron Measuring Method
- Measure the width and height of your wood surface.
- Decide how wide each chevron stripe should be.
- Mark evenly spaced vertical lines across the surface.
- Mark evenly spaced horizontal rows from top to bottom.
- Use the grid intersections to guide your diagonal tape lines.
For a small tray, you might mark vertical lines every 2 inches and horizontal rows every 2 inches. For a dresser drawer or tabletop, 3- to 4-inch spacing may look better. Wider spacing gives a bold, modern pattern. Narrow spacing creates a busier, more decorative look.
Use a pencil and a light hand. You want guide marks, not archaeological carvings. If you are painting a light base color, use faint pencil marks so they do not show through.
Step 6: Tape the Chevron Pattern
Apply painter’s tape along the diagonal lines of your grid to form repeating V shapes. Press the tape down firmly as you work. The tape should meet cleanly at the points of each V. Use a craft knife and straightedge to trim tape ends for sharp corners.
Remember that the tape itself takes up space. If you want the painted stripes and base stripes to be the same width, place the tape carefully on the “outside” of the areas you plan to paint. It helps to mark tiny Xs in the sections that will receive the second color, so you do not accidentally paint the wrong stripe. Chevron patterns can play tricks on tired eyes.
Pro Tip: Seal the Tape Edges
To reduce paint bleed, seal the tape edges before painting the chevron color. One common method is to paint a very thin coat of the base color along the tape edge first. If any paint seeps under the tape, it will be the base color, not the contrasting stripe color. Let that sealing coat dry, then apply the chevron color.
This is one of the best tricks for getting crisp lines on wood, especially if the grain is slightly open or uneven. Wood fibers can invite paint under the tape like they are hosting a tiny paint party. Sealing the edge politely shuts the door.
Step 7: Paint the Chevron Stripes
Apply the chevron stripe color in thin coats. Use a foam roller for flat surfaces or a good brush for smaller areas. Paint away from the tape edge when possible instead of pushing paint into it. This helps reduce bleeding.
Do not overload the brush or roller. Heavy paint buildup along tape edges can create ridges and increase the chance of peeling when the tape comes off. Two thin coats usually look better than one thick coat. Let the first coat dry as directed, then apply the second coat if needed.
Step 8: Remove the Painter’s Tape Carefully
Remove the tape when the paint is dry to the touch but not rock-hard. Pull slowly back over itself at about a 45-degree angle. If the paint has dried too much and seems like it might lift, lightly score along the tape edge with a sharp craft knife before peeling.
This is not the moment for speed. Peel like you are defusing a tiny decorative bomb. Slow, steady removal gives cleaner edges and fewer chips.
Step 9: Touch Up the Pattern
Even with careful taping, you may find a few tiny bleeds or uneven points. Do not panic. Small touch-ups are normal. Use a small artist’s brush to sharpen corners, cover bleeds, or fix a broken line. Step back often while touching up. What looks dramatic from six inches away may be invisible from across the room.
If a line is badly uneven, let the paint dry fully, retape that section, and repaint. Chevron is bold, so clean geometry matters, but perfection is not required. Handmade work should look polished, not manufactured by a robot with control issues.
Step 10: Seal the Painted Wood
Once the paint is fully dry, protect the surface with a clear topcoat. A water-based polyurethane or polycrylic sealer is a popular choice for painted indoor wood because it dries clear and is easy to clean up. Apply thin coats with a quality brush or foam applicator, following the manufacturer’s instructions.
For furniture, trays, tabletops, and high-touch surfaces, apply two or three thin coats. Lightly sand between coats if the product directions recommend it. Let the final coat cure before heavy use. Dry to the touch does not mean ready for keys, coffee cups, elbows, and children with stickers.
Design Ideas for Chevron Patterns on Wood
Classic Two-Color Chevron
A classic two-color design is the easiest and most timeless. Try white and gray, navy and white, black and natural wood, sage and cream, or charcoal and tan. This style works well on dressers, wood signs, tabletops, and trays.
Natural Wood and Painted Chevron
If your wood grain is attractive, leave it as one “color” in the pattern. Stain or seal the wood first, let it dry, then tape and paint only the chevron stripes. The contrast between natural grain and solid paint gives the piece warmth and character.
Ombre Chevron
For a more artistic project, paint each row of chevrons in a slightly different shade. Start dark at the bottom and fade lighter toward the top. This works especially well on wall art, headboards, and decorative panels.
Metallic Chevron
Metallic gold, bronze, or silver paint can look stunning in small doses. Use metallic chevron stripes on a tray, jewelry box, or accent panel. Keep the base color simple so the metallic finish does not feel too busy.
Common Mistakes to Avoid
Skipping Surface Prep
Cleaning and sanding are not optional if you want the paint to last. Smooth, glossy, dirty, or waxy wood can cause adhesion problems. Prep is the unglamorous hero of painting.
Using Cheap Tape
Low-quality tape may not seal well and can leave fuzzy edges. For a geometric pattern like chevron, sharp lines matter. Use painter’s tape designed for clean removal and crisp paint edges.
Painting Too Thickly
Thick coats cause ridges, drips, long drying times, and messy tape removal. Use thin coats and build coverage gradually.
Removing Tape Too Aggressively
Fast tape removal can pull up paint or tear the edge. Peel slowly at an angle. Your future self will thank you.
Forgetting to Seal the Surface
If the wood will be touched, moved, wiped, or used, seal it. Decorative wall art may not need much protection, but furniture and trays definitely do.
Experience Notes: What I Learned Painting Chevron Patterns on Wood
The first thing experience teaches you about painting a chevron pattern on wood is that measuring is not the enemy. It is the friend who keeps you from making one stripe skinny, one stripe chunky, and one stripe that looks like it took a wrong turn near Albuquerque. On a small project, it is tempting to eyeball everything. Sometimes that works for a rustic, handmade look. But for a clean chevron pattern, a simple pencil grid saves time, paint, and emotional stability.
Another lesson is that wood grain matters. Smooth plywood, MDF, and sanded furniture panels usually create sharper tape lines than rough pine or reclaimed boards. Rough wood can still look beautiful, but the finished chevron pattern may have softer edges. If you want crisp, modern lines, spend extra time sanding and sealing. If you want a weathered farmhouse look, let the tiny imperfections become part of the charm.
Painter’s tape also behaves differently depending on the surface. On freshly painted wood, strong tape can pull up the base coat if the paint has not cured long enough. On dusty wood, tape may not stick at all. On rough wood, it may stick but still allow bleed-through. The best habit is to clean, sand, paint the base, let it dry properly, apply tape firmly, and seal the tape edge before adding the contrast color.
One of the most useful tricks is painting a thin coat of the base color over the tape edges before painting the stripe color. The first time you try it, it may feel like an unnecessary step. Then you peel the tape and see clean lines, and suddenly you become the kind of person who tells strangers at hardware stores about sealing tape edges. It is that satisfying.
Color choice can also change the whole mood of the project. High-contrast colors like black and white make every angle obvious, so they require careful taping. Softer combinations like cream and sage are more forgiving. If you are new to chevron painting, start with colors that are close enough to hide tiny mistakes but different enough to show the pattern. Once you feel confident, go bold.
Finally, patience is the real secret. Let primer dry. Let paint dry. Let the topcoat cure. DIY projects often go wrong when excitement outruns drying time. A chevron-painted wood project is not difficult, but it rewards calm, careful steps. Think of it as geometry with snacks nearby.
Conclusion
Learning how to paint a chevron pattern on wood is a smart way to upgrade furniture, decor, and craft projects without needing advanced artistic skills. The process is simple: clean the wood, sand it smooth, prime it, paint a base color, measure a clear grid, apply painter’s tape, seal the edges, paint thin coats, remove tape carefully, touch up, and protect the finished surface.
The most important details are surface preparation and tape technique. A well-prepped surface helps paint stick, while properly sealed painter’s tape creates the crisp zigzag lines that make chevron so eye-catching. Whether you choose a classic black-and-white pattern, a soft farmhouse palette, a natural wood contrast, or a metallic accent, chevron adds instant style and movement to wood.
Take your time, use thin coats, and remember that small imperfections are part of handmade charm. Done well, your painted chevron wood project will look custom, polished, and far more expensive than the actual supplies. That is the kind of math we can all enjoy.