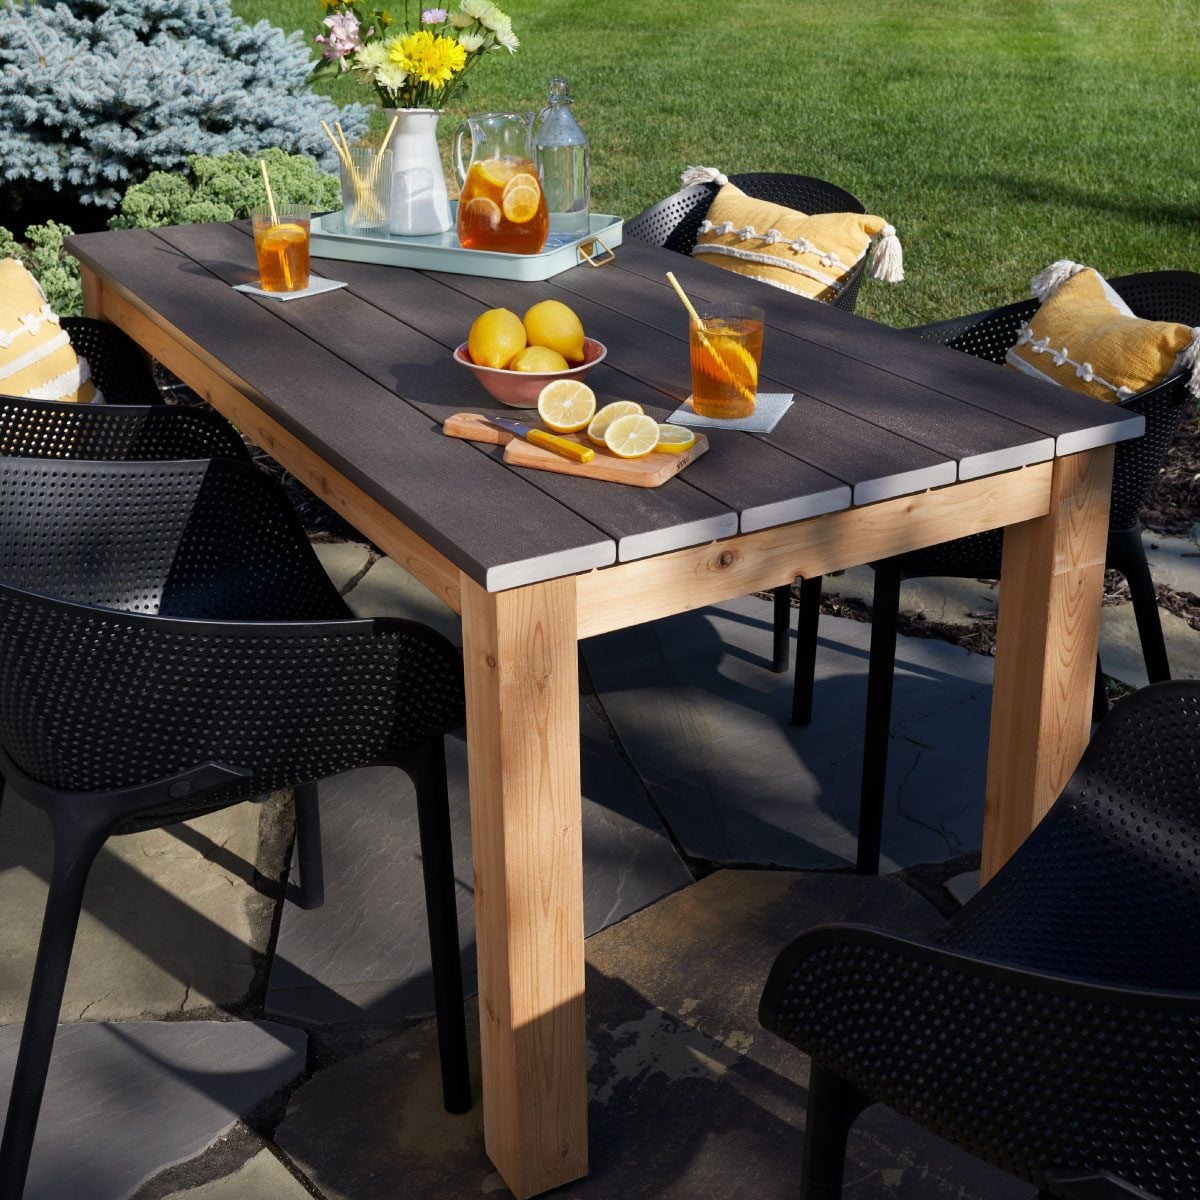

A DIY patio table is one of those projects that sounds ambitious until you realize the basic recipe is surprisingly friendly: sturdy lumber, accurate cuts, outdoor-rated screws, a weather-resistant finish, and enough patience not to assemble the legs backward while pretending everything is fine. Whether your patio is a full backyard retreat or a small concrete slab that currently hosts one lonely chair, building your own outdoor table gives you a custom piece that fits your space, your budget, and your exact snack-to-beverage ratio.
The best part? You do not need to be a master carpenter with a workshop full of mysterious clamps. A simple patio dining table can be built with common dimensional lumber, a drill, a saw, a tape measure, a sander, and a practical plan. This guide walks through the entire process: choosing materials, planning dimensions, cutting lumber, building the tabletop, assembling a strong base, weatherproofing the wood, and avoiding common mistakes. By the end, you will know how to build a DIY patio table that looks good, stands steady, and survives more than one season of rain, sun, barbecue sauce, and enthusiastic elbows.
Why Build a DIY Patio Table Instead of Buying One?
Store-bought patio tables can be beautiful, but they often come with three surprises: the price tag, the assembly instructions, and the moment you discover it is either too large, too small, or designed for a mysterious species with knees in unusual places. Building a DIY patio table gives you control over the size, style, wood type, finish, and features.
A homemade outdoor table can be customized for a narrow balcony, a family dining area, a deck, a garden corner, or a full outdoor kitchen setup. You can build a compact coffee table, a square table for four, a long farmhouse-style dining table, or a bar-height table for casual entertaining. You can also choose practical details such as slatted boards for drainage, an umbrella hole, chunky legs, built-in storage, or matching benches.
DIY also lets you balance cost and quality. Cedar, redwood, cypress, pressure-treated pine, and exterior-grade fasteners can create a table that feels far more substantial than many lightweight retail options. And yes, there is real pride in telling guests, “I built that,” especially when they are impressed and not asking why one leg is wearing a folded napkin as a shoe.
Plan the Table Before You Buy Lumber
Good patio table building starts before the first board is cut. Planning keeps the project from becoming a lumber-based puzzle with no picture on the box.
Choose the Right Table Size
For a standard outdoor dining table, a width of 36 to 42 inches works well for plates, serving bowls, drinks, and the occasional phone someone insists is not at the table. A length of 72 inches comfortably seats six people, while 84 to 96 inches can seat eight or more depending on chair size. For a smaller patio, a 30-by-48-inch table may be more practical. Coffee tables usually work well at 18 to 20 inches tall, while dining tables are typically around 29 to 30 inches high.
Before finalizing your dimensions, measure the patio area and leave enough clearance around the table. Aim for at least 30 to 36 inches of walking space behind chairs so guests can sit down without performing a sideways shuffle worthy of a game show.
Pick a Style That Matches Your Space
A slatted farmhouse table is a classic choice because it drains well and is easy to build. A modern outdoor table with straight lines looks clean on a deck or contemporary patio. A picnic-style table works well for family meals and casual gatherings. A square table is great for conversation, while a long rectangular table is better for big dinners and buffet-style serving.
If you want a beginner-friendly design, choose a simple rectangular tabletop made from 2×6 or 1×6 boards, supported by apron boards and four sturdy legs. This structure is strong, easy to understand, and forgiving enough for first-time builders.
Best Materials for a DIY Patio Table
Outdoor furniture lives a hard life. It faces sun, rain, humidity, temperature swings, spilled drinks, wet leaves, and the occasional bird with suspiciously good aim. Choosing the right materials is the difference between a long-lasting patio table and a science experiment.
Wood Options
Cedar is one of the best choices for a DIY outdoor table. It is naturally resistant to decay, lighter than many hardwoods, easy to cut, and attractive with a clear or semi-transparent finish. It is also less likely to warp than cheaper softwoods when properly sealed.
Redwood is another strong outdoor option with natural resistance to weather and insects. It has a beautiful color, but availability and price vary by region.
Cypress performs well outdoors and offers good durability, especially in humid climates. Like cedar and redwood, it is a naturally weather-friendly wood.
Pressure-treated pine is budget-friendly and widely available. It can work well for patio furniture, especially the base or frame, but it should be dried properly before finishing. It is also heavier and may require extra sanding for a furniture-grade feel.
Teak, white oak, and ipe are premium outdoor woods. They are durable and beautiful, but they can be expensive and harder to work with. For most weekend DIYers, cedar or pressure-treated lumber offers the best balance of cost, availability, and buildability.
Fasteners and Glue
Use exterior-rated screws, deck screws, or stainless steel screws. Ordinary indoor screws can rust, stain the wood, and weaken over time. If using pocket holes, choose outdoor pocket hole screws. For glued joints, use waterproof or water-resistant wood glue designed for exterior projects.
Do not rely on glue alone for outdoor furniture. Wood expands and contracts outdoors, so screws and mechanical joinery are important. Think of glue as backup vocals, not the lead singer.
Finish
A patio table should be sealed with an exterior-rated stain, oil, paint, or clear protective finish. UV-resistant and water-repellent finishes help reduce fading, graying, cracking, and moisture damage. Penetrating oil finishes create a natural look but usually need reapplication. Exterior paint provides more color options but requires careful surface preparation and occasional touch-ups.
Tools and Supplies You Will Need
You can build a basic DIY patio table with simple tools. A miter saw makes cutting easier, but a circular saw with a straightedge can also work. A pocket hole jig is helpful but not required.
Basic Tools
- Tape measure
- Pencil
- Speed square or framing square
- Miter saw or circular saw
- Drill and driver bits
- Orbital sander or sanding block
- Clamps
- Safety glasses
- Hearing protection
- Dust mask or respirator for sanding
Suggested Materials for a 6-Person Patio Table
- Five or six 2×6 boards for the tabletop, 72 inches long
- Four 4×4 posts or doubled 2x4s for legs
- 2×4 boards for the apron and support frame
- Exterior-rated deck screws
- Waterproof exterior wood glue
- Wood filler rated for exterior use
- 120-grit and 220-grit sandpaper
- Exterior stain, oil, sealer, or paint
These materials can be adjusted for your preferred dimensions. The key is to build a tabletop that is well supported and a base that resists wobbling.
Step-by-Step: How To Build a DIY Patio Table
Step 1: Measure and Cut the Tabletop Boards
Start by deciding the final table length. For this example, use 72 inches. Cut five or six 2×6 boards to the same length. Choose the straightest boards for the tabletop because bowed boards will make assembly harder and may create uneven gaps.
After cutting, lay the boards on a flat surface. Arrange them so the best-looking faces are up. If the color or grain varies, shuffle the boards until the top looks balanced. This is the woodworking version of arranging a family photo: everyone has a good side, but not everyone should stand in the front row.
Step 2: Leave Gaps for Drainage
Outdoor tabletops should not be built like indoor dining tables with tightly joined boards unless the design accounts for seasonal movement. Small gaps between boards allow rainwater to drain and help prevent standing moisture. A gap of about 1/8 to 1/4 inch is practical for many slatted outdoor tables.
Use pencils, tile spacers, or scrap pieces as temporary spacers while assembling the top. Keep the gaps consistent for a cleaner finished look.
Step 3: Build the Tabletop Support Frame
Cut two long apron boards slightly shorter than the table length and two end apron boards for the width. A typical apron frame sits under the tabletop and connects the legs. For a 72-by-38-inch table, the apron frame might be around 64 inches long and 30 inches wide, depending on leg placement and overhang.
Attach the apron boards using exterior screws and wood glue. Check for square by measuring diagonally from corner to corner. If both diagonal measurements match, your frame is square. If not, gently nudge the frame until it behaves.
Step 4: Attach the Legs
Cut four legs to the same height. For a standard dining table, legs around 28 to 29 inches usually work once the tabletop thickness is included. Use 4×4 posts for a chunky, stable look or build legs from paired 2x4s if that is what your budget allows.
Place each leg inside the apron corners and fasten it securely with exterior screws. For extra strength, drive screws from the apron into the legs from two directions. Clamps help hold the legs in place while you work. Check that each leg is square to the frame before tightening everything down.
Step 5: Add Cross Supports
Long patio tables need support under the tabletop to prevent sagging. Add two or three cross supports between the long apron boards. Space them evenly. These supports help hold the slatted boards flat and give you more points for attaching the tabletop.
If you want a sturdier base, add a lower stretcher between the legs on each long side. A center stretcher running lengthwise can also reduce wobble. This is especially helpful for long tables, heavy tabletops, or homes where guests lean dramatically while telling stories.
Step 6: Attach the Tabletop
Place the tabletop boards face down on a clean, flat surface with spacers between them. Set the base upside down on top of the boards. Center the base so the overhang is even on all sides. Then attach the boards from underneath using exterior screws through the support frame.
Fastening from underneath keeps the top cleaner because screw heads are hidden. If you screw down from the top, countersink the screws slightly and fill the holes with exterior wood filler. Either method works, but hidden fasteners give the table a more polished appearance.
Step 7: Sand Everything Smooth
Sanding is where a patio table turns from “construction project” into “furniture.” Start with 120-grit sandpaper to smooth rough areas, round sharp edges, and remove splinters. Follow with 220-grit for a softer surface. Always sand with the grain when possible.
Pay special attention to tabletop edges, corners, and the underside where hands may reach when moving the table. Outdoor furniture should feel good to touch. Nobody wants a splinter with their lemonade.
Step 8: Seal End Grain
End grain absorbs moisture more readily than the face of a board. The bottoms of legs are especially vulnerable because they may sit on damp concrete, pavers, grass, or deck boards. Seal the leg ends thoroughly with exterior finish, penetrating epoxy, or several coats of sealer.
You can also add adjustable furniture feet or rubber glides to lift the wood slightly off the ground. This small detail helps reduce moisture absorption and makes the table easier to level.
Step 9: Apply an Outdoor Finish
Before finishing, remove dust with a tack cloth or vacuum. Apply exterior stain, oil, sealer, or paint according to the manufacturer’s instructions. Work in mild, dry weather. Extreme heat, cold, or humidity can affect drying and penetration.
If staining, test the color on a scrap piece first. Wood species absorb stain differently, and the “warm walnut” look on the can may become “haunted orange fence” on your actual boards. Apply thin, even coats and wipe away excess if the product requires it. Coat the underside too, not just the visible top. A patio table needs protection from all sides.
Step 10: Let It Cure Before Heavy Use
Dry to the touch does not always mean fully cured. Give the finish enough time before placing heavy objects, hot dishes, or wet planters on the tabletop. Follow the product label. A little patience now prevents sticky rings, cloudy spots, and the tragic imprint of a serving tray becoming part of your design forever.
Design Upgrades Worth Considering
Add an Umbrella Hole
If your patio gets strong sun, an umbrella hole is a practical upgrade. Mark the center of the tabletop and use a hole saw sized for your umbrella pole. Sand the edge of the hole and seal the exposed wood thoroughly. Pair the table with a weighted umbrella base for stability.
Build Matching Benches
Benches are often easier to build than chairs and can slide under the table when not in use. Use the same wood and finish for a cohesive outdoor dining set. Keep bench height around 17 to 18 inches for comfortable seating with a standard table.
Use Breadboard Ends Carefully
Breadboard ends can give a tabletop a finished look, but outdoor wood movement must be considered. If boards are locked too tightly across the grain, seasonal expansion may cause cracks. For beginner builds, a simple slatted top is often more forgiving.
Add a Cooler Insert
A built-in cooler tray can turn a patio table into party headquarters. Leave a centered opening in the tabletop and install a removable metal or plastic insert. Make sure the structure remains strong and the insert can be removed for cleaning. Drainage matters unless you want your table to become a tiny swamp.
Common Mistakes To Avoid
Using Indoor Screws
Indoor screws are not made for rain and humidity. They can corrode, stain the wood, and fail sooner. Always use exterior-rated screws or stainless steel fasteners for outdoor furniture.
Skipping Sanding
Rough lumber may look rustic, but splinters are not charming. Sand the tabletop, edges, corners, and seat-adjacent areas thoroughly.
Forgetting Wood Movement
Wood expands and contracts as humidity changes. Slatted tops with small gaps are practical because they allow drainage and movement. Avoid trapping wide boards too tightly across the grain.
Not Sealing the Underside
Many DIYers finish the visible top and forget the underside. Moisture does not care which side looks pretty. Seal all surfaces, especially end grain and leg bottoms.
Building on an Uneven Surface
Assemble the table on a flat surface when possible. If the floor is uneven, you may accidentally build a wobble into the table. Use a level and check frequently.
Maintenance Tips for a Long-Lasting Patio Table
A DIY patio table does not need constant attention, but a little maintenance goes a long way. Clean the table regularly with mild soap and water. Avoid harsh pressure washing, which can raise the grain and damage softer woods. Reapply oil or sealer as needed, usually once a year for many penetrating finishes. Painted tables may need touch-ups where the finish chips or wears.
Use furniture covers during long rainy seasons or winter storage. If possible, move the table under a covered patio, pergola, garage, or shed during severe weather. Keep planters on saucers or risers so moisture does not sit directly on the tabletop. Tighten screws annually and inspect for cracks, loose joints, or finish failure.
Outdoor furniture ages. That is part of its character. The goal is not to keep your patio table frozen in showroom perfection; it is to help it weather gracefully instead of surrendering dramatically after one summer.
Budget Breakdown
The cost to build a DIY patio table depends on lumber choice, table size, hardware, and finish. A simple pressure-treated pine table may cost far less than a cedar or redwood version. A large dining table usually requires more boards, stronger support, and more finish than a coffee table or side table.
For a basic six-person patio dining table, many DIYers can expect to spend somewhere in the low-to-mid hundreds if buying new lumber and finish. Costs may drop if you already own tools, use reclaimed lumber, or choose a smaller design. However, do not cut corners on exterior-rated fasteners or weather protection. Saving a few dollars on screws is not worth watching rust streaks decorate your tabletop like sad modern art.
Safety Tips Before You Start Cutting
Wear safety glasses when cutting, drilling, and sanding. Use hearing protection with loud tools. Sanding and cutting create wood dust, so use dust collection when possible and wear a properly fitted dust mask or respirator, especially when sanding for long periods. Work in a well-ventilated area and follow all tool manuals.
Keep hands away from saw blades, use clamps when needed, and support long boards so they do not tip during cuts. Avoid loose clothing, dangling jewelry, and distracted work. DIY confidence is great; DIY overconfidence is how projects become emergency-room stories.
Experience Notes: What Building a DIY Patio Table Teaches You
Building a DIY patio table is not just about creating a flat surface for burgers, iced tea, and that one uncle’s extremely detailed grilling opinions. It teaches practical lessons that apply to almost every home project. The first lesson is that lumber is rarely perfect. Boards can twist, cup, bow, or look straight in the store and reveal their true personality once you get home. Take time to choose the best boards available. Sight down each board, reject badly warped pieces, and buy one extra board if the budget allows. That extra board can save the whole weekend.
The second lesson is that measuring matters, but consistency matters even more. If four legs are supposed to be 28 inches, they all need to be exactly the same length. A table does not care that you were “only off by a little.” It will wobble anyway, and it will do so with confidence. Stack matching parts together and cut them at the same time when possible. Label pieces with pencil marks. Dry-fit the base before driving screws. These tiny habits make the final assembly smoother.
The third lesson is that clamps are not optional luxuries. They are extra hands that do not complain, get hungry, or suggest checking social media halfway through the project. Clamps hold boards flush while you fasten them, keep legs from shifting, and help square the frame. Even two basic clamps can make a beginner project feel more controlled.
The fourth lesson is that finishing takes longer than expected. Many first-time builders think the table is done once it stands upright. In reality, sanding, dust removal, staining, sealing, drying, flipping, coating the underside, and waiting for cure time may take as much patience as the build itself. Do not rush this stage. A good finish protects the work you already did and makes the table feel like furniture instead of a stack of boards that got promoted too quickly.
The fifth lesson is that outdoor furniture needs forgiveness built in. Rain will happen. Sun will happen. Someone will put a wet glass directly on the table even though coasters are right there, staring at them like tiny disappointed parents. That is why slatted tops, sealed end grain, exterior screws, and yearly maintenance matter. A patio table is not a museum piece. It is supposed to be used, cleaned, bumped, leaned on, decorated, and enjoyed.
One of the best real-world tips is to assemble the tabletop upside down on a clean surface. This keeps the top flush and hides fasteners underneath. Another smart move is to round over sharp edges with sandpaper. You do not need a router to make a table comfortable; a few extra minutes of hand sanding can soften corners enough for everyday use.
If the table wobbles after assembly, do not panic. First, move it to a truly flat surface and test again. Patios often slope slightly for drainage, which can make even a good table seem crooked. If the wobble remains, check that all screws are tight and that the legs are equal. Adjustable feet can solve minor issues and protect the leg bottoms from moisture.
The most satisfying moment comes when the table is finally in place. It may not be flawless. You may notice a screw that is slightly off-center or a board gap that is more “handmade charm” than “machine precision.” That is fine. The table will still hold dinner, coffee, plants, board games, and summer conversations. Better yet, it will remind you that you built something useful with your own hands. That feeling is worth more than a perfect catalog photo.
Conclusion
Learning how to build a DIY patio table is one of the most rewarding outdoor projects for beginners and experienced DIYers alike. With the right lumber, exterior-rated fasteners, careful measurements, solid supports, proper sanding, and a weather-resistant finish, you can create a custom table that fits your patio and your lifestyle. Start with a simple design, leave room for drainage, seal every surface, and maintain the finish over time.
A DIY patio table does not need to be complicated to be beautiful. It simply needs to be sturdy, comfortable, weather-ready, and built with enough care that you feel proud every time you set down a plate. Add good food, good company, and maybe a few string lights, and suddenly your backyard feels less like unused square footage and more like the best room of the house.