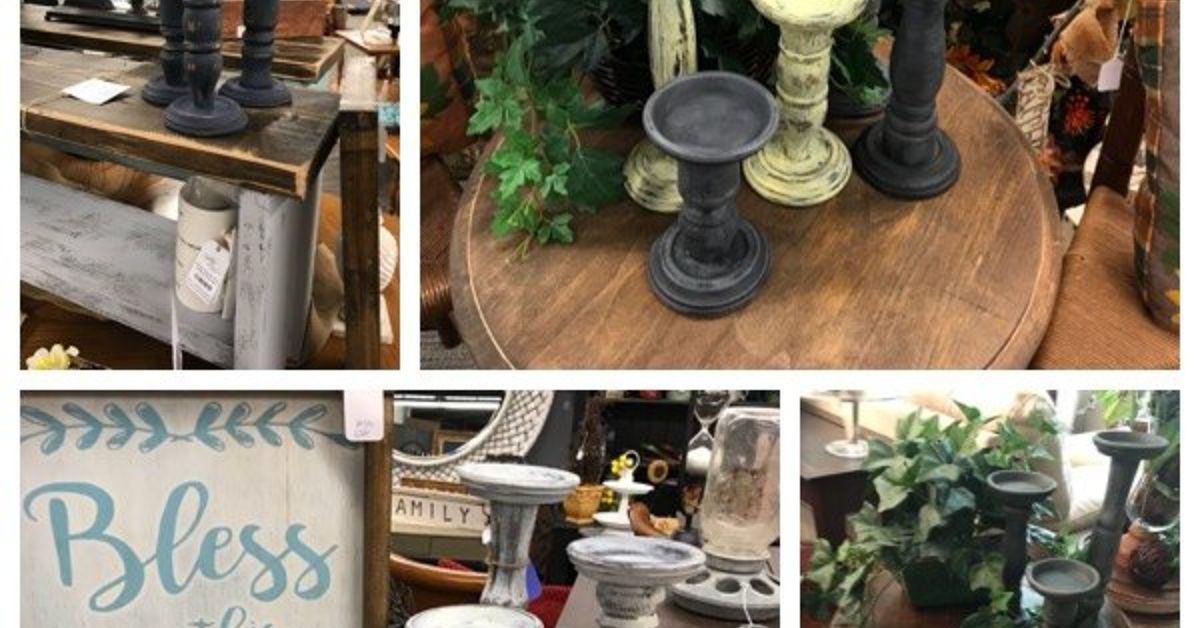

Old candlesticks have a habit of surviving every decorating trend except the one currently happening in your house. They may be scratched, tarnished, mismatched, or wearing a shade of fake gold that can only be described as “hotel lobby, circa 1987.” Fortunately, their sturdy bases, sculptural shapes, and built-in height make them excellent candidates for creative reuse.
Learning how to repurpose old candlesticks can turn an inexpensive thrift-store find into a modern centerpiece, plant stand, jewelry display, pedestal tray, seasonal decoration, or practical organizer. The secret is not complicated equipment. It is careful preparation, the right adhesive or finish, and enough restraint to stop before your project acquires glitter, rope, four ribbons, and an identity crisis.
Why Old Candlesticks Are Perfect for Upcycling
Candlesticks already contain several features that DIY projects often require: a stable base, vertical height, decorative detail, and a small platform at the top. Wood versions are easy to sand and paint. Metal candlesticks can provide substantial weight. Ceramic and glass holders add color and shine without needing much alteration.
They are also easy to find. Thrift stores, estate sales, flea markets, yard sales, and forgotten dining-room cabinets frequently contain single candlesticks whose partners disappeared years ago. A mismatched collection can become visually cohesive when it receives the same paint color or finish. This is one reason upcycling works so well: objects do not have to match in shape when they share a common visual element. Established home and craft publications regularly recommend unified color, creative reuse, and strategic grouping as affordable ways to give secondhand accessories a fresh identity.
Inspect the Candlesticks Before Starting
Identify the Material
Before reaching for paint or glue, determine whether the candlestick is made from solid brass, plated metal, cast iron, wood, ceramic, resin, or glass. The material affects how it should be cleaned, repaired, sanded, and finished.
A magnet can provide a useful clue. If it sticks strongly, the holder probably contains iron or steel. If it does not, the piece may be brass, aluminum, pewter, or another nonferrous metal. This is not a complete antique-authentication system, but it is more useful than staring at the object and whispering, “You look expensive.”
Check for Antique or Collectible Value
Look underneath the base for a maker’s mark, signature, hallmark, country of origin, or production number. A deeply tarnished candlestick may be valuable precisely because its original surface has not been aggressively polished or painted.
Do not permanently alter a signed, unusually heavy, handcrafted, or apparently old piece until you have researched it. Painting a five-dollar thrift-store holder is clever. Painting a collectible antique is the DIY equivalent of using a historic document as a grocery list.
Test Stability and Condition
Place each candlestick on a flat table and press gently from several directions. It should not wobble, lean, or separate at its joints. Tighten threaded sections where possible. Check ceramic and glass pieces for cracks, especially if the finished project will support a plate, planter, or open flame.
A decorative object can tolerate minor cosmetic damage. A candle holder or serving stand cannot tolerate structural damage. When stability is questionable, convert the piece into a lightweight decorative accent rather than a load-bearing project.
How to Clean Old Candlesticks
Remove Leftover Candle Wax
For durable metal holders, hardened wax can often be loosened by placing the candlestick in a freezer for approximately an hour. The cold makes many types of wax contract, allowing large pieces to pop away with gentle pressure from a plastic scraper.
Another option is to soften the wax carefully with warm air from a hair dryer. Blot the melting wax with paper towels instead of allowing it to run into seams. Avoid extreme temperature changes on glass or ceramic, since rapid heating or cooling may cause cracking.
Never use a sharp knife on a delicate finish. A wooden craft stick, plastic card, or silicone scraper is less likely to leave a permanent souvenir of your impatience. Similar gentle-heating and cooling methods are commonly used to remove wax from reusable candle containers.
Wash Away Dust and Grease
Clean ordinary metal, resin, ceramic, and painted wood candlesticks with a soft cloth and a mild solution of dish soap and water. Do not soak wooden pieces or objects with hollow interiors. Dry everything thoroughly, including seams and recessed details.
If the surface feels oily, wipe it with a degreaser appropriate for the material. Paint and adhesive perform poorly over grease, furniture polish, wax residue, or mystery grime accumulated during several presidential administrations.
Handle Rust Carefully
Remove loose rust from ordinary metal candlesticks with a small wire brush or abrasive pad. Sand the area until flaking material is gone and the edges feel smooth. A rust-inhibiting metal primer can then help stabilize the prepared surface before painting. Home-improvement guidance consistently emphasizes removing loose rust, cleaning thoroughly, sanding uneven areas, and using a compatible primer before applying finish coats.
Basic Supplies for Repurposing Candlesticks
- Old candlesticks in stable condition
- Dish soap, soft cloths, and a small cleaning brush
- Plastic scraper or wooden craft stick
- Fine- and medium-grit sandpaper
- Wire brush for rusty metal
- Primer formulated for the project material
- Brush-on paint or spray paint
- Painter’s tape and a drop cloth
- Two-part epoxy or another material-compatible adhesive
- Small plates, bowls, saucers, wood rounds, or decorative objects
- Ruler, pencil, and removable mounting putty
- Gloves, eye protection, and a suitable mask or respirator
You will not need every item for every project. Choose supplies after deciding what the finished candlestick will become. Buying twelve products before choosing a design is not preparation; it is a craft-store hostage situation.
A Reliable Method for Making Over Old Candlesticks
Step 1: Plan the Finished Use
Decide whether the candlestick will remain a functional candle holder or become something entirely different. This determines which areas may be painted, how much weight the base must support, and whether heat resistance matters.
Step 2: Dry-Fit Every Component
Place plates, bowls, wood rounds, planters, or decorations on the candlestick without adhesive. Check the proportions from several angles. The upper component should sit near the candlestick’s centerline and should not make the project dangerously top-heavy.
Mark the center on the underside of the upper piece with painter’s tape. For round objects, measure the diameter in two directions and mark where the lines intersect.
Step 3: Prepare the Surface
Lightly sand glossy surfaces when the material allows it. The goal is to create a clean, slightly textured surfacenot to excavate the candlestick’s geological history. Remove sanding dust with a tack cloth or lint-free rag.
Step 4: Prime and Paint
Apply a primer designed for metal, wood, plastic, ceramic, or glass, depending on the object. Use several light coats rather than one thick coat. Heavy spray-paint applications tend to drip, obscure decorative details, and create a finish resembling melted cheese.
Work outdoors or in a properly ventilated area, protect nearby surfaces, and follow the paint manufacturer’s temperature, ventilation, recoating, and curing directions. Home-improvement sources generally recommend thorough preparation, compatible primers, multiple thin coats, and complete drying between applications.
Step 5: Attach New Components
For permanent assemblies, use an adhesive specifically rated for both materials being joined. Two-part epoxy is often suitable for combinations such as metal and ceramic, but the product label should make the final decision.
Scuff and clean the contact areas before applying adhesive. Use only the recommended amount, align the parts carefully, and leave the project undisturbed for the full curing period. “It feels dry” and “it has reached full strength” are not always the same thing.
Step 6: Protect and Test
Add felt pads beneath the base to protect furniture. Before displaying the project, test it with slightly more weight than it will normally hold. Perform this test close to a padded surface, not above your favorite hardwood floor or directly beside the family cat.
12 Creative Ways to Repurpose Old Candlesticks
1. Create a Modern Monochrome Candlestick Collection
The simplest makeover is often the most effective. Gather candlesticks in different heights and shapes, then paint them one color. Matte black creates a graphic modern look, warm white suits cottage interiors, and muted green or terracotta adds an earthy feel.
Vary the heights while repeating the finish. Display the collection on a dining table, mantel, console, or sideboard. Decorative guidance often uses grouped candlesticks to introduce height, rhythm, and visual interest to tables and shelving.
2. Make a Pedestal Tray
Attach a sturdy plate, shallow bowl, or wood round to the top of a candlestick. The resulting pedestal can display wrapped candy, seasonal ornaments, soaps, jewelry, or other lightweight items.
For anything involving food, the food should touch only an intact, food-safe plate or liner. Do not place food directly on a painted, sealed, or adhesive-covered surface unless every material is specifically approved for that use.
3. Build a Tiered Organizer
Combine two candlesticks with two or three plates to make a vertical organizer. Use it for individually wrapped snacks, office supplies, sewing notions, bathroom accessories, or craft materials.
Keep the widest plate at the bottom and the lightest items on the top tier. A tiered stand saves horizontal space, but only when its footprint and connections remain stable.
4. Turn One Into a Mini Plant Stand
Attach a waterproof saucer or small tray to a broad candlestick and place a lightweight potted plant on top. This works especially well for trailing plants, small succulents, or artificial greenery.
Use a separate watertight container beneath a living plant. Prolonged moisture can damage wood, encourage rust, weaken some adhesives, and make furniture surprisingly unhappy.
5. Create a Jewelry Display
Top a candlestick with a small dish to hold rings and earrings. Add a horizontal dowel, decorative knob, or wire loop for bracelets and necklaces. A pair of matching candlesticks can support a removable rod for a larger jewelry organizer.
Line the dish with felt or velvet to reduce scratching and soften the sound of jewelry being dropped at 6:30 in the morning.
6. Make a Photo or Place-Card Holder
Insert a decorative wire coil into the candle socket or attach one to the top. The coil can hold photographs, recipe cards, wedding table numbers, buffet labels, or small signs.
This project is especially useful when several mismatched candlesticks need a unified purpose. Paint them one color and use them as reusable event decorations.
7. Display Seasonal Decorations
Use candlesticks as elevated bases for miniature pumpkins, decorative eggs, bottlebrush trees, pinecones, ornaments, or small wreaths. Removable mounting putty makes it possible to change the display without permanently attaching each object.
The additional height makes small decorations more visible and helps create layered arrangements. It also prevents every holiday display from resembling a committee meeting conducted entirely at table level.
8. Build Decorative Bookends
Heavy candlesticks can become decorative bookends when attached to broad wood blocks. Paint the bases and candlesticks together for a cohesive appearance, then add nonslip pads underneath.
This idea is best for solid metal or dense wood candlesticks. Lightweight resin or hollow ceramic pieces may look impressive while contributing approximately the restraining power of a breadstick.
9. Make an Elevated Soap or Perfume Stand
A shallow plate mounted on a short candlestick creates a useful riser for hand soap, perfume bottles, or guest toiletries. The added height can make a bathroom counter look more organized and intentional.
Choose moisture-resistant materials and wipe away water regularly. Removable museum putty beneath bottles can improve stability without permanently attaching them.
10. Create a Garden or Porch Accent
Weather-resistant metal or sealed wood candlesticks can support small solar lights, decorative gazing balls, or outdoor ornaments. Use only outdoor-rated paint, adhesive, and sealant, and place the finished piece in a protected area.
Do not assume an indoor finish will survive rain, intense sun, freezing temperatures, or repeated humidity. Bring delicate pieces inside during severe weather.
11. Convert Them Into LED Candle Displays
When a candlestick has been painted, embellished, or combined with potentially heat-sensitive materials, a battery-operated LED taper is the safest decorative option. LED candles are also useful around children, pets, curtains, dried flowers, and crowded seasonal displays.
Real candles require sturdy, nonflammable holders and clear space around the flame. Fire-safety organizations advise keeping candles away from combustible objects, placing them on stable surfaces, and extinguishing them whenever the room is unattended.
12. Transform a Large Candlestick Into a Lamp Base
A tall, solid candlestick can become a small accent lamp, but this is an advanced project. The center must accommodate a safe wiring route, and all sockets, cords, strain reliefs, and electrical components should be listed for their intended use.
A ready-made lamp kit can simplify the process, but anyone unfamiliar with electrical work should ask a qualified lamp repair professional or electrician to handle the wiring. A lamp should illuminate the roomnot introduce the room to the fire department.
How to Style Repurposed Candlesticks
Use Odd-Numbered Groups
Collections of three or five pieces often feel more natural than perfectly symmetrical rows. Combine tall, medium, and short candlesticks, leaving enough empty space for each silhouette to remain visible.
Repeat One Element
Mismatched holders become cohesive when they share a finish, candle color, material, or decorative theme. For example, three unrelated candlesticks can work together when each is painted soft white and topped with the same size LED taper.
Balance Height With Width
Tall candlesticks look strongest beside lower, wider objects such as books, bowls, trays, or small plants. Avoid placing every item at the same height. A successful display should resemble a skyline, not a row of people waiting at the driver’s license office.
Preserve Some Original Character
Not every piece needs to look new. A lightly polished brass holder or distressed wooden candlestick can add warmth to a room full of smooth, recently purchased objects. Original wear often provides the very character that mass-produced decor attempts to imitate.
Mistakes to Avoid
- Skipping preparation: Paint and glue cannot bond properly to wax, grease, dust, or flaking rust.
- Using the wrong adhesive: Hot glue is convenient for temporary decorations but is rarely the best structural choice for smooth ceramic, glass, or metal.
- Making the top too heavy: A narrow base cannot safely support a large platter or planter.
- Painting valuable antiques: Check marks and construction before making permanent changes.
- Ignoring curing time: Moving or loading a project too soon can weaken the bond.
- Using real flames near craft materials: Paper, artificial greenery, ribbon, untreated wood, and ordinary adhesives should be kept away from open flames.
- Overdecorating: The candlestick’s shape may already be interesting. It does not necessarily need beads, bows, stencils, rope, moss, and a motivational quote.
Experience-Based Lessons From Repurposing Old Candlesticks
The following project story is a composite of common DIY experiences rather than a claim about one specific personal workshop. It illustrates the small decisions that usually separate an attractive candlestick makeover from an object that quietly returns to the donation box.
A typical project begins with three thrifted candlesticks: one brass, one dark wood, and one lightweight metal holder with a finish that appears to have been applied during a power outage. None of the pieces match. Together, however, they have a good variety of heights and surprisingly elegant profiles.
The first lesson appears during cleaning. What looks like permanent discoloration on the brass holder turns out to be a mixture of old wax and furniture polish. Removing it reveals a warm, aged surface that is far more attractive than expected. Instead of painting all three candlesticks, the plan changes: the brass remains unpainted while the other two receive a dark matte finish. Good upcycling often involves editing the original plan rather than forcing every object to obey it.
The wooden candlestick creates the next challenge. Its glossy finish feels smooth, so it is tempting to paint immediately. A light sanding reveals why preparation matters. The sandpaper quickly becomes coated with old polish, and several shallow scratches become visible. After cleaning and priming, those imperfections nearly disappear. Without preparation, they would have remained visible beneath the paintand the new finish might have peeled the first time someone dusted it with enthusiasm.
The metal holder teaches another useful lesson: thin paint coats look slower but finish faster. The first spray pass barely changes the color, which can feel unsatisfying. The temptation is to continue spraying until the object looks complete. Resisting that temptation prevents drips from collecting around the decorative ridges. Three light coats produce a smoother finish than one heroic blast ever could.
Dry-fitting also changes the final design. A wide ceramic plate looks charming on the shortest candlestick, but a gentle push makes the arrangement tip. A smaller saucer is less dramatic and significantly more sensible. Once attached, it becomes a ring dish rather than a serving stand. The project improves when function is allowed to overrule ambition.
The most common surprise arrives during curing. Adhesive may feel firm after several hours, yet the manufacturer’s instructions may require much longer before the bond reaches full strength. Leaving the project untouched overnightor longer when directedcan be the difference between a durable pedestal and the sudden, heartbreaking sound of ceramic meeting the floor.
Styling the finished pieces provides the final lesson. The three candlesticks look disconnected when spread across a long mantel. Grouped closely with two stacked books and a small plant, they become a deliberate vignette. The books add width, the plant adds softness, and the candlesticks provide height. Nothing else is needed.
The larger experience is that successful repurposing rarely depends on expensive materials. It depends on looking carefully, preparing patiently, testing proportions, and knowing when to leave an attractive surface alone. Old candlesticks are useful because they already possess structure and character. The goal is not to erase their history. It is to give that history a better assignment.
Conclusion
Repurposing old candlesticks is an approachable way to create distinctive home decor without buying everything new. A forgotten holder can become a pedestal tray, plant stand, jewelry dish, photo holder, bathroom riser, seasonal display, or coordinated centerpiece. Even mismatched pieces can look intentional when their colors, materials, or functions are repeated.
Begin by checking the material, condition, stability, and possible value of each candlestick. Remove wax and grease, repair loose sections, prepare the surface properly, and choose products compatible with the materials involved. Dry-fit every design before gluing, respect curing times, and use LED candles whenever paint, ribbon, greenery, or other heat-sensitive additions are nearby.
Most importantly, let the original shape guide the makeover. The best upcycled decor does not look as though it narrowly survived a craft explosion. It looks useful, balanced, and pleasantly unexpectedwhich is a much better future than spending another decade at the back of a cabinet.