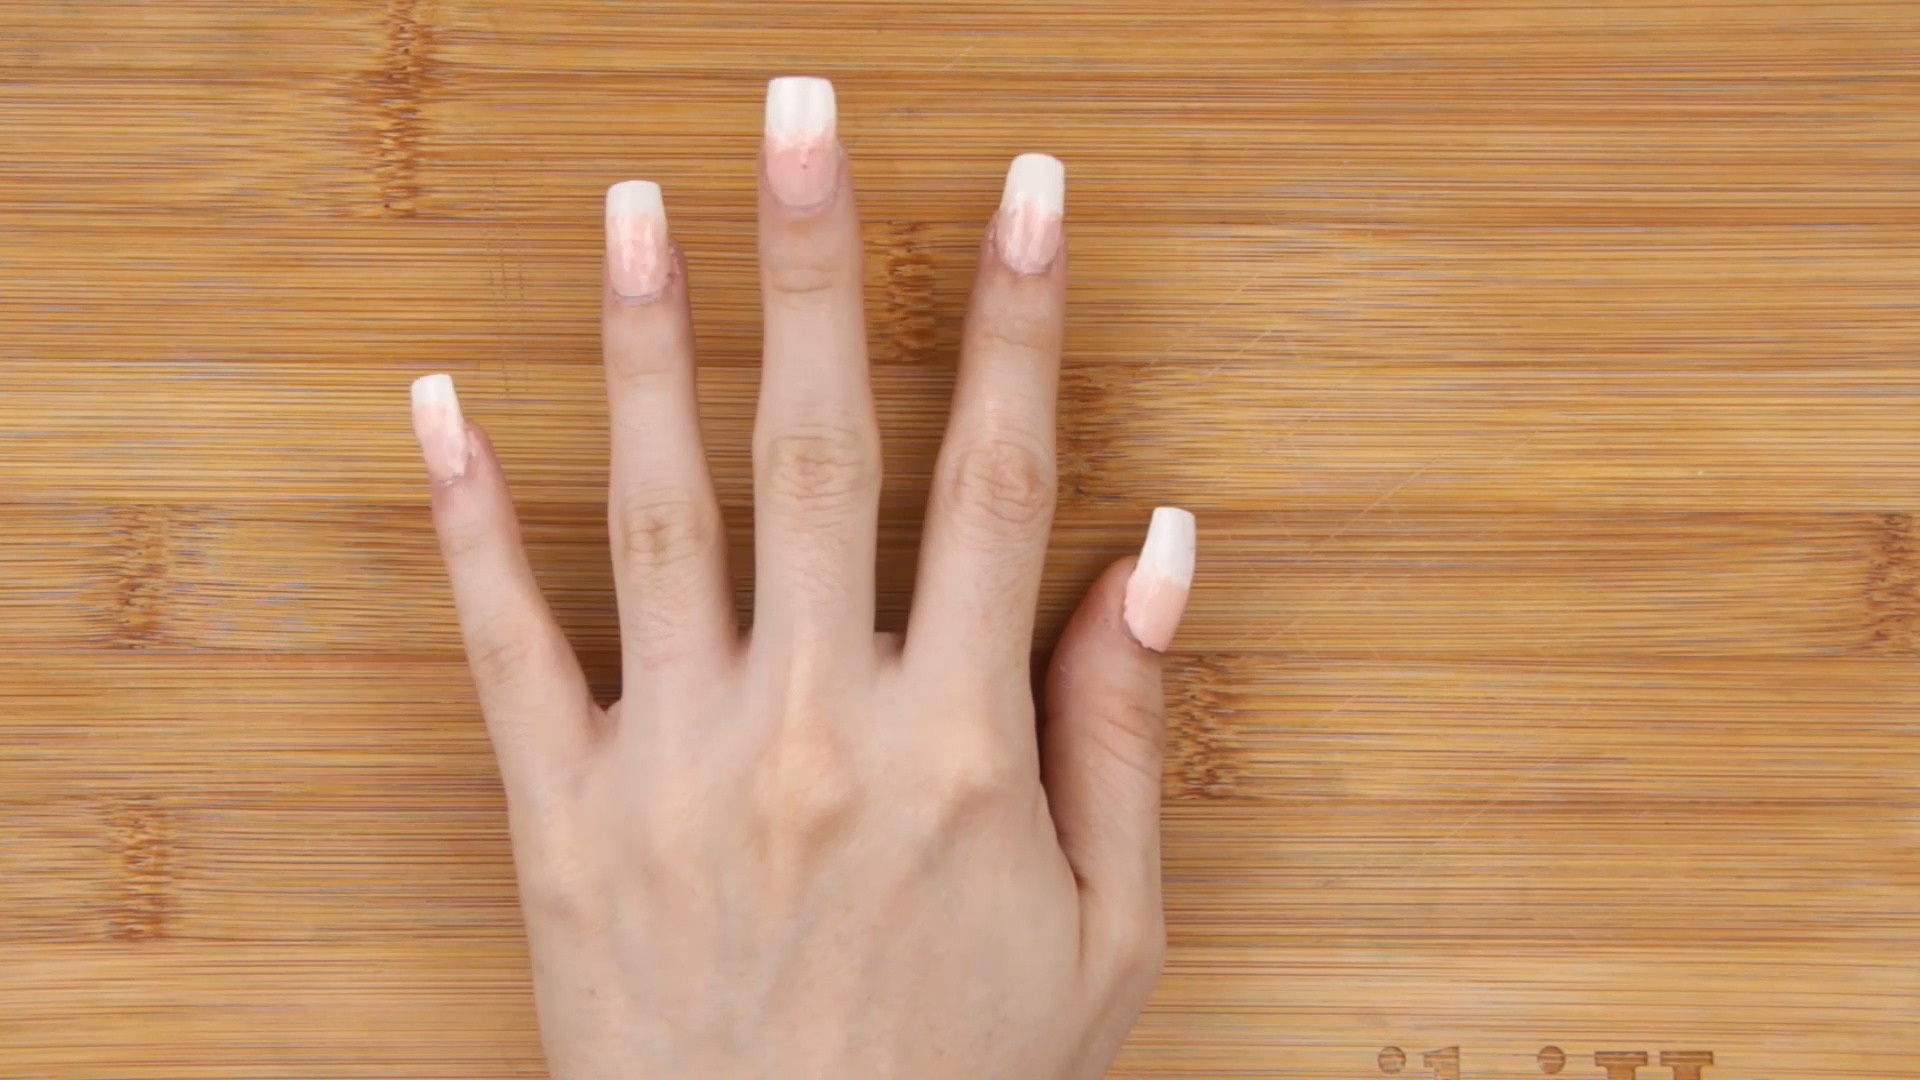

French ombre nails are what happens when the classic French manicure puts on a soft-focus filter and says, “I’m elegant, but I don’t need a sharp white line to prove it.” Also called baby boomer nails, French fade nails, or ombré French tips, this manicure blends a milky white tip into a sheer pink, nude, or beige base. The result is clean, romantic, flattering, and surprisingly forgivingbasically the manicure equivalent of good lighting.
The best part? You do not need to be a salon wizard with a tiny brush, a ring light, and three iced coffees to get the look. With the right prep and a little patience, you can create French ombre nails at home using two beginner-friendly methods: the makeup sponge method and the ombre brush method. One is quick and soft; the other gives you more control and a polished, salon-style finish.
In this in-depth tutorial, you will learn exactly how to prep your nails, choose the right colors, blend the gradient, fix common mistakes, and make your manicure last longer. We will cover both regular nail polish and gel polish tips, so whether you are a casual DIY nail painter or someone whose nail drawer has its own zip code, you are in the right place.
What Are French Ombre Nails?
French ombre nails are a modern version of the traditional French manicure. Instead of a crisp white smile line across the tip, the white fades gradually into a natural-looking base color. The design usually starts with a soft pink, sheer nude, milky beige, or translucent peach near the cuticle and blends into a cloud-like white at the free edge.
This style works beautifully on short, medium, and long nails. It is especially popular on almond, oval, coffin, and square shapes because the gradient elongates the fingers without looking too dramatic. Think bridal manicure, office-friendly nails, vacation nails, “I drink lemon water and always know where my keys are” nails.
Why French Ombre Nails Are So Popular
French ombre nails have stayed popular because they are simple but not boring. They look clean from far away and detailed up close. They also grow out more gracefully than a traditional French manicure because the base shade is sheer and natural. That means fewer panic moments when your nails are three days overdue for maintenance.
Another reason people love this look is versatility. You can keep it classic with pink and white, make it bridal with pearl accents, add a chrome glaze, soften it with milky white polish, or turn it playful with glitter ombre tips. The basic technique stays the same, but the personality can change completely.
Tools and Products You Will Need
Before you begin, gather your supplies. French ombre nails look expensive, but the starter kit is refreshingly reasonable.
Basic Nail Prep Tools
- Nail file
- Buffer block
- Cuticle pusher
- Cuticle oil
- Nail cleanser or rubbing alcohol
- Lint-free wipes or cotton pads
- Small cleanup brush
- Acetone or nail polish remover
Polish Colors
- Base coat
- Sheer pink, nude, beige, or milky neutral polish
- Soft white polish for the tip
- Glossy top coat
For Method 1: Sponge French Ombre Nails
- Latex-free makeup sponge or cosmetic wedge
- Liquid latex, peel-off nail tape, or petroleum jelly for skin protection
- A small piece of foil or palette for polish
For Method 2: Brush French Ombre Nails
- Ombre nail brush, fan brush, or soft blending brush
- Thin liner brush for refining the tip
- Gel polish or slow-drying regular polish, depending on your preferred system
Note: If you use gel polish, follow the curing time recommended by the polish and lamp manufacturer. Apply sunscreen to your hands before curing or use UV-protective fingerless gloves. Never cure gel polish on irritated skin, broken skin, or nails that feel painful.
Before You Start: Nail Prep Makes or Breaks the Manicure
A French ombre manicure is soft and sheer, which means uneven nail surfaces can show through. Do not worryyour nails do not need to be perfect. They just need a clean, smooth base.
Step 1: Shape Your Nails
File your nails into your preferred shape. Almond and oval shapes make French ombre nails look delicate and elongated. Square and squoval shapes create a crisp, modern look. Keep the edges even, because the white fade will draw attention to the tips.
Step 2: Push Back Cuticles Gently
Use a cuticle pusher to gently push back the cuticles. Avoid cutting too much skin. The goal is tidy, not “I fought a tiny lawn mower.” Clean cuticle lines help your polish sit neatly and last longer.
Step 3: Buff Lightly
Lightly buff the nail surface to remove shine and smooth ridges. Do not over-buff. Thin, sore nails are not a beauty goal; they are a distress signal.
Step 4: Clean the Nail Plate
Wipe each nail with nail cleanser or rubbing alcohol to remove oil, dust, and lotion. Polish sticks better to a clean, dry nail plate.
Step 5: Apply Base Coat
Apply a thin layer of base coat. If using regular polish, let it dry. If using gel, cure according to the product directions. A good base coat helps protect the nail and gives your color something to grip.
Method 1: How to Do French Ombre Nails With a Sponge
The sponge method is the easiest way to get French ombre nails at home. It creates a soft, airbrushed fade without needing advanced brush skills. It can be a little messy, but the final blend is worth the cleanup. Beauty sometimes requires a little chaos. Ask any eyeliner pencil.
Best For
- Beginners
- Regular nail polish users
- Soft, diffused gradients
- Quick DIY manicures
Step 1: Protect the Skin Around Your Nails
Apply liquid latex, peel-off nail tape, or a thin layer of petroleum jelly around each nail. This prevents the sponge from stamping polish all over your fingers. If you skip this step, cleanup will take longer, and you may briefly question your life choices.
Step 2: Apply Your Sheer Base Color
Paint one or two thin coats of sheer pink, nude, beige, or milky neutral polish. Let each coat dry before moving on. The base should look natural and translucent, not thick and chalky.
Step 3: Prepare the Sponge
Take a small makeup sponge and cut it into a nail-sized piece. A smaller sponge gives you better control. On the sponge, paint a stripe of your base color and a stripe of white polish directly next to it. Slightly overlap the two colors where they meet so the blend starts before the sponge touches your nail.
Step 4: Dab the Sponge Onto the Nail
Gently dab the sponge onto the nail, placing the white polish near the tip and the neutral shade toward the middle. Use light tapping motions instead of dragging. Dragging can create streaks, while tapping creates that soft French fade.
Step 5: Build the Gradient in Thin Layers
Let the first sponge layer dry for a minute, then repeat. Most French ombre nails need two to three sponge layers for a smooth, visible fade. Keep the white strongest at the tip and lighter as it moves toward the center of the nail.
Step 6: Soften the Blend
If the white looks too harsh, apply a very thin coat of sheer pink or milky nude over the entire nail. This “blurring coat” melts the colors together and gives the manicure that dreamy, salon-style finish.
Step 7: Clean Up the Edges
Remove the liquid latex or tape. Dip a small cleanup brush in acetone or polish remover and tidy the sidewalls and cuticle area. Clean edges make even a DIY manicure look professional.
Step 8: Seal With Top Coat
Apply a generous glossy top coat. This is the magic step. Top coat smooths the sponge texture, adds shine, and makes the gradient look more seamless. If using gel polish, cure the top coat and wipe off any sticky residue if your formula requires it.
Method 2: How to Do French Ombre Nails With a Brush
The brush method gives you more control over placement and intensity. It is excellent for gel polish because gel stays workable until cured. With regular polish, you need to move quickly before the polish dries. This method may take a little practice, but once you get it, you may feel dangerously powerful.
Best For
- Gel polish manicures
- More precise gradients
- Short nails that need careful blending
- People who want less sponge texture
Step 1: Apply Base Color
After nail prep and base coat, apply a sheer pink, nude, or milky neutral shade. For gel, cure after each thin coat. For regular polish, let the base dry until it is no longer tacky.
Step 2: Place White Polish at the Tip
Apply a small amount of soft white polish across the free edge of the nail. Do not paint too much. A tiny amount is easier to blend than a big blob of white polish that suddenly wants to become a snowdrift.
Step 3: Blend Downward With the Brush
Using a clean ombre brush or soft blending brush, lightly feather the white polish downward toward the center of the nail. Use short, gentle strokes. Keep the brush barely touching the surface so the color diffuses instead of smears.
Step 4: Wipe the Brush Often
Wipe the brush on a lint-free pad between strokes. This prevents polish buildup and keeps the blend soft. If the brush gets overloaded, it will drag the white too far down the nail.
Step 5: Add More White at the Tip
For a brighter French ombre effect, add another thin layer of white at the tip and blend again. The goal is opacity at the free edge and transparency toward the middle. Stop blending before the white reaches the cuticle area.
Step 6: Use a Sheer Overlay
Apply a thin coat of sheer pink, nude, or milky polish over the entire nail. This softens the transition and makes the manicure look cohesive. With gel polish, cure after the overlay coat.
Step 7: Finish With Top Coat
Seal the design with glossy top coat. Cap the free edge by running the brush along the nail tip. This helps prevent chips and keeps the white edge looking fresh.
Sponge vs. Brush: Which French Ombre Method Is Better?
Both techniques can create beautiful French ombre nails, but they have different strengths.
Choose the Sponge Method If:
- You are a beginner
- You want a soft, cloudy blend
- You are using regular nail polish
- You do not mind a little cleanup
Choose the Brush Method If:
- You use gel polish
- You want more control
- You prefer less texture
- You are comfortable working slowly and precisely
For most beginners, the sponge method is easier. For a smoother salon-style finish, especially with gel polish, the brush method is often better. If you are practicing, try both on press-on nails first. Press-ons are the perfect low-stakes training ground because they do not judge you.
Best Color Combinations for French Ombre Nails
The traditional French ombre look uses sheer pink and soft white, but you can customize it based on your skin tone, nail length, and personal style.
Classic Pink and White
This is the most timeless version. It looks clean, bridal, and polished. Use a sheer baby pink base with a creamy white tip.
Nude and Milky White
This combination is perfect for a modern minimalist manicure. A beige or neutral nude base creates a soft, expensive-looking finish.
Peach and White
Peachy bases warm up the look and flatter golden or olive undertones. This option feels fresh, healthy, and subtle.
Milky White on Milky Pink
For the “clean girl” manicure effect, choose translucent milky shades. The fade will look delicate and natural, almost like your nails were born with a built-in Instagram filter.
Glitter French Ombre
Add fine silver, champagne, or rose-gold glitter to the white tip area before top coat. This is great for weddings, holidays, birthdays, or any Tuesday that needs emotional support sparkle.
Common French Ombre Nail Mistakes and How to Fix Them
The White Tip Looks Too Harsh
Apply a sheer pink or nude coat over the entire nail to soften the contrast. You can also sponge or brush less white on the next layer.
The Gradient Looks Patchy
Use thinner layers. Ombre nails usually look awkward halfway through the process. Keep building gently and let the top coat do its smoothing magic.
The Sponge Leaves Texture
Use a finer makeup sponge and avoid pressing too hard. Finish with a thick glossy top coat to smooth the surface.
The Polish Floods the Cuticle
You are using too much polish. Keep layers thin and leave a tiny gap around the cuticle. Clean up immediately with a small brush dipped in remover.
The Gel Polish Wrinkles After Curing
The layer was too thick or under-cured. Gel polish should be applied in thin coats and cured according to the product instructions.
How to Make French Ombre Nails Last Longer
Once your nails look soft, glossy, and fabulous, you will want them to last. The secret is not just the applicationit is how you treat them afterward.
- Apply cuticle oil daily to keep the nail area flexible.
- Wear gloves when washing dishes or cleaning.
- Avoid using your nails as tools. They are nails, not tiny screwdrivers.
- Reapply regular top coat every two to three days if using traditional polish.
- Do not pick or peel gel polish, because it can damage the natural nail.
- Give your nails occasional breaks between gel manicures if they feel thin or brittle.
French Ombre Nail Ideas to Try Next
Once you master the basic pink-and-white fade, you can experiment with small upgrades that still look elegant.
Chrome French Ombre
Add a pearly chrome powder over the finished gradient for a glazed effect. This gives the manicure a luminous, modern shine.
Pearl Accent Nails
Add tiny pearl decals to one or two nails for a bridal or romantic finish. Keep the placement minimal so the manicure stays chic.
Micro Glitter Tips
Blend fine glitter into the white tip area. The sparkle should fade softly into the base, not sit on top like confetti after a birthday party.
Matte French Ombre
Use a matte top coat instead of glossy for a velvety, editorial look. This works especially well with nude and milky shades.
Color French Ombre
Swap white for pastel blue, lavender, blush, sage, or butter yellow. This keeps the French ombre structure but adds a seasonal twist.
Real-World Experience: What I Learned While Doing French Ombre Nails at Home
The first time I tried French ombre nails, I made the classic beginner mistake: I used too much white polish. In my mind, I was creating a delicate salon fade. On my nails, it looked more like I had dipped my fingertips into vanilla frosting and then panicked. The lesson? French ombre nails are built in whispers, not shouts. Thin layers are everything.
The sponge method was the easiest place to start. I found that cutting the makeup sponge into a smaller piece made a huge difference. A full-size wedge was too bulky and stamped polish all over the skin around my nails. Once I trimmed it down, I could control where the white landed. I also learned to tap lightly instead of pressing hard. Heavy pressure creates patchiness and sponge marks, while gentle tapping creates that soft, cloudy blend everyone wants.
Another helpful trick was using a sheer pink polish after sponging. At first, the gradient looked a little uneven, and I almost removed everything. But one thin coat of sheer pink over the top blurred the white perfectly. It was like putting a beauty filter on the manicure. Suddenly, the streaks looked intentional, the fade looked smoother, and I looked like someone who maybe knew what she was doing.
The brush method took more patience, but it gave a cleaner result with gel polish. Because gel does not dry until cured, I had time to move the white exactly where I wanted it. The biggest challenge was keeping the brush clean. If I forgot to wipe it, the brush dragged too much white down the nail and ruined the soft fade. Wiping between strokes felt fussy at first, but it made the final manicure look much more professional.
I also learned that nail shape matters. On short square nails, the white section needs to be very narrow or it can make the nail look shorter. On almond or oval nails, you can stretch the fade a bit farther down because the shape naturally elongates the finger. For short nails, I prefer a milky nude base and a very soft white tip. For longer nails, I like a brighter white edge with a sheer pink overlay.
Cleanup was another game changer. Even a beautiful ombre can look messy if polish is stuck around the cuticles. A small angled brush dipped in acetone made the manicure look instantly neater. I now consider cleanup non-negotiable. It is the difference between “DIY experiment” and “Yes, I totally have a standing nail appointment.”
My final piece of experience-based advice is to stop before you overwork the blend. French ombre nails often look imperfect before top coat. That does not mean they are ruined. Add top coat first, then judge. Glossy top coat smooths texture, softens the gradient, and makes the whole design look more expensive. Basically, top coat is the friend who tells everyone you arrived on time, even when you absolutely did not.
Conclusion
French ombre nails are elegant, wearable, and easier to create than they look. Whether you choose the sponge method or the brush method, the key is patience, thin layers, and a soft transition from nude or pink to white. The sponge method is ideal for beginners and regular polish users, while the brush method offers more control for gel polish lovers.
Start with clean nail prep, use sheer flattering colors, build the fade slowly, and finish with a glossy top coat. If your first try is not perfect, do not worry. Ombre nails are wonderfully forgiving, and every attempt teaches your hands what your eyes already understand. With a little practice, you can create a soft French fade that looks polished, graceful, and just dramatic enough to make holding a coffee cup feel like a lifestyle shoot.
SEO Tags