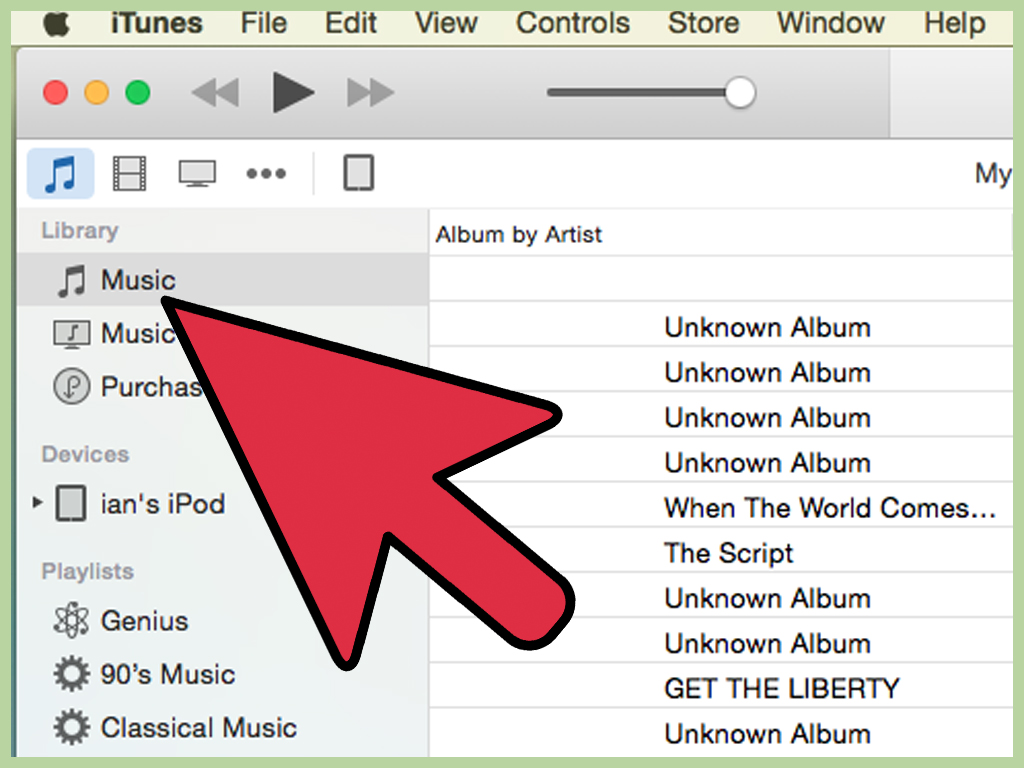

Note: The right method depends on your iPod model. An iPod classic, nano, or shuffle behaves very differently from an iPod touch. If you use the wrong method, your “quick transfer” can turn into a “why is everything gone?” moment.
Your iPod may be old, but your music taste is timeless. Maybe your previous computer retired with dignity. Maybe it died dramatically, taking your library with it like a villain in the third act. Either way, you now have a new computer and one very important question: how do you transfer music from your iPod without turning your playlist into digital confetti?
The good news is that there are several real, workable ways to do it. The less-good news is that Apple never made every iPod-to-computer transfer equally simple across every model. Some methods are clean and official. Some are more “roll up your sleeves and open hidden folders.” But all three methods below can help, depending on what kind of iPod you own, where the music came from, and whether your old computer is still accessible.
In this guide, you’ll learn the three best ways to transfer music from your iPod to a new computer, when each method makes sense, what to avoid, and how to keep your library organized after the transfer. No fluff, no robotic filler, and no suggestion that yelling at the USB cable will help. It won’t. I checked.
Before You Start: 5 Things to Check First
1. Identify your iPod model
If you have an iPod classic, nano, or shuffle, you’ll usually work with iTunes and sometimes with the device as a removable drive. If you have an iPod touch, the process is closer to handling an older iPhone or iPad, especially when backups are involved.
2. Do not auto-sync too soon
When you connect an iPod to a new computer, the biggest risk is accidental syncing. A fresh sync can replace content on the device with the empty or incomplete library on the new machine. Translation: your new computer may politely erase the very music you were trying to save. Open your music software carefully and avoid clicking “Sync” until you know which method you’re using.
3. Know what kind of music is on the iPod
Ask yourself whether the music came from the iTunes Store, CDs you imported years ago, MP3 downloads, or a mix of everything. Purchased music is usually the easiest to move with Apple’s built-in tools. Older ripped tracks and manual file transfers may require the manual recovery route.
4. Install the right software on the new computer
For most legacy iPods on Windows, iTunes is still the practical tool. On newer Apple-style device workflows, Windows may also use Apple’s device management tools for backups and restores. On a Mac, Finder handles much of what iTunes used to do for iPod touch, while older click-wheel iPods still often live happily in classic iTunes-style workflows.
5. Prepare a destination folder
Create a folder on your new computer before you begin. Something like Music/iPod Recovery is perfect. You’ll thank yourself later when random files named things like ABCD.mp3 appear and try to pretend they are normal.
Quick Comparison: Which Method Should You Use?
| Situation | Best Method | Difficulty |
|---|---|---|
| You bought the songs from the iTunes Store | Method 1: Transfer Purchases | Easy |
| You have an iPod classic, nano, or shuffle with old MP3s | Method 2: Manual Copy from Hidden Music Folders | Moderate |
| You have an iPod touch or a mixed library and need a fuller recovery plan | Method 3: Backup Restore or a Dedicated Transfer Tool | Moderate to Advanced |
Method 1: Transfer iTunes Store Purchases to Your New Computer
This is the cleanest option when your music was purchased through Apple. It is the official, low-drama route. If your iPod contains songs tied to your Apple account, your new computer can be authorized to receive those purchases.
When this method works best
- You bought music from the iTunes Store.
- Your iPod is recognized by iTunes or the supported Apple software on your computer.
- You want the simplest legal and organized transfer method.
How to do it
- Install and open iTunes on the new computer if that is the workflow your iPod uses.
- Sign in with the same Apple account used for the purchases.
- Authorize the computer.
- Connect your iPod with the proper USB cable.
- In iTunes, look for the option to transfer purchases from the device to the computer.
- Let the process finish before disconnecting the iPod.
Why people like this method
Because it behaves like a civilized adult. Your purchased tracks usually keep their names, metadata, artwork, and place in the library structure. It is also far less stressful than digging through hidden folders like you’re exploring a digital attic with a flashlight.
What this method does not do
It usually does not recover every non-purchased MP3, every ripped CD, or every manually added song sitting on older iPods. If your library was built from years of imports, mixtapes, downloads, and mystery files from 2009, you’ll probably need Method 2 or Method 3.
Example
Let’s say you have an iPod touch filled mostly with albums you purchased from Apple years ago. You buy a new laptop, install iTunes, sign in, authorize the machine, and transfer purchases. In that case, this method is fast, tidy, and boring in the best possible way.
Method 2: Copy Music Manually from an iPod Classic, Nano, or Shuffle
This method is the old-school rescue mission. It is especially useful for legacy iPods that can be used as a disk. Apple has long allowed certain models, including the iPod classic, nano, and shuffle, to be used like external storage. Once disk use is enabled, you can access the device in File Explorer or Finder and copy the music files out manually.
When this method works best
- You have an iPod classic, nano, or shuffle.
- Your songs were not all purchased from Apple.
- Your old computer is gone, broken, or unavailable.
- You just need the raw music files back on the new computer.
Step-by-step instructions
- Connect the iPod to the new computer.
- Open iTunes and select the device.
- Enable disk use if the option appears.
- On Windows, open File Explorer and make hidden items visible.
- Open the iPod drive and navigate to
iPod_Controland thenMusic. - Copy the music folders, often named
F00,F01, and so on, to your recovery folder on the computer. - Once copied, add that folder to iTunes, Apple Music, or your preferred music manager so the files can be indexed again.
What to expect after the copy
The filenames may look ridiculous. That is normal. Older iPods often store tracks with scrambled-looking names, even though the embedded track tags still contain the real song title, artist, and album. Once you import the files into a library app, much of the proper information can reappear automatically if the tags are intact.
Pros of this method
- It works even when the original computer is gone.
- It can recover non-purchased music.
- It does not require fancy software to begin.
Cons of this method
- Playlists may not transfer cleanly.
- Song names can look messy until imported properly.
- It is more hands-on and easier to mess up if you rush.
Example
Imagine you find your 160GB iPod classic in a drawer, still packed with thousands of songs from ripped CDs and old MP3 downloads. Your old desktop died years ago. This method lets you use the iPod itself as the emergency backup you forgot you had. Past You deserves a slow clap.
Method 3: Use an iPod Touch Backup or a Dedicated Transfer Utility
If you have an iPod touch, things can get trickier. Unlike older storage-style iPods, the iPod touch behaves more like an iPhone. That means music recovery often depends on backups, synced content, or specialized tools that can read the device and extract media to your new computer.
Option A: Restore from a backup
If you previously backed up the iPod touch to a computer or to iCloud, restoring from that backup is often the smartest move. Apple supports backing up and restoring iPod touch devices using a computer. This is especially useful when the goal is to move more than music, such as app data, settings, and photos.
Here is the big catch: a backup restore is best when you are restoring the device or rebuilding your Apple environment, not just cherry-picking a pile of songs. It is excellent for continuity, but not always ideal for people who only want standalone music files sitting neatly in a new desktop folder.
Option B: Use a dedicated music transfer tool
If your iPod touch is the only surviving copy of a mixed music library, a dedicated transfer utility can be the most practical choice. Over the years, reputable tech publishers have reviewed tools designed specifically to copy music from Apple devices to a computer when iTunes alone is too limited for the job.
The advantage here is convenience. Good transfer tools can often preserve song titles, playlists, ratings, and other metadata better than a purely manual process. The downside is that software quality varies, so use a reputable, well-reviewed option and avoid random downloads that look like they were built in a basement next to a lava lamp.
When this method works best
- You have an iPod touch instead of a classic, nano, or shuffle.
- You need more than iTunes Store purchases.
- You want a simpler interface than manual file recovery.
- You may also need playlists, play counts, or metadata preserved.
Example
Suppose you used an iPod touch as your portable library for years, mixed with purchased songs, ripped albums, and old live recordings. Your new computer is ready, but the old one is long gone. In that case, restoring from backup or using a reputable transfer tool is often the fastest route from “panic” to “playlist restored.”
Common Mistakes to Avoid
Connecting the iPod and clicking sync immediately
This is the classic mistake. It feels efficient. It is not efficient. It is like handing your music library to a paper shredder and calling it productivity.
Assuming every iPod works the same way
An iPod classic and an iPod touch are distant cousins, not identical twins. The storage-based models are easier to browse manually. The touch models lean heavily on backup and sync ecosystems.
Forgetting to show hidden files
If you are using the manual recovery method and cannot find the music folder, the files may simply be hidden. On Windows, you usually need to enable hidden items in File Explorer before the iPod_Control folder appears.
Expecting perfect playlist recovery every time
Raw music files are usually easier to recover than playlists, ratings, and other library details. If that metadata matters to you, backup-based recovery or dedicated transfer software may be worth the extra effort.
How to Organize Your Music After the Transfer
Once the songs are on your new computer, do not stop there. Import them into a proper music library and clean up the collection. This part is not glamorous, but it keeps your future self from wandering through folders named Misc, New Music, and New Music 2 Final Really.
- Consolidate your files into one master Music folder.
- Use a music app that reads metadata and organizes by artist and album.
- Fix missing album names and artist tags.
- Back up the recovered library to an external drive or cloud storage.
- Keep a second copy before you do any cleanup or renaming.
Which of the 3 Ways Is Best?
If your library is mostly purchases from Apple, Method 1 is the easiest and cleanest. If you own an old-school iPod classic, nano, or shuffle packed with MP3s, Method 2 is the most dependable recovery method. If you use an iPod touch or need better preservation of playlists and metadata, Method 3 is usually the smartest play.
The truth is that transferring music from your iPod to a new computer is not one single trick. It is more like choosing the least annoying door in a hallway of mildly annoying doors. Fortunately, one of those doors usually opens to your songs.
Final Thoughts
Your iPod may be a relic from another tech era, but it can still save your music library when a computer upgrade goes sideways. The key is choosing the method that matches your model and your type of music. Purchased songs? Use Apple’s built-in transfer tools. Legacy iPod with a giant offline collection? Copy the hidden folders manually. iPod touch with a more modern setup? Lean on backups or a trustworthy transfer utility.
Most importantly, once you recover the music, back it up somewhere else. External drive. Cloud storage. Even two places if you can. Because while nostalgia is wonderful, repeating this whole process next year is not.
Real-World Experiences: What People Usually Learn the Hard Way
In real-world use, transferring music from an iPod to a new computer is rarely about the transfer alone. It is usually about recovery, relief, and a strange burst of affection for a device that has been sitting in a drawer for years. A lot of people do not think about their iPod until they buy a new computer, lose an old hard drive, or realize the only surviving copy of a favorite album is living on a click-wheel device that still somehow boots like a champion.
One common experience is the surprise factor. People plug in an old iPod classic expecting a smooth, modern import process, then discover that the music is there but buried in hidden folders with filenames that look like alphabet soup. At first, it feels like bad news. Then comes the oddly satisfying moment when those files are imported into a music app and the song titles suddenly return, like old friends showing up at a reunion wearing nametags.
Another frequent experience is panic caused by the sync warning. Users see a message suggesting the iPod is linked to another library, and suddenly every click feels dangerous. That fear is justified. Many people only get one clean chance to recover a library before a mistaken sync replaces the contents. The lesson they usually share afterward is simple: slow down, read every prompt, and do not let urgency make decisions for you.
Owners of the iPod touch often describe a different problem. Their music is tied up with backups, account settings, and years of mixed content, so the process feels less like moving songs and more like reconstructing a tiny digital life. When a restore works, the relief is enormous. When it does not, that is when specialized transfer utilities start looking less like optional extras and more like rescue equipment.
There is also a strangely emotional side to this topic. During recovery, people rediscover tracks they forgot they owned, playlists made for road trips, gym sessions, old crushes, and very questionable college taste. A transfer project that begins as a technical chore often turns into a time capsule. That may sound dramatic, but anyone who has recovered a decade-old music library knows exactly what I mean.
The best experience, of course, happens at the end: the music is safely on the new computer, the library is backed up, and the iPod can finally stop carrying the entire emotional burden of your digital past. That is a good day for both you and the brave little rectangle that kept the songs alive.
SEO Tags