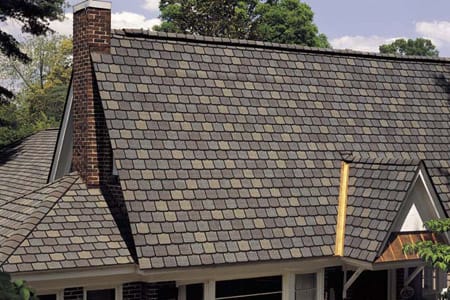

A damaged roof shingle may look like a small problemroughly the architectural equivalent of a chipped fingernail. Unfortunately, that tiny crack, curl, or empty spot can give rainwater a backstage pass to your roof deck, attic insulation, ceilings, and walls.
The good news is that repairing or replacing a few asphalt shingles can be manageable when the damage is limited, the roof is safely accessible, and you have basic home-improvement experience. The less cheerful news is that roof work involves serious fall hazards. A repair that saves a few dollars is not a bargain if it ends with an ambulance ride.
This guide explains how to inspect roof shingles, decide between repair and replacement, gather the right materials, complete a small shingle replacement, and recognize situations that belong in the hands of a professional roofer.
Editorial research for this article was informed by guidance from OSHA, the National Roofing Contractors Association, GAF, Owens Corning, CertainTeed, IKO, State Farm, This Old House, Family Handyman, and The Home Depot.
Why Damaged Roof Shingles Need Prompt Attention
Asphalt shingles form an overlapping water-shedding surface. Each course helps direct rain toward the eaves instead of allowing it to reach the underlayment and wood roof deck. When a shingle is missing, split, lifted, or badly creased, that protective pattern is interrupted.
Damage does not always produce an immediate ceiling leak. Water may enter beneath the roofing, travel along decking or framing, and appear several feet away from the original opening. By the time a brown ceiling stain shows up, moisture may already have affected insulation, fasteners, sheathing, or drywall.
Prompt roof shingle repair can help prevent a localized defect from becoming a larger roofing project. It also gives you an opportunity to inspect nearby flashing, sealant, vents, gutters, and shingles for related storm or age damage.
Inspect the Roof Before Reaching for a Hammer
Begin with a visual inspection from the ground. Binoculars or a camera with a zoom lens can reveal many common problems without requiring you to climb onto the roof.
Look for exterior warning signs
- Missing shingles or exposed sections of underlayment
- Shingles that are curled, cracked, buckled, or lifted
- Tabs that have slipped out of alignment
- Dark patches where protective granules are missing
- Creased shingles after strong winds
- Loose ridge-cap shingles
- Damaged flashing around chimneys, vents, skylights, or walls
- Shingle fragments or excessive granules in gutters
- Sagging areas that may indicate damaged decking or framing
Check the attic and interior
During daylight, inspect the attic for damp wood, wet insulation, dark stains, rusty fasteners, mold-like growth, and tiny points of visible light. After rain, look for active dripping or moisture trails. Inside living areas, peeling paint, musty odors, and ceiling discoloration may signal water intrusion.
Remember that a ceiling stain does not always sit directly below the leak. Water is annoyingly talented at traveling before announcing its arrival.
Should You Repair a Shingle or Replace It?
A minor repair may be appropriate when only a few shingles are affected and the surrounding roofing remains flexible, securely attached, and generally sound. Replacement is usually the better choice when a shingle is torn, missing, deeply cracked, punctured, badly creased, or stripped of a large portion of its granules.
A small repair may be reasonable when:
- One shingle corner is slightly lifted but otherwise intact
- A clean crack has not separated the shingle into loose pieces
- A tab needs to be carefully resealed
- The roof is relatively young and nearby shingles remain in good condition
Replace the damaged shingle when:
- The shingle is missing or torn
- Wind has created a permanent crease
- The shingle has multiple cracks or exposed fiberglass mat
- A large area of protective granules is gone
- The shingle cannot lie flat
- Previous patching has failed
Consider a professional inspection or broader roof replacement when damage is widespread, shingles are brittle throughout the roof, leaks appear in multiple locations, the deck feels soft, or large areas show curling and granule loss. Repairing one shingle on a failing roof can be like placing a fresh Band-Aid on a tired suitcase: technically possible, but not a long-term transportation strategy.
Roof Safety Comes Before Roof Repair
Falls are one of the most serious hazards associated with roofing. Do not work on a roof during rain, frost, snow, high winds, extreme heat, or when the surface is damp. Avoid walking on roofs that are steep, unusually high, visibly sagging, or made from brittle materials.
Use a properly rated extension ladder on firm, level ground. Secure it, keep the access area clear, and follow the ladder manufacturer’s setup instructions. Appropriate fall-protection equipment, suitable footwear, roof anchors, and training are essential for elevated work. Never rely on athletic confidence, optimism, or the phrase “I’ll only be up there for a minute.”
Hire a qualified roofer when:
- You cannot safely reach the damaged area
- The roof has a steep slope
- Damage is near electrical service equipment
- The deck appears rotten or unstable
- Flashing, valleys, skylights, or chimneys are involved
- The leak source is unclear
- Storm damage may involve an insurance claim
- Your warranty requires authorized installation or repair
Tools and Materials for Replacing Asphalt Shingles
Exact requirements vary by roof and shingle manufacturer, but a basic repair kit may include:
- Matching replacement shingles
- Flat pry bar or roofing bar
- Roofing hammer or standard claw hammer
- Galvanized roofing nails approved for the shingle system
- Asphalt-compatible roofing cement or manufacturer-approved sealant
- Caulk gun, if required by the sealant packaging
- Utility knife with a hooked roofing blade
- Tape measure and chalk
- Work gloves and eye protection
- Fall-protection and ladder-safety equipment
- Magnetic nail sweeper for cleanup
Try to match the original shingle brand, product line, profile, thickness, and color. Even an exact new match may look slightly different because existing shingles fade and weather over time. A leftover bundle from the original installation is ideal, provided it has been stored flat, dry, and protected from extreme temperatures.
How to Replace a Damaged Asphalt Roof Shingle
These steps describe a typical replacement for a field shingle on a warm, dry day. Always follow the instructions supplied by the shingle manufacturer because nail placement, sealant use, wind requirements, and exposure dimensions vary.
Step 1: Identify every fastener holding the shingle
Shingles are installed in overlapping courses. The damaged shingle is held by its own nails, while nails from the course above may also pass through its upper edge. This means you usually need to loosen more than one course to remove a single shingle properly.
Step 2: Break the adhesive seals carefully
Slide a flat pry bar beneath the lower edge of the shingle directly above the damaged one. Gently separate the factory sealant strip without tearing the shingle. Continue loosening the necessary adjacent tabs until you can reach the fasteners.
Warm shingles are generally more flexible. Cold or aging shingles may crack when lifted, turning a one-shingle repair into an unplanned group project.
Step 3: Lift and remove the nails
Position the pry bar near each nail and lift the shingle and nail together. Then remove the exposed fastener with the bar or hammer. Work slowly to avoid damaging the granulated surface of surrounding shingles.
Remove all nails securing the damaged shingle, including any fasteners driven through it from the course above. Do not simply cut the damaged portion away and leave concealed nails interfering with the replacement.
Step 4: Slide out the damaged shingle
Once the fasteners are removed, carefully pull the old shingle downward. Inspect the exposed underlayment and roof deck. Moisture damage, rot, holes, softness, or deteriorated underlayment should be evaluated before covering the area again.
Step 5: Prepare the replacement
Compare the new shingle with the removed piece. Trim it only when necessary, using the old shingle as a template. Preserve the intended exposure and alignment so the replacement fits naturally into the surrounding pattern.
Step 6: Install and align the new shingle
Slide the replacement upward beneath the shingles in the course above. Align its lower edge with neighboring shingles and confirm that the joints remain properly staggered. The replacement should sit flat without bulging, binding, or forcing nearby shingles out of position.
Step 7: Nail in the correct location
Fasten the replacement within the manufacturer’s designated nail zone. Drive nails straight and flush with the shingle surface. A nail that sits too high, too low, crooked, underdriven, or deeply overdriven can reduce holding strength or damage the shingle.
Do not assume every shingle requires the same fastener pattern. Products installed in high-wind regions may have different requirements, and local codes may add further rules.
Step 8: Replace any surrounding nails you removed
Reinstall appropriate fasteners in the loosened shingles above. Every removed fastener needs to be addressed; otherwise, the surrounding shingles may remain vulnerable to wind uplift.
Step 9: Reseal lifted tabs
Apply small amounts of compatible roofing cement beneath the tabs you loosened, following the shingle and sealant manufacturers’ directions. Press the shingles back into position without smearing cement across the exposed granule surface.
Factory sealant strips normally activate with suitable heat and sun exposure, but hand-sealing may be necessary after repairs, during cold weather, or in shaded locations. Too much cement can trap heat, create visible lumps, and cause additional problems, so more is not automatically better.
How to Repair a Curled or Cracked Shingle
Resealing a slightly lifted shingle
If the shingle is structurally intact, gently lift the affected edge and apply a small amount of asphalt-compatible roofing cement beneath it. Press the shingle flat and hold it according to the product directions. In some circumstances, a temporary weight may help maintain contact, but it must be placed and removed safely.
Sealing a simple crack
A clean, limited crack may sometimes be stabilized with compatible roofing cement beneath the split. Press the sides together, add a thin protective application where recommended, and cover visible cement with loose matching granules collected from a spare shingle.
This type of patch should not be used to disguise widespread deterioration. A shingle with several cracks, exposed reinforcement, severe brittleness, or missing pieces should be replaced.
When Several Shingles or the Entire Roof Need Replacement
Replacing a full roof is substantially different from swapping out one damaged shingle. A proper roofing system includes the deck, underlayment, leak barriers, drip edge, starter materials, field shingles, flashing, ventilation components, and ridge caps. All these parts must work together.
A typical professional replacement may involve:
- Protecting siding, windows, landscaping, and access areas
- Removing old roofing materials where required
- Inspecting and repairing the roof deck
- Installing drip edge, underlayment, and appropriate leak barriers
- Replacing damaged flashing and evaluating penetrations
- Installing starter strips along eaves and rakes
- Laying shingles with correct exposure and staggered joints
- Completing valleys, hips, ridges, vents, and wall transitions
- Cleaning debris and collecting loose nails
- Performing a final inspection and documenting warranty information
Local building codes determine whether an existing roof covering may remain, whether a tear-off is required, what underlayment is acceptable, and which wind, fire, ice-barrier, ventilation, and flashing provisions apply. Permits and inspections may also be required.
Common Roof Shingle Repair Mistakes
Using the wrong adhesive
General household caulk is not automatically suitable for roofing. Use a product specifically compatible with asphalt shingles and follow both manufacturers’ instructions.
Face-nailing an exposed shingle
Driving a nail through the visible surface creates a direct penetration. Exposed fasteners are sometimes used in specialized details or temporary emergency work, but they are not a substitute for correct concealed fastening.
Covering damaged decking
A new shingle cannot restore rotten, soft, delaminated, or structurally damaged sheathing. The deck must provide a sound fastening surface.
Ignoring flashing
Leaks near chimneys, walls, plumbing vents, skylights, and valleys are often related to flashing rather than field shingles. Smearing sealant over the general area may hide the symptom temporarily without correcting the water path.
Working in unsuitable temperatures
Cold shingles may crack when lifted, while excessive heat can make asphalt surfaces soft and easy to scuff. Choose conditions permitted by the product instructions and avoid stepping unnecessarily on the roof.
Failing to document storm damage
After severe weather, photograph visible damage from a safe location before permanent repairs begin. Save damaged materials when practical, keep receipts, review your policy, and contact your insurer promptly when a claim may apply. Avoid signing hurried contracts with unsolicited crews before verifying licensing, insurance, references, and the exact scope of work.
Experience-Based Lessons From Roof Shingle Repairs
The most useful roofing lessons are often discovered five minutes after the hardware store closes. Experienced roofers and careful homeowners repeatedly encounter the same practical surprises, so learning them in advance can make a repair safer and more effective.
Lesson 1: The visible damage may not be the whole problem
A missing shingle naturally attracts attention, but the surrounding area may have lifted fasteners, broken seals, creased tabs, or damaged underlayment. One common experience is replacing the obvious shingle only to discover that the course above was loosened by the same wind event.
Inspect beyond the damaged spot. Look uphill, downhill, and sideways, paying particular attention to ridges, rakes, vents, and flashing. Wind does not read repair manuals, and it rarely damages materials in a perfectly convenient rectangle.
Lesson 2: Matching the shingle is harder than matching the label
A replacement purchased under the same color name may look noticeably brighter than the roof. Existing shingles accumulate years of ultraviolet exposure, dust, algae, and weathering. Product designs may also change over time.
Before buying an entire bundle, compare a sample outdoors under natural light. Check the shingle’s width, exposure, tab design, thickness, and shadow pattern. A perfect color match may be impossible, but a compatible profile and installation pattern are essential.
Lesson 3: Older shingles dislike being disturbed
On a newer roof, the tabs above a damaged shingle may lift with controlled pressure. On an older roof, those same tabs can behave like crackers left open overnight: stiff, dry, and eager to snap.
Work during moderate temperatures and lift only as much material as necessary. If neighboring shingles crack during careful handling, the roof may be too brittle for isolated DIY replacement. That is valuable information, even if it changes the project from a quick repair to a professional evaluation.
Lesson 4: Finding a leak requires detective work
Homeowners often focus on the roof directly above an interior stain. In practice, water can enter at a vent, flashing joint, nail hole, or damaged shingle and then follow decking, rafters, or wiring before dripping into the room below.
A useful approach is to inspect the attic during or shortly after rain, beginning downhill from roof penetrations and tracing moisture upward. Water testing with a garden hose may help in some situations, but it should be performed carefully by two people and only when safe. Flooding half the roof at once merely confirms that water remains wet.
Lesson 5: Cleanup is part of the roofing job
Loose roofing nails have an uncanny ability to migrate toward tires, shoes, lawn equipment, and bare feet. Lay tarps before beginning, control removed materials, and use a magnetic sweeper around driveways, walkways, landscaping, and the base of downspouts.
Count tools before leaving the roof. A forgotten pry bar can slide during the next storm, while an abandoned utility knife is an unpleasant surprise for anyone cleaning gutters later.
Lesson 6: A good stopping decision is a roofing skill
One of the most valuable experiences is recognizing when a small project has crossed into professional territory. Unexpected deck rot, widespread brittleness, complicated flashing, incoming weather, or difficulty maintaining fall protection are all valid reasons to stop.
Temporary protection installed by a qualified contractor is often safer than rushing a permanent repair. The goal is not to prove that you can repair a roof. The goal is to keep the building dry without becoming the next thing that needs repair.
Maintaining Shingles After the Repair
Inspect the roof from a safe location in spring and fall and after major storms. Keep gutters and downspouts clear, trim branches that rub against the roof, and address moss or algae using methods approved by the shingle manufacturer. Do not pressure-wash asphalt shingles, as aggressive cleaning can remove protective granules and force water beneath the roofing.
Check the attic periodically for moisture and confirm that bathroom, kitchen, and dryer exhaust systems discharge outdoors rather than into the attic. Good insulation and ventilation help manage heat and moisture, although ventilation changes should be designed as part of the complete roof and attic system.
Conclusion
Knowing how to repair and replace roof shingles can help you respond quickly to isolated damage, prevent avoidable leaks, and communicate more effectively with roofing contractors. The essential process is straightforward: inspect carefully, choose compatible materials, loosen surrounding shingles without damaging them, remove every necessary fastener, align the replacement correctly, nail within the specified zone, and reseal disturbed tabs.
The more important skill, however, is recognizing the limits of a DIY repair. Steep slopes, widespread deterioration, structural damage, complex flashing, and uncertain leak sources deserve professional attention. A well-repaired shingle should quietly disappear into the roof. A poorly planned repair may introduce itself again during the next thunderstorm.
Note: Roofing work is hazardous. Product specifications, warranties, permits, and building-code requirements vary by manufacturer and location. Review the applicable instructions and consult a licensed, insured roofing professional whenever safe access or the correct repair method is uncertain.