
A crow’s nest Halloween wreath delivers exactly the right combination of rustic fall texture, Gothic drama, and “something may be watching from the porch” energy. Best of all, it looks elaborate without requiring advanced crafting skills, expensive equipment, or a mysterious inheritance from a Victorian aunt.
This step-by-step project uses a grapevine wreath, loose twigs, moss, faux eggs, a black crow, and optional battery-operated lights. The finished Halloween door decoration resembles a weathered nest abandoned by a particularly theatrical bird. You can make it elegant, creepy, whimsical, or downright ominous depending on the accessories you choose.
Project Overview
- Difficulty: Beginner to intermediate
- Working time: About 90 minutes
- Drying time: Several hours if painting or sealing
- Recommended wreath size: 16 to 20 inches
- Best location: A covered front door, porch wall, mantel, or interior entryway
- Estimated cost: Approximately $25 to $60, depending on materials already available
Materials and Tools
Essential Supplies
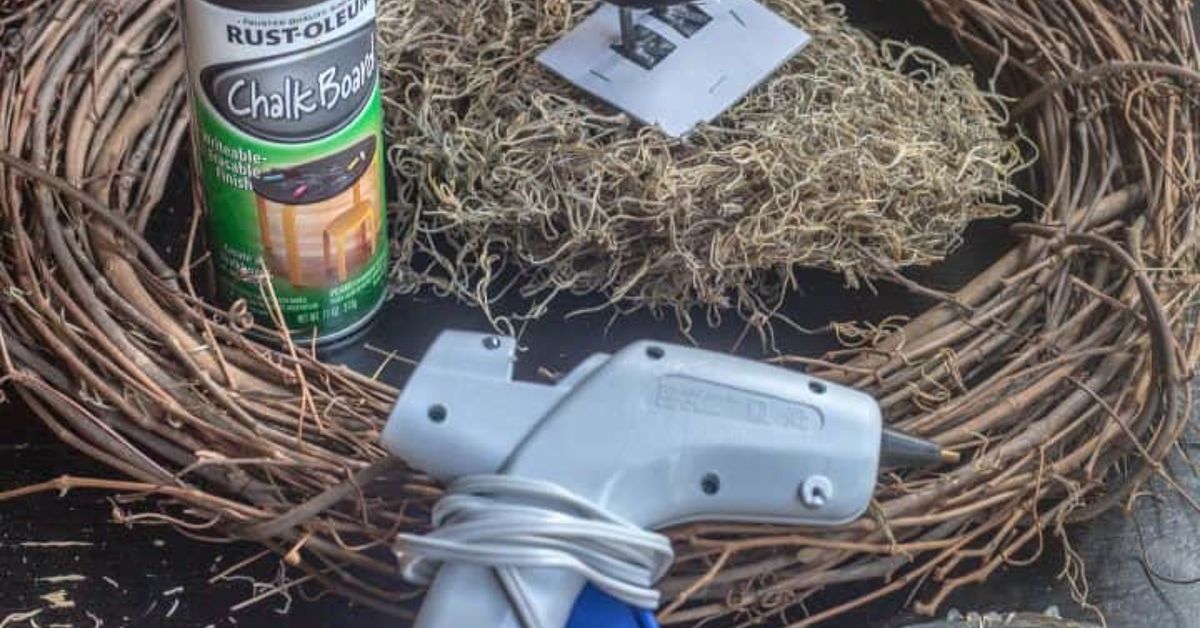
- One 16- to 20-inch grapevine wreath
- One lightweight faux crow or raven
- A bundle of clean, dry twigs in several lengths
- Natural or preserved sheet moss
- Three to five faux bird eggs
- Black, dark brown, or charcoal floral wire
- Black or dark brown spray paint
- Hot glue gun and glue sticks
- Wire cutters
- Pruning shears or heavy-duty scissors
- Protective gloves
- Wreath hanger, ribbon, or outdoor-rated adhesive hook
Optional Halloween Embellishments
- Battery-operated micro LED lights
- Black feathers
- Faux spiderweb
- Miniature bones or skulls
- Dried seedpods
- Black berries or dark floral picks
- A small wooden sign
- Gray or silver craft paint for aging effects
- Matte outdoor clear sealer
Why a Grapevine Wreath Works Best
A grapevine wreath is practically auditioning for this project before you remove the price tag. Its twisted vines already resemble the rough outer wall of a large bird’s nest, and the gaps between the vines make convenient attachment points for wire, moss, feathers, and decorative stems.
Unlike a smooth foam ring, grapevine creates an irregular silhouette. That uneven shape is useful because a convincing crow’s nest should look slightly wild rather than perfectly measured. Birds are impressive architects, but they do not stop halfway through construction to check whether the left side is Instagram-ready.
An 18-inch wreath is large enough to accommodate a visible nest and crow without becoming too heavy for an ordinary front door. Choose a form that feels firm when lifted and does not shed broken vines every time it moves.
How to Make a Crow’s Nest Halloween Wreath Step by Step
Step 1: Plan the Composition Before Attaching Anything
Place the grapevine wreath flat on a protected work surface. Position the faux crow temporarily at the lower left, lower right, or top edge. Then arrange a few twigs and eggs near it to test the overall composition.
For the strongest visual effect, avoid distributing every decoration evenly around the circle. Instead, create one dominant cluster that occupies roughly one-third to one-half of the wreath. An asymmetrical arrangement feels more natural and gives the crow a clear place to perch.
Take a quick photograph of the arrangement before moving the pieces. This small step prevents the familiar crafting mystery known as “It looked perfect thirty seconds ago, so why does it now resemble a pile of yard debris?”
Step 2: Darken the Grapevine Base
Move outdoors or to a well-ventilated work area and protect the surrounding surface. Shake the spray paint according to the manufacturer’s directions. Apply several light, even coats rather than one thick coat, rotating the wreath as needed to reach the sides and inner edges.
Matte black creates a dramatic Gothic Halloween wreath. Charcoal preserves more twig detail, while dark brown creates an aged woodland appearance. You do not need to cover every tiny opening. Leaving a few natural brown areas visible adds depth and prevents the wreath from looking like a plastic ring.
Let the base dry completely before continuing. Attempting to attach moss to tacky paint usually results in black fingertips, flattened moss, and vocabulary unsuitable for trick-or-treaters.
Step 3: Build the Outer Nest Structure
Cut or break the dry twigs into pieces approximately 6 to 12 inches long. Select several flexible pieces for the outer curve and shorter, sturdier pieces for the center.
Begin in the lower third of the wreath. Tuck the ends of the longest twigs into the grapevine form, allowing them to cross and overlap. Arrange them in a shallow crescent rather than a flat bundle. The goal is to create the illusion of a nest projecting from the front of the wreath.
Wrap floral wire around the thickest twigs and the wreath base. Twist the wire tightly at the back, trim the excess, and bend the sharp end inward. Add more branches in alternating directions until the structure resembles a loose basket.
Floral wire should provide the main support. Hot glue is useful for stopping small pieces from shifting, but glue alone may loosen when exposed to heat, cold, or repeated door movement.
Step 4: Form the Nest Bowl
Add shorter twigs across the lower cluster, building upward around the sides while leaving the center slightly hollow. Real crow nests are substantial structures with rough stick exteriors and softer interior linings, so contrast is important.
Press small amounts of moss, dried grass, or fine bark fibers into the center. Secure the lining with thin wire or small dots of hot glue placed underneath. Keep the moss uneven and slightly recessed. A perfectly round green cushion will look more like a fairy garden than an ominous crow’s nest.
Step back and view the project vertically. If the nest appears flat, add two or three short branches that project outward at slight angles. Trim any twig that extends far enough to catch clothing or surprise a delivery driver.
Step 5: Secure the Faux Crow
Many decorative crows have wired feet, clips, or lightweight plastic legs. Whenever possible, wrap the feet directly around a strong twig or the grapevine base. Reinforce the attachment by passing floral wire around the body support or legs, keeping the wire hidden beneath feathers.
Position the bird so it appears to look into the nest, guard the eggs, or stare suspiciously at arriving guests. A slight head turn creates more personality than a perfectly forward-facing pose.
Test the attachment by gently tilting the wreath forward. The crow should remain stationary. If it nods enthusiastically or attempts to leave the project, add another wire anchor.
Step 6: Add the Faux Eggs
Place three faux eggs in the moss-lined center. Odd-numbered groups generally look more natural than pairs. Pale gray, cream, muted blue, or speckled eggs photograph well against black twigs and dark feathers.
Apply a small amount of hot glue beneath each egg and hold it in place until stable. Avoid flooding the nest with glue. Large shiny glue puddles can make the eggs look less “mysterious woodland discovery” and more “school craft emergency.”
For a creepier variation, paint fine black cracks on one egg or substitute a miniature skull. Keep the focal point simple, however. The crow, nest, and eggs should remain readable from several feet away.
Step 7: Fill the Gaps Without Overfilling the Wreath
Tuck small pieces of moss, black leaves, feathers, dried pods, or dark berries around the nest. Repeat materials in two or three locations to create visual continuity.
Leave portions of the painted grapevine exposed. Negative space keeps the design from becoming a solid black mass and helps the nest stand out. A good spooky wreath suggests that nature has taken a sinister turn; it does not need to contain the entire seasonal aisle.
For subtle contrast, dry-brush a tiny amount of gray craft paint across selected twig edges. This gives the branches a weathered, moonlit appearance.
Step 8: Add Optional Battery-Operated Lights
Thread a short strand of battery-powered micro lights through the back of the grapevine wreath. Bring a few bulbs around the nest, hiding the wire beneath moss and branches.
Use warm white lights for an antique look, purple lights for playful Halloween color, or dim amber lights for an eerie glow. Secure the battery pack to the back with floral wire or a removable strap, leaving the switch accessible.
Do not use an open flame anywhere near dried twigs, moss, feathers, ribbon, or faux spiderweb. Battery-operated lights create atmosphere without turning your front door decoration into an unscheduled fire demonstration.
Step 9: Perform the Vertical Shake Test
Lift the wreath and hold it upright over the worktable. Gently shake it several times. Check the crow, eggs, twigs, battery pack, and hanging loop.
Rewire anything that shifts. Remove loose moss strands and trim exposed wire ends. This inspection is especially important for a wreath displayed on a frequently used door, where opening, closing, wind, and enthusiastic children can test every attachment.
Step 10: Seal and Hang the Finished Wreath
For a covered outdoor location, apply a compatible matte clear sealer after testing it on an inconspicuous area. Follow the product directions and allow the finish to cure before hanging the wreath.
Use a wreath hanger, sturdy ribbon, or an outdoor-rated adhesive hook that can support more than the finished wreath’s total weight. Clean and prepare the door surface according to the hook manufacturer’s instructions, observe the recommended waiting period, and confirm that the hook is intended for the door material and outdoor conditions.
Hang the wreath at approximately eye level. Make sure the bird, twigs, and lights do not interfere with the doorknob, door frame, screen door, or visibility through a peephole.
Crow’s Nest Halloween Wreath Design Variations
Elegant Gothic Wreath
Use matte black grapevine, charcoal feathers, dark burgundy berries, black velvet ribbon, and antique silver accents. Limit the palette to three colors for a sophisticated result.
Haunted Forest Wreath
Add gray moss, lichen-like floral picks, tiny mushrooms, weathered seedpods, and a few skeletal branches. Position the crow as though it has just landed in an abandoned forest.
Edgar Allan Poe-Inspired Wreath
Attach a small plaque reading “Nevermore,” add aged book-page strips, and place the bird above the nest. Keep paper elements indoors or under a deeply covered porch.
Family-Friendly Halloween Wreath
Use a wide-eyed cartoon crow, purple ribbon, orange berries, striped eggs, and softly glowing lights. Replace bones and cobwebs with miniature pumpkins.
Minimalist Crow Wreath
Paint the grapevine wreath black, add one twig nest, three eggs, and a single crow. Skip the mossy extras and ribbon. The limited design is striking on a light-colored door.
Common Problems and Easy Fixes
The Nest Looks Like a Random Bundle of Sticks
Create a visible bowl by shortening the center twigs and building the sides higher. Add a distinct moss lining so viewers can immediately understand the shape.
The Crow Keeps Leaning Forward
Wire both feet to a structural branch and add a hidden support wire behind the body. Avoid relying on a small foot clip when the wreath will hang on a moving door.
The Wreath Looks Too Dark
Add pale eggs, gray dry-brushing, a muted ribbon, or warm micro lights. Contrast is more effective than adding more decorations.
Hot Glue Is Visible
Cover cooled glue with moss, a small twig, black paint, or a feather. On future attachments, place glue beneath the object rather than around its edges.
The Wreath Tilts on the Door
The decorative cluster may be heavier on one side. Move the hanging loop slightly toward the heavier section or add a hidden stabilizing pad to the back.
Natural Materials Are Shedding
Remove brittle pieces, secure loose moss with fine wire, and apply a light compatible sealer. Store the wreath in a rigid box rather than a flexible bag.
Care and Storage Tips
Display the wreath under a covered porch whenever possible. Prolonged rain, intense sunlight, and strong wind can damage moss, feathers, paint, adhesives, and lightweight accessories even when a protective coating has been applied.
Bring the wreath indoors during severe weather. Before storage, remove the batteries from any light strand and inspect the wreath for moisture or loose materials. Place it in a wreath box with acid-free tissue or clean kraft paper supporting the nest and crow.
Store the box flat or secured upright in a dry, temperature-stable location. Avoid placing heavy holiday bins on top unless flattened crows are part of next year’s decorating theme.
Final Thoughts
Learning how to make a crow’s nest Halloween wreath is less about achieving perfect symmetry and more about building believable texture. A dark grapevine base provides the tangled structure, crossed twigs create the nest, moss softens the center, and a watchful faux crow gives the entire piece its personality.
The project is easy to customize, inexpensive when made with repurposed supplies, and dramatic enough to become the centerpiece of a Halloween porch. Secure each component carefully, keep outdoor conditions in mind, and let the arrangement remain slightly wild. A crow’s nest should appear mysterious and weatherednot as though the bird hired an interior designer with a ruler.
Practical Experience Notes: What Makers Learn While Building This Wreath
The most useful lesson from assembling a crow’s nest wreath is that the project usually looks worse before it looks better. During the early stages, the wreath may resemble a black ring with several twigs caught in it after a storm. That is normal. The design begins to make sense only after the nest develops a raised outer wall, a softer center, and a clearly positioned crow.
Building the twig structure directly on a door is tempting because it lets you judge the final orientation. It is also an excellent way to drop moss on the floor, scratch the door, and discover that hot glue does not respect gravity. Working flat for the initial assembly and checking the wreath vertically after every major stage produces better results.
Another common discovery is that the most realistic twigs are not always the easiest twigs to use. Dramatically crooked branches add character, but they can make the wreath too deep for a storm door. Before wiring them permanently, hold the wreath against its intended display location and check the available clearance. A slightly flatter nest is preferable to hearing the crow get smacked every time someone opens the door.
Wire proves more valuable than glue throughout the project. Glue is fast, convenient, and ideal for small decorative pieces, but wire handles weight and movement more reliably. A good working approach is to wire the structural elementsthe crow, large twigs, battery pack, and heavy floral picksand use glue only to stabilize moss, eggs, feathers, and lightweight accents.
The crow’s direction also matters more than expected. When the bird faces outward, it appears to greet or threaten visitors. When it faces the nest, the scene tells a clearer story: the bird is guarding something. Turning its head slightly toward the viewer creates the strongest combination of narrative and creepiness. Even an inexpensive faux crow looks more convincing when its pose seems intentional.
It is easy to add too much moss. A thin, irregular lining looks natural, while a thick mound can swallow the eggs and hide the twig construction. Start with less than you think you need. Additional moss can always be tucked into empty spaces, but removing a hot-glued green clump is an activity best described as character-building.
Lighting should be tested before the final layer of decorations is attached. Confirm that the battery pack works, that the switch remains reachable, and that the light color complements the wreath. Once the wire is buried beneath moss and branches, replacing the strand becomes an archaeological excavation.
The finished wreath should also be photographed from the street or sidewalk rather than only at close range. Details that look impressive on a worktable may disappear from ten feet away. Pale eggs, a recognizable bird silhouette, and one concentrated decorative cluster remain visible at a distance. Tiny spiders, miniature labels, and delicate feathers work better as close-up surprises than primary features.
Finally, restraint usually produces the best result. Stop when the crow, nest, and eggs are immediately recognizable and the wreath still shows areas of open grapevine. Halloween decorating encourages enthusiastic excess, but this design becomes creepier when it suggests a story rather than explaining every detail. One silent crow guarding an unsettling nest can be far more memorable than seventeen plastic spiders fighting for attention.
SEO Information