
Easter eggs are basically tiny, oval billboards for your personality. Minimalist? Maximalist? “I found this in the craft drawer and I’m committing to the bit”?
There’s an Easter egg for that. This guide rounds up 45 creative Easter egg ideas you can make andmore importantlyactually display all spring long,
from natural-dyed classics to modern, dye-free designs and centerpiece-worthy arrangements.
Along the way, you’ll get practical styling tips (so your eggs don’t look like they’re waiting for a ride home), plus display tricks that work whether you’re hosting brunch,
decorating a mantle, or just trying to make your kitchen counter look like a spring magazine spread.
Before You Start: The “Don’t Ruin the Fun” Prep
Pick your egg type (based on how long you want to keep them)
- Hard-boiled eggs: Great for same-day decorating and short-term display. If you’ll eat them, stick to food-safe dyes and keep them chilled when not decorating.
- Blown eggs (emptied shells): Best for keepsakes and long displayslightweight, classic, and less “science experiment” on day three.
- Faux eggs (wood, plastic, papier-mâché): The MVP for wreaths, garlands, and anything involving glue, glitter, paint, or ambitious toddlers.
Styling rule of thumb
The most photogenic Easter egg displays use one unifying theme (color palette, pattern style, or finish) plus one surprise element
(metallic detail, texture, or an unexpected motif). Translation: choose “pastel ombré” and add one gold-leaf accentnot every craft supply you own.
Color & Dye Effects That Look Fancy (Even If You’re Winging It)
-
Natural Dye “Pantry Rainbow” Eggs
Simmer dyes from kitchen staples like red cabbage (blues), turmeric (gold), onion skins (warm amber), coffee (soft brown), or beets (pink). The colors come out earthy and layeredperfect for a spring centerpiece that feels organic, not neon. -
Ombre Dip-Dyed Eggs
Create a gradient by dipping the egg in dye for longer at the base and shorter at the top. It’s the easiest way to get a “designer” look with minimal effortlike your eggs hired a stylist. -
Speckled “Robin’s Egg” Finish
Start with pale blue or soft green, then flick diluted brown paint (or cocoa-tinted edible color for food-safe eggs) for a natural speckle. Display in a shallow bowl with moss or faux grass for instant spring vibes. -
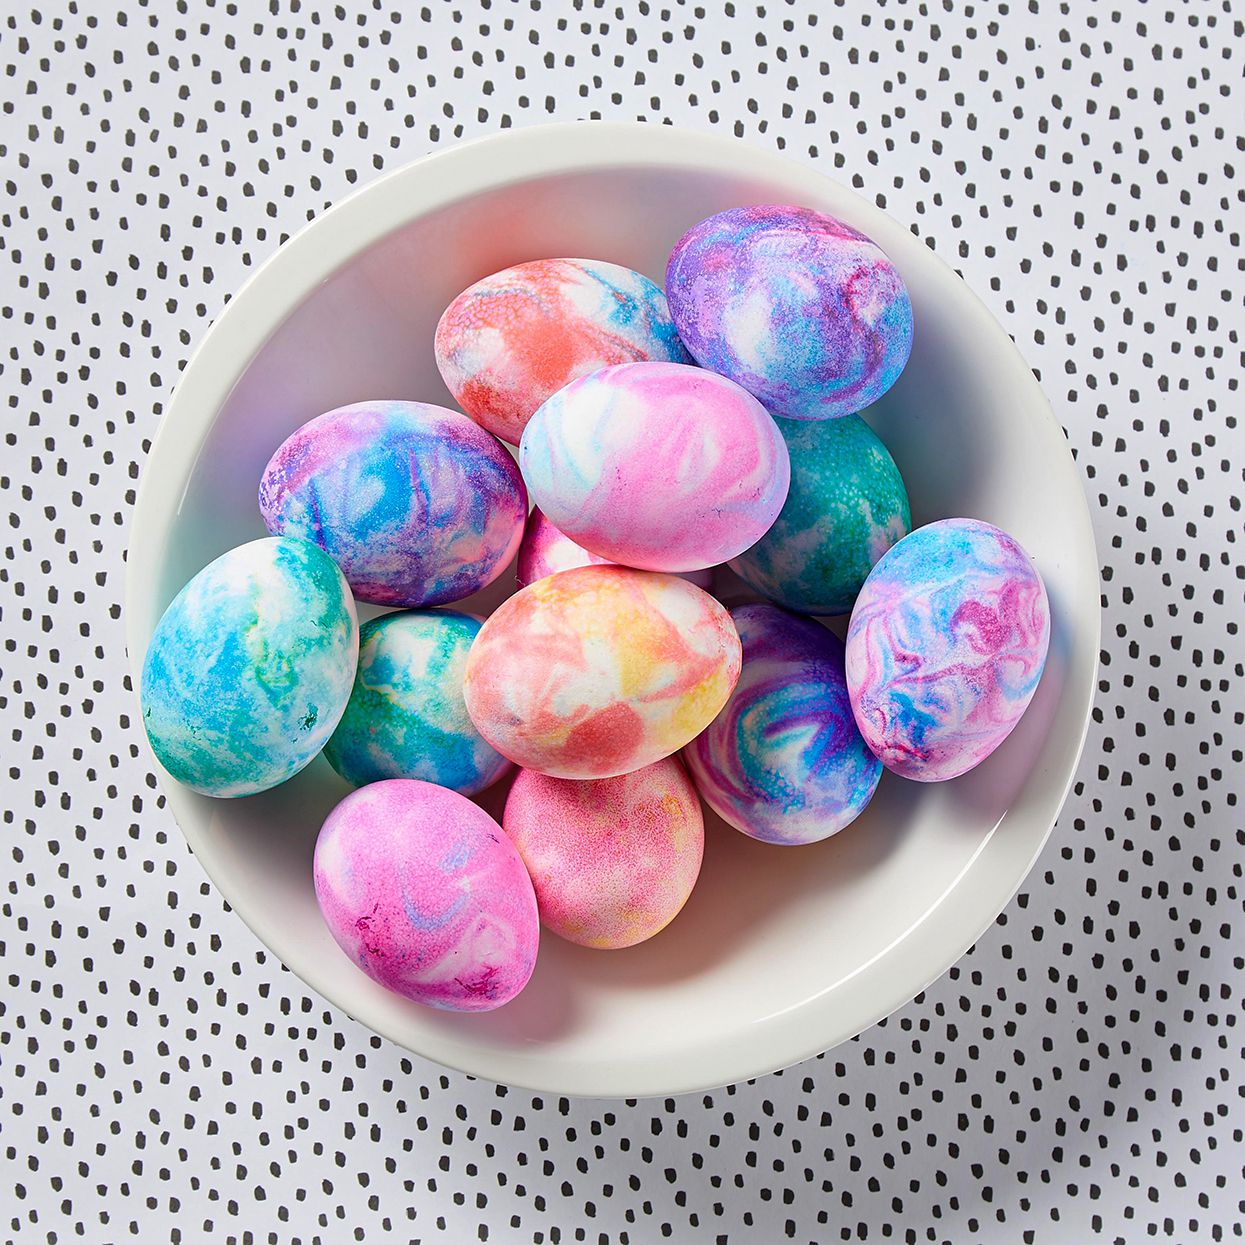
Shaving Cream Marble Eggs
Swirl dye through shaving cream, roll the egg, and you’ll get dreamy marbling that looks like fancy stationery. These are especially striking displayed in a clear glass compote or cloche. -
Oil-Slick “Galaxy” Swirl Eggs
Use a dark base (navy or black), then add tiny dots of metallic paint or edible shimmer (if you’re eating them) for a starry effect. Arrange in a black bowl or on a white platter for high contrast. -
Watercolor Wash Eggs
Brush on diluted watercolor-style dye in soft layers. The key is letting colors overlap a littlelike a spring sunset, but egg-shaped. -
Color-Block Dip Eggs
Dip one half, let dry, then dip the other half in a contrasting color. Display upright in egg cups so the line stays crisp and graphic. -
Two-Tone “Half-Dipped” Minimal Eggs
Leave the top white and dip only the bottom third. Add a thin metallic stripe at the border for a clean, modern finish that looks great on open shelving. -
Tea-Stained Vintage Eggs
Soak shells in strong tea (or coffee) for an antique patina. Pair with twine and dried florals for a “cottagecore, but make it calm” display. -
Tie-Dye Wrap Eggs
Wrap eggs in a paper towel, drizzle multiple dye colors, and let them blend. The result is unpredictablein the fun way, not the “why is there blue on the dog” way. -
Stamped Dye Patterns
After dyeing, add small stamped motifs (dots, tiny flowers, or abstract shapes). Keep the stamp color consistent across a set to make the collection feel curated. -
Monochrome “One Color, Many Shades” Set
Pick one color family (all blues, all pinks, all greens) and vary saturation across the batch. Display in a white egg carton or ceramic tray for a clean, editorial look.
Paint, Tape, Texture: Dye-Free Designs That Still Steal the Show
-
Washi Tape Geometric Eggs
Add triangles, stripes, or confetti shapes using washi tape. This is the mess-free hero of Easter egg decoratinggreat for kids, perfectionists, and anyone who fears dye stains more than taxes. -
Sticker-Resist Eggs
Place small stickers (stars, dots, letters), dye or paint the egg, then peel. The negative space looks crisp and modernespecially when displayed in a grid-like tray. -
Paint-Pen Pattern Eggs
Use paint pens for dots, squiggles, checkerboards, and tiny florals. This is basically doodling, but with a springtime excuse. -
Chalkboard Eggs
Paint eggs with chalkboard paint (faux eggs are best), then write names, little messages, or mini menus. Perfect as place cards at brunchyour guests get a seat assignment and a compliment. -
Polka Dot “Confetti Party” Eggs
Use a sponge dauber or the eraser end of a pencil to dot on paint. Keep the dot size consistent for a polished look that reads playful, not chaotic. -
Brushstroke Modern Art Eggs
One or two bold brushstrokes on a white egg can look gallery-worthy. Group them in a monochrome bowl so the strokes feel intentional and graphic. -
Splatter-Paint Eggs
Mask your area, then flick paint lightly for a Jackson Pollock-meets-spring effect. Display on a plain linen napkin so the texture stands out. -
Gold or Silver Metallic Drip Eggs
Let metallic paint “drip” from the top and stop naturally. It’s glam, fast, and looks expensiveeven if your “studio” is a kitchen counter. -
Puffy Paint Raised-Texture Eggs
Use puffy paint to create raised flowers, squiggles, or geometric lines. These look especially cool in a low bowl where guests can see the 3D detail up close. -
Decoupage Napkin-Print Eggs
Use patterned napkins (think florals or toile) to wrap eggs for a vintage, heirloom vibe. Display in a basket lined with a tea towel for a “found at a charming market” look. -
Tissue Paper Mosaic Eggs
Layer small tissue pieces for a stained-glass vibe. This works beautifully as a grouped displaymany eggs together look like a colorful patchwork quilt. -
Crepe Paper Wrapped Eggs
Wrap faux eggs in crepe paper for soft texture. These are fantastic in wreaths because the paper finish reads cozy and dimensional. -
Fabric-Wrapped Eggs
Wrap with scraps of gingham, linen, or floral cotton. Secure with a ribbon bow and display in a carton or tiered tray for farmhouse spring decor. -
String-Wrapped “Textile” Eggs
Wrap faux eggs with embroidery floss or thin yarn. These look amazing in neutral tonescream, blush, sagearranged in a wooden bowl. -
Foil-Pressed Shine Eggs
Apply foil sheets for a reflective finish. Use sparinglyone foil egg per five matte eggs keeps the display classy, not disco.
Nature-Inspired & Luxe Details (For When Spring Decor Turns Serious)
-
Pressed Flower Eggs
Apply pressed flowers to faux eggs for delicate botanical art. Display under a glass cloche to protect the details and make it feel museum-y (in a good way). -
Leaf-Print “Eco” Eggs
Wrap a small leaf against the shell, secure with fabric or stocking, then dye. The leaf creates a crisp silhouette that looks like a nature printperfect for rustic table styling. -
Herb + Twine Nest Eggs
Place eggs in small nests of twine with sprigs of rosemary or thyme. It’s fragrant, pretty, and makes your table look like it has a cooking show budget. -
Gold-Leaf Accent Eggs
Add tiny bits of gold leaf to watercolor or neutral eggs. This is the easiest “luxe upgrade” that still feels spring-appropriate rather than holiday-glitzy. -
Botanical Illustration Eggs
Paint simple stems, buds, or tiny wildflowers. Keep the motifs small and airy; negative space is what makes them look refined. -
Vintage China-Inspired Eggs
Paint patterns that mimic classic dishware (spatterware, transferware, or delicate borders). Display them in a ceramic egg carton for a charming “collected” look. -
“Geode” Crystal Eggs
Create a geode-style opening with painted facets or glued faux crystals (faux eggs only). These look best as a few statement pieces mixed into simpler eggs. -
Soft Neutral “Stone” Eggs
Use taupe, clay, and cream tones, then add light speckling. Pair with natural wood, linen, and greenery for a calm, modern spring palette. -
Pastel Plaid Eggs
Paint thin plaid lines in soft colors. When displayed together, plaid reads cozy and classiclike spring pajamas, but decorative.
Display Ideas: Turn Decorated Eggs Into Actual Spring Decor
-
Classic Egg Bowl Centerpiece
Fill a wide bowl with decorative filler (moss, shredded paper, faux grass), then nest eggs on top. Add a few blooms around the edge for a finished look. -
Eggs Under Glass (Cloche Display)
Place a small arrangement of eggs under a cloche for an instant focal point. Mix 3–7 eggs with different patterns, keeping the palette consistent. -
Ceramic Egg Carton “Gallery Tray”
Display eggs in a carton-style tray so each egg gets its own spotlight. This looks especially clean with monochrome or minimalist designs. -
Egg Tree (Branch Display)
Hang lightweight eggs from branches in a vase to create an “Easter tree.” Keep ornaments coordinated (all pastels, all neutrals, or all metallic-accented) so it reads elegant, not craft-chaos. -
Easter Egg Wreath
Use faux eggs to build a wreath in a color story: ombré, all-white-and-gold, or “spring meadow.” Add a ribbon tail for drama at the door. -
Egg Garland for Mantles and Stair Rails
String lightweight eggs (plastic or papier-mâché) with ribbon or twine. Alternate eggs with greenery to keep it airy and springlike. -
Place-Setting Egg Cups
Put one decorated egg in a cup at each setting with a name tag. It’s both decor and a conversation starterbecause everyone will ask, “How did you do that?” -
Egg “Bouquet” Basket
Arrange blown or faux eggs on sticks like floral stems, then place them in a small vase or basket. It’s a bouquet that never wiltsand doesn’t need water. -
Tiered Tray Spring Scene
Layer eggs with mini bunnies, candles, and greenery on a tiered tray. Use varying heights so it looks styled; repeating colors keeps it cohesive.
Quick Wrap-Up: How to Make Your Eggs Look “Styled,” Not “Stored”
The best Easter egg decorations follow three simple design moves:
(1) repeat a palette, (2) mix finishes (matte + glossy, soft + metallic), and (3) add height with branches, stands, or tiers.
When in doubt, edit. One stunning egg in a pretty cup beats twelve eggs that look like they fought a glitter war.
Spring Egg-Decorating Experiences: What You Learn After 45 Eggs
If you’ve ever decorated Easter eggs and thought, “Why does this feel like a cheerful craft and a tiny life lesson at the same time?”welcome. Egg decorating is
one of those spring rituals that starts simple (dip, dry, done) and ends with you debating whether your dining table needs an egg tree “for balance.”
Here are the real-world experiences that tend to show up once you’ve tried a whole batch of creative Easter egg ideasand how to use them to your advantage.
First, you discover the power of a theme. In the beginning, it’s tempting to try everything: marbling, florals, plaid, gold leaf, cartoon faces,
you name it. The result can be funbut also visually loud. Once you’ve made enough eggs, you start noticing that the most satisfying displays aren’t the ones with
the most techniques; they’re the ones with a clear point of view. A set of ombré eggs in one color family looks intentional. A mix of botanicals and neutrals feels
calm and “springy.” Even goofy eggs (hello, tiny mustaches) look better when they share a unifying color palette.
Second, you learn that drying time is a real character in this story. Not a villainmore like that friend who shows up late and still changes the whole plan.
Some finishes need patience: watercolor layers, decoupage, and anything with glue or textured paint. If you’re making eggs for a centerpiece, you’ll be happiest
when you build in “boring minutes” for drying. Those minutes also happen to be perfect for setting up your display: choosing a bowl, fluffing moss, trimming ribbon,
or deciding that yes, your cloche deserves attention too.
Third, you get surprisingly good at problem-solving. A color comes out lighter than expected? Add speckles, a paint-pen border, or a metallic accent.
A pattern smudges? Turn it into an abstract brushstroke and pretend it was modern art all along. An egg cracks? Congrats, you just created a “geode” opportunity (for faux eggs)
or a reason to pivot that one into the “kitchen snack” category (for edible eggs). After enough attempts, you stop seeing mistakes as failures and start treating them like
plot twists.
Fourth, you notice how much display changes everything. An egg that looks merely “cute” in your hand can look stunning in the right setup.
Egg cups elevate minimalist designs. A shallow bowl makes speckling look more detailed. Branches add height so the whole arrangement reads like spring decor, not just a pile
of eggs taking a nap. If you want your eggs to feel like home décor, you start thinking like a stylist: contrast, repetition, and a focal point.
Finally, there’s the best part: egg decorating is social glue (sometimes literally). Families and friends end up swapping tools, sharing ideas, and laughing at
the accidental “sad egg” face someone painted. It’s one of those crafts where the process matters as much as the result. So if you’re making a display for spring,
take a picture of the setupbut also enjoy the behind-the-scenes. The eggs will look great on the table, but the real win is the memory of making them.