
Concrete has an identity crisis: everyone says it “dries,” but what it actually does is cure. Curing is the not-so-magical chemical reaction (hydration) where cement + water form the glue that locks your sand and gravel together. And that reaction doesn’t finish the day you pull the formsit keeps going for weeks, with a big milestone at about 28 days. Your job during the early days is simple: don’t let the concrete lose the moisture and temperature conditions it needs to become strong.
Do it right and you get a slab that’s tougher, more durable, and less likely to crack like a dry cookie. Do it wrong and you get surface dusting, spiderweb cracks, scaling, and the kind of regret that makes you stare at your driveway like it personally betrayed you. Let’s fix thathere are the practical curing concrete dos and don’ts (with specific examples) so your next pour turns out like you meant it to.
Concrete Curing 101: Set vs. Cure (and Why People Get Tricked)
“Set” is when it firms up. “Cure” is when it gets strong.
Concrete typically sets within hoursenough to hold shape and resist light disturbance. But curing is the longer process where it gains strength and durability. The first few days are critical because the surface can lose water fast (sun + wind = moisture thief), and that can interrupt hydration near the top. Result: a weak, crack-prone “skin” over stronger concrete beneath.
Curing is moisture + temperature management
The goal is to keep the concrete surface from drying out too quickly and to prevent temperatures from getting too extreme. Moisture retention and steady temperature early on help reduce cracking and improve long-term performanceespecially abrasion resistance and scaling resistance.
The Dos: What to Do After You Pour Concrete
DO start curing as soon as finishing is done (and the surface can handle it)
Curing should begin once the concrete is firm enough that water or coverings won’t mar the surface. If you start too early, you can wash out cement paste or damage the finish. If you start too late, the surface may already be drying and shrinking. Think of it like sunscreen: you don’t put it on after you get sunburned and call it “preventative.”
DO keep it damp (not flooded) during the early cure
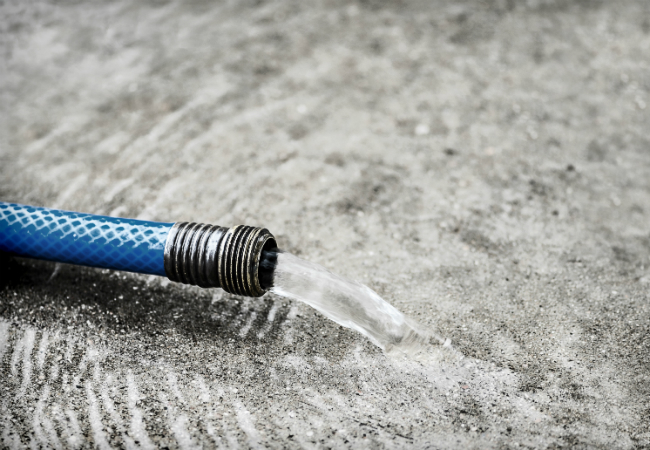
One classic approach is moist curinglightly wetting the surface multiple times per day. For many small DIY slabs, frequent light watering is practical. The big idea is steady moisture, not occasional dramatic hose-downs that turn your slab into a temporary splash pad.
DO choose a curing method that matches your project (and your patience level)
Here are the most common curing options, from “hands-on” to “set it and forget it.”
- Water curing (spraying or sprinkling): Keep the surface continuously damp. Works well for broom-finished walks, slabs, and small pours.
- Wet coverings: Wet burlap or curing blankets placed on the surface and kept damp. Great for consistent moisture retention.
- Plastic sheeting: Poly sheeting reduces evaporation. Overlap seams, weight the edges, and avoid wrinkles for a more uniform result. (Note: plastic can leave mottled color on decorative concrete.)
- Ponding (for slabs): Surround the slab edge, then keep a shallow “pond” of water above it. Very effective when it’s practical.
- Curing compounds: Spray-on membrane-forming products that reduce moisture loss. Useful when water curing isn’t feasible.
DO use curing compounds correctly (if you go that route)
A membrane-forming curing compound creates a thin film that slows moisture loss. This can be a lifesaver on large slabs or jobs where repeated watering is unrealistic. The trade-off: some curing compounds need removal before certain coatings, stains, or adhesives will bond properly. Always match the product to your end goal (bare concrete, sealed, stained, painted, tiled, etc.).
DO plan for weather, because the weather is not emotionally invested in your timeline
Hot, dry, windy weather: protect against rapid evaporation
Wind and low humidity can pull water off the surface fast, increasing the risk of plastic shrinkage cracking. Use windbreaks, shade, mist-fogging, or evaporation control methods as needed. And keep your curing plan ready before you pourimprovising after the fact is how cracks become “decorative.”
Cold weather: protect from freezing and slow strength gain
Cold temperatures slow hydration. Freezing is worseif concrete freezes before it gains sufficient early strength, performance can drop dramatically. Use insulating blankets, enclosures, and other cold-weather measures, and keep the concrete protected until it reaches safe early strength.
DO cut control joints (because concrete will crack… your job is to choose where)
Even with excellent curing, concrete shrinks and moves with temperature changes. Control joints create a planned “weak line” so any cracking happens where it’s less visible and less harmful. A common rule-of-thumb is to space joints in feet at about 2–3 times the slab thickness in inches (for example, a 4-inch slab often gets joints around 8–12 feet apart). Cut them early enoughtypically within the first dayso the concrete cracks on your terms, not its own.
The Don’ts: How Concrete Gets Ruined (Quietly, Then Suddenly)
DON’T let the surface dry out early
The number-one curing mistake is letting the surface lose moisture too fast. You may not see immediate damage, but the surface can end up weaker, dustier, and more prone to scaling or cracking. If you’re going to pour, commit to curinghalf-curing is like half-brushing your teeth. You don’t get half a cavity.
DON’T blast it with water right away
If you spray too aggressively or too early, you can damage the surface, wash out cement paste, or ruin a nice finish. Wait until the surface can take light water application without marring, then keep it gently damp.
DON’T add extra water to the surface while finishing
Adding water during finishing (or “blessing” the slab with a hose because it feels sticky) can weaken the surface layer and increase dusting. If finishing is getting difficult, the fix is usually better timing, better tools, or mix/placement adjustmentsnot turning the top into soup.
DON’T paint, stain, or seal too soon
Young concrete still has internal moisture moving through it. Applying coatings too early can cause adhesion problems, discoloration, or peeling. Many guides recommend waiting until around the 28-day mark for paints and stains unless the product is specifically designed for “green” concrete.
DON’T load it like it’s fully cured just because it looks hard
Concrete gains strength over time. It may feel rock-solid, but early loading can cause cracking, surface damage, or corner spalling. A practical rule-of-thumb for many residential slabs is:
| Time After Pour | Typical What’s Safe | What to Avoid |
|---|---|---|
| First 24 hours | Leave it alone; light protection/covering when surface can take it | Foot traffic, pets, moving forms early, aggressive watering |
| 24–48 hours | Light foot traffic may be okay (project-dependent) | Heavy loads, sharp turns, ladders with point loads |
| 3–7 days | Ongoing curing; strength rising quickly | Deicers, heavy vehicles, harsh abrasion |
| 7–10 days | Some driveways may handle passenger cars (if mix and conditions allow) | Heavy trucks, RVs, concentrated loads |
| 28 days | Near “design strength” for many mixes | Still avoid abusegood concrete isn’t indestructible |
Always follow your ready-mix supplier’s guidance or the bagged mix instructions, especially for high-early-strength mixes or cold-weather placements. Traffic timing depends on thickness, reinforcement, subgrade, mix design, and weathernot just optimism.
A Simple Curing Plan You Can Actually Follow
Step 1: Pick your method before the truck arrives
Choose one main approach: wet curing, plastic/blanket covering, curing compound, or a combination. “I’ll figure it out later” is how you end up googling “why is my concrete cracking” with damp socks at 9 p.m.
Step 2: First 7 days = the “don’t mess this up” window
Many standard specifications and industry guidance treat about 7 days of curing as a common baseline, with adjustments for mix type and conditions. Some mixes and conditions may allow shorter curing, but longer curing generally improves performance.
Step 3: Extend or upgrade curing for demanding conditions
Consider longer curing (or more consistent moisture retention) when: the weather is hot/windy, the slab is thin with lots of exposed surface area, you need extra durability, or the mix includes supplementary cementitious materials that can benefit from extended curing.
Hot-Weather and Cold-Weather Curing: Quick Playbooks
Hot weather (high temp, low humidity, wind)
- Do use windbreaks and shade if possible.
- Do consider fogging/misting to reduce evaporation during finishing (without adding water to the surface layer).
- Do cure immediately after finishingdon’t wait for the surface to “look thirsty.”
- Don’t pour at the hottest part of the day if you can schedule morning/evening work.
Cold weather (near-freezing temps or dropping nights)
- Do protect fresh concrete from freezing until it reaches safe early strength.
- Do use insulating blankets/enclosures; keep temperatures steady to avoid thermal shock.
- Don’t place concrete on frozen subgrade.
- Don’t rely on “it’ll be fine” when forecasts show cold nightsplan protection up front.
Troubleshooting: “Uh… What If Something Goes Wrong?”
It rained a few hours after the pouram I doomed?
Light rain after the surface has firmed can sometimes help curing by adding moisture, but heavy rain early can damage the surface and finish. If rain is expected soon after placement, cover the slab (without touching the surface) and avoid washing or eroding the fresh paste.
My slab has fine hairline crackswhat caused it?
Hairline “map” cracks can come from rapid surface moisture loss (plastic shrinkage), finishing issues, temperature swings, or insufficient curing. The best prevention is consistent moisture control, wind protection, and prompt curing.
The color looks blotchy after curing under plastic
Plastic can trap moisture unevenly, creating darker and lighter patches (especially on decorative concrete). If appearance is critical, consider wet burlap (kept evenly damp) under plastic, a curing blanket, or a curing compound designed for architectural finishes.
Pro-Level Details That Make DIY Results Look… Not DIY
Edges and corners need extra love
Edges dry faster and chip easier. If you’re water-curing, don’t ignore the perimeter. If you’re covering, make sure the edges are sealed down so air doesn’t sneak under and dry the sides.
Bagged mixes have their own instructionsfollow them
Products from manufacturers may specify curing durations based on temperature ranges and product chemistry. Some recommend 3–5 days of continuous moisture, others longer, and cold weather protection is often explicitly called out. If the bag says “keep moist for 3 days,” do not translate that as “mist it twice and hope for the best.”
Deicers and salts: keep them away early
Deicing salts can contribute to surface scaling, especially before the concrete has matured. Avoid applying deicers during the first winter if possible, and use sand for traction instead when practical.
of Real-World “Experience” Lessons (What People Commonly Learn the Hard Way)
Below are the kinds of real-life curing lessons contractors, ready-mix suppliers, and homeowners regularly sharepatterns that show up again and again on patios, sidewalks, and driveways. Think of these as “community-sourced wisdom,” minus the part where you have to learn it by staring at a cracked slab while whispering, “But I did everything right… mostly.”
1) The Windy-Day Surprise: Concrete Cracks Even When It’s Not “Hot”
One of the most common stories is a mild-temperature pour that still cracks. The culprit is often wind combined with low humidity. The surface dries faster than the concrete underneath, and tiny plastic shrinkage cracks appearsometimes before the homeowner even finishes putting away the tools. The “fix” people wish they had done: windbreaks, shade, and fogging/misting during finishing, followed by immediate curing coverage. It’s a good reminder that curing is about evaporation rate, not just the thermometer.
2) Plastic Sheeting Works… Until Someone Cares About Looks
Plastic is wonderfully effective at slowing evaporation, which is why it’s popular. But decorative slabs sometimes come out mottleddark streaks, light patches, “tie-dye concrete,” you name it. The pattern usually matches wrinkles or uneven contact points where moisture and temperature varied. People who care about appearance often report better results using wet burlap (kept evenly damp) with plastic over it, or curing blankets that reduce uneven condensation. If the slab will be stained or stamped, the curing method should be chosen with aesthetics in mind, not just convenience.
3) The “It Looked Dry” Mistake: Overwatering vs. Consistent Dampness
Another common experience is the well-intentioned hose blastespecially on day onefollowed by a roughened surface or visible erosion. The best outcomes usually come from gentle, frequent moisture maintenance once the surface can handle it: light spraying, wet coverings, or a curing compound. Consistency beats intensity. In other words: you’re moisturizing a slab, not pressure-washing a driveway.
4) The Too-Soon Sealer Problem
People often seal early because the slab “feels hard,” then get cloudy spots, peeling, or uneven color. Many coatings need the concrete to reach a more stable moisture conditionoften near the 28-day windowunless the product is made for green concrete. The repeat lesson: don’t let the calendar bully you. If conditions are humid or cool, moisture can linger longer, and rushing the finish can create adhesion problems that take far more time (and money) to correct than waiting would have.
5) The Paw-Print Reality Check
Finally, there’s the universal truth: pets and kids do not respect curing schedules. Homeowners commonly report that the easiest “quality upgrade” is simply creating a temporary barrier for the first day or twotape, cones, sawhorses, whatever worksbecause a single enthusiastic dog can stamp a permanent signature into your “brand-new” walkway. It sounds silly, but controlling traffic is part of curing success. Concrete doesn’t care why the footprint happened; it just keeps it forever.
Conclusion: Strong Concrete Is Mostly Just Well-Cared-For Concrete
If you remember only three things, make them these: (1) curing is hydration management (not just “drying”), (2) the first week is where you win or lose durability, and (3) the best curing plan is the one you’ll actually followevery day, on purpose. Keep it moist, protect it from extremes, cut smart control joints, and give coatings the patience they demand. Your future self (and your slab) will thank you.