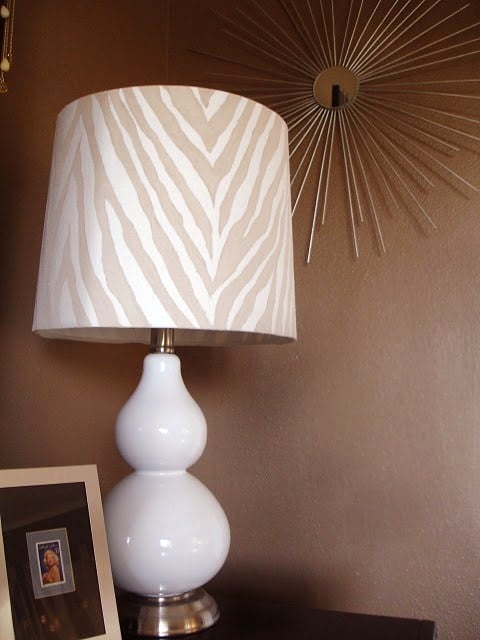

A plain lampshade is practical, dependable, and about as exciting as unsom decorative accent without requiring advanced artistic skills or an expensive shopping trip.
This hand painted lamp shade tutorial explains how to select the right shade, choose compatible paint, create a balanced design, avoid bleeding and brush marks, and finish the project safely. Whether you prefer delicate wildflowers, bold geometric shapes, playful scallops, or relaxed watercolor washes, the same basic process will help you achieve a polished result.
Why Paint a Lampshade Instead of Buying a New One?
Painting a lampshade is one of the simplest ways to personalize a room. A basic white drum shade can become a sophisticated focal point, while a thrift-store find can be rescued from its former life as somebody’s questionable 1997 decorating decision.
A DIY painted lampshade also gives you complete control over the colors and pattern. You can match existing curtains, repeat a shape from a rug, introduce an accent color, or create a design that would be difficult to find in a store.
The project is especially effective on table lamps, bedside lamps, small floor lamps, and decorative reading lights. Because the light shines through or around the painted surface, the design changes character when the lamp is switched on. Translucent colors tend to glow, while opaque areas create stronger silhouettes.
Choose the Right Lampshade for Painting
Start with a Simple Shape
A drum or cylinder shade is the easiest option for beginners because its sides are relatively straight. Empire and bell-shaped shades can also be painted, but their sloping surfaces make repeating patterns slightly more complicated.
Look for a shade that is structurally sound. The frame should not be bent, the covering should feel securely attached, and the interior lining should not be cracked, scorched, or peeling. Painting can improve appearance, but it cannot repair a shade that is already auditioning for a role in a disaster movie.
Identify the Surface Material
Before opening a bottle of paint, determine what the shade is made from. Common materials include woven cotton, linen, polyester fabric, paper, parchment-style material, vinyl-coated hardback, and plastic.
- Fabric shades: Use fabric paint or acrylic paint mixed with textile medium.
- Paper shades: Use acrylic craft paint, paint pens, or a lightly diluted wash applied sparingly.
- Vinyl or plastic shades: Use paint labeled for multiple surfaces and test adhesion first.
- Silk or delicate shades: Avoid heavy acrylic coatings. A specialist fabric dye or extremely light application is safer.
A white, cream, or pale neutral shade generally produces the most predictable colors. Dark fabric can still be decorated, but it usually requires opaque paint and may reduce the amount of light passing through the shade.
Materials and Tools
Gather everything before you begin so you do not have to wander through the house holding a wet lampshade and asking where the paper towels went.
- A clean fabric, paper, or hardback lampshade
- Fabric paint, multi-surface acrylic paint, or acrylic craft paint
- Textile medium for woven fabric, if needed
- Small flat, round, and detail paintbrushes
- Foam dauber or cosmetic sponge for stenciling
- Painter’s tape
- Chalk pencil, disappearing fabric marker, or soft graphite pencil
- Paper, cardboard, or a printed design template
- Stencil, ruler, flexible measuring tape, and eraser
- Lint roller, microfiber cloth, or soft brush
- Paper plate or artist’s palette
- Water container and paper towels
- Drop cloth or kraft paper
- Low-heat LED light bulb compatible with the lamp
How to Hand Paint a Lampshade Step by Step
Step 1: Unplug the Lamp and Remove the Shade
Unplug the lamp before doing anything else. Wait until the bulb is completely cool, unscrew the finial if necessary, and lift off the shade. Painting while the shade is attached creates unnecessary electrical risk and makes it harder to reach every part of the surface.
Inspect the lamp’s socket and wiring while the shade is removed. If the cord is damaged, the socket is loose, or you notice scorch marks, stop using the lamp until it has been professionally repaired or replaced.
Step 2: Clean the Surface
Dust, hair, and oily fingerprints prevent paint from adhering evenly. Use a lint roller or microfiber duster on fabric. A vacuum with a clean upholstery attachment can help with heavily textured material.
For a washable hardback surface, wipe gently with a barely damp cloth and a small amount of mild soap. Do not saturate paper, glued seams, decorative trim, or cardboard-backed shades. Allow the shade to dry completely before painting.
Step 3: Test the Paint in a Hidden Area
Apply a small amount of paint near the rear seam or lower inside edge. Let it dry and check the shade both with the lamp off and with a cool LED bulb switched on.
The light test matters because a color that appears soft in daylight can become much darker when illuminated from behind. It also reveals uneven coverage, pinholes, bleeding, and brush marks before they spread across the entire project.
Step 4: Plan the Design on Paper
Sketch the basic layout before drawing directly on the shade. Decide where the design should begin, how it will wrap around the surface, and whether the rear seam will be visible.
For repeating patterns, measure the shade’s circumference and divide it by the number of motifs you want. A 30-inch circumference divided into ten sections, for example, gives you one design every three inches.
Beginners should consider forgiving patterns such as:
- Loose botanical branches
- Scalloped borders
- Irregular dots or dashes
- Vertical stripes
- Simple leaves and flowers
- Abstract arches
- Brushstroke grids
- Two-color geometric blocks
Step 5: Transfer the Design Lightly
Use a chalk pencil or disappearing fabric marker on woven shades. A regular pencil can work on paper, but use very little pressure so the point does not dent or tear the surface.
To trace a printed image, temporarily place the template inside a pale shade and shine a light through it. Secure the template with removable tape and trace the visible outline. This simple technique is useful for leaves, birds, stars, lettering, and symmetrical motifs.
Keep guidelines faint. Dark pencil marks may remain visible under translucent paint, like tiny reminders that enthusiasm arrived before planning.
Step 6: Mix and Prepare the Paint
For a fabric lampshade, use ready-made fabric paint or combine acrylic paint with a textile medium according to the product instructions. Textile medium helps acrylic paint spread more smoothly and reduces stiffness on woven material.
Do not dilute the paint excessively. Too much water can travel through the fibers, create halos, loosen adhesive, or warp a paper shade. For a transparent wash, add water one drop at a time and test the mixture before using it on the main design.
Mix enough of each custom color to complete the project. Recreating the exact shade of dusty blue halfway through a border is surprisingly difficult, especially when every blue in the paint box begins looking emotionally identical.
Step 7: Paint from Light Colors to Dark Colors
Begin with the palest color and gradually introduce darker shades. Light colors are easier to correct, while dark paint can quickly overpower a small design.
Load the brush lightly and remove excess paint on the palette. Apply thin coats rather than one heavy layer. On fabric, use gentle strokes that follow the weave. Avoid scrubbing the surface, which can roughen fibers and push paint beyond the intended outline.
Rotate the shade as you work instead of reaching across wet sections. Placing the shade on a clean lazy Susan or rotating cake stand can make this much easier.
Step 8: Build Depth with Additional Layers
Allow the first layer to become touch-dry before adding shadows, outlines, or highlights. Layering creates richer color without producing a thick, rubbery coating.
For painted flowers, begin with broad petal shapes, add a darker color near the center, and finish with a few fine lines. For leaves, paint the overall silhouette first and add the vein only after the base layer dries.
When painting geometric patterns, remove painter’s tape while the final coat is still slightly damp. Pull the tape back slowly at a low angle. Waiting until the paint is fully hardened can cause the tape to lift the edges of the design.
Step 9: Correct Mistakes Without Panicking
Fresh paint can often be lifted with a clean, slightly damp brush or cotton swab. Blot rather than rub. Rubbing spreads the mistake and may damage the surface.
Once the paint dries, transform small imperfections into intentional details. A crooked leaf can gain a neighboring leaf. A misplaced dot can become the first member of a charming dot family. Handmade decoration benefits from slight variation; perfect repetition can look printed rather than painted.
For a major mistake on an opaque design, allow it to dry and cover it with the original background color. This works best on painted hardback shades and less reliably on absorbent natural fabric.
Step 10: Let the Shade Dry and Cure
Set the finished shade upright in a clean, dry location with good airflow. Follow the paint manufacturer’s curing instructions, which may require considerably more time than ordinary touch-drying.
Do not reinstall a damp shade. Avoid heat-setting paint on an assembled lampshade unless both the shade manufacturer and paint manufacturer specifically approve the method. Many shades contain adhesives, plastic liners, or synthetic components that should not be exposed to an iron or concentrated heat.
Three Easy Hand-Painted Lampshade Ideas
Watercolor Botanical Shade
Mix muted green, blue, and warm brown fabric paints. Sketch several curved stems around the shade, then add loose leaves with a small round brush. Let some leaves overlap and vary their size. Finish with tiny berry-like dots in a contrasting color.
This design is forgiving because soft edges and uneven color contribute to the watercolor appearance.
Modern Scalloped Border
Measure an even distance from the lower edge and mark small guide dots around the shade. Use a round object, such as a jar lid, as a template for repeating arcs. Paint below the scalloped line with an opaque accent color.
A terracotta, navy, olive, or mustard border can update a neutral lamp without dramatically reducing light output through the upper portion.
Playful Brushstroke Pattern
Choose two or three coordinating colors. Paint short vertical marks around the shade, leaving irregular spaces between them. Add a second row with the strokes pointing in a different direction.
The result feels energetic and modern, and no one can accuse a brushstroke of being crooked when crookedness is the entire artistic strategy.
How to Prevent Common Lampshade Painting Problems
Paint Bleeding Beyond the Design
Bleeding usually occurs when the brush is overloaded or the paint is too watery. Use a drier brush, apply less pressure, and build color gradually. For stencil work, tap the foam dauber onto a paper towel before applying it to the shade.
Patchy or Streaky Coverage
Patchiness is often visible after the lamp is switched on. Apply another thin coat only where needed and inspect the shade repeatedly from the inside and outside. Do not chase perfect opacity if you want the finished design to glow.
A Stiff, Crusty Surface
Heavy acrylic paint can stiffen fabric and fill its texture. Use fabric paint, add a compatible textile medium, and avoid repeatedly brushing over partially dried areas.
Paint Peeling from a Plastic Surface
The surface may be too glossy or incompatible with the paint. Test a multi-surface product in a hidden area. Some hard shades may require a compatible bonding primer, but every added coating reduces translucency and changes how light passes through the material.
The Finished Shade Is Too Dark
Dense paint and large dark motifs reduce illumination. Keep opaque decoration concentrated near the top or bottom border, use smaller motifs, or leave generous unpainted areas between shapes.
Important Lamp Safety After Painting
Always follow the maximum wattage and bulb-type label printed on the lamp or socket. Using a bulb above the recommended wattage can overheat the fixture and nearby materials. A painted shade should never touch the bulb.
A compatible LED is a practical choice because LEDs produce light far more efficiently than traditional incandescent bulbs and release substantially less energy as heat. Even so, an LED still creates some heat, so maintain the clearances built into the original lamp and never cover ventilation openings.
Check the shade during its first several uses. Switch off and unplug the lamp if you notice an unusual odor, discoloration, bubbling paint, melting material, or excessive heat. Never use highly flammable decorative additions, and avoid painting the socket, harp, wiring, or interior electrical components.
Practical Experience Notes from Painted Lampshade Projects
The most useful lesson from lampshade makeovers is that the illuminated version matters more than the unlit version. A pattern can look perfectly balanced on a worktable and surprisingly heavy once light shines through it. Testing after the first few motifs prevents an hour of painting from becoming an hour of creative regret.
White cotton-look drum shades are usually the easiest surfaces for beginners. Their simple shape makes measuring straightforward, and their pale background shows most paint colors accurately. Highly textured linen can be beautiful, but the weave grabs the brush and creates broken edges. That texture works wonderfully for loose botanical art and less wonderfully for tiny lettering that demands the precision of a tax form.
Another recurring lesson is to stop before the design feels completely finished. Makers often continue adding leaves, dots, outlines, and flourishes because the supplies are still on the table. The result can become visually crowded, especially when illuminated. Leaving open space allows the pattern to breathe and preserves the lamp’s original purpose: producing useful light.
Brush selection also makes a larger difference than many beginners expect. A medium round brush produces natural leaves and petals with one confident stroke. A flat brush is better for stripes, borders, and color blocking. Fine liner brushes should be reserved for final details because trying to fill a large motif with one is similar to painting a bedroom wall with a toothbrush.
For stencils, the best results come from using very little paint. A nearly dry sponge produces sharper edges than a wet one. It is helpful to hold the stencil firmly against the curved surface and work from the outside of the opening toward the center. Peeling the stencil away immediately prevents wet paint from sticking to its underside and creating surprise smears during the next repeat.
Color mixing deserves extra patience. Paint often appears lighter when wet and deeper after drying, while illumination may shift it again. Warm white bulbs can make cream, terracotta, coral, and olive feel richer. Cooler bulbs may emphasize blue, gray, and green. Testing the design with the bulb that will actually be used eliminates guesswork.
Simple designs tend to age better than highly specific themes. A loose branch pattern can move from a bedroom to a living room without looking out of place. A detailed parade of cartoon dinosaurs is delightful, but it may have fewer future career opportunities. When decorating a shade for a child’s room, removable embellishments or limited painted borders can make later updates easier.
Finally, patience between coats produces a cleaner result than any expensive tool. Brushing over tacky paint causes lifting, streaks, and rough texture. Allowing each layer to dry creates sharper details and more predictable color. The project may be small, but it still rewards the same habits as a larger painting: test first, work lightly, step back often, and know when to put down the brush.
Final Thoughts
A hand painted lampshade is an approachable DIY project that delivers a genuinely custom result. The key is not artistic perfection. It is thoughtful preparation, compatible materials, thin paint layers, and a design that looks attractive both illuminated and switched off.
Begin with a clean, pale-colored shade, test every paint mixture, and choose a pattern suited to your confidence level. Loose brushstrokes, simple botanicals, and repeating borders are especially beginner-friendly. Once the paint has cured, reinstall the shade with a compatible LED bulb and enjoy the moment when an ordinary lamp becomes a small piece of functional art.