
A rustic hanging chicken wire fruit basket is one of those rare DIY projects that looks like it came from a charming farmhouse market, costs less than a fancy brunch, and actually solves a real kitchen problem. It lifts bananas, apples, citrus, onions, and avocados off the counter, adds texture to a blank wall or pantry corner, and gives your kitchen that “I casually preserve peaches and know where my twine is” energy.
The beauty of this project is its honest simplicity. Chicken wire is flexible, inexpensive, lightweight, and full of country character. With a little bending, trimming, and careful shaping, it becomes a breathable hanging basket that works well for produce that likes air circulation. Add chain, jute rope, a wooden hoop, or a reclaimed frame, and suddenly your fruit storage becomes decor. Your apples are no longer homeless. Your bananas have a balcony.
This guide walks you through the full process: choosing materials, shaping the basket, reinforcing the rim, hanging it safely, styling it beautifully, and avoiding common mistakes. The result is a practical farmhouse kitchen storage piece that feels handmade in the best possible waynot “I fought a roll of wire and lost,” but “I made this, and yes, I own pliers.”
Why Make a Hanging Chicken Wire Fruit Basket?
A hanging fruit basket is more than a cute kitchen accessory. It saves counter space, improves visibility, keeps produce within reach, and can help certain fruits and vegetables stay fresher by allowing better airflow. Wire baskets are especially useful because they do not trap moisture the way closed containers can. That matters when you are storing room-temperature produce such as bananas, onions, garlic, citrus, or avocados that are still ripening.
Chicken wire also brings instant rustic charm. Its hexagonal pattern feels nostalgic without trying too hard. It pairs beautifully with wood shelves, butcher block counters, white cabinets, beadboard walls, black hardware, copper pans, and vintage signs that say things like “Farm Fresh” even if the nearest farm is a grocery store parking lot.
Best Uses for This Basket
This DIY chicken wire fruit basket works well for lightweight produce such as apples, oranges, lemons, limes, onions, garlic, avocados, small pears, shallots, and bananas if you add a side hook. It is not ideal for heavy melons, giant bags of potatoes, or anything that makes your ceiling question its career choices. Keep the total loaded weight modest and always use properly rated hanging hardware.
Materials and Tools You’ll Need
You do not need a professional workshop for this project. A kitchen table, a garage floor, or a covered porch will do. Just protect the surface first, because chicken wire has a talent for scratching things and behaving like a caffeinated slinky.
Materials
- Chicken wire or galvanized poultry netting, preferably 20-gauge or similar lightweight wire
- Wire cutters or aviation snips
- Needle-nose pliers
- Leather work gloves
- Protective eyewear
- Measuring tape
- Marker or painter’s tape
- Jute rope, light chain, or sturdy hanging cord
- Three small S-hooks or split rings
- One ceiling hook, wall hook, or plant hook rated for the expected weight
- Optional: wooden embroidery hoop, grapevine wreath ring, metal hoop, or reclaimed wood frame for the rim
- Optional: burlap ribbon, cotton liner, wood beads, antique brass chain, or matte black spray paint
Choosing the Right Chicken Wire
For a fruit basket, choose flexible galvanized chicken wire with openings small enough to support produce without leaving awkward pressure marks. A 1-inch mesh looks tidy and holds smaller items better. A 2-inch mesh has a more open farmhouse look but may need a liner if you plan to store lemons, limes, or shallots. Galvanized wire resists rust better than plain steel, which is helpful in kitchens where moisture is always lurking like a tiny villain near the sink.
If you want a softer decorative look, you can use vinyl-coated chicken wire in black, white, or green. For a traditional rustic style, silver galvanized wire is the classic choice. It ages nicely, reflects light, and looks right at home beside wood, enamelware, and glass jars.
Safety First: Chicken Wire Is Cute but Poky
Chicken wire may look innocent, but the cut ends are sharp. Wear leather gloves, long sleeves, and protective eyewear when measuring, cutting, and bending. Work slowly and keep the roll controlled so it does not spring open dramatically like it just remembered an appointment. Cut wire ends should always be folded inward, crimped flat, or covered by a rim material so they do not scratch hands, fruit, walls, or curious pets.
Also think carefully about where you hang the basket. A ceiling joist, exposed beam, or properly installed rated hook is best. Drywall alone is not enough for a loaded basket unless you use the correct anchor and stay within the hardware’s weight rating. When in doubt, go lighter, use stronger hardware, and do not hang the basket above a walkway where someone tall may become personally acquainted with your oranges.
Step-by-Step: How to Make a Rustic Hanging Chicken Wire Fruit Basket
Step 1: Decide the Basket Size
Start with a practical size. A good beginner basket is about 10 to 12 inches wide and 6 to 8 inches deep. This gives you enough room for a small weekly fruit supply without creating a swinging produce chandelier. For a single-tier basket, cut a piece of chicken wire around 24 inches by 24 inches. For a deeper bowl, increase the size slightly. For a shallow wall-mounted basket, use a rectangular piece around 18 inches wide by 14 inches tall.
Before cutting, imagine what the basket will hold. Five apples and three oranges weigh more than they look. Fruit has a way of pretending to be decor until gravity files a complaint. Keep the design light, breathable, and easy to empty.
Step 2: Cut the Chicken Wire
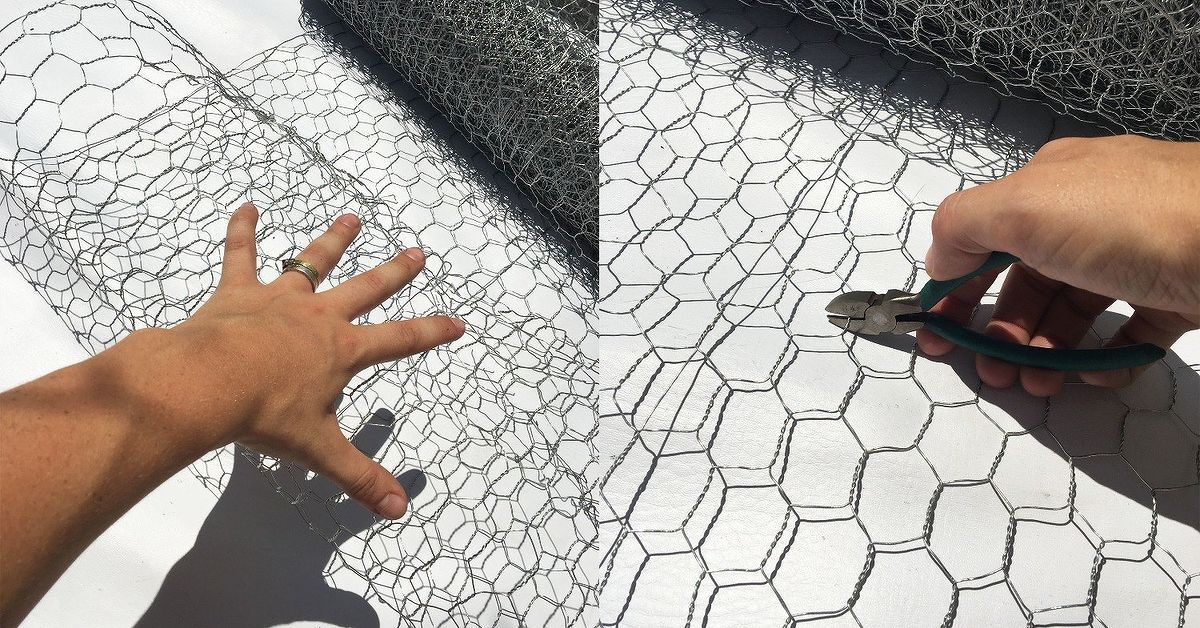
Roll out the chicken wire on a protected surface. Use painter’s tape or a marker to outline your cutting area. Cut slowly with wire cutters or aviation snips, following the pattern as evenly as possible. Leave small wire “tails” around the edges if you plan to twist them together, but do not leave long sharp spikes. Those are not rustic. Those are tetanus confetti.
Once cut, gently flatten the wire with gloved hands. It will naturally want to curl from the roll. Let it curl a little if you are making a bowl; that curve can actually help with shaping.
Step 3: Shape the Basket Bowl
Place the wire over an upside-down mixing bowl, colander, or round planter to use as a form. Press the chicken wire around it gradually, working from the center outward. The wire will overlap and pucker in places. That is normal. Small wrinkles add handmade character, but big folds should be flattened or overlapped neatly.
To make a round basket, bring the edges upward and overlap the sides slightly. Twist short wire tails together where the edges meet, then press the twisted sections flat with pliers. If you prefer a half-basket for a wall, shape the wire into a curved pocket and attach the back edge to a wood board or hoop.
Step 4: Reinforce the Rim
The rim is the difference between “adorable farmhouse basket” and “wire taco with fruit.” You need a strong top edge so the basket holds its shape and gives you a safe place to attach hangers.
There are several good options. You can fold the top inch of wire inward and crimp it flat with pliers. You can wrap the rim with jute rope, floral wire, or burlap ribbon. You can also attach the chicken wire to an embroidery hoop, grapevine ring, or metal hoop. A wooden hoop gives the basket a warmer, cottage-style look. A metal hoop looks cleaner and slightly industrial. A grapevine ring adds texture and says, “Yes, I probably own a pie cooling rack.”
If using a hoop, fold the wire over the hoop and secure it with small pieces of floral wire every 2 inches. Make sure no cut points stick out. Run your gloved hand around the rim to check for rough spots, then crimp or cover anything sharp.
Step 5: Create Three Hanging Points
A three-point hanging system keeps the basket level. Mark three evenly spaced points around the rim, like a triangle. Attach a small S-hook, split ring, or short loop of wire at each point. Then connect equal lengths of chain, jute rope, or sturdy cord to those points.
Bring the three lengths together above the basket and attach them to a larger ring or S-hook. Hold the basket up and test the balance before loading it. If one side dips, shorten or adjust that hanger. This is easier now than later, when an apple rolls out and makes a dramatic escape across the kitchen floor.
Step 6: Add a Liner if Needed
A liner is optional, but it can make the basket more useful. For small produce, use a piece of cotton fabric, burlap, or washable linen. Cut it into a circle larger than the basket and tuck it inside. If you want airflow, do not use plastic or anything airtight. Breathable fabric protects delicate fruit while still allowing air to move.
For a rustic look, burlap is charming, but it can shed fibers. Cotton tea towels are softer and easier to wash. A scrap of flour sack towel works beautifully and gives the basket that “grandma’s pantry, but make it Pinterest” feeling.
Step 7: Install the Hanging Hook
Choose a location near your prep area but away from direct sunlight, stove heat, and heavy traffic. A pantry corner, open shelf area, breakfast nook, or side wall near the counter usually works well. Direct sun can warm produce and shorten freshness. Stove heat can do the same, plus nobody wants garlic with a hint of steam facial.
If hanging from the ceiling, locate a joist with a stud finder. Drill a pilot hole slightly smaller than the screw hook, then screw the hook firmly into the joist. If you are using drywall, choose a proper toggle anchor or swag hook rated for the basket’s loaded weight. For exposed beams, a J-hook or S-hook can work well, provided the beam and hardware are strong enough.
Step 8: Load the Basket Thoughtfully
Once the basket is hanging securely, add produce gradually. Start with lighter items and watch how the basket behaves. It should hang level, not sag, twist, or lean like it has secrets. Keep heavier fruit at the bottom center. Put lighter items around the edges.
For everyday use, a good combination might be oranges in the bottom, apples above them, and bananas hanging from a side hook. If you store onions or garlic in the basket, keep them separate from potatoes and away from delicate fruits. Apples, bananas, tomatoes, and some other fruits release ethylene gas, which can speed ripening and affect nearby produce. Separating sensitive vegetables from ethylene-producing fruits helps reduce waste and keeps your kitchen from becoming a tiny science experiment.
Design Ideas for a Better Rustic Look
Farmhouse Classic
Use galvanized chicken wire, jute rope, and a natural wood hoop. This style pairs well with white cabinets, wood countertops, ceramic crocks, and open shelving. Add a small kraft paper tag that says “Fruit” if you enjoy labeling obvious things with confidence.
Industrial Rustic
Use black chain, matte black hooks, and dark-stained wood. This version looks great in kitchens with black cabinet pulls, metal stools, subway tile, or exposed shelving. It feels a little less farmhouse and a little more urban market.
Cottage Garden
Use a grapevine wreath ring as the rim and add a soft linen liner. This look is perfect for a cozy kitchen with floral curtains, vintage plates, herbs on the windowsill, or a suspiciously large collection of mugs.
Two-Tier Produce Basket
Once you master the single basket, you can make a two-tier version. Create one larger basket for the bottom and one smaller basket for the top. Connect them with chain or rope, leaving enough space between tiers for easy access. Store sturdy produce on the bottom and lighter fruit above. Keep the total weight low and upgrade the hanging hardware accordingly.
Produce Storage Tips for Your Hanging Basket
A hanging chicken wire basket is best for produce that can sit at room temperature for a short time. Bananas, citrus, avocados that need ripening, onions, garlic, and some apples can work well. However, berries, cut fruit, leafy greens, grapes, and most delicate vegetables belong in the refrigerator. The basket is not a magic freshness machine; it is a handsome airflow helper.
Wash produce under running water before preparing or eating it, not necessarily before storing it in the basket. Extra moisture can encourage spoilage, especially if fruit sits for several days. If you do wash fruit in advance, dry it thoroughly before placing it in the basket. Never wash produce with soap or household detergents; plain running water is the standard safe approach for everyday fruits and vegetables.
Check the basket every couple of days. Remove bruised fruit quickly because one soft apple can turn the whole basket into a tragic fruit opera. Rotate older produce to the top so it gets eaten first. If you have kids, place snack fruit at eye level. If you have adults who behave like kids near snacks, do the same.
Common Mistakes to Avoid
Using Wire That Is Too Flimsy
Very thin decorative wire may look pretty but can sag under fruit. Choose chicken wire or poultry netting with enough structure to hold a bowl shape. If the wire collapses when empty, it will not become stronger when full of oranges.
Skipping the Rim Reinforcement
The rim carries the stress of the hanging points. Reinforce it with folded wire, rope, a hoop, or a frame. A weak rim can bend, stretch, or poke. A strong rim makes the whole basket look intentional and finished.
Hanging It From Weak Hardware
Never assume a small decorative hook can hold a loaded basket. Always check the hardware rating, install into a joist or proper anchor, and keep the weight reasonable. Fruit falls are funny only in cartoons.
Overloading the Basket
A rustic basket should feel abundant, not overstuffed. Leave breathing room. Airflow is part of the point, and an overpacked basket makes it harder to spot ripe or bruised produce.
Maintenance and Cleaning
Dust the wire regularly with a dry cloth or soft brush. For sticky spots, remove the liner and wipe the wire with a damp cloth, then dry it completely. If you used galvanized wire, avoid harsh cleaners that may damage the finish. Wash fabric liners often, especially if fruit juice leaks or onion skins begin forming their own ecosystem.
Inspect the hanging points every few weeks. Look for loosened wire, stretched rope, bent hooks, or sharp edges. Tighten and repair as needed. A handmade basket should be charming, not suspenseful.
Budget Breakdown
This project can be very affordable, especially if you already have tools. A small roll of chicken wire may cost more than you need for one basket, but the leftovers can become garden cloches, cabinet inserts, memo boards, wreath forms, or gift baskets. Jute rope, hooks, and basic chain are usually inexpensive. If you thrift an embroidery hoop, old wire basket, or scrap wood, the project becomes even cheaper.
Expect to spend roughly $15 to $35 depending on the materials you choose. The rustic version with jute and galvanized wire is usually the least expensive. The polished version with black chain, finished wood, and decorative hardware costs a bit more but still comes in below many store-bought hanging baskets.
of Real-World Experience: What This Project Teaches You
The first thing you learn while making a rustic hanging chicken wire fruit basket is that chicken wire has a personality. It is not evil, exactly, but it is spirited. It curls when you want it flat, flattens when you want it round, and occasionally grabs your sleeve like a tiny farm ghost. The trick is to stop wrestling it and start guiding it. Use a bowl or planter as a form, press slowly, and let the wire’s natural curve help you.
The second lesson is that rustic does not mean careless. The best farmhouse-style projects look relaxed because the structure underneath is solid. A reinforced rim, evenly spaced hanging points, and hidden sharp ends make the difference between handmade charm and homemade chaos. When the basket hangs level and the rim looks clean, the whole piece feels more expensive than it is.
Another useful discovery is that the basket changes how you use your kitchen. When fruit is visible, people eat it faster. Apples on the counter sometimes become background decor, but apples in a hanging basket feel inviting. Citrus looks brighter. Bananas are easier to grab. Onions stop hiding behind the coffee maker. A small storage change can genuinely reduce waste because you see what needs to be used before it turns into a soft, mysterious object.
Location matters more than expected. Hanging the basket too high makes it decorative but annoying. Hanging it too low turns it into a forehead hazard. The sweet spot is usually just below eye level or slightly above counter height, where you can reach it easily without ducking. A corner near the prep area is ideal. Avoid sunny windows unless you want your avocados to ripen with Olympic speed.
Weight is the quiet villain of this project. An empty chicken wire basket feels featherlight, so it is tempting to fill it like a harvest festival display. Then you add six apples, four oranges, three avocados, and a bunch of bananas, and suddenly your cute basket is auditioning for a structural engineering case study. Keep it light. Use it for weekly produce, not emergency melon storage.
Styling is the fun part. A jute hanger makes the basket softer and more farmhouse. A black chain makes it sharper and more modern. A linen liner makes it feel finished. A wood hoop warms everything up. You can even make seasonal swaps: lemons in summer, apples in fall, oranges and cinnamon bundles in winter. The basket becomes a small rotating display that still earns its keep.
The most satisfying part is that this project feels personal. Store-bought baskets are fine, but a handmade one fits your space, your style, and your habits. You decide the size, the finish, the depth, the hanger, and the mood. Maybe yours looks like it belongs in a farmhouse pantry. Maybe it looks like it came from a vintage general store. Either way, it holds fruit, saves space, and gives your kitchen a little handmade wink.
Conclusion
Making a rustic hanging chicken wire fruit basket is a simple, useful DIY project with a lot of personality. It combines farmhouse decor, kitchen organization, and practical produce storage in one lightweight piece. With chicken wire, a reinforced rim, sturdy hanging hardware, and a little patience, you can create a basket that looks charming and works hard every day.
The key is to build it safely and thoughtfully. Wear gloves, fold sharp edges inward, reinforce the rim, balance the hanging points, and install the basket from a properly rated hook. Then load it with the right produce, keep it clean, and enjoy the extra counter space. Your kitchen gets a rustic upgrade, your fruit gets better airflow, and you get the quiet satisfaction of pointing at something useful and saying, “I made that.”
SEO Tags