
Garages have a funny way of becoming museums for things we “might need someday.” One week you have a rake, a cooler, and a few paint cans. The next week, your garage looks like a hardware store sneezed. That is exactly why learning how to build garage shelves is one of the most useful DIY projects a homeowner can tackle. Itlabeled “misc.”
The best garage shelves are not complicated. In most homes, a sturdy combination of 2×4 lumber, plywood or OSB, screws, wall studs, and smart spacing can transform wasted wall space into reliable storage. Whether you want wall-mounted garage shelves, freestanding garage shelving, or a simple tote-friendly storage rack, the goal is the same: get clutter off the floor, keep heavy items safe, and create a garage that works instead of growls at you every time you open the door.
Why Build Garage Shelves Instead of Buying Them?
Store-bought shelving is convenient, but DIY garage shelves give you control over size, strength, layout, and budget. Pre-made metal racks can be excellent, but they often come in fixed dimensions. That can leave awkward gaps, wasted corners, or shelves that are either too shallow for storage bins or so deep they swallow small tools like a black hole with a socket wrench habit.
Building your own shelves lets you customize the design around your garage. You can make shelves 16 inches deep along a side wall so a car door still opens comfortably, or 24 inches deep for large plastic totes. You can build high shelves for seasonal items and lower shelves for heavy paint cans, power tools, automotive supplies, and gardening gear. The result is less clutter, better access, and fewer moments where you mutter, “I know I put it somewhere safe,” which is homeowner code for “it has vanished forever.”
Plan Before You Cut: The Secret to Better Garage Storage
Before buying lumber, measure your garage wall and decide what the shelves need to hold. This step is not glamorous, but it saves money, time, and the emotional damage caused by discovering your favorite storage bin is half an inch too tall.
Measure the Wall Space
Use a tape measure to record the width, height, and depth of the available space. Note outlets, switches, windows, doors, garage door tracks, water heaters, pipes, and anything else that might interfere. If you are building wall-mounted shelves, locate the wall studs with a stud finder and mark them lightly with pencil or painter’s tape.
Choose Shelf Depth
For most garage shelves, 16 to 24 inches deep is the sweet spot. A 16-inch shelf is great for tools, smaller bins, cleaning supplies, and automotive products. A 24-inch shelf works better for large totes, coolers, camping gear, and bulky seasonal décor. Avoid going unnecessarily deep unless you enjoy excavating old extension cords from the back like an archaeologist in safety glasses.
Decide on Shelf Spacing
Measure the height of the items you plan to store. Common storage totes often need 14 to 18 inches of vertical clearance, while larger bins may need 20 inches or more. Leave enough space above each shelf so items slide in and out easily. A shelf that technically fits your bins but requires wrestling them into place is not storageit is a weekly upper-body workout.
Best Materials for DIY Garage Shelves
The classic DIY garage shelving build uses 2×4 lumber for the frame and plywood or OSB for the shelf surface. This combination is popular because it is strong, affordable, and available at most home improvement stores.
Lumber
Use straight 2×4 boards for shelf frames, legs, ledgers, and supports. Inspect each board before buying. Skip pieces that are badly warped, twisted, split, or full of loose knots. A small bow is workable; a board shaped like a banana with ambition is not.
Shelf Decking
For shelf surfaces, 1/2-inch plywood may work for lighter storage, but 3/4-inch plywood is better for heavier loads and longer spans. OSB can also be used for budget garage shelves, especially when the frame has enough support underneath. If the shelves will hold heavy items, add middle supports to reduce sagging.
Fasteners
Use structural screws or quality wood screws rather than drywall screws. Drywall screws are brittle and not intended for structural loads. For attaching ledgers to wall studs, use screws long enough to penetrate solid framing. For assembling shelf frames, 2-1/2-inch to 3-inch screws are commonly used. Always match fasteners to the project and the wall structure.
Tools You Will Need
- Tape measure
- Pencil or marker
- Stud finder
- Level
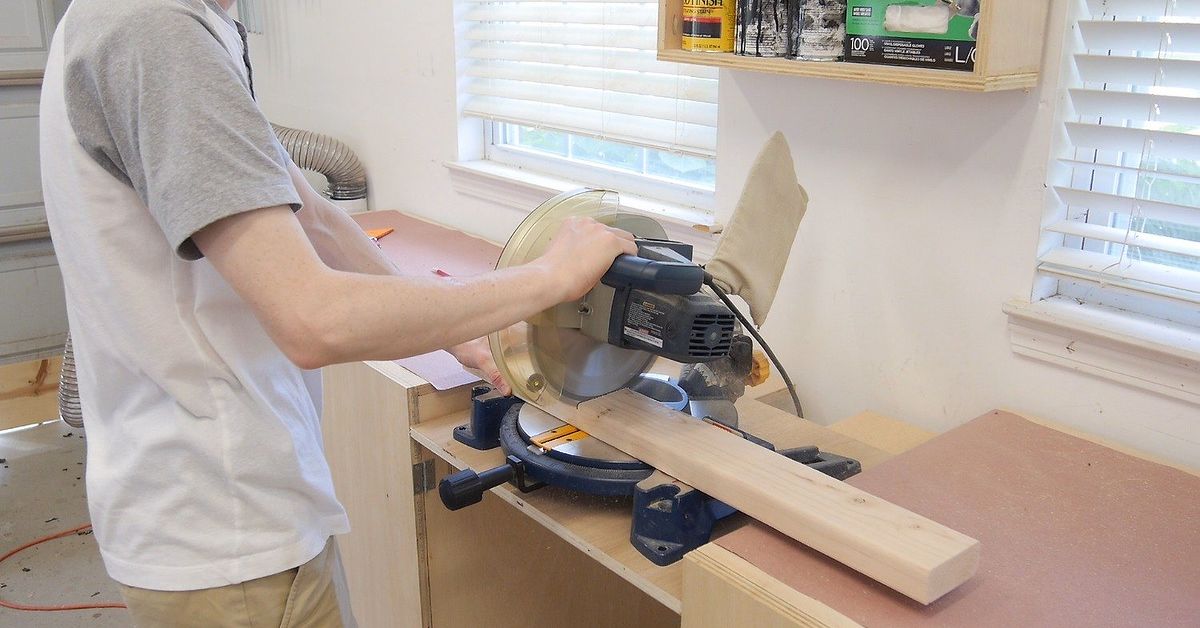
- Circular saw or miter saw
- Drill and driver bits
- Clamps
- Speed square
- Safety glasses
- Hearing protection
- Work gloves
You do not need a professional workshop to build garage shelves. A driveway, a pair of sawhorses, and a patient neighbor who does not mind sawdust drifting politely across the property line will usually do.
Simple Wall-Mounted Garage Shelves: Step-by-Step
This design is ideal when you want strong shelves attached to the garage wall. It uses horizontal 2×4 ledgers fastened into studs, front support boards, and plywood decking.
Step 1: Mark the Shelf Heights
Start by marking where each shelf will go. Use a level to draw straight horizontal lines along the wall. The first shelf is often placed 18 to 24 inches above the floor, depending on what you want to store underneath. Keep heavier items lower and lighter seasonal items higher.
Step 2: Locate and Mark Wall Studs
Use a stud finder to locate the studs behind the drywall. Most residential wall studs are spaced 16 or 24 inches on center, but do not assume. Mark each stud location along your shelf lines. The strength of wall-mounted garage shelves depends heavily on fastening into solid framing, not just drywall.
Step 3: Install the Rear Ledger Boards
Cut 2×4 boards to the desired shelf length. Hold the first ledger board against the wall on your level line and drive structural screws through the board into the studs. Use at least two screws at key stud locations when possible, and keep checking that the board stays level. This rear ledger acts as the backbone of the shelf.
Step 4: Build the Shelf Frame
For each shelf, build a rectangular frame from 2x4s. The back of the frame may be the wall ledger, or you can build a full rectangle and fasten it to the ledger. Add cross supports every 16 to 24 inches, especially if the shelf will hold heavy totes or tools. Think of these supports as tiny bodyguards preventing your plywood from sagging dramatically in the middle.
Step 5: Add Front Supports or Legs
If your shelves are deep or heavily loaded, add vertical front legs from 2x4s. These legs transfer weight to the floor and make the shelves stronger. Another option is angled braces from the wall down to the front of the shelf, but vertical legs are easier for many beginners and work well for long shelving runs.
Step 6: Attach the Plywood Decking
Cut plywood to fit the shelf frame. Lay it on top and secure it with screws every 12 to 16 inches along the frame and supports. Pre-drilling can help prevent splitting near edges. If the plywood overhangs slightly, trim it flush or sand the edges to avoid splinters.
Step 7: Test for Level and Stability
Before loading the shelves, push gently on the frame and check for wobble. Confirm that screws are tight, legs sit flat, and the shelf does not tilt forward. Add braces if needed. A shelf should feel boringly solid. Exciting shelves are usually shelves that are about to become floor décor.
Freestanding Garage Shelves: A Flexible Alternative
Freestanding garage shelves are a great choice if you cannot or do not want to attach shelves directly to the wall. Renters often prefer this option, and it also works well against concrete block walls where anchoring requires special fasteners.
A simple freestanding design uses four vertical 2×4 legs, rectangular shelf frames, and plywood decking. Build two ladder-like side frames first, then connect them with long horizontal boards to create shelf levels. Add plywood on each level and secure it with screws. For stability, make the unit wide enough and deep enough to resist tipping, and consider anchoring it to the wall with anti-tip hardware if children, pets, or heavy loads are involved.
Smart Garage Shelf Layout Ideas
Create Zones
Organize shelves by category. Keep lawn and garden supplies together, sports gear in one zone, tools near the workbench, automotive fluids in a safe location, and holiday items higher up. Labeling each zone helps everyone in the household understand where things belong, at least in theory. Whether they follow the system is a separate family meeting.
Use Matching Storage Bins
Uniform bins make garage shelves more efficient because they stack neatly and use space consistently. Clear bins help you see contents quickly, while opaque bins hide visual clutter. Either way, labels are essential. A label that says “Christmas lights” is better than opening five identical boxes and discovering one contains tangled cords, one contains pool toys, and one contains something you are afraid to identify.
Store Heavy Items Low
Place paint cans, tile boxes, power tools, car parts, and heavy hardware on lower shelves. Store lightweight items such as wreaths, camping pillows, paper towels, and seasonal decorations higher up. This improves safety and makes the shelves easier to use.
Keep Everyday Items Easy to Reach
Items used weekly should stay between waist and shoulder height. Rarely used items can go higher or deeper. The best garage organization system is not just tidy; it is convenient enough that you will actually maintain it after the initial burst of motivation wears off.
Safety Tips for Building Garage Shelves
Safety starts before the first cut. Wear safety glasses when cutting wood and driving screws. Use hearing protection with power saws. Keep cords clear, support boards properly, and never cut lumber balanced on a trash can, folding chair, or any other object that looks helpful but secretly wants chaos.
When building wall-mounted shelves, fasten into studs, not just drywall. Use appropriate screws and anchors for your wall type. Avoid storing flammable materials near heat sources, water heaters, furnaces, or electrical panels. Leave required clearance around appliances, breaker boxes, and garage door mechanisms.
Do not overload shelves. The safe weight capacity depends on lumber quality, shelf span, fasteners, wall structure, support spacing, and construction method. When in doubt, add more supports, reduce shelf span, or keep heavy materials on the floor under the shelves. It is much easier to add an extra 2×4 now than to clean up a dramatic avalanche of motor oil, camping gear, and regret later.
Common Mistakes to Avoid
Skipping the Studs
Drywall alone cannot support heavy garage shelving. Always locate studs or use a properly designed freestanding unit. If you are mounting to concrete or masonry, use fasteners rated for that material.
Making Shelves Too Deep
Deep shelves seem like more storage, but they can create hidden clutter. If items disappear behind other items, the shelf becomes a cave. Match depth to what you actually store.
Forgetting the Car
Measure with the car parked inside if possible. Make sure doors can open and people can walk around comfortably. A garage shelf that prevents you from using the garage is not a shelf; it is a wooden inconvenience.
Ignoring Moisture
Garages can be damp. Keep cardboard boxes off the floor and consider using plastic bins for items that need protection. If your garage has water intrusion, fix that problem before storing valuables on low shelves.
Finishing Touches That Make Garage Shelves Better
You do not have to paint garage shelves, but sealing or painting the wood can make them easier to clean and more resistant to moisture. Sand sharp edges, especially along plywood fronts. Add a front lip if you store round items that might roll off. Install hooks under shelves for extension cords, folding chairs, or small ladders. Combine shelves with pegboard, slatwall, or wall hooks to create a complete garage storage system.
Lighting also matters. A shelf in a dark corner becomes a mystery shelf. Add shop lights or LED strips if needed so you can see labels and avoid grabbing the wrong container. Nobody wants to open “camping gear” and find tax records from 2014.
Estimated Cost and Time
The cost of DIY garage shelves depends on lumber prices, shelf size, plywood thickness, fasteners, and whether you already own tools. A basic wall-mounted shelf system can often be built affordably with several 2x4s, plywood sheets, and screws. A larger freestanding unit will use more lumber but may still cost less than heavy-duty commercial shelving.
Most beginner-friendly garage shelving projects can be completed in a weekend. A small wall shelf may take only a few hours. A full wall of shelves can take a day, especially if you are measuring carefully, cutting multiple pieces, and stopping occasionally to admire your progress like a proud carpenter in a garage-themed movie montage.
Experience Notes: What Building Garage Shelves Teaches You
Building garage shelves sounds like a simple storage project, and it is, but it also teaches a few practical lessons that most instructions only hint at. The first lesson is that the garage tells the truth. Inside the house, clutter hides in cabinets and closets. In the garage, every unused paint roller, mystery cable, half-empty bag of potting soil, and lonely soccer cleat stands under fluorescent lighting waiting to be judged. Before building shelves, it helps to sort everything into groups: keep, donate, toss, recycle, and “ask someone else because I refuse to take responsibility for this object.” That sorting process makes the shelf design much smarter.
The second lesson is that storage should fit your habits, not your fantasy self. It is tempting to design perfect shelves with color-coded bins and elegant spacing, but the best system is the one you will use on a tired Tuesday. If you grab garden tools every weekend, do not bury them behind camping gear. If holiday decorations come out once a year, they can live on the top shelf. If kids use sports equipment daily, give it a low, open spot. Garage shelves work best when they reduce friction.
The third lesson is to build stronger than you think you need. Not wildly overbuilt, not “survive a meteor strike” overbuilt, but solid enough for real life. Garage shelves rarely hold only lightweight decorations. Over time, they collect power tools, paint, hardware, car supplies, bulk purchases, and that one bin full of random metal parts nobody can identify but everyone agrees might be important. Extra cross supports, good screws, and proper stud attachment are worth the small additional effort.
The fourth lesson is that shelf height matters more than people expect. A top shelf that requires a ladder is fine for light seasonal items, but it is a terrible home for heavy bins. A lower shelf that is too close to the floor can collect dust, moisture, and spider real estate. Leaving space underneath the first shelf for large items, rolling bins, or a shop vacuum can make the whole garage feel more flexible.
The fifth lesson is emotional: the project feels bigger before you start than it does once you are cutting boards. Many homeowners delay building garage shelves because they imagine complicated joinery, perfect plans, and professional skills. In reality, most useful garage shelving is square frames, straight cuts, level lines, and patience. The first shelf may take longer because you are checking every measurement three times. By the second shelf, you will feel faster. By the third, you may start using phrases like “load transfer” at dinner, which your family may or may not appreciate.
The final lesson is that organization is not a one-time event. After the shelves are built, give the system a few weeks of real use. Move items if the layout feels awkward. Add labels. Add hooks. Add one more shelf if needed. A garage is a working space, not a showroom. The goal is not perfection. The goal is opening the garage door without feeling personally attacked by a pile of stuff.
Conclusion
Learning how to build garage shelves is one of the most rewarding DIY upgrades because it solves a real problem immediately. With 2×4 lumber, plywood, sturdy fasteners, careful measurements, and a plan based on what you actually store, you can turn a cluttered garage into a cleaner, safer, more useful space. Start with the wall, measure your bins, anchor properly, keep heavy items low, and build with enough support to handle everyday use.
The beauty of DIY garage shelving is that it does not need to be fancy to be fantastic. Strong, level, practical shelves will always beat a garage floor covered in mystery boxes. Build them well, label them clearly, and enjoy the rare household miracle of knowing exactly where the extension cord is.
Note: This article provides general DIY guidance. Always check your wall structure, fastener ratings, shelf span, and local safety conditions before loading garage shelves with heavy items.