
Adding a phone number to Apple Messages sounds like it should be a dramatic two-second tap, followed by a tiny digital marching band. In reality, it is simple, but it has one important catch: you cannot add just any random number to iMessage. Apple Messages uses the phone number connected to your active iPhone SIM or eSIM, then lets you choose that number for sending and receiving iMessages across your iPhone, iPad, and Mac.
If your messages are coming from your email address instead of your phone number, your Mac is not showing your number, or your iPad is acting like it has never met your iPhone before, this guide is for you. Below, you will learn how to add a phone number on Apple Messages in 12 clear steps, how to set it as your default sender, how to enable it on other Apple devices, and how to fix common iMessage activation problems without throwing your iPhone into a decorative bowl of rice for emotional support.
What Does “Add a Phone Number to Apple Messages” Actually Mean?
When people say they want to add a phone number to Apple Messages, they usually mean one of three things. First, they want their iPhone number to appear under Settings > Apps > Messages > Send & Receive. Second, they want new iMessages to start from their phone number instead of their Apple Account email address. Third, they want the same phone number to work on their Mac or iPad.
Apple Messages supports iMessage, SMS, MMS, and RCS depending on your device, software, carrier, region, and the person you are messaging. iMessages appear in blue bubbles and work between Apple devices over Wi-Fi or cellular data. SMS, MMS, and RCS messages appear in green bubbles and rely more heavily on your carrier. Your phone number matters because friends, family, coworkers, and group chats often recognize you by your number, not by an email address you created in 2014 during a mysterious “cool username” phase.
Before You Start: What You Need
Before adding your phone number to Apple Messages, make sure your iPhone has an active cellular plan. That can be a physical SIM or an eSIM. Your iPhone should also be connected to Wi-Fi or cellular data, running updated iOS software, and signed in to the Apple Account you want to use with Messages. If you want the number to appear on your iPad or Mac, all devices should use the same Apple Account.
It is also worth checking that your date and time settings are correct. iMessage activation can be fussy when your network, time zone, or carrier setup is not ready. Think of iMessage activation like making pancakes: simple ingredients, but if one thing is off, the first attempt gets weird.
How to Add a Phone Number on Apple Messages: 12 Steps
Step 1: Confirm Your Phone Number Is Active on Your iPhone
Open the Phone app and make sure your iPhone can make calls or send regular text messages. If you recently changed carriers, transferred your number, added an eSIM, or bought a new iPhone, give the cellular service a moment to settle. Your number must be tied to an active SIM or eSIM before Apple Messages can use it for iMessage.
Step 2: Update Your iPhone
Go to Settings > General > Software Update and install any available iOS update. This step matters because Apple occasionally fixes iMessage activation problems through software updates. A current iPhone is less likely to get stuck on “Waiting for activation,” which is the iMessage equivalent of standing outside a party while the doorbell refuses to work.
Step 3: Open Messages Settings
On newer iOS versions, open Settings, tap Apps, then tap Messages. On some older iOS versions, Messages may appear directly in the main Settings list. Either way, your destination is the Messages settings screen.
Step 4: Turn On iMessage
Find the iMessage switch and turn it on. Your iPhone may take a moment to activate the service. If you see a message about carrier SMS charges for activation, allow it if you want to activate your phone number for iMessage. Apple may use SMS in the background to verify the number with your carrier.
Step 5: Tap Send & Receive
In Messages settings, tap Send & Receive. This is the control room for your iMessage identity. It shows the phone numbers and email addresses that can receive iMessages and reply from your account.
Step 6: Sign In With Your Apple Account
If you see Use your Apple Account for iMessage, tap it and sign in. Use the same Apple Account you use on your iPad or Mac. This keeps your iMessage setup consistent across Apple devices and prevents the classic “my Mac is sending from my email but my iPhone is sending from my number” confusion.
Step 7: Select Your Phone Number Under “You Can Receive iMessages To and Reply From”
Look for your phone number under the section that says you can receive iMessages and reply from certain addresses. Make sure your phone number has a check mark. You can also keep your Apple Account email selected if you want people to reach you there too, but your phone number should be selected if your goal is to add it to Apple Messages.
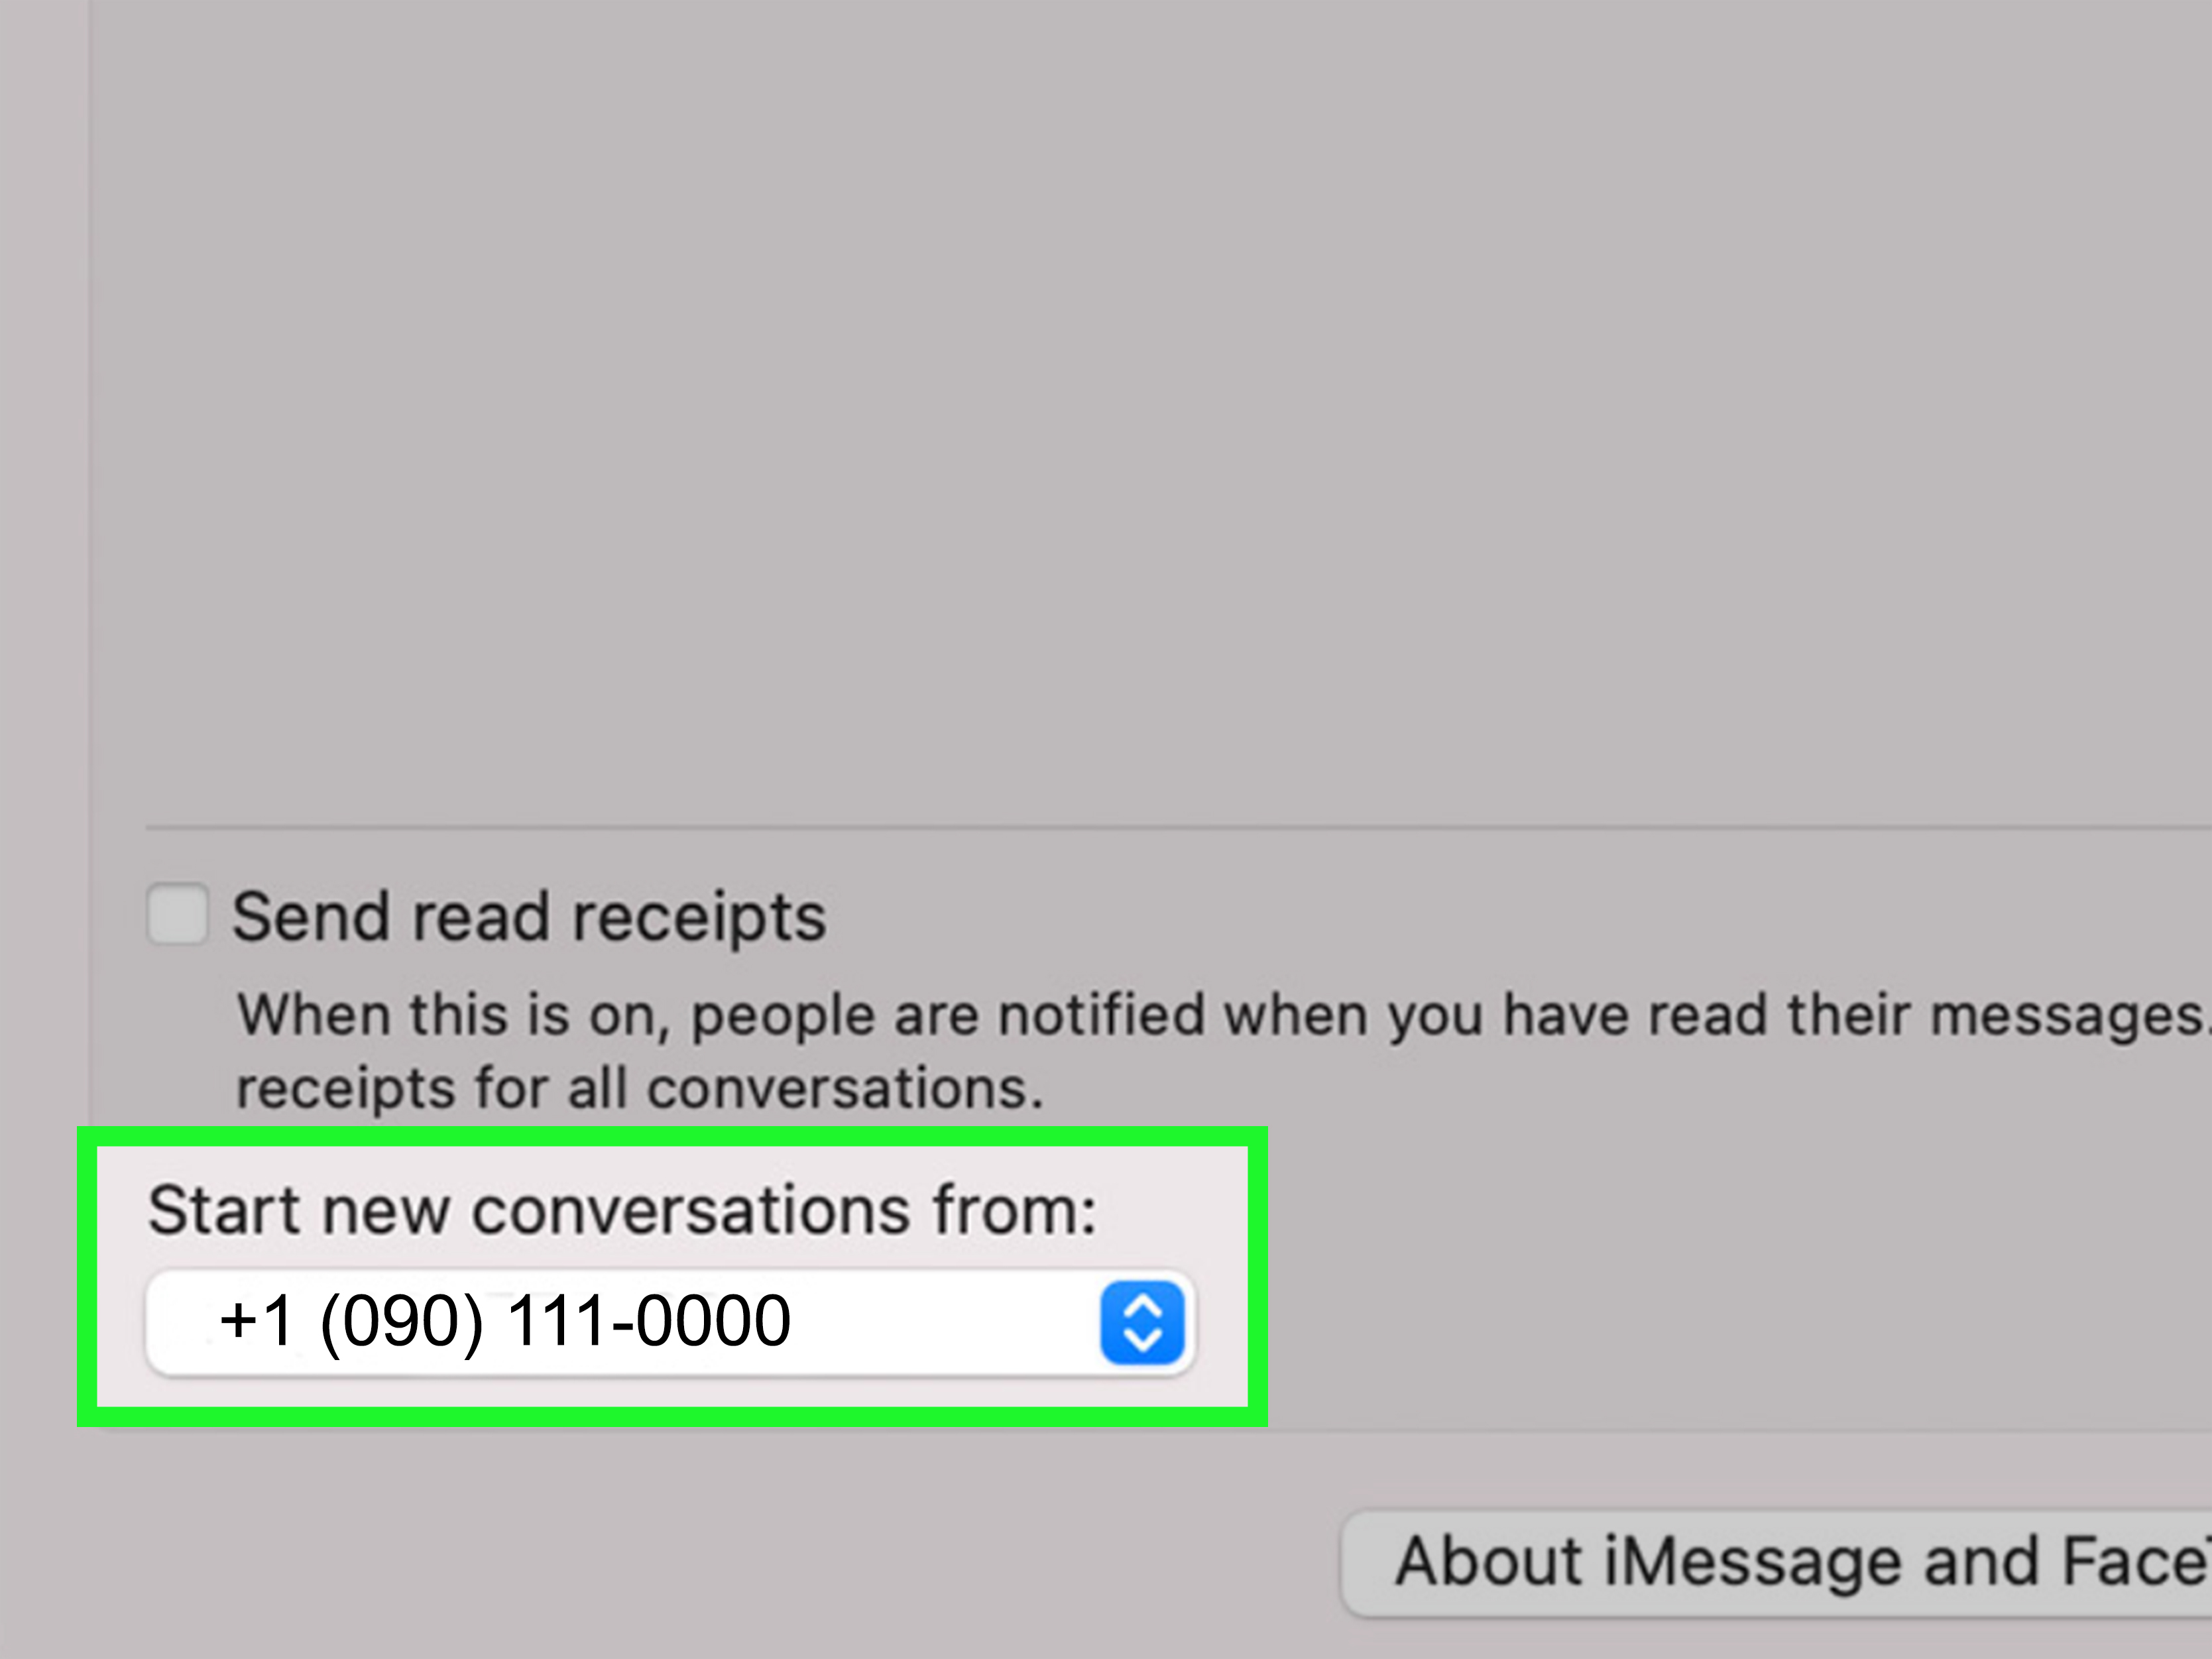
Step 8: Choose Your Phone Number Under “Start New Conversations From”
Scroll to Start New Conversations From and select your phone number. This tells Messages to use your phone number as the sender for new conversations. Existing conversations that began from your email address may continue using that email, so start a new chat if you want a contact to see your phone number instead.
Step 9: Test a New iMessage
Open Messages, tap the compose button, and start a new conversation with someone who uses iMessage. If everything is working, your message should send as a blue bubble. If it sends as green to another Apple user, your iMessage activation may still be pending, the recipient may not have iMessage available, or your connection may need troubleshooting.
Step 10: Add the Phone Number to Messages on iPad
On your iPad, go to Settings > Apps > Messages. Turn on iMessage, tap Send & Receive, and sign in with the same Apple Account used on your iPhone. When your iPhone number appears, select it under the reachable options. This lets your iPad receive iMessages sent to your phone number, which is handy when your iPhone is charging across the room and you are deeply committed to not getting up.
Step 11: Add the Phone Number to Messages on Mac
On your Mac, open the Messages app. From the menu bar, choose Messages > Settings, then click iMessage. Sign in with the same Apple Account used on your iPhone. Under the list of addresses where you can be reached, select your phone number. If you want new conversations from your Mac to come from your phone number, choose that number in the Start new conversations from menu.
Step 12: Turn On Text Message Forwarding if You Want Green-Bubble Texts on Other Devices
iMessage is not the same as SMS, MMS, or RCS. If you want your iPad or Mac to send and receive regular carrier-based texts from non-Apple devices, go back to your iPhone and open Settings > Apps > Messages > Text Message Forwarding. Turn on the devices you want to include. This allows green-bubble conversations to appear on your other Apple devices too, as long as your setup supports it.
How to Make Your Phone Number the Default in Apple Messages
If your friends say, “Why are you texting me from an email address?” the fix is usually simple. Open Settings > Apps > Messages > Send & Receive, then select your phone number under Start New Conversations From. Going forward, new conversations should begin from your number.
However, existing threads can be stubborn. If a conversation started from your email address, Apple Messages may keep using that address inside the same thread. The practical fix is to start a fresh conversation after switching your default sender to your phone number. It is not glamorous, but neither is explaining to your cousin why “[email protected]” is actually you.
What If Your Phone Number Does Not Appear?
If your phone number does not appear in Send & Receive, start with the basics. Make sure iMessage is turned on, your SIM or eSIM is active, your iPhone has Wi-Fi or cellular data, and your iOS software is updated. Then restart your iPhone and check again.
If your number is visible but unchecked, tap it. If it refuses to select, sign out of Messages and FaceTime on your iPhone, iPad, and Mac, then sign back in using the same Apple Account. On iPhone, go to Settings > Apps > Messages > Send & Receive, tap your Apple Account, and sign out. Repeat the process for FaceTime. Then turn iMessage back on and sign in again.
Fixing “Waiting for Activation” or “Activation Unsuccessful”
iMessage activation can show messages like Waiting for activation, Activation unsuccessful, or Could not sign in. If that happens, do not panic. First, confirm your internet connection. Then go to Settings > Apps > Messages and turn iMessage off. Go to FaceTime settings and turn FaceTime off too. Restart your iPhone, then turn both services back on.
Apple notes that carrier verification can take up to 24 hours in some cases. If your number still does not activate after that, contact your carrier and ask whether your line can send and receive international SMS messages. This matters because iMessage phone number activation may rely on SMS verification. It is not the most exciting phone call you will ever make, but it can solve the mystery.
Special Case: eSIM, Dual SIM, and iOS 26 Issues
If you use eSIM or Dual SIM, pay close attention to which line is active. In some cases, especially after adding an eSIM later during setup or after updating software, iMessage may not automatically connect your phone number. If you see green bubbles, “Not Delivered” alerts, duplicate numbers, or messages coming from your email address, turn iMessage off and back on after confirming the correct SIM or eSIM is active.
If two SIMs show the same phone number and one is inactive, remove the inactive physical SIM or delete the inactive eSIM. Then return to Settings > Apps > Messages > Send & Receive and tap your phone number to activate it. Dual SIM users can also choose which number to use when starting a new message, which is useful if you separate personal and business lines.
Phone Number on iPhone vs. Phone Number on Apple Account
There is a small but important difference between adding a number to Messages and managing phone numbers on your Apple Account. Your Apple Account can have trusted numbers or sign-in phone numbers for account security. Apple Messages, however, uses the number connected to your active iPhone line for iMessage. In other words, adding a trusted number for account recovery does not automatically make that number an iMessage sender.
For most people, the right path is: activate the number on iPhone, turn on iMessage, select the number in Send & Receive, and then enable the same number on iPad or Mac. Simple, once you know which drawer Apple hid the spoon in.
Common Mistakes to Avoid
Using Different Apple Accounts
Your iPhone, iPad, and Mac should use the same Apple Account for iMessage. If one device is signed in with a different account, your number may not appear correctly.
Expecting an iPad or Mac to Add the Number First
Your iPhone is the anchor. Set up the phone number on your iPhone first, then enable it on your iPad or Mac.
Ignoring Carrier Activation
If you just switched carriers or transferred a number, iMessage may need time. Make sure your cellular service is fully active before troubleshooting deeper.
Forgetting About Existing Threads
Changing the default sender affects new conversations. Existing threads may continue from the original email or number, so begin a new conversation when needed.
Experience Notes: Real-World Lessons From Adding a Phone Number to Apple Messages
The most common experience people have when adding a phone number to Apple Messages is not a dramatic technical disaster. It is usually a tiny identity crisis. One minute, your iPhone is sending perfectly normal blue bubbles. The next, your Mac is messaging from your email address, your friend asks who you are, and you briefly consider changing your name to “Sent From iCloud” and moving to the mountains.
In everyday use, the best habit is to check Send & Receive after any major phone change. Bought a new iPhone? Check it. Switched from physical SIM to eSIM? Check it. Ported your number to another carrier? Definitely check it. Updated iOS and suddenly messages look odd? Check it before assuming your phone has developed a personality.
Another useful lesson is to give iMessage a little breathing room. People often toggle iMessage off and on ten times in five minutes, hoping the digital gods will be impressed by their enthusiasm. That usually does not help. If activation is pending, make sure the basics are correct, restart once, turn iMessage back on, and wait. If 24 hours pass and the number still will not activate, then it is time to contact the carrier or Apple Support.
For families, the biggest mistake is sharing one Apple Account across multiple people. It may seem convenient at first, especially when setting up devices for children or relatives, but Messages can become messy fast. If the same Apple Account is used on several devices, conversations and reachable addresses can overlap. Family Sharing is a cleaner option because each person keeps a separate Apple Account while still sharing eligible purchases and services.
For business users, Dual SIM can be a blessing and a tiny puzzle. If you have one personal number and one work number, take a moment before sending a new message. Apple lets you choose which line to use, but it is easy to start a conversation from the wrong number when you are moving quickly. A good practice is to label your cellular plans clearly, such as “Personal” and “Work,” then double-check the sender line when messaging clients, coworkers, or anyone who should not receive a Saturday grocery-list text from your business number.
Mac users should remember that the Mac does not magically own your phone number. It borrows access through your Apple Account and your iPhone setup. If the number disappears from Messages on Mac, the fix often starts on the iPhone, not the Mac. Confirm iMessage is active on iPhone, confirm your number is checked, then return to Mac Messages settings and select the number again.
Finally, do not overlook the emotional power of a test message. After changing settings, send a fresh message to someone who uses iMessage and ask what sender they see. It is quick, practical, and much less embarrassing than discovering three weeks later that your entire group chat knows you only as an email address from high school. Adding your phone number to Apple Messages is mostly about making your Apple devices agree on who you are. Once they do, everything feels smoother, cleaner, and a lot less mysterious.
Conclusion
Adding a phone number on Apple Messages is mainly about activating iMessage on your iPhone, selecting your number in Send & Receive, and using the same Apple Account across your Apple devices. Once your number is checked and selected as the default for new conversations, your iMessages should come from the identity most people recognize: your phone number.
If something goes wrong, start simple. Update iOS, check your connection, restart your iPhone, confirm your SIM or eSIM is active, and make sure your carrier can support the verification process. For iPad and Mac, remember that your iPhone does the heavy lifting first. The other devices join the party after the number is set up properly.
In short, Apple Messages is powerful, but it likes things tidy: one active number, one correct Apple Account, and the right check marks in the right places. Give it that, and your blue bubbles should behave beautifully.