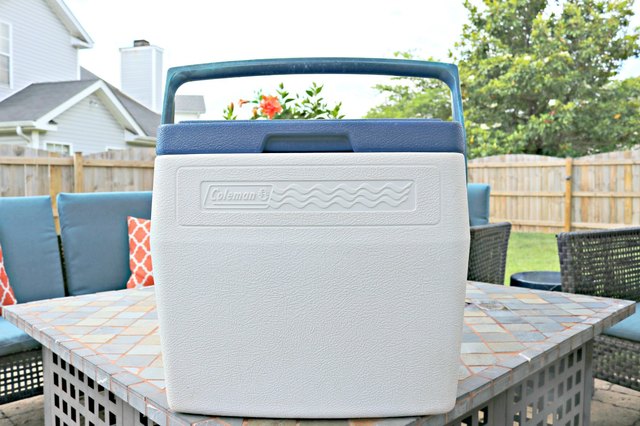

A cooler is one of those household heroes that works hard and complains quietly. It hauls sandwiches to the beach, keeps drinks cold at tailgates, guards potato salad like a tiny refrigerator with a handle, and occasionally returns home smelling like a seafood truck parked in the sun. If you have opened your cooler and immediately questioned your life choices, you are not alone.
The good news is that learning how to clean and deodorize a cooler is simple. The better news is that you do not need a laboratory, a hazmat suit, or a dramatic TikTok cleaning cocktail that fizzes like a science fair volcano. You need a smart process: remove debris, wash with soap, tackle stains, sanitize when needed, neutralize odors, dry completely, and store the cooler properly so the stink does not stage a comeback tour.
This guide explains the safest and most effective way to clean a cooler, remove fish smell, get rid of moldy odors, brighten stained plastic, and keep your ice chest fresh between trips. Whether you have a hard-sided camping cooler, a soft cooler bag, a lunch cooler, or a large wheeled ice chest, the same basic rule applies: clean it soon, dry it well, and never trap moisture inside with the lid closed.
Why Coolers Get So Smelly in the First Place
A cooler is basically a sealed box designed to hold cold, wet things. That is great for food safety during travel, but it also creates the perfect little cave for odors if leftovers, spilled drinks, melted ice, meat juices, fish residue, or damp towels sit inside too long. Even a tiny amount of organic matter can leave a strong smell once the cooler warms up.
The most common causes of cooler odor include spilled soda, leaking meat packages, fish slime, forgotten sandwiches, melted ice mixed with food residue, mildew from storage, and bacteria growing on damp surfaces. Plastic can also hold smells, especially if the cooler has scratches, textured walls, a rubber gasket, a drain plug, or tight corners where grime hides like it signed a lease.
The key is to treat odor as a cleaning problem first and a deodorizing problem second. Sprinkling baking soda into a dirty cooler may reduce smell temporarily, but it will not remove the source. Think of it like spraying air freshener in a gym bag full of old socks. Technically something happened, but not the thing you wanted.
Supplies You Need to Clean and Deodorize a Cooler
Before you begin, gather your tools. Most cooler cleaning jobs require only basic household items, which is excellent news for anyone who spent all their money on steaks and forgot cleaning supplies exist.
Basic cooler cleaning supplies
- Mild dish soap
- Warm water
- Soft sponge or microfiber cloth
- Soft-bristle brush or old toothbrush
- Baking soda
- White vinegar
- Clean towels
- Bucket or spray bottle
- Optional: unscented household bleach for sanitizing
- Optional: vanilla extract for lingering plastic odors
Avoid steel wool, abrasive powders, harsh degreasers, and rough scrub pads unless your cooler manufacturer specifically allows them. Many cooler interiors are plastic or lined materials that can scratch. Scratches are not just cosmetic; they become tiny hiding places for food residue and odor.
Step-by-Step: How to Clean a Cooler After Regular Use
For everyday cleaning after a picnic, road trip, camping weekend, or grocery run, this method is enough. It works for most hard coolers and many soft coolers, although soft coolers need gentler handling and more careful drying.
1. Empty the cooler completely
Start by removing everything: food containers, cans, ice packs, loose wrappers, melted ice, and suspicious crumbs that may or may not have once been chips. Open the drain plug if your cooler has one and let all liquid drain out. If the cooler held raw meat, seafood, poultry, or anything that leaked, handle the mess carefully and wash your hands afterward.
2. Rinse away loose debris
Use a garden hose, sink sprayer, or pitcher of warm water to rinse the cooler. Pay attention to corners, the drain channel, the underside of the lid, hinges, handles, and gaskets. Rinsing first keeps you from scrubbing grit across the plastic like sandpaper.
3. Wash with mild soap and warm water
Mix mild dish soap with warm water. Scrub the inside and outside of the cooler with a sponge or soft brush. Do not forget the lid. The lid often traps the most odor because it has seams, grooves, and sometimes a gasket that presses against damp air.
If the cooler has a drain plug, clean around it carefully. Remove the plug if the design allows it, wash it separately, rinse it well, and let it dry. A dirty drain plug can make an otherwise clean cooler smell like you missed a spotbecause you did.
4. Rinse thoroughly
Rinse until no soap remains. Soap residue can affect the taste of ice, leave a film, and make the cooler feel sticky. If you use the cooler for food or drinks, a thorough rinse is not optional. Nobody wants a sparkling water with notes of lemon dish soap and regret.
5. Dry with the lid open
Wipe the cooler with a clean towel, then leave it open to air-dry completely. This is one of the most important steps. A clean but damp cooler stored with the lid closed can develop mildew odor quickly. If possible, dry it in a shaded, breezy spot. A short period of sunlight can help reduce odors, but do not leave soft coolers or delicate liners baking in harsh sun for hours unless the manufacturer says it is safe.
How to Deodorize a Smelly Cooler Naturally
If your cooler still smells after washing, it needs deodorizing. The safest place to start is baking soda, which helps absorb odors without leaving a strong scent behind. Vinegar can also help with mild mildew smells and mineral residue, but use it separately from bleach. Never mix vinegar and bleach.
Baking soda method for cooler odors
Sprinkle baking soda over the damp interior of the cooler or make a paste with baking soda and a small amount of water. Spread the paste over stained or smelly areas and let it sit for 15 to 30 minutes. For stubborn smells, leave an open bowl of dry baking soda inside the closed cooler overnight after the cooler has been washed and dried. The next day, discard the baking soda, rinse the cooler, and dry it again with the lid open.
Vinegar method for mildew smell
Mix equal parts white vinegar and water in a spray bottle. Spray the inside of the cooler, let it sit for several minutes, then scrub lightly and rinse well. Vinegar is especially helpful when the smell is musty rather than rotten. After rinsing, dry the cooler completely. If vinegar scent lingers, leave the lid open for several hours.
Vanilla extract trick for lingering plastic odor
Some cooler manufacturers recommend wiping the interior with a cloth dampened with vanilla extract when odors persist after cleaning. This does not replace washing or sanitizing; it is a final odor treatment. Place the vanilla-dampened cloth inside the clean cooler overnight, then remove it and air out the cooler. Use this trick only after the cooler is genuinely clean, not as a dessert-scented disguise for old fish.
How to Sanitize a Cooler Safely
Cleaning and sanitizing are not the same thing. Cleaning removes dirt, food residue, and grime. Sanitizing helps reduce germs on a clean surface. If your cooler held raw meat, seafood, poultry, spoiled food, or mold, sanitizing is a smart extra step after washing.
For many household coolers, a diluted bleach solution can be used as a sanitizer, but always check the care instructions for your specific cooler. Some soft cooler liners and specialty materials may not tolerate bleach well. When in doubt, use the gentlest approved method.
Bleach safety rules
- Use plain, unscented household bleach only if appropriate for the cooler material.
- Always dilute bleach with room-temperature water.
- Do not mix bleach with vinegar, ammonia, rubbing alcohol, or other cleaners.
- Work in a well-ventilated area.
- Rinse food-contact surfaces thoroughly after sanitizing unless the product label says otherwise.
- Let the cooler air-dry completely before storage.
For light sanitizing, many food-contact surface guidelines use very dilute bleach solutions. For heavy odor, mold, or manufacturer-approved deep cleaning, some cooler brands suggest stronger diluted bleach-and-water mixtures. Follow the label on your bleach bottle and the care instructions for your cooler. More bleach is not automatically better; it can leave strong fumes, discolor surfaces, and damage materials.
How to Remove Stains from a Plastic Cooler
Coolers collect stains from berries, barbecue sauce, dirt, leaves, fish, meat packaging, and that one mystery liquid nobody in the family will confess to spilling. Stains are often cosmetic, but if they come with odor, they need attention.
Use a baking soda paste
Make a paste with baking soda and water. Apply it to the stained area and let it sit for 10 to 20 minutes. Scrub gently with a sponge or soft brush, then rinse. This works well on general discoloration, food marks, and mild grime without being too abrasive.
Try vinegar for mineral or mildew stains
If the stain looks chalky, musty, or water-related, spray it with a vinegar-and-water solution. Let it sit briefly, scrub, rinse, and dry. Again, do not use vinegar before or after bleach unless the cooler has been thoroughly rinsed and aired out. Keep cleaning chemistry boring. Boring is safe.
Use a soft brush for texture and seams
Many hard coolers have textured interiors. A sponge may glide over the raised texture while grime stays tucked in the low spots. Use a soft-bristle brush or toothbrush for seams, grooves, hinges, gaskets, cup holders, wheel wells, and the drain area.
How to Clean a Cooler That Smells Like Fish
Fish smell deserves its own section because it is the Olympic champion of cooler odors. The best solution is fast cleaning. As soon as possible after a fishing trip, empty the cooler, rinse it, wash it with dish soap, and scrub around the drain plug. Then use baking soda paste on the interior walls and let it sit before rinsing.
If the smell remains, try the overnight baking soda method. Place one or two open bowls of baking soda inside the dry cooler, close the lid, and let it sit overnight or longer. For extreme fish odor, repeat the process. You can also wipe the cooler with a vinegar solution after washing, rinse thoroughly, and dry it open.
For future fishing trips, use a dedicated fish cooler if possible. If that is not realistic, line the bottom with sealed bags or trays, keep fish in leakproof packaging, and clean the cooler immediately after use. Waiting until Monday after a Saturday fishing trip is how coolers become outdoor furniture nobody wants to open.
How to Clean Mold or Mildew from a Cooler
Mold and mildew usually happen when a cooler is stored damp or dirty. If you see black, green, gray, or fuzzy spots, take the cooler outside, wear gloves if needed, and avoid breathing in disturbed spores. Wash the cooler thoroughly with soap and warm water first. Scrub seams, gasket areas, and the drain plug.
After cleaning, sanitize according to the cooler’s care instructions. For hard plastic coolers, diluted bleach may be appropriate. For soft coolers, use caution because bleach may damage the liner. Some soft coolers are best cleaned with mild soap and water only, then dried extremely well.
Once the mold is gone, the most important step is drying. Leave the cooler open until every surface, seam, and pocket is completely dry. For soft coolers, prop the bag open so air can circulate. If the cooler still smells musty, use dry baking soda overnight after the cooler has dried.
How to Clean a Soft Cooler Bag
Soft coolers need a gentler approach than hard-sided ice chests. Start by checking the care label. Most soft coolers should be hand-washed, not machine-washed, unless the manufacturer specifically says otherwise.
Empty the cooler and shake out crumbs. Wipe the inside with warm water and mild dish soap. Use a soft cloth around seams and zippers. Rinse with a damp cloth rather than flooding the cooler, especially if it has insulation that should not be soaked. Clean the outside fabric according to the label. Then prop the cooler open and let it dry completely before zipping it shut.
If odor remains, place a small open container of baking soda inside the dry cooler overnight. You can also use crumpled newspaper for odor absorption, but make sure ink does not transfer to light-colored liners. Avoid strong fragrances because they can cling to soft materials and make tomorrow’s turkey sandwich taste like artificial lavender.
How Often Should You Clean a Cooler?
Clean your cooler after every use if it held food, drinks, ice, fish, meat, or anything damp. A quick wash now prevents a dramatic rescue mission later. If the cooler only carried sealed cans for a few hours and stayed dry, a wipe-down and full air-dry may be enough. But if melted ice touched food packages, the cooler needs a proper wash.
Before the first use of the season, clean the cooler even if it looked fine in storage. Dust, garage smells, and trapped moisture can build up over time. At the end of the season, clean and dry it carefully before storing it away. Future you will be grateful, and future you deserves nice things.
Cooler Cleaning Mistakes to Avoid
Closing the lid before the cooler is dry
This is the number one mistake. A damp cooler with a closed lid is basically an invitation for mildew to move in, hang curtains, and start a family. Always store the cooler open or loosely closed only after it is fully dry.
Using harsh scrubbers
Abrasive pads can scratch plastic interiors. Scratches trap grime and make future cleaning harder. Use soft tools and let cleaning solutions do the work.
Mixing cleaning products
Do not mix bleach with vinegar, ammonia, rubbing alcohol, or other cleaners. Dangerous fumes are not a cleaning strategy. Use one product at a time, rinse thoroughly, and ventilate the area.
Skipping the drain plug
The drain plug is a tiny odor factory if ignored. Clean it every time, especially after melted ice, meat juices, or fish water have drained through it.
Masking odor instead of removing it
If a cooler smells bad, perfume is not the answer. Wash first. Deodorize second. Scent tricks come last, if needed.
How to Keep Your Cooler Fresh Between Uses
Prevention is easier than cleaning a cooler that smells like a dock at low tide. After every trip, empty the cooler immediately. Do not leave food, ice water, or sealed containers inside overnight. Wash and dry it as soon as possible.
Store the cooler with the lid open or slightly ajar so air can circulate. If you must store it closed, make absolutely sure it is dry first. Place a small open box of baking soda inside for long-term storage, especially if the cooler lives in a garage, basement, shed, or boat.
When packing food, separate raw meat and poultry from ready-to-eat items. Use leakproof containers and resealable bags. Consider one cooler for drinks and another for food. The drink cooler gets opened more often, which raises the temperature inside. Keeping food in a separate cooler helps maintain cold conditions and reduces spills.
For food safety, cold perishable foods should stay at 40 degrees Fahrenheit or below. Use plenty of ice or frozen gel packs, keep the lid closed as much as possible, and place the cooler in shade. A clean cooler is important, but a cold cooler is what keeps lunch from becoming a gastrointestinal adventure.
Real-Life Experience: What Actually Works When a Cooler Gets Nasty
Here is a realistic cooler-cleaning scenario: you come home from a weekend cookout, unload the car, promise yourself you will deal with the cooler “in a minute,” and then life happens. Two days later, you open the lid and discover a puddle of melted ice, a forgotten hot dog package, and a smell that seems personally offended by your presence. This is when panic cleaning begins.
In my experience, the biggest mistake people make is jumping straight to bleach or fragrance. They want the smell gone immediately, so they reach for the strongest thing under the sink. But the most effective first step is boring: remove the mess and wash the cooler really well with dish soap and warm water. You have to physically remove the food residue before any deodorizer can do its job. A cooler can look clean after a quick rinse, but the odor often hides in the lid seam, drain plug, handle wells, and little textured grooves along the bottom.
The second lesson is that baking soda works best when you give it time. A quick sprinkle and rinse may help, but an overnight treatment is better for stubborn odors. After washing and drying the cooler, place a bowl of dry baking soda inside and close the lid. The next day, the smell is often much weaker. If the odor is still hanging around like an unwanted houseguest, repeat the process. Some strong smells, especially fish, may need two or three rounds.
For fish coolers, speed matters. The faster you clean after the trip, the better the result. I have seen coolers go from “perfectly fine” to “possibly cursed” simply because fish water sat in the drain channel overnight. A soft toothbrush around the plug makes a huge difference. It is not glamorous, but neither is explaining to guests why the soda cooler smells like bait.
Another practical trick is to dry the cooler outdoors with the lid open after cleaning. Airflow does what sprays cannot. If the weather is mild, leaving a clean cooler open in a breezy shaded spot helps remove trapped moisture and stale odor. Sunlight can help with hard plastic coolers, but I avoid long exposure for soft coolers because heat can stress liners, adhesives, and fabric.
I also like to store coolers with the lid slightly open. A folded towel, small block, or loose latch can prevent the lid from sealing completely. This one habit prevents most mildew smell. When people complain that their cooler smells bad every summer, storage is usually the culprit. They cleaned it, but they put it away damp and sealed. The cooler then spent six months quietly brewing garage-flavored mildew.
The final lesson is simple: use the right cooler for the job. If you often fish, camp, or transport raw meat, consider dedicating one cooler to those tasks. Keep another for drinks, fruit, and ready-to-eat foods. That small separation saves cleaning time and helps prevent cross-contamination. Your cooler does not need to smell like a brand-new appliance forever, but it should smell neutral. Neutral is the goal. If it smells like nothing, congratulationsyou have won.
Conclusion
Knowing how to clean and deodorize a cooler is less about fancy products and more about good habits. Empty it quickly, wash it with mild soap and warm water, scrub the hidden spots, sanitize when necessary, treat odors with baking soda or vinegar, and dry it completely before storage. For fish smell, mold, or spoiled food, act fast and clean deeply. For everyday use, a simple wash and open-air dry will keep your cooler ready for beach days, camping trips, tailgates, grocery runs, and all the snacks worthy of chilled transportation.
The best cooler is not the most expensive one. It is the one that opens without making everyone step backward. Keep it clean, keep it dry, and your cooler will remain what it was meant to be: a portable palace for cold drinks and safe food, not a plastic box of mysterious regret.
Note: This article synthesizes practical cleaning and food-safety guidance from reputable U.S. public-health, food-safety, university extension, cleaning, and cooler-manufacturer resources.