
There are two kinds of people in the world: people who set a timer on their phone like normal citizens, and people who look at a single button and think, “What if this could become a tiny cathedral of timing logic, LED feedback, debounce algorithms, power management, and unnecessary emotional support?” Welcome to the glorious world of the Over-Engineered Single Button Timer, a project that proves one button can absolutely do the work of fiveprovided you are willing to make the firmware sweat.
At its simplest, a single button timer starts, stops, resets, and maybe adjusts time using one lonely physical input. At its most over-engineered, it becomes a polished DIY timer project with long-press detection, double-click controls, OLED menus, haptic feedback, sleep mode, rechargeable power, event logging, and a personality that silently judges your productivity. Is it practical? Yes. Is it excessive? Also yes. That is the point.
This article explores how a one-button timer works, why makers love building it, where the real engineering challenges hide, and how a simple device can teach surprisingly deep lessons about embedded design, user experience, and the ancient art of not accidentally turning one button press into seven.
What Is an Over-Engineered Single Button Timer?
An over-engineered single button timer is a timer controlled by only one button, but designed with far more thought, logic, and features than the phrase “one button” suggests. It may be used as a kitchen timer, desk productivity timer, workout interval timer, soldering bench reminder, coffee brew countdown, meditation timer, or Pomodoro-style focus gadget.
The “over-engineered” part is not an insult. In maker culture, it often means the builder turned a basic function into a learning playground. A normal timer says, “Press start.” An over-engineered one says, “Short press to start, long press to reset, double press to change modes, triple press to summon the blinking LED of destiny.”
The Single Button Challenge
A single button creates an elegant constraint. With only one input, every interaction must be carefully designed. A short tap might start or pause the timer. A long press might reset it. A double tap might increase the duration. Holding the button during startup might open settings. That sounds simple until you realize the software must distinguish between all those actions without making the user feel like they are entering a cheat code on a 1990s game console.
This is where the project becomes interesting. A single button timer is not just about counting seconds. It is about interpreting human intent through one piece of plastic.
Why Build One When Your Phone Already Has a Timer?
Because your phone is a chaos rectangle. You open it to set a 10-minute timer, and suddenly you are watching a video of a raccoon washing grapes like a tiny exhausted dishwasher. A physical timer, especially a dedicated single button timer, does one job and does it without inviting you into the notification swamp.
There is also a hands-on learning reason. This kind of project touches many real electronics topics: button debounce, finite state machines, low-power modes, display control, buzzers, LEDs, battery charging, timing accuracy, enclosure design, and user interface logic. That is a lot of education hiding behind one clicky switch.
Useful, Not Just Nerdy
A well-designed one-button timer can be genuinely useful. In a workshop, it can remind you when glue has cured or when a 3D print stage needs attention. In the kitchen, it can handle steeping tea, boiling eggs, or preventing “just five more minutes” from becoming roasted charcoal with seasoning. On a desk, it can encourage focus sessions without the temptation of apps, tabs, and messages.
The best version is not complicated for the user. It is complicated behind the scenes so the front end feels effortless. That is the secret sauce of good engineering: hide the circus.
The Core Components of a DIY Single Button Timer
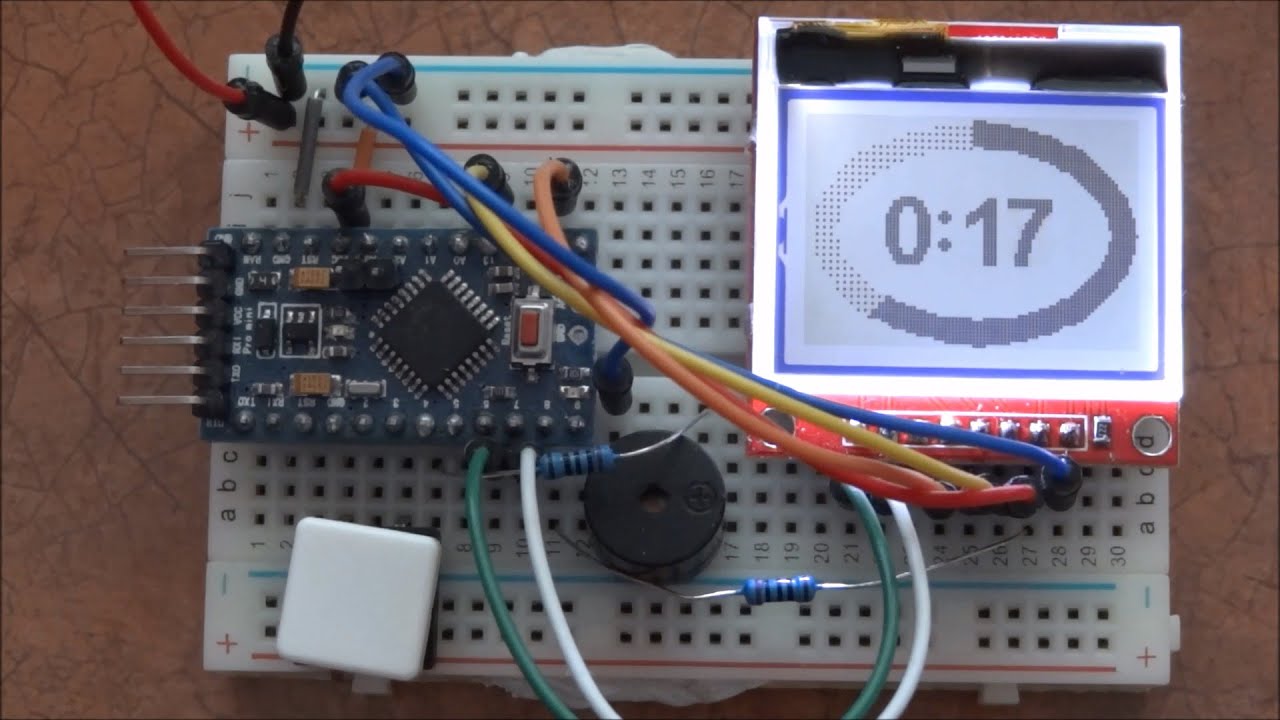
A typical DIY timer project can be built around a small microcontroller, one momentary push button, a display or indicator, a sound or vibration output, and a power source. The parts list can stay humble or become hilariously fancy depending on how deep the builder wants to go.
1. Microcontroller
The brain might be an Arduino-compatible board, an ATmega328P, an ESP32, a Raspberry Pi Pico, or another small microcontroller. For a timer, the requirements are modest: read a button, track time, update outputs, and sleep when idle. Even a tiny microcontroller can handle the job without breaking a digital sweat.
2. Button and Pull-Up Resistor
The single button is the hero, villain, and unreliable witness. A push button usually needs a defined electrical state so the input pin does not float unpredictably. Many microcontrollers support internal pull-up resistors, allowing the button to connect the pin to ground when pressed. External pull-up or pull-down resistors can also be used, especially when designing a custom PCB.
3. Display or Feedback System
The timer can communicate through a small OLED screen, seven-segment display, LED ring, single RGB LED, buzzer, vibration motor, or all of the above if restraint is not invited to the meeting. A minimalist version may use one LED: blinking slowly while running, quickly when paused, and dramatically when finished. A more luxurious version might show minutes, seconds, battery level, mode, and motivational messages like “Focus, human.”
4. Power Source
A USB-powered timer is simple. A battery-powered one is more portable but introduces charging, sleep mode, power switching, and battery monitoring. This is where an innocent afternoon project can become a three-week expedition involving datasheets, voltage regulators, and the quiet realization that batteries have opinions.
The Real Problem: Button Bounce
Mechanical buttons are not as clean as they look. When pressed, the contacts can rapidly open and close for a few milliseconds before settling. This is called button bounce, and it can make one press appear to the microcontroller as several presses. Your finger says “click.” The circuit says “click-click-click-click-click.” Very rude.
For an Arduino timer or any microcontroller-based timer, debouncing is essential. Without it, a short press might accidentally start, pause, and reset the timer before you have time to feel proud of yourself.
Software Debounce
Software debounce filters button noise in code. A common method is to wait for the button state to remain stable for a short period, such as 10 to 50 milliseconds, before accepting the press. A better method avoids blocking delays and uses timestamps, so the timer can keep updating while the code checks whether the input is stable.
This matters because a timer should not freeze every time it reads the button. Blocking code is like a cashier who stops serving everyone whenever someone asks what time it is. It works, technically, but nobody leaves impressed.
Hardware Debounce
Hardware debounce uses components like resistors and capacitors to smooth the signal before it reaches the microcontroller. An RC filter can reduce noise, while a Schmitt trigger input can help create cleaner transitions. This can make the firmware simpler, but it adds parts, board space, and design decisions.
In an over-engineered timer, the correct answer is often “both,” because why solve a problem once when you can solve it electrically and philosophically?
Designing the One-Button User Interface
The hardest part of a single button timer is not the countdown. Counting down is easy. The real challenge is designing controls that feel natural. A good one-button interface should be memorable, forgiving, and consistent.
Common Button Actions
A practical control scheme might look like this:
- Short press: Start or pause the timer.
- Long press: Reset the current timer.
- Double press: Add one minute or switch preset duration.
- Press and hold at startup: Enter settings mode.
- Very long press: Power off or enter deep sleep.
The trick is to avoid making the user memorize too much. One button can support many gestures, but too many gestures can turn the device into a pocket-sized escape room.
Feedback Must Be Immediate
Every press should produce feedback: a click, beep, LED blink, screen change, or vibration. If the user presses the button and nothing happens, they will press it again. Then again. Then harder, because apparently humans believe pressure is a debugging tool.
Immediate feedback tells the user, “Yes, I heard you.” Delayed results can still happen later, but acknowledgment should be instant. This is especially important when distinguishing between short and long presses, because the device may need to wait before deciding what the user intended.
The Firmware Architecture: Tiny Device, Big Brain
A polished microcontroller timer benefits from a structured firmware design. Instead of writing one enormous loop that checks everything in a tangled pile, developers often use a state machine. A state machine defines what the timer is currently doing and what events can move it to another state.
Example Timer States
The timer might include these states:
- Idle: Waiting for the user to start.
- Running: Countdown active.
- Paused: Countdown stopped but not reset.
- Finished: Alerting the user.
- Settings: Changing presets or preferences.
- Sleep: Low-power mode to save battery.
This structure keeps behavior predictable. When the timer is running, a short press pauses it. When it is paused, a short press resumes it. When it is finished, a short press silences it. Same button, different state, clear logic.
Non-Blocking Timing
Good firmware avoids blocking delays. In Arduino-style programming, that often means using a timestamp approach instead of stopping the entire program with a delay function. The timer compares the current time to the previous update time and acts only when enough time has passed.
This allows the device to update the display, scan the button, blink LEDs, play alerts, and manage power without tripping over itself. The timer feels responsive because the code is not taking little naps at inconvenient moments.
Over-Engineering Features That Are Actually Worth It
Not every fancy feature is pointless. Some upgrades make the timer more reliable, pleasant, or useful. The key is knowing which extras improve the experience and which ones exist mainly because a parts drawer looked lonely.
Preset Modes
Preset modes are practical. A timer could include 1-minute, 5-minute, 10-minute, 25-minute, and custom intervals. A desk version might include focus, break, stretch, and “stop browsing and drink water” modes.
LED Ring Progress Display
An LED ring is one of the most satisfying ways to show progress. As time passes, LEDs can turn off one by one, creating an at-a-glance countdown. It is less precise than a numeric display, but more emotionally dramatic. Sometimes you do not need to know there are 14 minutes and 32 seconds left. You just need to see the circle of doom shrinking.
Haptic Feedback
A tiny vibration motor can make the device usable in quiet environments. It is ideal for classrooms, offices, shared workspaces, or anywhere a buzzer would make people stare at you like you brought a smoke alarm to a library.
Low-Power Sleep
Battery-powered projects benefit from sleep modes. A timer that sleeps when idle can last much longer between charges. Wake-on-button behavior also makes the device feel polished: press once, it wakes; press again, it works. Very civilized.
Over-Engineering Features That Are Deliciously Unnecessary
Some features are not needed, but they are fun. And fun is a valid engineering requirement, even if it rarely appears in corporate design documents.
Wi-Fi Sync
A single button timer does not need Wi-Fi. But could it upload session logs to a dashboard? Of course. Could it sync with a calendar? Certainly. Could it send a notification to your phone saying, “Your tea is ready, champion”? Absolutely. Should it? That depends on how much you enjoy debugging network credentials on a device with one button.
Animated Startup Screen
A boot animation adds no timing accuracy whatsoever. It does, however, make the project feel like a tiny consumer product instead of a circuit board with ambition. A good startup animation says, “This was built by someone who owns both a soldering iron and a sense of occasion.”
Achievement Badges
A productivity timer could track completed sessions and reward streaks. Finish four focus rounds and the display shows a trophy. Miss a session and it gently forgives you, because unlike some apps, your timer has manners.
Specific Example: A 25-Minute Desk Timer
Imagine a compact desk timer designed for 25-minute focus sessions. It has one tactile button, a small OLED screen, a ring of twelve LEDs, a piezo buzzer, and a rechargeable battery. The user presses once to start. The OLED shows “Focus: 25:00.” Every two minutes, one LED changes state to show progress. A long press pauses and asks whether to reset. A double press switches to a 5-minute break.
Inside the firmware, the button handler detects short, long, and double presses. The state machine handles idle, running, paused, finished, and setup modes. The display updates once per second, while the LEDs update only when progress changes. The buzzer uses short patterns instead of one long, unbearable scream. After two minutes of inactivity, the device enters sleep mode.
That is a lot of engineering for a timer, but the result feels simple. The user does not see the debounce logic, state transitions, power-saving routines, or edge detection. They see a button, press it, and get a timer that behaves exactly as expected. That is the magic trick.
Common Mistakes When Building a Single Button Timer
Mistake 1: Ignoring Debounce
If the timer behaves randomly, check debounce first. Many “haunted microcontroller” problems are just bouncy switches wearing a bedsheet.
Mistake 2: Making Gestures Too Complicated
Short press, long press, and double press are usually enough. Triple press, quadruple press, and rhythmic button Morse code should be used only if your target audience includes secret agents and extremely patient squirrels.
Mistake 3: Using Blocking Delays Everywhere
Blocking delays make the interface feel sluggish. A responsive timer should keep scanning inputs and updating outputs even while waiting for the next second to pass.
Mistake 4: Forgetting the Enclosure
A project is not truly finished until it can survive being placed in a drawer with cables, pens, and one mysterious screw from 2017. A good enclosure protects the electronics and makes the button feel intentional.
Experience Notes: What Building an Over-Engineered Single Button Timer Teaches You
Building an Over-Engineered Single Button Timer is one of those projects that starts with confidence and ends with deep respect for every appliance in your kitchen. At first, the idea feels almost too easy. One button. One countdown. Maybe one LED. How hard could it be? Then the button bounces, the timer misses a click, the long press fires after a short press, the buzzer sounds like an angry microwave, and suddenly you are sketching state diagrams at midnight while whispering, “I understand now.”
The first lesson is that simplicity at the surface often requires discipline underneath. A single-button interface only feels simple when the logic is carefully organized. You quickly learn that every press needs context. Was the timer idle? Running? Paused? Finished? Was the button released quickly or held? Was this the first tap or the second tap in a double-click window? The button did not become complicated. The meaning did.
The second lesson is that feedback matters more than expected. During testing, a silent timer can feel broken even when it is working. Add a tiny LED blink or a soft beep, and suddenly the device feels alive. Add too much feedback, and it feels like a toy spaceship having a nervous breakdown. The sweet spot is subtle confirmation: enough to reassure the user, not enough to annoy the room.
The third lesson is that timing projects expose messy human behavior. People do not press buttons perfectly. They tap too fast, hold too long, change their minds, press during alerts, and occasionally mash the button like it owes them money. A durable timer design accepts imperfect input gracefully. It should not punish the user for being human. Debounce the button, debounce the interface, and maybe debounce your expectations.
The fourth lesson is that power management can turn a cute project into real product thinking. A USB-powered prototype is easy. A battery-powered timer forces questions: How long should it sleep? How does it wake? Should the screen turn off? How low can the battery go? Should the buzzer be disabled at low power? These details are not glamorous, but they separate “cool demo” from “thing I actually use.”
The fifth lesson is that over-engineering is not always wasteful. Sometimes it is how you learn. Adding a state machine, a proper debounce routine, a progress display, and sleep mode may be excessive for boiling eggs, but those same skills apply to real embedded systems, wearables, control panels, smart home gadgets, and industrial interfaces. The timer becomes a tiny classroom with a button on top.
And finally, the project teaches taste. Not every feature belongs. The best over-engineered timer is not the one with the most parts. It is the one that uses extra engineering to make the experience cleaner, calmer, and more reliable. When the device disappears into the taskwhen the user presses once and trusts itthat is success. The timer may be over-engineered, but it should never feel overcomplicated.
Conclusion: One Button, Many Lessons
The Over-Engineered Single Button Timer is a perfect maker project because it is small enough to finish but deep enough to teach. It blends practical electronics, firmware design, human interface thinking, and just enough absurdity to keep the build entertaining. With one button, you can explore debounce, state machines, non-blocking timing, LED feedback, battery power, and the delicate art of making technology feel obvious.
Yes, your phone already has a timer. But your phone will not teach you why switch bounce matters, why state machines are useful, or why a long press should not accidentally reset dinner. A homemade one-button timer does all of that while sitting on your desk like a tiny monument to controlled overthinking.
Note: This article is written as publish-ready web content and is based on real electronics, microcontroller, button debounce, timer design, and maker-project principles.