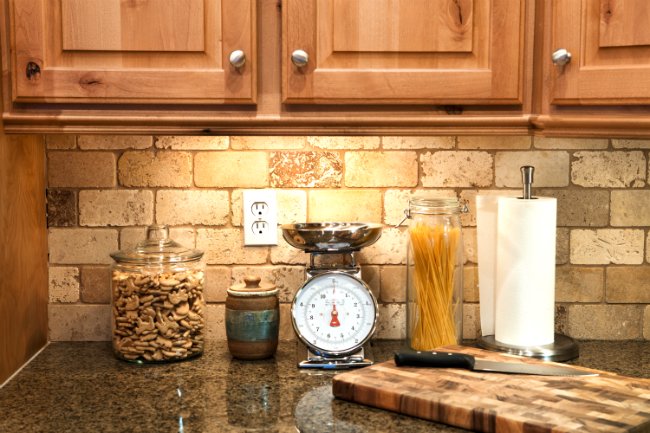

A brick backsplash can make a kitchen feel warm, textured, and full of character faster than you can say, “Who spilled marinara on the wall again?” It has that old-building charm people love: a little rustic, a little industrial, a little farmhouse, and somehow still polished when paired with modern cabinets and stone countertops. But before you start imagining yourself living inside a magazine spread, there are a few practical truths to know.
Brick is not the same as smooth ceramic tile. It is porous, textured, heavier-looking, and more demanding when it comes to sealing and cleaning. Installed well, a brick kitchen backsplash can become a gorgeous focal point. Installed carelessly, it can become a crumb-catching, grease-grabbing wall with the personality of a dusty pizza oven. The difference is planning.
This guide explains the five biggest things to know before installing a brick backsplash, from material choices and tools to sealers, cleaning, efflorescence, and real-life lessons that can save your budget and your weekend.
1. Decide Whether You Want Real Brick, Thin Brick, or Brick-Look Tile
The first big decision is not color, pattern, or whether your kitchen will suddenly look like a cozy café in Brooklyn. It is material. A traditional solid brick wall is durable, beautiful, and heavy. For most kitchens, however, solid brick is not practical as a backsplash because it takes up too much depth and usually requires structural planning. That is why many homeowners choose thin brick veneer or brick-look tile instead.
Thin Brick Veneer
Thin brick veneer is made from real clay brick but sliced thinner for wall applications. It gives you authentic texture, natural color variation, and that imperfect handmade look without building a full masonry wall. It can often be installed over properly prepared drywall, cement board, or another suitable substrate, depending on the product and wall condition.
Faux Brick Panels
Faux brick panels are lighter and often cheaper. Some are made from polyurethane, PVC, or composite materials. They are easier to cut, easier to handle, and friendlier for renters or budget remodels. The tradeoff is realism. Up close, many faux panels look like they are trying very hard to be brick, the way a garden gnome tries very hard to be security.
Porcelain or Ceramic Brick-Look Tile
Brick-look porcelain or ceramic tile is another smart option. It can deliver the rectangular shape and warm color of brick while offering a smoother, easier-to-clean surface. For busy kitchens where tomato sauce, bacon grease, and coffee splashes are not rare visitors, glazed brick-look tile may be the practical winner.
If you want authenticity, choose thin brick. If you want low maintenance, consider porcelain brick-look tile. If you want the fastest cosmetic update, faux brick panels may work, but make sure they are rated for kitchen use and safe near heat sources.
2. Understand the Tools and Installation Requirements Before You Start
A brick backsplash is a doable DIY project for confident homeowners, but it is not quite the same as sticking peel-and-stick squares behind the sink and calling yourself a renovation wizard. Thin brick usually requires layout planning, cutting, adhesive or mortar, spacers, grout or mortar joints, and sealing.
Basic tools may include a tape measure, level, pencil, notched trowel, grout bag, sponge, bucket, bristle brush, spacers, safety glasses, gloves, and a tile saw or angle grinder with a diamond blade for cuts. You may also need outlet extenders because brick veneer adds thickness to the wall. This small detail matters. Outlets should sit safely and neatly flush with the new finished surface, not sunken into the wall like they are hiding from responsibility.
Prepare the Wall Properly
The wall must be clean, dry, flat, and free of grease. Areas behind a stove often collect a thin film of cooking oil, even in homes where everyone claims they “barely fry anything.” Clean the surface with mild dish soap and water, rinse, and let it dry completely. Patch damaged drywall, remove loose paint, and sand bumps smooth.
Plan the Layout
Dry-fit the brick before applying adhesive. Mix pieces from multiple boxes so the color variation looks natural. If you install all the dark pieces on one side and all the light pieces on the other, your backsplash may look less “historic charm” and more “accidental checkerboard.”
Mark a level starting line and decide where cut pieces will land. Aim to avoid tiny slivers at exposed edges, around windows, or above the counter. A balanced layout looks professional even before the grout goes in.
Use the Right Mortar or Adhesive
For thin brick veneer, use a product recommended by the brick manufacturer. Many systems call for polymer-modified thin-set mortar or a veneer mortar designed to reduce sag on vertical surfaces. Work in small sections so the adhesive does not skin over before the brick is pressed into place. Press each piece firmly and keep joints consistent.
3. Seal the Brick Before Kitchen Life Gets Messy
Brick is porous. That is part of its charm and part of its drama. Without sealer, brick can absorb moisture, oils, food splatter, and stains. A clear masonry sealer helps protect the surface while preserving the natural look. In a kitchen, this is not optional unless you enjoy watching spaghetti sauce become part of your architecture.
A penetrating silane or siloxane masonry sealer is often a good choice for real brick because it can help resist water while maintaining a natural finish. Some sealers create a matte look; others add sheen. Always test the sealer on a spare brick or hidden area first. A product that looks invisible on the label can still darken the brick once applied.
Seal Before and After Grouting?
Many installers prefer sealing or using grout release before grouting because brick can absorb grout haze and pigment. After the grout or mortar joints cure, a final protective coat may be applied according to the sealer manufacturer’s instructions. Do not rush this step. If the mortar is still damp, trapped moisture may cause cloudy finishes or future staining.
Pay Attention to the Stove Zone
The area behind the range needs extra thought. Grease, steam, and heat gather there. Choose a sealer that can handle kitchen conditions, and confirm clearances for your stove, range hood, and wall material. Brick itself handles heat well, but adhesives, sealers, faux panels, and surrounding finishes may have limitations.
4. Be Honest About Cleaning and Maintenance
A brick backsplash is not difficult to maintain, but it is different from wiping glass tile. The surface is textured, and mortar joints create little ledges where dust and grease can settle. If your cooking style involves high-heat stir-fry, bubbling sauce, or anything that ends with “oops,” you should plan for routine cleaning.
Use mild cleaning methods first. A soft cloth, warm water, and a small amount of dish soap can handle everyday splatter. A soft bristle brush can help loosen buildup in mortar joints. Avoid wire brushes, steel wool, harsh acids, and abrasive powders. Brick may be tough, but it is not a cast-iron skillet; it does not need to be attacked to prove a point.
Best Cleaning Habits
Wipe splashes quickly, especially oil, tomato sauce, wine, coffee, and turmeric. Use a pH-neutral cleaner when possible. Keep the area behind the cooktop from becoming sticky by cleaning lightly but frequently. A five-minute wipe-down after cooking is easier than a heroic deep clean six months later.
Grout and Mortar Joints Matter
The joints between brick pieces affect both the look and maintenance level. Deep, rough joints feel rustic but catch more grime. Smoother, slightly recessed joints are easier to clean. Light-colored mortar gives an airy farmhouse look but may show stains faster. Darker mortar hides more but can make the backsplash feel heavier. Choose with your actual kitchen habits in mind, not just your Pinterest board’s emotional needs.
5. Know What Efflorescence Is Before It Surprises You
Efflorescence is the white, powdery mineral deposit that can appear on brick, mortar, or masonry surfaces when moisture moves salts to the surface and then evaporates. It can look alarming, especially on a brand-new backsplash, but it is usually a moisture-and-salt issue rather than a mysterious kitchen ghost.
Because a backsplash lives near water, steam, sinks, and cooking moisture, efflorescence is possible. Good installation practices reduce the risk: keep brick dry before installation, use proper mortar, avoid excessive water during cleanup, seal the finished surface, and fill small cracks where moisture could enter.
If white deposits appear, start gently. A dry brush may remove light powder. If deposits return repeatedly, look for a moisture source before using stronger cleaners. Harsh acids can damage masonry or discolor mortar if used carelessly, so follow product directions and test first. When in doubt, ask a masonry professional instead of turning your backsplash into a chemistry experiment with cabinets.
Brick Backsplash Pros and Cons
Pros
A brick backsplash adds warmth, texture, and architectural character. It pairs beautifully with white cabinets, black counters, butcher block, soapstone, brass fixtures, open shelving, and industrial lighting. It can soften a new kitchen that feels too shiny or add depth to a small kitchen without relying on bold color.
Thin brick is also durable when installed correctly. Unlike some trendy finishes, brick does not need to be perfect to look good. Chips, color shifts, and uneven edges often add to the charm.
Cons
The main drawbacks are cleaning, sealing, and installation complexity. Brick is more porous than glazed ceramic or glass. It may require resealing over time. It can be harder to cut around outlets and corners. It also adds visual weight, so in a very small or dark kitchen, too much dark brick can make the room feel closed in.
In short, brick is a style commitment. It is not the best choice for someone who wants a perfectly smooth, wipe-and-go surface. But for homeowners who love texture and do not mind a little maintenance, it can be a showstopper.
Design Tips for a Brick Kitchen Backsplash
Color is everything. Red brick feels classic and rustic. Whitewashed brick feels soft, cottage-like, and bright. Gray brick leans industrial. Tan or cream brick works well in transitional kitchens. If your cabinets are already dark, consider lighter brick or a washed finish. If your cabinets are white, natural red brick can add the contrast the room needs.
Pattern also changes the mood. A running bond pattern looks timeless. Herringbone adds movement and a custom feel, especially behind a range. Stacked brick looks cleaner and more modern. For a budget-friendly approach, use a standard running bond across most of the kitchen and create a framed accent panel behind the stove.
Open shelving looks especially good against brick, but remember that shelves add holes and hardware. Install blocking or use anchors rated for the wall assembly. Brick veneer is decorative, not a structural support system for your entire mug collection.
Cost and Budget Considerations
Brick backsplash costs vary widely depending on material, labor, wall condition, and layout complexity. Thin brick material may be affordable compared with high-end stone, but labor can rise if there are many outlets, corners, shelves, windows, or detailed cuts. Professional backsplash projects often fall into a broad midrange, while high-end materials or complicated layouts cost more.
Budget for more than brick. You may need mortar or adhesive, grout or pointing mortar, sealer, grout release, caulk, outlet extenders, trim pieces, blades, drop cloths, and possibly wall repair. A realistic budget includes the boring items too. Unfortunately, “miscellaneous installation supplies” is where many remodel budgets go to learn dark magic.
Real-World Experience: What Homeowners Often Learn After Installing Brick
After seeing many brick backsplash projects succeedand a few that clearly needed a time machinethe biggest lesson is simple: the final look depends on preparation more than enthusiasm. Everyone gets excited about the brick color. Fewer people get excited about cleaning grease from the drywall, checking outlet depth, or testing sealer on a sample piece. Yet those unglamorous steps decide whether the backsplash looks custom or chaotic.
One common experience is underestimating how much color variation matters. Real thin brick rarely comes in perfectly identical pieces, and that is a good thing. The wall looks richer when light, medium, and dark pieces are blended naturally. Homeowners who open one box at a time often end up with patches of similar color. The better method is to open several boxes, spread the pieces out, and pull from all of them during installation. It feels slower, but the result is more balanced.
Another lesson is that the stove area deserves special treatment. The backsplash may look clean on installation day, but real cooking quickly reveals weak spots. If the brick is not sealed well, oil can darken random areas. If the mortar joints are too rough, they can hold dust and splatter. A smooth, sealed finish behind the range makes daily cleanup much easier. Some homeowners even use a stainless panel or framed accent tile directly behind the cooktop while keeping brick on the surrounding wall.
People also learn that lighting changes everything. Brick has texture, which means shadows. Under-cabinet lighting can make the wall look dramatic and expensive, but it can also highlight uneven joints or messy grout haze. Before the mortar fully sets, step back and look at the wall under the lights you use every day. Daylight, warm bulbs, and bright task lighting can each reveal different issues.
Cleaning habits are another reality check. Brick is forgiving visually, but not magically self-cleaning. The happiest homeowners treat the backsplash like a cast of charming but slightly needy characters. They wipe splashes promptly, use gentle cleaners, and reseal when water stops beading on the surface. The least happy homeowners install unsealed brick behind a busy stove and then act surprised when the wall starts collecting evidence from every dinner since Tuesday.
Finally, many homeowners discover that brick makes the kitchen feel more personal. Smooth white tile is clean and classic, but brick has a storybook quality. It works especially well when repeated subtly elsewhere, such as with wood shelves, black hardware, aged brass, vintage art, or warm flooring. The trick is restraint. Let the brick be the texture hero. If every other surface also screams for attention, the kitchen can start to feel like a restaurant theme night.
The best brick backsplash projects are not perfect; they are thoughtful. They respect the material. They balance beauty with maintenance. They accept that brick is not the lowest-effort backsplash option, but it may be one of the most rewarding. Install it carefully, seal it properly, clean it gently, and it will give your kitchen the kind of character that flat walls can only dream about.
Conclusion
A brick backsplash can be a beautiful upgrade, but it is not a decision to make on looks alone. Before installing one, know your material options, prepare the wall carefully, use the right adhesive or mortar, seal the surface, clean it gently, and understand how moisture can lead to efflorescence. Real brick and thin brick veneer bring warmth and texture that few materials can match, while brick-look porcelain tile offers a cleaner, lower-maintenance alternative.
If you love a backsplash with personality, depth, and a little old-world swagger, brick may be worth the extra care. Just do not skip the practical steps. Kitchens are hardworking spaces, and your backsplash needs to handle more than compliments.