
Note: This guide focuses on ground-level patios installed over a stable concrete slab. Elevated decks, balconies, rooftops, and patios over occupied living space need professional waterproofing design, because gravity has a mischievous personality and water always finds the one place you forgot about.
A ceramic tile patio can turn a plain backyard slab into a polished outdoor roomthe kind of space where morning coffee tastes better, dinner somehow becomes “al fresco,” and even a folding chair starts acting fancy. But outdoor tile is not the same as tossing a few pretty squares onto concrete and hoping for the best. A patio has to survive rain, sun, foot traffic, freeze-thaw cycles in cold climates, furniture legs, grill splatter, and the occasional dropped burger.
The good news? Building a patio with ceramic tile is absolutely possible when you choose the right tile, prepare the base correctly, use exterior-rated setting materials, and respect drainage like it is the boss of the projectbecause it is. The better news? Once installed properly, a tiled patio can be durable, easy to clean, stylish, and much less dramatic than wood decking.
This guide walks through the complete process: planning, choosing outdoor ceramic or porcelain tile, preparing the concrete, setting the tile, grouting, sealing, avoiding common mistakes, and maintaining the finished patio so it looks good long after the first barbecue.
Can You Use Ceramic Tile for an Outdoor Patio?
Yes, but with one important clarification: not every ceramic tile belongs outdoors. Technically, porcelain is a type of ceramic tile, and porcelain is usually the better choice for patios because it is denser, less porous, and more resistant to moisture. Traditional glazed ceramic tile may work in some covered, mild-climate areas, but it is often too absorbent or too slippery for exposed outdoor floors.
When people say “ceramic tile patio,” the smartest interpretation is “outdoor-rated ceramic or porcelain tile.” That means the tile should be approved for exterior floor use, have low water absorption, offer slip resistance when wet, and be tough enough for your climate. A glossy kitchen wall tile may look adorable on a backsplash, but on a rainy patio it can become a backyard skating rink. Cute? Yes. Safe? Not unless your guests signed waivers.
Start with the Patio Plan
Choose the Right Location
A patio should feel connected to the house and the yard. Most homeowners place it near a kitchen, dining area, or living room so it is easy to carry food, drinks, cushions, and that one uncle who insists he knows how to grill salmon. If the patio is far from the house, create a clear path and a reason for the journey, such as a fire pit, pergola, garden view, or outdoor dining zone.
Think About Size and Use
Before buying tile, decide what the patio needs to hold. A small bistro set may need only a compact space, while a dining table, lounge chairs, grill, and planters require more square footage. Leave enough room to pull out chairs and walk around furniture without doing the sideways shuffle. For example, a 10-by-12-foot patio may work for a small dining setup, while a larger entertainment space may need 16-by-20 feet or more.
Plan Drainage First
Outdoor tile fails quickly when water sits on the surface or seeps under the tile assembly. A patio should slope away from the house. A common target is about 1/4 inch per foot, or roughly a 2% slope. That slope should be built into the substrate, not created with random blobs of mortar under the tile. Mortar is for bonding tile, not sculpting a tiny mountain range.
How to Choose Outdoor Ceramic Tile
Look for Exterior Floor Rating
Check the manufacturer’s specifications before falling in love with a tile sample. The tile should be rated for outdoor floor use, not just walls or indoor floors. Look for terms such as “exterior,” “frost resistant,” “porcelain paver,” “outdoor floor tile,” or “suitable for wet areas.” In cold regions, frost resistance is essential because absorbed water can freeze, expand, and crack unsuitable tile.
Pick Porcelain When in Doubt
Porcelain tile is often the patio champion. It is dense, durable, low maintenance, and available in designs that mimic stone, concrete, terracotta, wood, and even handmade tile. Many outdoor porcelain pavers are made thicker than standard indoor tile, giving them extra strength for patios, walkways, and outdoor kitchens.
Choose Texture Over Shine
Slip resistance matters outdoors. Rain, pool water, dew, leaves, pollen, and spilled lemonade can make a smooth surface dangerous. Choose textured tile with a surface intended for wet foot traffic. Ask about slip-resistance ratings, but also use common sense: if a tile looks like polished glass, it probably does not belong where people walk in flip-flops after a thunderstorm.
Consider Color and Heat
Dark tile looks sleek, but it can get hot in full sun. Light gray, beige, sand, warm taupe, and stone-look tiles are popular because they hide dust better than bright white and stay cooler than charcoal. If the patio gets intense afternoon sun, take a sample outside and let it sit for an hour. Then step on it carefully. Your feet will provide honest feedback.
Tools and Materials You Will Need
A successful ceramic tile patio starts with the right supplies. At minimum, expect to need outdoor-rated tile, exterior-grade polymer-modified thin-set mortar, grout approved for exterior use, spacers, movement-joint sealant, a notched trowel, margin trowel, buckets, mixing paddle, level, chalk line, tape measure, wet saw or tile cutter, rubber grout float, sponges, knee pads, safety glasses, and gloves.
Depending on the condition of the slab, you may also need concrete patch, crack-isolation membrane, waterproofing membrane, uncoupling membrane, primer, backer rod, and a penetrating grout sealer. Do not skip the knee pads unless you enjoy walking like a pirate for three days.
Step-by-Step Guide to Building a Ceramic Tile Patio
Step 1: Inspect the Concrete Slab
Tile needs a stable, clean, properly sloped base. If you already have a concrete patio, inspect it carefully. Hairline cracks may be manageable with a crack-isolation membrane, but large cracks, heaving sections, hollow spots, severe spalling, or poor drainage should be fixed before tile goes anywhere near the surface.
The concrete should be structurally sound, fully cured, and free of paint, sealers, oil, grease, dust, and loose material. Thin-set mortar bonds best to clean, porous concrete. If water beads on the slab instead of absorbing, the surface may need mechanical preparation.
Step 2: Confirm the Slope
Use a long level, laser level, or string line to check that the slab slopes away from the house. Water should not drain toward doors, siding, foundation walls, or outdoor kitchen cabinets. If the slab is flat or slopes the wrong way, correct the drainage before tiling. This may involve resurfacing, adding a properly bonded sloped mortar bed, installing drains, or replacing the slab.
Step 3: Repair Cracks and Surface Damage
Fill small cracks and chips with an appropriate concrete repair product. For cracks that may move, use a crack-isolation membrane according to the manufacturer’s instructions. Remember: tile is rigid. Concrete moves. A membrane helps reduce the chance that a concrete crack will telegraph directly into your beautiful new tile like a very expensive text message.
Step 4: Add Waterproofing or an Uncoupling Membrane
For many outdoor tile patios, a membrane is a smart investment. Waterproofing helps manage moisture, while uncoupling and crack-isolation products help separate tile from minor substrate movement. Exterior tile assemblies are exposed to water, heat, cold, and expansion, so the installation system matters as much as the tile itself.
Follow the membrane manufacturer’s instructions carefully. Use the recommended mortar, overlap seams as required, treat edges properly, and do not assume one product works with every tile, mortar, or climate. Tile systems are like recipes: swapping ingredients randomly may produce something, but it might not be dinner.
Step 5: Dry-Lay the Tile Pattern
Before mixing mortar, lay out several rows of tile dry. This helps you plan cuts, balance the layout, and avoid ending with a skinny sliver of tile along the house or outer edge. Snap chalk lines to keep the layout straight. For large-format tile, check the manufacturer’s recommended offset; many rectangular tiles should not be installed with a 50% brick pattern because it can increase lippage.
Step 6: Mix Exterior-Grade Thin-Set Mortar
Use a mortar rated for exterior applications and suitable for your tile type. Large-format porcelain tile may require a large-and-heavy-tile mortar. Mix only as much as you can use within the product’s working time. The mortar should be creamy, consistent, and able to hold a notch without slumping. Let it slake if the instructions require it, then remix. Yes, reading the bag matters. The bag is boring, but it knows things.
Step 7: Spread Mortar Correctly
Use the correct notched trowel size for your tile. Spread mortar in straight, parallel ridges rather than swirling it around. Directional troweling helps air escape when the tile is pressed into place. For outdoor installations, full mortar coverage is critical; industry guidance commonly calls for very high coverage in exterior tile work because voids can collect water and lead to failure.
Back-butter larger tiles by applying a thin coat of mortar to the back of each tile before placing it. Set the tile into the mortar and move it slightly back and forth across the ridges to collapse them. Periodically lift a tile to check coverage. If the back is not well covered, change your trowel size, mortar technique, or both.
Step 8: Keep Joints Consistent
Use spacers to maintain even grout joints. Outdoor tile usually benefits from slightly wider joints than ultra-tight indoor installations because temperature changes create movement. Follow the tile manufacturer’s minimum joint recommendations. Rectified porcelain can often use narrower joints than handmade-look ceramic, but “as narrow as humanly possible” is not a design plan.
Step 9: Include Movement Joints
Movement joints are essential outdoors. Tile expands and contracts with temperature changes, and patios get hammered by sun, shade, moisture, and seasonal swings. Use flexible sealant joints around the perimeter and at intervals through the tiled field. A common exterior guideline is to place movement joints every 8 to 12 feet in each direction, with closer spacing in high-sun or high-temperature areas.
Never grout hard against walls, posts, steps, thresholds, or other fixed objects. Use backer rod and exterior-rated sealant instead. Skipping movement joints is one of the fastest ways to create cracked grout, loose tile, or “tenting,” where tiles pop up dramatically like they are trying to leave the project.
Step 10: Grout the Patio
Once the mortar has cured according to the manufacturer’s instructions, grout the tile with an exterior-rated grout. Cementitious grout is common and affordable, while high-performance grouts may offer better stain resistance and lower maintenance. Pack the joints fully using a rubber grout float, then clean the surface with a damp sponge. Avoid washing out the joints with too much water.
After the grout cures, apply a penetrating sealer if the grout manufacturer recommends it. Some modern grouts do not require sealing, while traditional cement grout often benefits from it. Sealer helps reduce staining and moisture absorption, but it is not magic armor. You still need to clean the patio and maintain the joints.
Common Ceramic Tile Patio Mistakes to Avoid
Using Indoor Tile Outdoors
Indoor tile may not handle moisture, freeze-thaw stress, or wet traction needs. Always check the tile’s use rating before buying. A bargain tile becomes very expensive when it has to be removed with a chisel and regret.
Ignoring Drainage
Poor drainage is the villain in many failed patio stories. Standing water can stain grout, encourage mildew, seep under tile, and freeze in cold climates. Build the slope into the patio from the beginning.
Setting Tile Over Dirty Concrete
Mortar does not bond well to dust, paint, curing compounds, grease, or old sealers. Clean and prepare the slab thoroughly. A beautiful tile installation over a bad bond is basically a decorative countdown timer.
Skipping Movement Joints
Outdoor tile needs room to move. Grout is rigid, so it cannot replace flexible sealant. Add movement joints at perimeters, transitions, and throughout larger patios.
Choosing Style Over Safety
A patio tile should be beautiful, but it also needs traction. Textured porcelain, quarry tile, and outdoor-rated ceramic surfaces are better choices than glossy, slick finishes.
Design Ideas for a Ceramic Tile Patio
Tile gives you design freedom that plain concrete cannot match. For a Mediterranean look, choose warm terracotta tones, patterned accent tiles, and olive-green planters. For a modern patio, use large-format concrete-look porcelain with clean furniture and black metal accents. For a natural garden style, stone-look porcelain blends beautifully with grasses, wood furniture, and soft outdoor lighting.
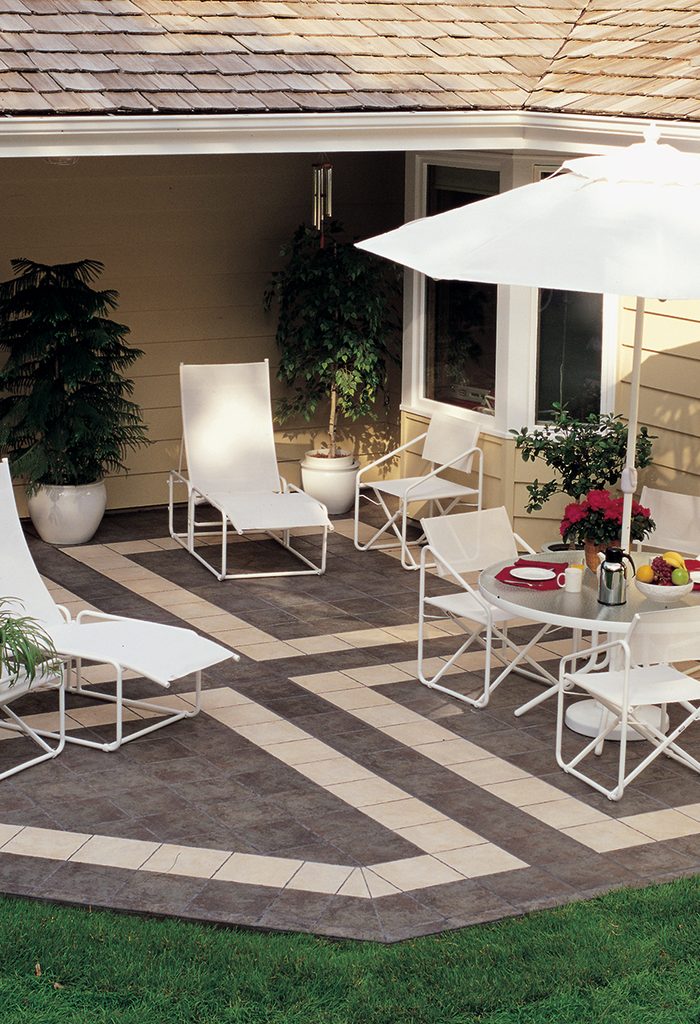
You can also create zones with tile patterns. Use a border tile to frame the dining area, a diagonal layout to make a small patio feel wider, or a contrasting tile “rug” under a seating group. Just keep the surface practical. Tiny mosaic tiles may look charming, but more grout lines mean more cleaning, and outdoor dirt has excellent attendance.
How to Maintain a Ceramic Tile Patio
Routine maintenance is simple. Sweep regularly to remove grit, leaves, and dirt. Wash the patio with water and a mild pH-neutral cleaner when needed. Avoid harsh acids unless the tile and grout manufacturer specifically approves them. Pressure washing can damage grout if used aggressively, so keep the pressure moderate and the nozzle moving.
Inspect grout and sealant joints at least once or twice a year. Replace cracked or deteriorated sealant before water gets behind the tile assembly. Reseal cementitious grout as recommended. In snowy climates, use plastic shovels instead of metal blades and avoid deicers that may harm the tile, grout, or concrete below.
When Should You Hire a Professional?
A confident DIYer can tile a small, ground-level concrete patio if the slab is stable, properly sloped, and in good condition. However, hire a professional if the patio has major cracks, drainage problems, structural movement, complicated stairs, large-format tile, or waterproofing over living space. Also consider professional help in freeze-thaw climates, where small installation mistakes can become big repairs after winter.
Professional tile contractors understand movement joints, membranes, mortar coverage, layout, and exterior detailing. Their work may cost more upfront, but it can save money compared with rebuilding a failed patio. Sometimes the most budget-friendly tool is experience.
Real-World Experience: What Actually Matters When Building a Ceramic Tile Patio
The biggest lesson from patio tile projects is that the boring steps matter most. Nobody posts a glamorous photo of concrete surface preparation, but that is where the success of the patio begins. A homeowner may spend weeks choosing between “warm limestone beige” and “slightly warmer limestone beige,” then rush through cleaning the slab. That is backwards. The tile color matters for style; the slab condition matters for survival.
One practical experience is to test water behavior before installing anything. Spray the patio with a hose and watch where the water goes. If it runs away from the house and disappears quickly, you are in good shape. If it puddles near the door, gathers in the center, or sneaks toward the foundation, fix that first. Tile will not solve drainage problems. It will politely cover them until they become worse.
Another lesson: buy extra tile. Outdoor projects involve more cuts, breakage, pattern planning, and future repairs than people expect. Ordering 10% extra is common; for diagonal layouts, complex borders, or large-format tile, 15% may be smarter. If the tile is discontinued later, finding a match can be harder than finding a quiet leaf blower.
Dry layout also saves headaches. On one patio example, the original layout would have left a two-inch strip of tile along the most visible edge. Shifting the layout by just a few inches created balanced cuts on both sides and made the entire patio look intentional. This is why professionals snap lines, measure twice, and stare at the floor for a suspiciously long time before opening the mortar bag.
Mortar coverage is another make-or-break detail. Exterior tile needs excellent contact between tile and substrate. Voids under tile can trap water, and trapped water can freeze, expand, or weaken the bond. Back-buttering large tiles feels slow, but it is much faster than replacing hollow tiles later. Check coverage early and often by lifting a freshly set tile. It is better to adjust technique on tile number five than discover a problem on tile number eighty.
Movement joints may feel like an aesthetic interruption, but they are really insurance. A flexible joint placed in the right location is much less noticeable than cracked grout running across the entire patio. Match the sealant color to the grout and plan joints with the tile layout so they look deliberate.
Finally, think about daily living. A tile that looks perfect in the showroom may show every footprint outdoors. A highly textured tile may be safe but harder to mop. A very light grout may look crisp on day one and “well seasoned” after one grilling season. The best patio tile balances beauty, traction, cleanability, climate suitability, and realistic maintenance. In other words, choose the tile that fits your lifenot the tile that only behaves under showroom lighting.
Conclusion
Building a patio with ceramic tile is a rewarding project when it is planned like an outdoor construction job, not just a decorating upgrade. Choose exterior-rated ceramic or porcelain tile, make sure the concrete base is stable and properly sloped, use the right mortar and grout, include waterproofing or crack isolation where needed, and never skip movement joints. A tiled patio can be elegant, durable, and easy to maintain, but it demands respect for water, weather, and temperature movement.
If you get the foundation and installation details right, your ceramic tile patio can become one of the most useful spaces in the home: a breakfast spot, party zone, container garden stage, and sunset-watching platform all in one. And unlike a lawn chair sinking into wet grass, it will do its job with style.