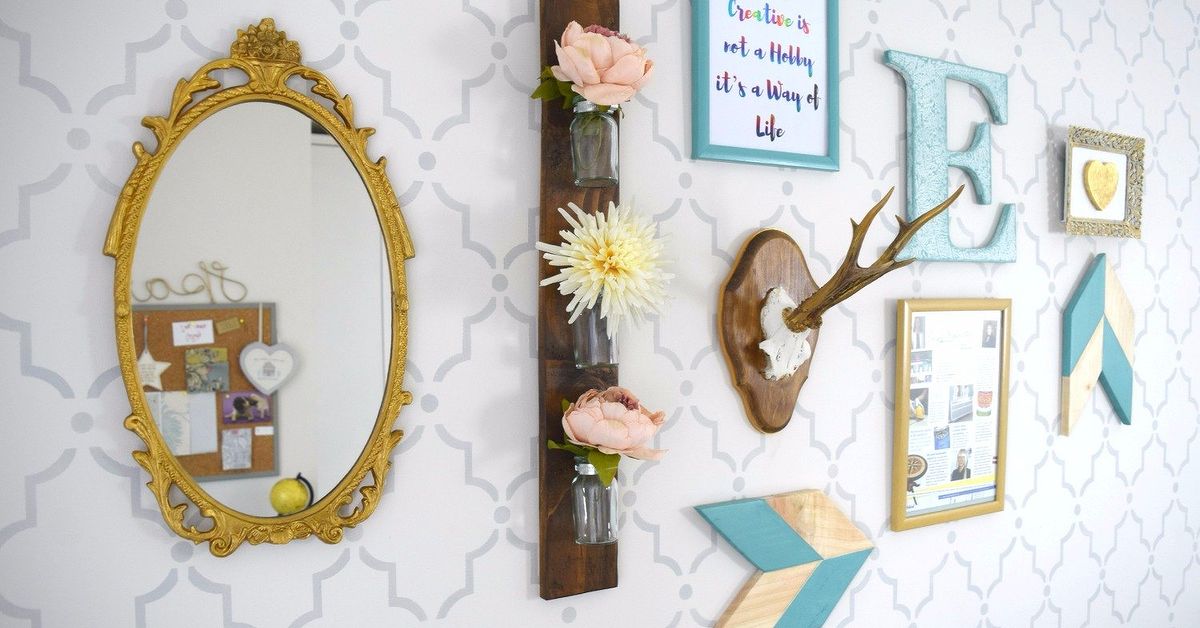

If you have ever looked at your craft supplies and thought, “Wow, I own 47 markers, three hot glue guns, and exactly zero self-control,” welcome home. A dream craft room does not have to come with a designer price tag, a custom carpenter, or a suspiciously perfect social media reveal. A beautiful, functional, and affordable craft room makeover is absolutely possible when you focus on smart storage, flexible furniture, and a layout that actually supports how you create.
This guide walks through a realistic craft room makeover on a budget, from planning your layout to choosing low-cost storage ideas, improving lighting, and adding personality without sending your wallet into witness protection. Whether you have a spare bedroom, a guest room corner, a converted closet, or a tiny nook near the dining table, you can build a creative space that feels inspiring and practical.
Why a Budget Craft Room Makeover Works Better Than You Think
The biggest myth about a dream craft room is that it has to be huge. It does not. The second biggest myth is that it has to be expensive. Also false. What matters more is whether the room is easy to use. If your scissors are always missing, your paper gets bent, your ribbon reproduces overnight, and your desk becomes a disaster zone by Tuesday, the problem is not your creativity. The problem is the setup.
A good budget craft room makeover solves three things at once:
- Storage: everything has a home
- Visibility: you can actually see what you own
- Workflow: the room supports your favorite projects
That means your makeover should not start with decor. It should start with function. Cute labels are lovely. Knowing where the glue sticks live is even lovelier.
Step 1: Plan the Room Before You Buy a Single Basket
Before you start tossing things into bins like a motivated raccoon, pause and assess the room. Ask yourself what kinds of projects you do most often. Scrapbooking, sewing, painting, Cricut projects, jewelry making, card making, and knitting all need different storage solutions. One giant cabinet may look neat, but it is not helpful if it turns every project into a scavenger hunt.
Create Activity Zones
Divide the room into simple zones based on what you actually do:
- Work zone: your main table or desk
- Storage zone: bins, shelves, drawers, carts, and cabinets
- Cutting or prep zone: for trimming, measuring, and messy tasks
- Display zone: inspiration board, finished projects, or seasonal decor
This zoning method makes even a small craft room feel intentional. It also helps you avoid the classic mistake of buying organizers first and figuring out the layout later. That is how people end up with six matching baskets and no place to sit.
Measure Everything
Measure the room, the desk, the closet, the wall space, and especially the awkward corners. Budget decorating becomes much easier when you know what can fit. A narrow rolling cart, a tall bookcase, or wall-mounted shelves can transform a room, but only if they do not block the door or force you to do side shuffles like a confused crab.
Step 2: Declutter Like a Kind, Crafty Minimalist
A dream craft room makeover begins with less chaos, not more containers. Go through your supplies and sort them into five categories: keep, donate, toss, relocate, and “why do I own this?” Be honest with yourself. If you have not touched a dried-out stamp pad since the previous decade, it does not need prime real estate.
Keep the items you use regularly, truly love, or need for current projects. Donate duplicates, unopened supplies, or tools that no longer fit your hobbies. Toss damaged or expired items. Relocate anything that does not belong in a craft room, like old chargers, mystery cables, or that one screwdriver that keeps showing up in every room of the house like a suburban ghost.
Decluttering makes your craft room organization more effective because you are organizing what matters instead of preserving clutter with prettier packaging.
Step 3: Choose Budget-Friendly Furniture That Works Hard
You do not need custom built-ins to create a polished craft room. In fact, some of the best budget-friendly setups come from repurposed or mixed-use furniture.
Best Affordable Furniture Ideas for a Craft Room
- Old dresser: perfect for vinyl, fabric, paper, and tools
- Bookcase: adds vertical storage without taking much floor space
- Rolling cart: ideal for the supplies you use every day
- Fold-out table: great for small rooms or shared spaces
- Dining table or desk: an affordable work surface with room to spread out
- Closet system: smart for turning a spare closet into a mini craft studio
Secondhand furniture is the secret weapon of a low-cost makeover. A thrifted cabinet with fresh paint can look high-end. A basic cube shelf can become a supply station. A hutch can store paper, jars, ribbons, and tools while hiding visual clutter. The magic is not in the price. It is in how well the piece serves your workflow.
Step 4: Use Vertical Storage Like Your Walls Owe You Rent
When floor space is limited, walls become your best friends. One of the smartest small craft room ideas is to go vertical. This keeps supplies accessible without crowding the workspace.
Smart Vertical Storage Ideas
- Pegboards for scissors, rulers, tools, and small baskets
- Floating shelves for bins, books, and decor
- Wall rails with hanging cups or containers
- Over-the-door organizers for ribbon, glue, markers, and cutting tools
- Corkboards or magnetic boards for inspiration, schedules, and project notes
A pegboard is especially useful because it grows with your needs. You can move hooks, add baskets, and adjust the setup when your hobbies shift. Today it holds brushes and twine. Next month it becomes command central for bead kits, sewing notions, and the tiny clips you buy in bulk because apparently you are a dragon guarding office supplies.
Step 5: Organize Supplies by Category, Not by Vibe
This is where many makeovers go off the rails. It is tempting to organize by color because it looks gorgeous in photos. But unless your goal is to create a rainbow and then never find anything again, organize first by type and purpose.
Try categories such as:
- Paper and cardstock
- Fabric and thread
- Pens, markers, and brushes
- Adhesives and tapes
- Cutting tools
- Seasonal embellishments
- Works in progress
Once grouped, use clear bins, stackable boxes, jars, drawer dividers, and labels. Clear storage helps you see what you already own, which saves money because you are less likely to buy another pack of glue dots while standing in a store whispering, “Maybe I only have one at home.”
Low-Cost Storage Ideas That Look Good
- Mason jars for buttons, clips, and pens
- Plastic bins with simple labels for categories
- Shoe boxes covered in contact paper or paint
- Magazine holders for vinyl sheets or scrapbook paper
- Baskets for soft goods and bulky items
- Drawer organizers for tiny tools and accessories
Step 6: Make Lighting Better, Because Squinting Is Not a Design Style
Lighting can change the entire feel of a craft room. If your room has natural light, take advantage of it. Place your desk near a window if possible. Natural light makes colors easier to judge and helps the room feel more cheerful and energizing.
But natural light alone is not enough, especially if you craft in the evening. Add layered lighting with three levels:
- Ambient lighting: the main ceiling light or general room lighting
- Task lighting: a desk lamp or focused light for detailed work
- Accent lighting: softer decorative light for warmth and mood
An adjustable task lamp is one of the best affordable upgrades for a craft room makeover on a budget. It improves visibility, reduces eye strain, and makes close-up work much easier. If overhead light feels harsh, soften the room with a warmer bulb, a lamp with a shade, or indirect light from a corner fixture.
Step 7: Add Personality Without Blowing the Budget
Once the room works well, then comes the fun part: style. A dream craft room should feel creative and personal, not like a supply closet that accidentally became sentient.
Affordable Decor Ideas for a Craft Room
- Frame your own art or favorite fabric scraps
- Use a corkboard as both a mood board and wall decor
- Paint one wall a cheerful color
- Add peel-and-stick wallpaper to a shelving back panel
- Bring in a small rug to warm up the space
- Display finished projects on open shelves
- Use matching labels for a clean, polished look
Try to balance pretty with practical. Decorative baskets should still hold useful items. Wall art can also hide storage. Your favorite mug can hold pens. Your finished embroidery hoops can become decor. In a good craft room, beauty and utility stop pretending they are enemies and become roommates.
Step 8: Build a Room You Can Maintain
The real test of a makeover is not how the room looks on day one. It is how it looks after three weeks of actual use. A sustainable setup should be easy to reset in five to ten minutes.
That means:
- Frequently used tools stay within arm’s reach
- Every category has a clearly assigned home
- Projects in progress have their own bin or tray
- Seasonal supplies are stored higher up or out of sight
- The desk surface stays mostly clear
Create a quick reset routine after each crafting session. Put tools back, clear scraps, return bins to shelves, and jot down what materials need restocking. This simple habit keeps your craft room from sliding back into chaos. Because every crafter knows the truth: glitter is not a supply, it is a lifestyle hazard.
Budget Craft Room Makeover Example
Imagine a small spare bedroom with one window, beige walls, and a random pile of supplies in mismatched bags. Instead of renovating the entire room, you start with basics. A secondhand desk becomes the work zone. A cube shelf on one wall stores labeled bins. A pegboard above the desk holds scissors, rulers, and tape. A rolling cart keeps daily-use supplies close by. An old dresser stores paper, fabric, and seasonal materials. A thrifted lamp adds task lighting. A coat of paint and a soft rug make the room feel finished.
Total transformation? Huge. Total drama? Minimal. The room becomes brighter, easier to use, and a lot more inspiring. That is the real power of a thoughtful makeover. You are not buying perfection. You are building a space that supports creativity.
Final Thoughts: Your Dream Craft Room Is About Freedom, Not Fancy Shelves
A beautiful craft room makeover on a budget is not about copying someone else’s Pinterest-perfect studio. It is about creating a space that fits your habits, your projects, and your real life. You do not need custom cabinets, expensive decor, or a giant room. You need a smart layout, flexible storage, better lighting, and a little personality.
Start small. Use what you have. Repurpose what you can. Buy only what solves a real problem. When your room is organized around how you actually create, it becomes easier to start projects, finish projects, and enjoy the process a whole lot more.
And that, honestly, is the dream. Not a flawless craft room. A usable one. A joyful one. A room where the glue gun is easy to find and your imagination has enough breathing room to do its thing.
My Personal Experience With a Budget Craft Room Makeover
When I first imagined my dream craft room, I pictured a bright little studio with perfect shelves, matching bins, and enough countertop space to spread out every project like I was hosting an arts-and-crafts cooking show. What I actually had was a spare room that looked like a clearance aisle had collided with a tornado. Ribbon was stuffed into drawers. Paper was leaning in dangerous towers. Paint bottles were scattered everywhere. I had supplies, yes, but I did not have a system. Every project started with ten minutes of searching and one dramatic sigh.
The biggest shift came when I stopped trying to make the room look expensive and started trying to make it work. That change in mindset saved me money immediately. Instead of shopping for a fantasy version of myself, I organized around the way I really craft. I realized I reach for scissors, pens, adhesive, and cutting mats almost every time, so those items earned the closest spots to my desk. Seasonal items, bulky extras, and “maybe one day” supplies moved to higher shelves and drawers. Suddenly, the room felt easier to use, even before it looked especially pretty.
I also learned that repurposed furniture has way more personality than flat-packed perfection. An old dresser became paper storage. A cart turned into my daily-use station. A plain bookcase became the star of the room once I added matching labels and a few baskets. None of it was glamorous on its own, but together it created structure. And structure, it turns out, is weirdly luxurious when you are tired of losing your favorite glue stick every other Thursday.
Lighting was another surprise. I had underestimated how much bad lighting affected my mood. Once I added a good task lamp and shifted my table closer to the window, the room felt more cheerful and less like a dim workshop for tiny, frustrated goblins. Colors were easier to judge, small details stopped making my eyes ache, and I actually wanted to spend time in the room again.
Most of all, I learned that a budget makeover does not mean settling for less. It means being more intentional. Every shelf, hook, and bin has to earn its keep. That limitation made the room better. It forced me to focus on what mattered: comfort, function, creativity, and a little joy. The final result was not a showroom. It was better. It was mine. And every time I walk in, sit down, and start making something without first digging through three mystery boxes, it feels like the makeover paid for itself.
SEO Tags