
Some home projects whisper, “You can do this.” DIY plywood plank floors kick the door open, hand you a circular saw, and say, “Let’s make this room look expensive without financially insulting your wallet.” If you love the warm look of wood floors but your budget is currently making dramatic noises, plywood plank flooring can be a surprisingly stylish, durable, and customizable option.
The idea is simple: take smooth plywood sheets, cut them into planks, install them over a clean and stable subfloor, then sand, stain, paint, and seal them until they look like they belong in a charming farmhouse, a cozy cottage, or a Pinterest board that has its life together. The result can be rustic, modern, coastal, industrial, or “I did this myself and now I will casually mention it to every guest.”
But before you start slicing plywood like a home-improvement chef, there are details that matter: plywood grade, plank width, subfloor prep, spacing, fasteners, sanding, sealing, and moisture control. Done well, plywood plank floors can be budget-friendly and beautiful. Done poorly, they can squeak, splinter, cup, stain unevenly, or make your hallway look like a pirate ship had a rough weekend.
This guide walks through the full process of planning, cutting, installing, finishing, and living with DIY plywood plank floors, with practical tips gathered from real flooring practices, woodworking principles, finish manufacturers, home improvement experts, and experienced DIYers who have already learned the “oops” moments so you do not have to.
What Are DIY Plywood Plank Floors?
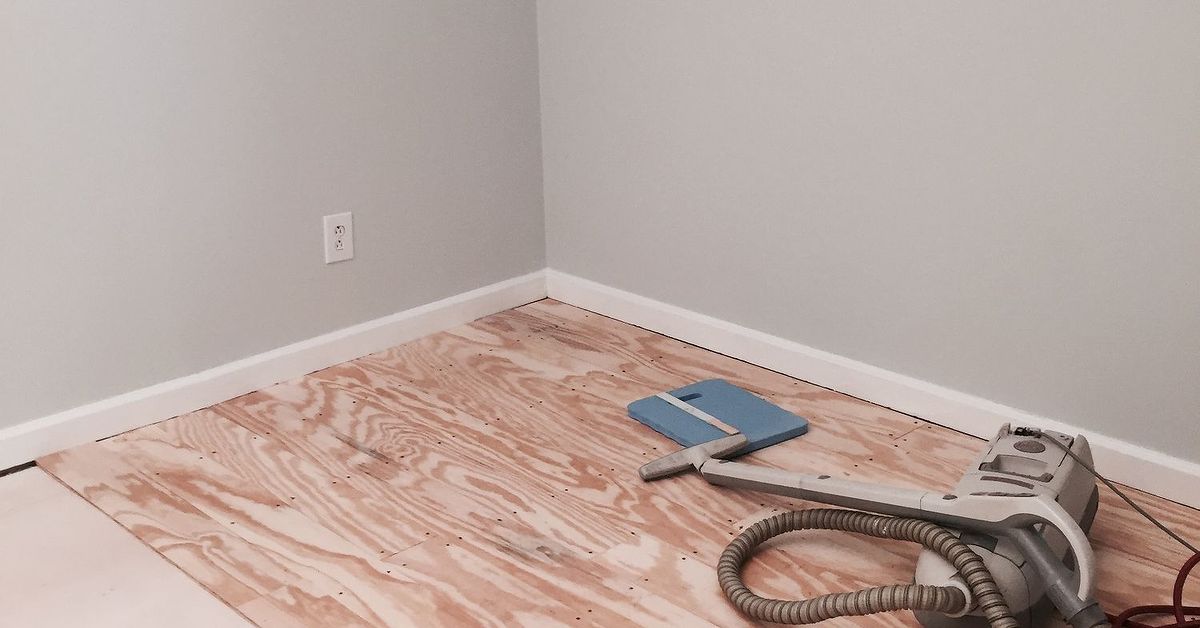
DIY plywood plank floors are floors made by cutting plywood sheets into long strips that imitate traditional wood planks. Instead of buying prefinished hardwood or engineered wood flooring, you create your own boards from plywood, install them directly over a suitable subfloor, and finish them on-site.
Plywood is made from thin layers of wood veneer bonded together with alternating grain directions. That layered construction gives plywood more dimensional stability than a single board of solid wood. It is not magic, though. Plywood still reacts to moisture, expands and contracts, and needs proper sealing. Think of it as dependable, not invincible. Like a good pickup truck, it works hard, but you still have to change the oil.
Why Choose Plywood Plank Flooring?
It Is Budget-Friendly
The biggest reason homeowners try plywood plank floors is cost. A sheet of sanded plywood can cover a large area for far less than many hardwood flooring options. Prices vary by region, thickness, grade, and lumber market conditions, but plywood often makes sense for bedrooms, offices, closets, lofts, workshops, cottages, and budget remodels where traditional hardwood is simply not in the plan.
It Is Customizable
With plywood planks, you control the width, color, finish, and pattern. Want wide farmhouse boards? Cut 8-inch planks. Prefer a narrow cottage look? Try 5-inch planks. Want dark walnut stain, soft whitewash, painted checkerboard, or a clear matte finish? Your floor, your rules. Just remember: the floor will remember every shortcut, so make the rules responsible.
It Can Look Surprisingly High-End
When sanded well and sealed properly, plywood plank floors can look far more polished than people expect. The visible grain can be warm and natural, especially if you choose sanded pine, birch, maple, or cabinet-grade plywood. Some sheets have attractive face veneers that stain beautifully. Others are better for painting. Choosing the right material is half the design battle.
Best Plywood for Plank Floors
Not all plywood is a good candidate for finished flooring. For a floor surface, you want smooth, stable panels with an attractive face and minimal voids. Many DIYers use 1/2-inch or 3/4-inch sanded plywood, depending on the height of nearby flooring, the condition of the subfloor, and the desired feel underfoot.
Look for plywood labeled as sanded, cabinet-grade, AC, BC, or similar smooth-face material. The first letter usually refers to the better face. An “A” face is smoother and more appearance-ready, while “B” and “C” faces may have more patches, knots, or repairs. CDX sheathing plywood is generally better suited for structural use under other materials, not as a pretty finished floor, unless your design theme is “construction site chic.”
For indoor air quality, choose plywood that complies with U.S. composite wood product standards, especially when using hardwood plywood. Structural plywood products and many engineered wood panels are manufactured under specific performance standards, but it is still smart to check product labels, manufacturer information, and local building requirements. When in doubt, buy from reputable suppliers and avoid mystery panels that smell like a chemical science fair.
Tools and Materials You Will Need
A plywood plank floor does not require a contractor’s entire garage, but it does require precision. Your circular saw and measuring tape are not decorative objects today; they are the main characters.
- Sanded plywood sheets
- Circular saw, table saw, or track saw
- Straightedge or saw guide
- Tape measure and pencil
- Orbital sander or floor sander
- Sandpaper in several grits
- Construction adhesive, finish nails, brad nails, or screws
- Wood filler or putty
- Spacers for expansion gaps
- Vacuum and tack cloth
- Stain, paint, or wood conditioner
- Floor-rated polyurethane or water-based floor finish
- Knee pads, safety glasses, hearing protection, and dust mask
Step 1: Inspect and Prepare the Subfloor
Your plywood plank floor is only as good as the surface underneath it. If the subfloor is uneven, squeaky, damp, dirty, or damaged, the new floor will not politely hide those problems. It will announce them every time you walk across the room with coffee.
Remove old carpet, vinyl, tack strips, staples, loose nails, adhesive chunks, and debris. Check for soft spots, water damage, uneven seams, and squeaks. Refasten loose subfloor panels to the joists with appropriate screws. Sand down high seams and fill low areas if needed. The surface should be clean, dry, flat, and stable before installation begins.
Moisture matters. Plywood and wood finishes do not love damp environments. Avoid installing plywood plank floors in wet bathrooms, laundry rooms with poor ventilation, or basements with moisture problems unless you have addressed vapor control, humidity, and drainage first. Plywood is affordable, but it is not a submarine.
Step 2: Acclimate the Plywood
Bring the plywood into the room where it will be installed and let it acclimate for several days. Stand panels on edge with space between them so air can circulate. This helps the material adjust to the room’s temperature and humidity before you cut and fasten it down.
Acclimation reduces the chance of movement after installation. It does not eliminate wood movement completely, but it helps prevent dramatic gaps or raised edges later. Flooring success is often boring at first: let wood sit, check moisture, clean the subfloor, plan the layout. Then the fun starts.
Step 3: Plan the Plank Layout
Before cutting, decide your plank width and layout pattern. Common DIY plywood plank widths range from about 4 inches to 8 inches. Wider planks create a farmhouse or cottage look, while narrower planks feel more traditional.
Plan to stagger end joints so they do not line up across the room. A random staggered pattern usually looks more natural than a stair-step pattern. Avoid having tiny sliver boards along one wall. Measure the room width, divide by plank width, and adjust your first and last rows if needed.
Leave an expansion gap around the perimeter of the room, usually hidden later by baseboards or shoe molding. Wood needs a little breathing room. Without it, seasonal movement can create buckling, edge lifting, or language that should not be repeated in front of children.
Step 4: Cut the Plywood Into Planks
Cutting is where accuracy pays off. Use a table saw, circular saw with a guide, or track saw to rip plywood sheets into long, even strips. A sharp fine-tooth blade helps reduce splintering. Mark each cut carefully and keep the factory edge as a reference when possible.
If you do not own a table saw, many home centers can make rough cuts, but do not rely on store cuts for perfect flooring planks. For best results, cut or clean up the planks yourself with a straightedge. Label stacks by width if needed, and inspect each plank for voids, chipped edges, ugly patches, or dramatic grain differences.
Lightly sand the edges after cutting. You can also add a tiny bevel to the top edges with sandpaper or a router. A slight bevel makes small gaps look intentional and helps prevent sharp plywood edges from splintering.
Step 5: Dry-Fit the Floor
Lay out several rows before fastening anything. This lets you test the pattern, adjust board lengths, and spot pieces that look too patched, too warped, or too weird for a visible area. Save less attractive pieces for closets or under furniture. Every floor has a “behind the couch” section. Use it wisely.
Mix planks from different plywood sheets so color and grain variations are spread throughout the room. If one sheet is darker or more dramatic, scattering those pieces creates a natural look. Grouping them in one corner can make the floor look like it got a sunburn.
Step 6: Install the Plywood Planks
Start along the longest, straightest wall. Use spacers to maintain the expansion gap. Apply construction adhesive if you want extra hold, then fasten planks with finish nails, brad nails, or screws appropriate for your subfloor and plank thickness.
Nails are fast and easier to hide, while screws offer strong holding power but require countersinking and filling. Some DIYers prefer visible screws for a rustic industrial look. Others want fasteners hidden like a secret. Either method can work if the boards are secure and the fasteners are set below the surface.
Keep seams staggered and check your layout frequently. Small errors multiply across a room. Every few rows, measure from the installed planks to the opposite wall to make sure you are staying square. Flooring has a sneaky way of drifting while you are busy feeling confident.
Step 7: Fill Holes and Sand Smooth
Once the planks are installed, fill nail holes, screw holes, chips, and unwanted gaps with stainable or paintable wood filler. Let it dry fully, then sand the floor smooth. Start with a medium grit and work toward a finer finish. Do not oversand thin face veneers, especially on lower-cost plywood. The pretty layer on top may be thinner than your patience.
Vacuum thoroughly after sanding. Then vacuum again. Then wipe with a tack cloth or slightly damp cloth if recommended for your finish system. Dust is the enemy of a smooth floor finish. It will leap into wet polyurethane like it was invited to a party.
Step 8: Stain, Paint, or Whitewash
Plywood can absorb stain unevenly, especially softwood plywood. Test stain on scraps from the same plywood before committing to the whole room. A pre-stain wood conditioner can help reduce blotchiness on pine and other absorbent woods.
If you want a natural look, clear finish may be enough. If you want a richer tone, choose a stain that complements the plywood grain. For a coastal or Scandinavian look, try a whitewash effect. For a bold design, use porch and floor paint or a painted pattern. Painted plywood plank floors can look charming, especially in bedrooms, studios, and old-house remodels.
Let each coat dry according to the manufacturer’s directions. Rushing stain or paint is a classic DIY mistake. The floor may feel dry on top while still soft underneath, and that is how sock prints become part of the design.
Step 9: Seal With a Durable Floor Finish
A plywood plank floor needs a tough protective finish. Use a product designed for floors, such as floor-rated polyurethane or a water-based floor finish. Wall paint clear coat is not enough. Craft sealer is not enough. Wishful thinking is definitely not enough.
Oil-based polyurethane often gives wood a warm amber tone and strong durability, while water-based polyurethane dries clearer and usually has lower odor. Both can work well when applied correctly. Follow label directions for ventilation, dry time, sanding between coats, and full cure time.
Most plywood floors benefit from multiple coats. Lightly sand between coats if the product instructions call for it. Keep pets, dust, hair, and curious family members away from the wet finish. A cat walking across fresh polyurethane is not a design feature. It is a crime scene with whiskers.
Pros and Cons of DIY Plywood Plank Floors
Pros
- Lower material cost than many hardwood options
- Custom plank width, color, and finish
- Can be painted, stained, whitewashed, or sealed naturally
- Great for rustic, farmhouse, cottage, or creative interiors
- DIY-friendly for patient homeowners with basic tools
Cons
- Requires careful sanding and finishing
- Can splinter if edges are not handled well
- Not ideal for wet rooms or high-moisture spaces
- May not add the same resale value as hardwood
- Lower-grade plywood can stain unevenly or show patches
Where Plywood Plank Floors Work Best
Plywood plank floors are best for dry interior spaces where budget, creativity, and character matter. Bedrooms, home offices, craft rooms, guest rooms, lofts, playrooms, and low-traffic living spaces are good candidates. They can also work in cabins and workshops when sealed well.
They are less ideal for full bathrooms, wet basements, mudrooms with soaked boots, or kitchens where spills are frequent and ignored. You can install plywood in a kitchen, but it needs excellent sealing and regular maintenance. If your household treats water spills like abstract art, choose a more water-resistant floor.
Maintenance Tips for Plywood Plank Floors
Keep plywood plank floors clean with regular sweeping or vacuuming. Use a slightly damp mop, not a soaking wet one. Avoid steam mops, standing water, harsh cleaners, and abrasive pads. Place rugs in high-traffic areas and felt pads under furniture legs.
Over time, the finish may show wear, especially in hallways and near doors. The good news is that plywood plank floors can often be refreshed with light sanding and another coat of finish. If the floor is painted, touch-ups are usually simple. If it is stained, keep a record of the stain and finish products you used so future repairs do not turn into a color-matching detective drama.
Common Mistakes to Avoid
Using Rough Construction Plywood
Cheap sheathing plywood may save money upfront, but it often has knots, voids, rough grain, and patchy surfaces. For a finished floor, smoother plywood is worth the extra cost.
Skipping Subfloor Repairs
A squeaky, uneven subfloor will not become quiet and flat just because you cover it. Fix problems before installation.
Forgetting Expansion Gaps
Wood needs room to move. Leave gaps at walls and around fixed objects, then cover them with trim.
Applying Too Few Finish Coats
A floor takes more abuse than a shelf or tabletop. Use a floor-rated finish and apply enough coats for real protection.
Moving Furniture Back Too Soon
Dry and cured are not the same thing. Many finishes need days to cure enough for rugs, furniture, and normal traffic. Read the label and resist the urge to redecorate immediately.
Design Ideas for DIY Plywood Plank Floors
For a farmhouse look, cut wide planks, stain them medium brown, and use a satin finish. For a Scandinavian feel, try pale plywood with a clear matte water-based finish. For a cottage room, paint the planks soft white, sage green, or warm gray. For a playful space, paint a checkerboard pattern or border.
You can also vary plank lengths for a more authentic hardwood appearance. Another option is to use plywood squares or rectangles instead of long planks, creating a modern geometric floor. If you like rustic style, leave small gaps slightly visible and use darker stain to emphasize the plank lines. If you prefer clean modern design, keep gaps tight and choose a clear finish with minimal color change.
Real-World Experience: What DIY Plywood Plank Floors Teach You
The first experience most people have with DIY plywood plank floors is emotional whiplash. At the store, plywood feels like a bargain. In the room, surrounded by sheets, sawdust, spacers, and a suspiciously judgmental tape measure, it becomes clear that “budget-friendly” does not mean “effort-free.” This project saves money because you are supplying the labor, the patience, and possibly the soundtrack of mild muttering.
One of the biggest lessons is that cutting matters more than expected. A plank that is off by a small amount may not seem important on its own. But once you place ten of them side by side, the floor starts quietly drifting out of square. A saw guide or track saw makes a huge difference. So does cutting slowly, supporting the plywood properly, and using a sharp blade. Plywood loves to splinter at the exact moment you feel proud of yourself.
Another real-world lesson is that stain samples are not optional. Plywood can surprise you. The same stain that looks rich and elegant on oak may look orange, blotchy, or strangely dramatic on pine plywood. Testing on scraps gives you a preview before the entire floor becomes a permanent reminder that optimism is not a finishing technique. Wood conditioner can help, but it also changes the final color, so test that too.
Sanding is where patience becomes visible. If you rush sanding, every rough edge and filler smear will appear once the finish goes on. If you oversand, you may burn through the face veneer and reveal the layer underneath. The sweet spot is smooth but not aggressive. This is especially important around seams and fastener holes. A plywood floor does not need to look factory-perfect, but it should feel comfortable under bare feet.
Finishing the floor is also a lesson in household logistics. You need a route out of the room. You need ventilation. You need to keep dust down. You need to prevent pets from entering unless you want paw-print archaeology. Water-based finishes can be easier to live with because they dry clearer and usually smell less, while oil-based finishes can add warmth and depth. Either way, follow the manufacturer’s cure time before dragging furniture back across your masterpiece like a medieval siege weapon.
The best part of the experience is the transformation. A plain room can suddenly feel warm, intentional, and custom. Guests may not guess the floor is plywood, and when you tell them, they often look down again with fresh respect. That moment is deeply satisfying. You did not just install flooring; you turned basic building material into a design feature.
The most honest advice is this: DIY plywood plank floors are perfect for people who enjoy hands-on projects and can tolerate imperfection with style. They are not the right choice if you want a flawless, prefinished, luxury surface with zero maintenance. But if you want character, affordability, and a floor with a story, plywood planks deliver. Every seam, knot, and brushstroke says, “A human made this.” In a world full of cookie-cutter interiors, that is not a flaw. That is the charm.
Conclusion
DIY plywood plank floors are one of the most creative ways to get the look of wood flooring on a modest budget. They require planning, careful cutting, subfloor prep, sanding, finishing, and patience, but the payoff can be dramatic. With the right plywood, proper installation, and a durable floor finish, this project can turn an ordinary room into a warm, custom-looking space.
The key is to treat plywood like real flooring, not a shortcut. Choose smooth panels, acclimate them, stagger the planks, fasten them securely, protect them from moisture, and seal them thoroughly. Do that, and your DIY plywood plank floor can be more than a money-saving hack. It can be a beautiful, personal, conversation-starting feature that proves good design does not always arrive in a luxury box.