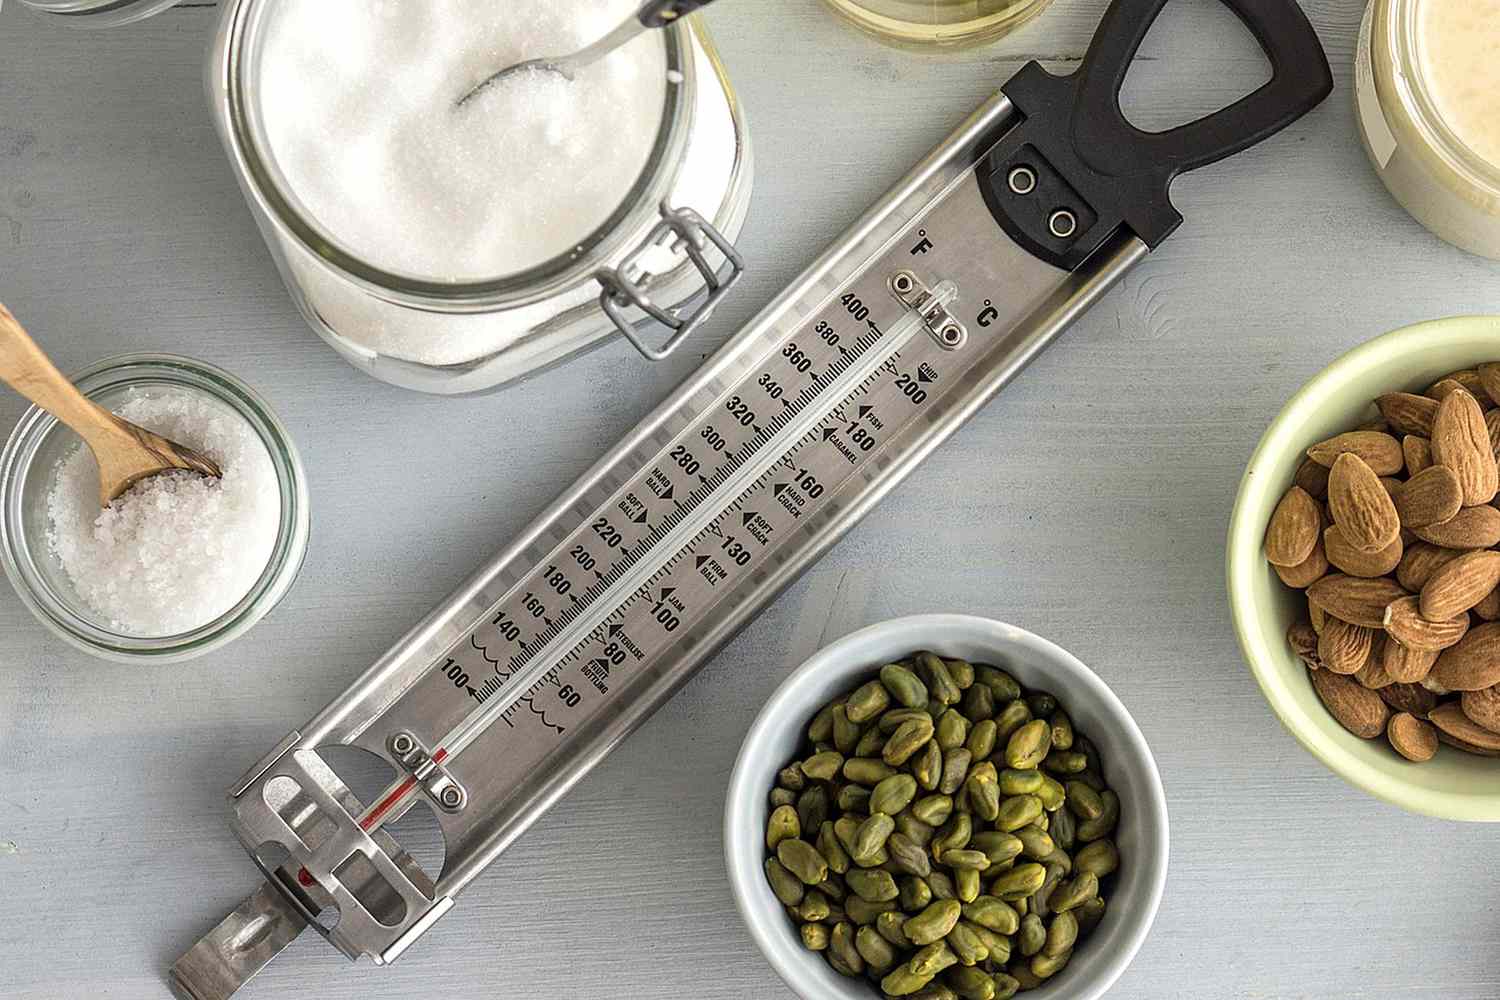

Candy making is basically delicious chemistry… with the emotional stability of a toddler. One minute your syrup is
behaving, the next it’s either grainy fudge sand or a caramel that could double as driveway sealant. And the
difference can be just a couple of degrees.
That’s why learning how to test and calibrate a candy thermometer is one of the easiest ways to
level up your homemade candy game. The good news: you don’t need a lab coat, a microscope, or a PhD in Sugar.
You just need water, ice, and a tiny bit of patience (the rarest ingredient in the kitchen).
Why Candy Thermometer Accuracy Matters (a Lot More Than You Think)
Most cooking is forgiving. Roast chicken can be a few degrees off and still taste great. Candy? Candy is
picky. When you’re boiling sugar syrup, temperature controls how much water has evaporated and how concentrated
the syrup has become. That concentration determines whether you end up with:
- fudge that sets creamy,
- caramels that chew (instead of shattering),
- taffy that stretches (instead of snapping),
- or brittle that actually breaks instead of bending like sad glass.
A thermometer that reads even 4–6°F off can push you into the wrong “stage,” especially around the soft-ball,
firm-ball, and crack stages where outcomes change fast.
Know What You’re Calibrating: Types of Candy Thermometers
1) Classic glass candy thermometer (clip-on)
This is the old-school tube style, often labeled with candy stages on the side. Many are accurate enough, but
not all are adjustable. If yours can’t be adjusted, you’ll use an offset (a correction factor).
2) Dial (bimetal) thermometer
These usually have a metal stem and a round dial. Many include a calibration nut so you can physically adjust the
reading. They’re common in general kitchen use and can work for candy if the temperature range is high enough.
3) Digital probe thermometer (instant-read or leave-in)
Digital thermometers can be fast and accurate, but not all are designed for very high sugar temperatures or
continuous use in boiling syrup. Some allow calibration, others don’t. Either way, you can still test accuracy and
apply an offset.
4) Infrared thermometer (not the hero you need here)
Infrared thermometers read surface temperaturenot the actual temperature of the syrup throughout the pot. For
candy making, that can be misleading. They’re great for pizza stones and griddles, not for sugar syrup accuracy.
Before You Start: Quick Setup and Safety Tips
- Use a deep pot to reduce splashing and help the thermometer sit safely.
- Clip the thermometer so the sensing area is fully submerged but not touching the bottom or sides.
- Keep your face back. Boiling sugar is basically napalm with better PR.
- Read analog thermometers at eye level to avoid “angled optimism” (also known as parallax error).
Test #1: The Boiling Water Test (Great for Candy Thermometers)
The boiling water test checks your thermometer near candy-making temperatures. At sea level, pure water boils at
212°F (100°C). But here’s the catch: boiling point changes with elevation and atmospheric pressure.
So the goal isn’t always “212°F”the goal is “your boiling point today, where you live.”
Step-by-step boiling water test
- Fill a deep pot with a few inches of water (enough to cover the sensing area).
- Bring it to a rolling boil (steady, vigorous bubblesnot a shy simmer).
- Clip the thermometer to the pot so the sensing area is in the water, not touching the pot.
- Let the reading stabilize. For analog thermometers, give it a minute or two; some models may take longer.
- Write down the temperature the thermometer shows while the water is boiling.
Find your expected boiling point (altitude matters)
If you’re close to sea level, your expected boiling point will be near 212°F. If you’re at higher elevation, it will
be lower. A common rule of thumb is roughly about 1°F lower for every 500 feet of elevation, but
barometric pressure can shift it slightly on any given day.
| Elevation | Boiling Point (°F) | What this means for candy |
|---|---|---|
| 0 ft (sea level) | 212°F | Use recipe temperatures as written (assuming your thermometer is accurate). |
| 1,000 ft | ~210°F | Expect slightly lower boiling point; verify with a test. |
| 5,000 ft | ~203°F | Candy temps often need downward adjustment. |
| 7,500 ft | ~198°F | High elevation: temperature targets shift noticeably. |
| 10,000 ft | ~194°F | Careful calibration and/or altitude guidance becomes essential. |
Calculate your thermometer’s offset
Once you know your expected boiling point, calculate the difference between what your thermometer should read
and what it does read:
- Offset = Thermometer reading − Expected boiling point
Example: Your expected boiling point is 208°F, but your thermometer reads 212°F in boiling water.
Offset = 212 − 208 = +4°F (your thermometer reads high).
In candy making, that means when your thermometer says 244°F, the syrup is really about 240°F. So you would
subtract 4°F from your recipe targets (or mentally subtract 4°F from the reading as you cook).
Boiling water test mistakes that cause “fake wrong” results
- Thermometer touching the pot: metal or glass contact can read hotter than the water.
- Not enough water: the sensing area isn’t fully submerged or gets blasted by steam pockets.
- Not a rolling boil: simmering water may be below boiling temperature depending on conditions.
- Reading at an angle: a dial can look “correct-ish” until you check at eye level.
Test #2: The Ice Bath Test (The 32°F Truth Serum)
The ice bath test checks accuracy at the freezing point: 32°F (0°C). The big advantage is that it’s
stable and reliable when done correctly.
Step-by-step ice bath test
- Fill a tall glass completely with crushed ice (crushed works better than big cubes).
- Add cold water until it reaches the top of the ice. Stir well.
- Let it sit for a minute so the ice-water slurry stabilizes.
- Insert the thermometer probe/sensing area into the center of the slurry.
- Make sure it doesn’t touch the glass.
- Wait until the reading stabilizes. It should be very close to 32°F.
If your ice bath reads “not 32°F,” check your method first
A properly made ice bath is a slushy mixture. If you have mostly water with a few floating cubes, you can get a
reading above 32°F because the water isn’t fully controlled by melting ice. The goal is a thick ice slurry.
How to Calibrate (or Compensate) After Testing
After you test, you have three realistic paths: adjust it, use an offset, or
replace it.
Option A: Adjust a dial thermometer (with a calibration nut)
Many bimetal dial thermometers have a small nut under the head. You can calibrate them in an ice bath:
- Keep the probe in the ice bath slurry.
- Hold the calibration nut with a wrench.
- Turn the thermometer head until it reads 32°F.
- Re-test to confirm it stays at 32°F in the slurry.
Tip: Some thermometers require a minimum immersion depth for accurate sensing. If only the tip is in the slurry,
you might be calibrating the wrong part of the stem.
Option B: Use an offset for glass candy thermometers (common and totally fine)
Many glass candy thermometers aren’t designed to be mechanically adjusted. That’s not a dealbreaker. You can still
get excellent results by applying your offset every time you cook.
- If your thermometer reads high, subtract the offset from your target temperatures.
- If your thermometer reads low, add the offset to your target temperatures.
Practical trick: Put a small piece of heat-safe tape on the thermometer handle that says “−4°F” (or whatever your
offset is). Your future self will thank you during caramel time.
Option C: Calibrate/adjust a digital thermometer (depends on the model)
Some digital thermometers allow recalibration or a user-defined offset. Others are factory-calibrated and not meant
to be adjusted. In that case:
- Record the offset from your ice bath and/or boiling test.
- Replace the battery if readings are unstable or slow.
- If the error is large or inconsistent, replace the thermometer (especially for candy work).
Use Your Calibration in Real Candy Making
Once you know your thermometer’s behavior, you can cook with confidence. Here’s a quick reference for classic sugar
stages (ranges vary slightly by source and recipe style, but these are widely used targets).
| Stage | Approx. Temp Range (°F) | Typical Uses |
|---|---|---|
| Thread | ~230–235 | Syrups, glazes |
| Soft Ball | ~235–240 | Fudge, fondant |
| Firm Ball | ~245–250 | Chewy caramels |
| Hard Ball | ~250–266 | Nougat, marshmallow bases |
| Soft Crack | ~270–290 | Taffy, toffee-style candies |
| Hard Crack | ~295–310 | Brittles, lollipops, hard candy |
| Caramel (sugar browning) | ~320–355 | Caramel sauce, spun sugar, flavoring |
Specific example: Soft-ball fudge with an offset
Let’s say your recipe calls for cooking to 238°F for a soft-ball stage fudge base. You tested your
thermometer and found it reads +4°F high.
- Target temperature (recipe): 238°F
- Thermometer reads high by: 4°F
- Adjusted target: 238 − 4 = 234°F on your thermometer
You haven’t changed the candy sciencejust corrected the instrument. Now you’re cooking the syrup to the right
concentration instead of accidentally wandering into the “why is my fudge crumbly?” zone.
Specific example: High-altitude candy + thermometer offset
High elevation lowers boiling point, which often lowers target finishing temperatures for certain candies. Suppose
you live around 5,000 feet and your tested boiling point is ~203°F today. Your thermometer reads +2°F high.
If your recipe says “cook to 300°F for brittle,” you might already need an altitude adjustment (many high-elevation
candy guides provide specific lowered finishing temps). Then you’d apply your thermometer offset on top of that.
The key is: calibrate first, then adjust targets intelligently.
When to Re-Test Your Candy Thermometer
- Before a big candy-making session (especially holiday marathon mode).
- After the thermometer is dropped, knocked, or “mysteriously” found under a stack of pans.
- When results change suddenly (your fudge is off, your caramel is weird, your brittle is moody).
- Every 6–12 months as basic maintenance, even if it seems fine.
Common Problems and What They Usually Mean
The reading jumps around or lags forever
- Digital: low battery, moisture in the probe connection, or a probe not meant for sustained high heat.
- Analog: damage to the sensing mechanism or the stem not immersed properly.
The dial fogs up
Moisture has gotten inside. That can cause slow readings and drifting accuracy. For candy making, that’s a strong
argument for replacement.
The thermometer reads correctly in ice water but not in boiling water
That can happen if the thermometer is more accurate at low temps than high temps, or if the boiling test setup is
flawed (touching the pot, not fully submerged, not actually boiling). Re-run the boiling test carefully.
My thermometer can’t reach candy temperatures
Some thermometers top out around 200–220°F. Those aren’t candy thermometers; they’re “soup thermometers with big
dreams.” Use a model rated for at least 350°F for sugar work.
Care and Handling: Keep Your Thermometer From Becoming a Drama Queen
- Avoid thermal shock: don’t move a cold thermometer straight into boiling syrup. Warm it gradually.
- Don’t scrape the bottom: contact with the pot can damage sensors and skew readings.
- Clean smart: soak the stem/bulb in hot water to dissolve sugar. Avoid soaking parts not meant to be submerged.
- Store safely: protect glass thermometers from banging around in drawers with ladles and other chaos gremlins.
Quick “Do This Every Time” Checklist
- Test your candy thermometer (boiling water is the most relevant for candy).
- Confirm your local boiling point (altitude + pressure).
- Record the offset and apply it to recipe targets.
- Clip correctly: submerged, centered, not touching pot.
- Cook steadily and avoid stirring once boiling hard (unless the recipe says otherwise).
Real-World Experiences: What Usually Happens in Candy Thermometer Land (Extra )
Anyone who’s made candy long enough has a thermometer storybecause candy making is where confidence goes to get
lightly toasted. A very common first experience looks like this: you follow the recipe perfectly, your thermometer
hits the “soft-ball” mark, you celebrate too early… and your “fudge” sets like damp beach sand. The culprit is
often a thermometer that’s reading high, meaning your syrup wasn’t actually concentrated enough. People tend to
blame the recipe, the weather, the vibes of the kitchen, or the fact that Mercury is in retrogradewhen the real
issue is that the thermometer needed a five-minute reality check in boiling water.
Another classic: the thermometer is clipped on, but the bulb is quietly touching the bottom of the pot. The syrup
temperature might be 285°F, but the bulb is getting extra heat from the metal, so it reads 295°F. Ten minutes later
you’ve “made taffy,” except it’s now a brittle sculpture of regret. This is why experienced candy makers can sound
oddly intense about “don’t let it touch the pan.” It’s not fussinessit’s trauma with a lesson plan.
High altitude adds its own plot twist. Someone moves to Denver or a mountain town, uses the same recipe they’ve made
for years, and suddenly their caramels won’t set. The instinct is to cook longer (which sometimes helps), but the
better move is to test the thermometer, figure out the local boiling point, and adjust targets. Once people start
doing this, they often have a funny “wait… that’s it?” moment. All that heartbreak, fixed by learning that water
doesn’t always boil at 212°F where they live.
Digital thermometers bring modern convenienceand modern confusion. Many home cooks have had the experience of a
digital probe reading perfectly in an ice bath, but acting oddly when held in fast-boiling syrup. The reason is
often that the probe isn’t designed for sustained high heat, or it’s positioned so the sensing area is partly in
steam pockets. The “experience lesson” here is to use the right tool for the job: either a reliable candy
thermometer rated for high temperatures or a leave-in probe designed for frying/candy, placed carefully and kept
away from pan contact.
One more shared experience: people underestimate how helpful an offset note can be. The kitchen gets hot, timers
beep, kids ask questions, and your brain starts buffering. If your thermometer is off by 4°F and you’re trying to
do mental math while stirring a bubbling sugar volcano, you’re basically auditioning for a stress documentary.
Folks who succeed consistently tend to do something simple: they write the offset on a piece of tape and stick it
right on the thermometer. It’s not glamorous, but neither is scraping burnt caramel off a saucepan with a spoon
while questioning your life choices.
The biggest “experienced candy maker” takeaway is surprisingly calm: testing and calibrating doesn’t have to be a
big production. Do a quick boil test before a candy session, apply your correction, and suddenly candy making feels
less like gambling. You still have to respect the sugar, of coursebut now you’re negotiating with facts instead of
hope.
Conclusion
Testing and calibrating a candy thermometer is one of those small kitchen habits that pays off in big ways. A quick
boiling water test (plus an ice bath check when appropriate) can prevent ruined batches, wasted ingredients, and the
very specific sadness of “I swear I did everything right.”
Whether you adjust a calibration nut, set a digital offset, or simply keep a sticky-note correction on the handle,
the goal is the same: trust your temperatures. Once your thermometer is telling the truth, your
candy recipes get dramatically easierand a whole lot more fun.