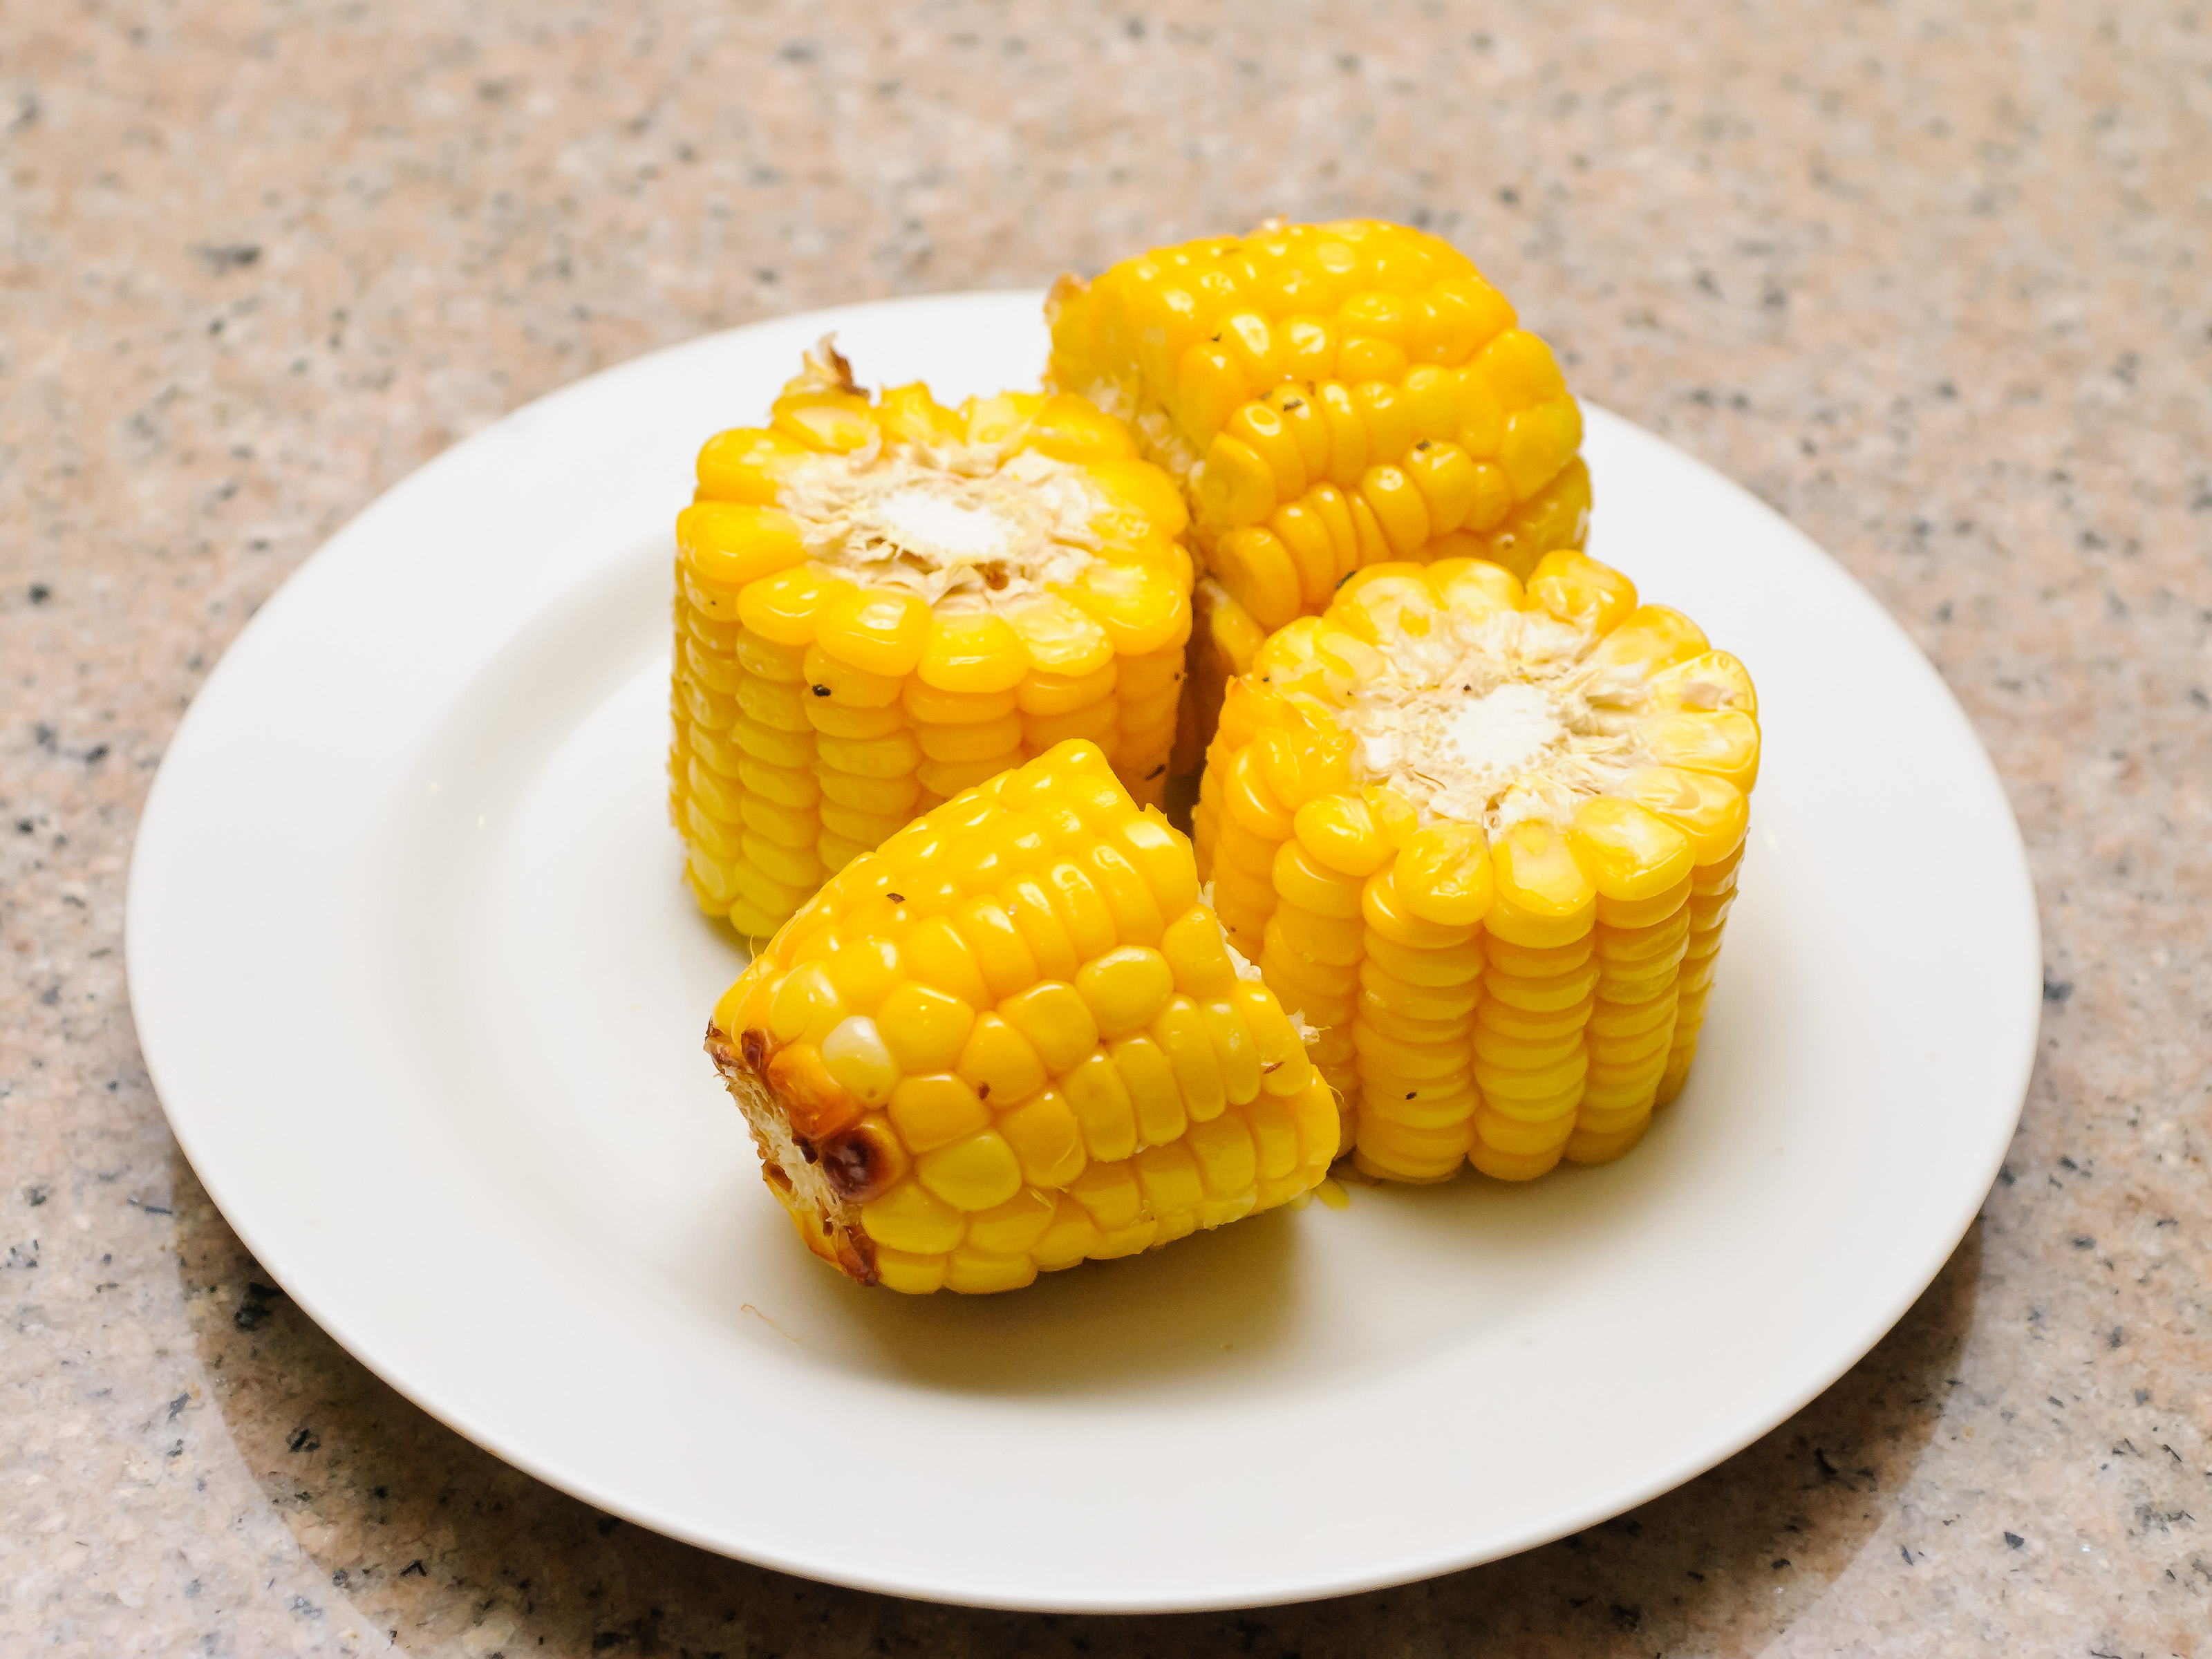

Corn on the cob is one of those foods that can make a normal dinner feel like a backyard party, even if the “backyard” is your kitchen and the party guests are just you, your plate, and one very determined stick of butter. The good news? You do not need a grill, a giant stockpot, or a degree in Midwest summer traditions to make sweet, juicy, tender corn. You can cook corn on the cob in the oven beautifully, and there is more than one way to do it.
Oven corn on the cob is convenient because it is hands-off, easy to scale for a crowd, and flexible enough to match whatever else you are cooking. Want soft, buttery kernels? Wrap the corn in foil. Want roasty brown spots? Bake it uncovered. Hate removing silk? Roast it in the husk and let the oven do some of the cleanup work. The oven is basically the quiet kitchen helper who never complains, unless you forget the timer.
This guide covers five reliable oven methods: foil-wrapped corn, bare roasted corn, corn roasted in the husk, oven-steamed corn in a baking dish, and broiled corn for a quick charred finish. You will also get seasoning ideas, timing tips, storage advice, common mistakes to avoid, and a personal-experience section at the end for real-world cooking notes.
Before You Start: How to Choose and Prep Fresh Corn
The best oven corn starts before the oven is even warm. Look for ears with bright green, snug husks and tassels that are slightly sticky or silky, not dry and brittle. The ear should feel heavy for its size, which usually means the kernels are plump and juicy. Avoid corn with blackened, slimy, or very dry husks.
Freshness matters because sweet corn begins losing sweetness after harvest as its sugars convert to starch. That is why farmers’ market corn often tastes like sunshine wearing a yellow jacket, while old corn can taste flat and chewy. For the best flavor, cook corn as soon as possible after buying it. If you need to store it, keep it in the refrigerator, ideally with the husks on, until shortly before cooking.
Should You Wash Corn Before Oven Cooking?
If you remove the husks before cooking, rinse the ears under cold water and rub away clinging silk. Do this close to cooking time rather than a day ahead. Washing and shucking too early can dry out the kernels and reduce that fresh, juicy bite. If you are roasting corn fully in the husk, trim only messy ends if needed and keep the husk intact.
Method 1: Foil-Wrapped Oven Corn on the Cob
This is the classic oven method for buttery, tender corn. Foil acts like a mini steam chamber, trapping moisture and flavor around the cob. It is ideal when you want corn that tastes rich, soft, and evenly seasoned without much fuss.
Best For
Family dinners, cookouts without a grill, meal prep, picky eaters, and anyone who believes butter should have a frequent-flyer card.
How to Make It
Preheat the oven to 400°F. Shuck the corn, remove the silk, and rinse the ears. Pat them dry so the butter sticks instead of sliding around like it has weekend plans. Place each ear on a square of aluminum foil. Spread with softened butter or brush with melted butter, then season with salt, black pepper, garlic powder, smoked paprika, parsley, or chili powder.
Wrap each ear tightly in foil and place the packets on a baking sheet. Bake for 25 to 30 minutes, turning once halfway through if you remember. If you forget, the corn will probably forgive you. Let the packets cool for a few minutes before opening because the steam is hot and surprisingly dramatic.
Flavor Variations
Try garlic-herb butter with parsley and chives, chili-lime butter with lime zest and cayenne, or Parmesan butter with grated cheese and cracked pepper. For a sweet-savory version, mix butter with a small amount of honey and a pinch of smoked paprika.
Method 2: Bare Roasted Corn on the Cob
If foil-wrapped corn is soft and buttery, bare roasted corn is its slightly rebellious cousin. Cooking corn uncovered allows dry heat to touch the kernels directly, creating light browning and a deeper roasted flavor. The texture is a little firmer, the edges can caramelize, and the taste is closer to grilled corn without actually going outside.
Best For
People who love roasted vegetables, smoky seasonings, and corn with a little color. This method is excellent for tacos, salads, grain bowls, and summer plates that need a side dish with personality.
How to Make It
Preheat the oven to 425°F. Shuck and clean the corn. Brush each ear lightly with oil or melted butter. Do not drown it; the goal is a glossy coat, not a corn spa treatment. Season with salt, pepper, paprika, garlic powder, or taco seasoning.
Place the corn directly on a rimmed baking sheet. Roast for 18 to 25 minutes, turning every 6 to 8 minutes so the kernels brown evenly. The corn is done when it is bright, tender, and lightly golden in spots.
Pro Tip
If the kernels begin to dry before they brown, brush with a little extra butter during the final few minutes. Bare roasting gives great flavor, but it is less forgiving than foil because moisture escapes faster.
Method 3: Oven-Roasted Corn in the Husk
Roasting corn in the husk is wonderfully low-effort. The husk protects the kernels, traps steam, and helps the silk loosen after cooking. It is one of the easiest methods when you want minimal prep and maximum “wow, that was simple.”
Best For
Busy weeknights, large batches, and anyone who dislikes fighting corn silk. This method also works well when your corn is very fresh and still wrapped in clean, healthy husks.
How to Make It
Preheat the oven to 350°F to 375°F. Place whole ears of corn, husks and all, directly on the oven rack or on a baking sheet. Roast for 30 to 35 minutes. The husks may dry and darken slightly, which is normal.
Remove the corn carefully with tongs or oven mitts. Let it rest for 5 minutes before peeling. Slice off the stem end, then pull back the husk and silk. Much of the silk should come away more easily than it does when raw. Add butter, salt, herbs, cheese, or lime juice after cooking.
Should You Soak the Husks?
For oven roasting, soaking is optional. If the husks are very dry or you plan to cook at the higher end of the temperature range, a short soak can help reduce scorching. But for fresh corn, the natural moisture inside the husk usually does the job.
Method 4: Oven-Steamed Corn in a Baking Dish
This method is perfect when you want juicy corn but do not want to wrap each ear individually. A baking dish, a little water, and a tight foil cover create a gentle steam environment inside the oven. It is less roasty than uncovered corn, but it is dependable, tender, and great for serving a group.
Best For
Potlucks, family dinners, and anyone cooking several ears at once. It is also helpful when your oven is already on for chicken, ribs, casseroles, or baked burgers.
How to Make It
Preheat the oven to 400°F. Shuck and clean the corn. Place the ears in a large baking dish in a single layer if possible. Add about 1/2 inch of water to the dish. Cover tightly with foil so steam stays trapped.
Bake for 25 to 30 minutes, depending on the size and freshness of the corn. Carefully remove the foil, opening it away from your face because steam has no manners. Drain the water, then toss the corn with butter, salt, herbs, or your favorite seasoning blend.
Why This Works
Steam cooks the corn gently and helps preserve tenderness. It is especially useful when you do not want the kernels to dry out. The flavor is clean and sweet, making it a great blank canvas for toppings.
Method 5: Broiled Corn on the Cob for a Charred Finish
The broiler is the closest your oven gets to acting like a grill. It uses high, direct heat from above to brown and blister the kernels quickly. Broiled corn is fast, flavorful, and slightly smoky-tasting, especially when paired with chili powder, lime, or melted butter.
Best For
Finishing cooked corn, creating grilled-style flavor indoors, or making street-corn-inspired toppings. It is also excellent when you already steamed or foil-baked the corn and want more color.
How to Make It
Shuck and clean the corn. Brush it lightly with oil or melted butter. Place the ears on a foil-lined baking sheet. Set the oven rack about 6 inches below the broiler and turn the broiler on high.
Broil for 6 to 10 minutes, turning every 2 minutes, until the kernels are lightly charred in spots. Watch closely because broilers can go from “beautifully browned” to “tiny corn meteor” faster than expected.
Street Corn-Style Topping
After broiling, brush the corn with a mixture of mayonnaise or sour cream, lime juice, chili powder, and a pinch of salt. Sprinkle with cotija cheese or Parmesan, then finish with cilantro. It is messy, delicious, and absolutely worth keeping napkins nearby.
Oven Corn on the Cob Timing Chart
| Method | Temperature | Approximate Time | Texture and Flavor |
|---|---|---|---|
| Foil-wrapped corn | 400°F to 425°F | 20 to 30 minutes | Moist, buttery, tender |
| Bare roasted corn | 425°F | 18 to 25 minutes | Roasty, lightly caramelized |
| Corn in the husk | 350°F to 375°F | 30 to 35 minutes | Soft, sweet, naturally steamed |
| Oven-steamed corn | 400°F | 25 to 30 minutes | Juicy, mild, evenly cooked |
| Broiled corn | High broil | 6 to 10 minutes | Charred, bold, grill-like |
Best Seasonings for Oven Corn on the Cob
Butter and salt are classic for a reason, but oven corn can handle much more. For a simple everyday flavor, use melted butter, garlic powder, parsley, salt, and pepper. For smoky corn, add smoked paprika and a pinch of cayenne. For Mexican-inspired corn, use chili powder, lime juice, cotija cheese, and cilantro. For a savory Italian-style version, try Parmesan, basil, oregano, and black pepper.
If you are cooking for guests, set up a small topping bar with softened butter, lime wedges, grated cheese, chopped herbs, hot sauce, and seasoning blends. Corn on the cob suddenly becomes interactive, and everyone gets to pretend they are a professional corn stylist.
Common Mistakes to Avoid
Overcooking the Corn
Fresh sweet corn does not need endless cooking. Overcooked kernels can become chewy, tough, or dry. Start checking early, especially if the ears are small or very fresh.
Using Too Much Salt Before Cooking
A little seasoning is fine, especially in butter mixtures, but heavy salting before cooking can sometimes make corn taste less tender. For the brightest flavor, season lightly before baking and adjust after cooking.
Forgetting Steam Safety
Foil packets, husks, and covered baking dishes trap steam. Open them carefully and away from your face. Your eyebrows deserve a peaceful evening.
Cooking Old Corn Like Fresh Corn
Older corn tends to be starchier and less juicy. Foil-wrapped or oven-steamed methods are better for corn that is not at peak freshness because they help protect moisture.
How to Store and Reheat Oven-Cooked Corn
Store leftover cooked corn in an airtight container in the refrigerator. For best quality, eat it within 3 to 4 days. You can reheat whole ears in a 350°F oven for 5 to 10 minutes, wrapped loosely in foil with a small pat of butter. You can also cut the kernels off the cob and warm them in a skillet with butter, garlic, and herbs.
Leftover kernels are excellent in salads, quesadillas, soups, cornbread batter, scrambled eggs, rice bowls, and pasta. In other words, leftover corn is not a problem. It is a tiny golden opportunity.
Which Oven Method Is Best?
The best way to cook corn on the cob in the oven depends on what you want. For the softest, most buttery corn, choose foil-wrapped. For deeper roasted flavor, roast it uncovered. For the easiest prep, leave it in the husk. For juicy batch cooking, use a covered baking dish with water. For char and drama, finish under the broiler.
If you are new to oven corn, start with the foil-wrapped method at 400°F for about 30 minutes. It is forgiving, flavorful, and hard to mess up. Once you know how your oven behaves, try bare roasting or broiling for extra flavor.
Experience Notes: What I’ve Learned Cooking Corn on the Cob in the Oven
After making oven corn many different ways, the biggest lesson is that corn is simple, but it has opinions. Very fresh corn wants gentle cooking. It already has sweetness and moisture, so the job is not to “transform” it but to warm it, season it, and stay out of its way. Older corn needs a little more help, usually in the form of foil, butter, or steam.
The foil method is the one I would recommend for beginners because it gives consistent results. It is also the best choice when cooking for people with different preferences. You can season each ear differently: garlic butter for one person, plain butter for another, chili-lime for the brave soul who thinks dinner should come with a tiny kick. The packets also make cleanup easy, which is important because nobody has ever finished dinner and said, “I wish I had more pans to scrub.”
Bare roasting is my favorite when the corn is going into another dish. The lightly browned kernels taste fantastic in salads, tacos, pasta, and rice bowls. The trick is not to over-oil the corn. Too much oil prevents browning and makes the kernels feel heavy. A thin coat is enough. Turning the ears during roasting matters too. If you leave them in one position, one side gets all the personality while the other side stays shy.
Roasting in the husk feels almost too easy, which is why it is useful. Put the corn in the oven, wait, peel, eat. It is not the most seasoned method because the butter goes on after cooking, but the texture is lovely. It also makes silk removal less annoying. The husk method is great when you have a lot of corn and very little patience.
The baking-dish steam method is underrated. It does not produce dramatic browning, but it is excellent for feeding a group. The corn stays juicy, and you can season it after cooking with a big bowl of herb butter. This method also works well when the oven is already occupied by another dish at 400°F. Slide the corn onto a lower rack and let it do its thing.
Broiling is the method I use when I want oven corn to taste more like grilled corn. It requires attention, but the reward is big flavor in a short time. The broiler is not where you walk away to check your phone, fold laundry, or begin a complicated emotional conversation. Stay nearby, turn the corn often, and pull it when the kernels are browned in spots.
My final experience-based advice is to match the method to the meal. Serving corn with barbecue chicken or burgers? Foil-wrapped or broiled corn fits perfectly. Making a fresh summer salad? Bare roasted corn adds depth. Cooking for kids or a crowd? Oven-steamed corn is gentle and reliable. Want almost no prep? Husk-on roasting is your friend. Once you understand the texture each method creates, cooking corn on the cob in the oven becomes less of a recipe and more of a choose-your-own-corn-adventure.
Conclusion
Cooking corn on the cob in the oven is easy, flexible, and surprisingly delicious. Whether you wrap it in foil, roast it bare, leave it in the husk, steam it in a baking dish, or finish it under the broiler, the oven gives you a reliable way to make sweet, tender corn without boiling a giant pot of water. The key is choosing the right method for your preferred texture: foil for buttery tenderness, bare roasting for caramelized flavor, husk-on baking for simplicity, oven-steaming for juicy batch cooking, and broiling for charred flavor.
Start with fresh corn, avoid overcooking, season thoughtfully, and do not underestimate the power of good butter. With these five oven methods, corn on the cob can move from “basic side dish” to “why did everyone eat this before the main course arrived?” And honestly, that is the kind of kitchen problem we can all live with.