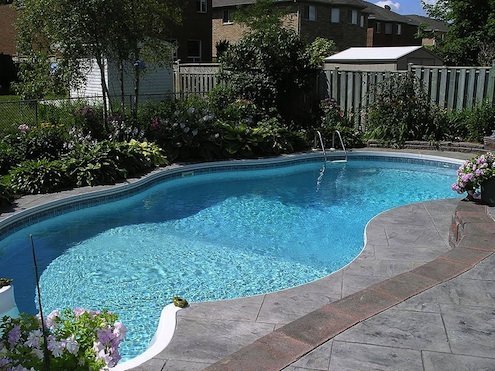

A swimming pool is supposed to feel like a backyard vacation, not a giant bowl of rough concrete that scrapes toes, collects stains, and quietly drinks several inches of water every week. Yet even a well-built pool surface eventually ages. Chemicals attack it, sunlight fades it, minerals cling to it, and thousands of cannonballs do not exactly improve the finish.
Swimming pool resurfacing restores the interior layer that separates the water from the pool shell. Depending on the pool, that may mean replacing worn plaster, applying a quartz or pebble finish, repairing a fiberglass coating, or installing a new vinyl liner. Done correctly, resurfacing improves appearance, swimmer comfort, water retention, and the long-term protection of the underlying structure.
The job is more complicated than rolling on a coat of waterproof paint and declaring victory before lunch. Surface preparation, structural repairs, material selection, installation conditions, filling, and startup chemistry all affect the result. This guide explains when resurfacing is necessary, what the process involves, how much it may cost, and how to avoid turning a large home-improvement project into a larger home-improvement project.
What Is Swimming Pool Resurfacing?
Resurfacing is the process of renewing a pool’s interior finish. In a concrete or gunite pool, the visible plaster or aggregate layer is not the main structural shell. It is the finished surface that helps protect the shell, holds water, and gives swimmers something more pleasant to touch than raw concrete.
Contractors may remove most of the old finish before installing a new one, or they may prepare the existing surface and apply a compatible bonding system over it. The exact approach depends on the condition of the pool, the new material, local construction practices, and the product manufacturer’s instructions. Bob Vila and This Old House describe preparation methods that may include chipping, sandblasting, grinding, acid washing, repairing damaged areas, and applying a bond coat before the new finish is installed.
Resurfacing Is Not the Same as Cleaning
Scale removal, stain treatment, pressure washing, and acid washing may make a structurally sound surface look better, but they do not replace failing material. An acid wash removes a thin layer from certain cement-based finishes and is not appropriate for every pool. Fiberglass, vinyl, acrylic, and painted surfaces generally require different treatment, and an old surface with cracks or hollow areas may be too fragile for aggressive cleaning.
If the finish is merely dirty, cleaning may be enough. If it is rough, delaminating, deeply cracked, badly etched, or exposing the shell underneath, resurfacing is usually the more sensible remedy.
Which Types of Pools Can Be Resurfaced?
Concrete and Gunite Pools
Concrete pools are the classic candidates for resurfacing. Their interiors may be finished with standard plaster, colored plaster, quartz aggregate, exposed pebble, glass beads, tile, or specialty polymer coatings. Because the underlying shell can last for decades, renewing the finish can give an older pool a dramatic second life.
Fiberglass Pools
A fiberglass pool normally has a smooth gelcoat surface. A quality gelcoat may last for decades, but it can eventually develop fading, chalking, blisters, cracks, or discoloration. Fiberglass resurfacing requires a coating system designed to bond to fiberglass; standard pool plaster is not an interchangeable substitute. Some modern thermoplastic and polymer finishes can be applied on-site, but preparation and temperature control remain critical.
Vinyl-Liner Pools
Vinyl pools are not resurfaced in the traditional plastering sense. When the interior becomes faded, brittle, wrinkled, stretched, or torn, the liner is replaced. Before ordering a new liner, the installer should inspect the walls, floor, fittings, steps, and track for damage. Installing expensive new vinyl over an unresolved structural problem is the pool equivalent of putting a tuxedo on a raccoon.
Signs Your Pool May Need Resurfacing
No single stain proves that a pool needs a new finish. A group of persistent symptoms, however, deserves professional attention.
- A rough or abrasive texture: Pitting and erosion can make plaster uncomfortable underfoot and may snag swimsuits.
- Flaking or peeling: Loose material suggests that part of the finish is separating from the substrate.
- Widespread discoloration: Some stains can be treated, but permanent mottling and chemical damage may remain.
- Visible cracks: Small surface checks may be cosmetic, while wider or moving cracks can indicate structural or soil-related trouble.
- Exposed aggregate or concrete: When the finish wears through, the protective layer is no longer doing its full job.
- Unexplained water loss: A crack in the finish or shell may be leaking, although plumbing, fittings, evaporation, and equipment can also cause water loss.
- Constant chemistry problems: A badly etched or deteriorating cement surface can make water management more difficult.
Before approving resurfacing solely because the water level is dropping, perform a leak evaluation. The U.S. Environmental Protection Agency recommends comparing pool-water loss with water loss from a partially submerged bucket over 24 hours. When the pool level drops farther than the bucket level, leakage may be involved rather than ordinary evaporation.
Choosing a New Pool Finish
Standard White or Colored Plaster
Traditional plaster combines white cement with marble aggregate. It provides a smooth, familiar appearance and is generally the least expensive cement-based option. White plaster creates bright blue-looking water, while pigments can produce gray, blue, or other tones.
The trade-off is sensitivity. Plaster is more vulnerable than harder aggregate finishes to staining, etching, poor water balance, and surface erosion. Depending on installation quality, water chemistry, climate, and use, homeowners often plan for roughly 5 to 15 years of service rather than treating any advertised lifespan as a stopwatch.
Quartz Aggregate
Quartz finishes mix durable quartz crystals with cement and pigments. They usually cost more than standard plaster but offer improved resistance to wear, staining, and chemical damage. Their texture is generally smoother than a coarse exposed-pebble surface, making quartz a popular middle-ground choice for homeowners who want durability without giving their feet a daily geology lesson.
Pebble and Exposed Aggregate
Pebble finishes use natural stones embedded in a cementitious base. They can create deep, lagoon-like water colors and frequently outlast basic plaster. Some products may remain serviceable for 15 to 20 years or longer when properly installed and maintained. However, texture varies substantially. Larger exposed stones may feel rough to sensitive feet, while refined small-pebble products provide a smoother experience.
Glass-Bead and Polished Finishes
Glass beads and polished aggregates create reflective, high-end surfaces with rich color and sparkle. They can be durable and visually striking, although material cost and specialist labor increase the budget. Samples should be viewed underwater whenever possible because a tiny dry sample cannot perfectly predict the finished water color.
Pool Tile
A fully tiled interior is durable, easy to clean, and exceptionally customizable. It is also usually the most expensive option. Tile installation requires a stable substrate, appropriate waterproofing, pool-rated setting materials, careful grouting, and an installer who understands submerged applications. A bargain tile crew can turn an elegant mosaic into a very expensive collection of loose puzzle pieces.
Paint and Specialty Coatings
Pool paint has a lower initial cost, but it generally has a shorter service life than plaster or aggregate. Successful recoating requires identifying the existing paint, repairing cracks, removing contaminants, and creating the correct surface profile. Incompatible coatings can blister or peel. Specialty polymer systems may provide greater durability, but they should be evaluated as complete manufacturer-approved systems rather than mixed from unrelated products.
How the Pool Resurfacing Process Works
1. Inspection and Project Planning
A contractor first identifies the pool type, finish, damage, access limitations, drainage options, and any needed upgrades. This is also the time to inspect coping, waterline tile, drains, skimmers, lights, steps, fittings, plumbing penetrations, and equipment. Repairing these areas while the pool is already empty can be more efficient than draining it again next year.
2. Draining the Pool
The water must be discharged legally and safely. Rules vary widely: some communities allow dechlorinated water in certain drains, while others prohibit discharge into stormwater or sanitary systems. Saltwater pools may face additional restrictions. EPA guidance specifically advises checking state and local rules before releasing pool water onto property or into a sewer.
An empty pool should not be left unattended longer than necessary. High groundwater can exert upward pressure on the shell, and improper draining can contribute to cracking, movement, orin extreme casesa pool lifting out of the ground. The contractor should evaluate groundwater conditions and hydrostatic relief before draining.
3. Removing or Preparing the Old Finish
Loose, contaminated, or incompatible material must be removed. Crews may chip around fittings and tile lines, mechanically grind the surface, hydroblast it, or remove most of the old plaster. Dust, weak material, oils, algae, scale, and paint residue can all interfere with adhesion.
4. Repairing Defects
Cracks, hollow areas, rust stains, exposed steel, damaged drains, and leaks should be investigated before the cosmetic finish is installed. A patch may solve a localized surface defect, but active structural cracks may require engineering or specialized repair. Covering a moving crack without diagnosing it is less “repair” and more “temporary disguise.”
5. Applying the Bond Coat and Finish
When required, a compatible bond coat is applied to the prepared shell. The new plaster or aggregate is then mixed, pumped, spread, and hand-troweled. Installation must proceed efficiently so the crew can maintain consistent thickness, color, and texture. Manufacturer instructions establish acceptable preparation, application, curing, and exposure procedures.
6. Exposing Aggregate, Polishing, or Cleaning
Some aggregate finishes are washed or lightly treated to reveal the stones. Polished finishes require additional finishing steps. This stage strongly influences texture and appearance, which is one reason experienced applicators matter.
7. Refilling and Starting Up the Pool
New cement-based finishes normally begin curing while submerged, so the pool is filled promptly and continuously. Interrupting the fill can leave a visible line on the surface. Once filling begins, avoid shutting off the water until it reaches the specified level.
Startup is not casual maintenance. Fresh plaster changes water chemistry and releases plaster dust. The National Plasterers Council emphasizes controlled chemical balancing and regular brushing during the first several weeks. Its guidance calls for brushing at least twice daily during the early startup period and delaying salt addition in saltwater pools. Proprietary finishes may have different requirements, so the installer’s and manufacturer’s instructions take priority.
How Much Does Pool Resurfacing Cost?
National cost estimates vary because “resurfacing” can describe everything from coating a small pool to stripping and refinishing a large free-form concrete pool with premium pebble, new tile, structural repairs, and difficult backyard access.
As of 2026, several U.S. cost guides place a typical professional resurfacing project at approximately $6,000 to $15,000. Standard plaster commonly occupies the lower or middle portion of that range, while quartz, pebble, glass, polymer, and tile finishes can raise the total substantially. Extensive concrete repair, full interior tile, equipment upgrades, or high-cost labor markets may push a project beyond $20,000.
The most important pricing factors include:
- Total interior surface area, not merely water capacity
- Pool shape, depth, attached spa, benches, ledges, and steps
- Existing surface condition and removal method
- Crack, plumbing, steel, or structural repairs
- Chosen finish and color
- Waterline tile and coping work
- Access for workers, pumps, compressors, and debris removal
- Water disposal and refill charges
- Local labor costs, permits, and seasonal demand
Obtain at least three detailed proposals based on the same scope. A bid that simply says “resurface pool” does not reveal whether the contractor will remove loose plaster, replace fittings, repair cracks, apply a bond coat, handle startup, or disappear into the sunset the moment the hose is turned on.
Can You Resurface a Pool Yourself?
Small plaster patches and limited cosmetic repairs may be manageable for an experienced homeowner. Full resurfacing is a different category. It requires rapid material application, specialized tools, several workers, careful troweling, safe chemical handling, drainage planning, and precise startup management.
A mistake may not become visible until the pool is filled, at which point correcting it requires draining the pool and removing the failed finish. For most homeowners, professional installation is the more economical choice once the risk of delamination, streaking, staining, uneven texture, or premature failure is included. Angi likewise recommends hiring experienced pool resurfacing professionals unless the homeowner already has substantial plastering expertise.
How to Choose a Pool Resurfacing Contractor
Ask each contractor for proof of licensing where required, general liability insurance, workers’ compensation coverage, recent references, and examples of completed pools using the exact finish you are considering. Confirm whether the company’s own crew performs the work or whether it will be subcontracted.
A useful written proposal should identify:
- The preparation and removal method
- The exact brand, product, color, and finish
- Crack repairs and other excluded structural work
- Tile, fittings, drains, lights, and hardware included
- Who drains, refills, and starts up the pool
- Estimated schedule and weather contingencies
- Workmanship and manufacturer warranties
- Payment milestones and final inspection procedures
Avoid selecting solely by price. The least expensive estimate may omit surface removal, repairs, startup service, or warranty protection. The best value is a clearly defined installation by a contractor who follows the selected manufacturer’s specifications.
Practical Pool Resurfacing Experiences and Lessons
The Stain That Was Not a Surface Failure
A common homeowner experience begins with an ugly brown or green patch and an immediate assumption that the pool needs new plaster. In many cases, the culprit is iron, copper, organic debris, or scale rather than complete finish failure. A qualified technician can test the stain and evaluate the texture before recommending a five-figure project. The lesson is simple: diagnose first. Resurfacing a healthy pool because of a treatable stain is like replacing a car because a pigeon found it.
The Low Bid That Kept Growing
Another familiar scenario involves a surprisingly cheap proposal. Once the pool is drained, the contractor announces that crack repairs, fitting replacement, debris disposal, bond coating, and startup are “extras.” The final invoice then swims past the more complete bids that initially looked expensive. Homeowners generally have better experiences when they compare itemized scopes instead of bottom-line numbers. Ask what happens if hollow plaster, rusted steel, or active leaks are discovered and how change orders will be approved.
The Finish Chosen From a Tiny Sample
Pool finishes look different underwater, in sunlight, in shade, at different depths, and beside various decking colors. A dark gray chip may produce dramatic blue water, while a warm beige sample may look greener than expected. Homeowners who are happiest with the result often view several completed pools rather than relying on a brochure. They also ask whether pigments may mottle naturally. Cement finishes are hand-applied materials, not sheets of printed wallpaper, so subtle variation can be part of their character.
The Perfect Finish With a Bad Startup
A beautifully applied surface can still develop scale, stains, streaking, or discoloration when startup chemistry is neglected. Trouble often begins when everyone assumes someone else is responsible. The plaster crew thinks the service company is handling startup; the service company thinks the builder is handling it; the homeowner thinks the pool will somehow balance itself through positive thinking.
Before work begins, obtain a written startup plan naming the responsible party. Record fill-water chemistry, brushing, filtration, chemical additions, and test results. Do not add salt, install an automatic cleaner, heat the pool, or allow swimming until the applicable instructions permit it. PebbleTec, for example, recommends frequent brushing during the first days and continued regular brushing afterward.
The Remodel That Solved Several Problems at Once
The most satisfying projects often combine resurfacing with sensible repairs and upgrades. While the pool is empty, a homeowner may replace a cracked skimmer face, update old drain covers, repair a light niche, renew waterline tile, add a handrail, or correct a damaged step. Bundling unrelated luxury features can inflate the budget, but addressing necessary components during the same shutdown may prevent another drain-and-refill cycle.
The Lesson Learned After the First Year
After resurfacing, long-term satisfaction depends less on admiring the color and more on maintaining balanced water. Aggressive water can etch cement and pull calcium from the surface; scale-forming water can leave a pale crust or cloudy haze. Weekly testing, regular brushing, prompt stain investigation, and correct winterization help protect the investment. Leslie’s and finish manufacturers consistently warn that poor water balance contributes to pitting, staining, scaling, and premature deterioration.
How to Extend the Life of a Resurfaced Pool
- Follow the complete startup procedure for the installed product.
- Test and balance water consistently rather than waiting for visible problems.
- Brush walls, steps, benches, corners, and the waterline regularly.
- Repair leaks promptly to prevent water waste and soil damage.
- Use brushes and cleaning tools approved for the finish.
- Avoid draining the pool without professional advice.
- Keep written records of chemistry, repairs, and warranty documents.
- Investigate stains before using strong acids or abrasive treatments.
Conclusion
Swimming pool resurfacing can restore a tired backyard pool, protect its underlying shell, and make the water look inviting again. The best results come from matching the finish to the pool type, repairing underlying defects, preparing the surface properly, and treating the startup period as part of the installation rather than an afterthought.
Standard plaster remains a practical budget choice. Quartz balances comfort and durability. Pebble delivers natural appearance and long service life. Tile offers premium beauty at a premium price, while fiberglass and vinyl pools require systems designed specifically for their construction.
Begin with a professional inspection, compare detailed proposals, view real finished pools, and identify exactly who will handle filling and startup chemistry. A pool surface spends its entire working life underwater while being exposed to sunlight, chemicals, minerals, cleaning tools, weather, and enthusiastic children. It deserves something sturdier than guesswork.
Note: Cost ranges, service lives, startup procedures, permit requirements, and discharge rules vary by location, pool condition, finish manufacturer, and contractor. Confirm current local requirements and product instructions before beginning work. This guide synthesizes information from Bob Vila, Angi, This Old House, The Spruce, HomeGuide, HomeGnome, the U.S. Environmental Protection Agency, the National Plasterers Council, PebbleTec, SGM, Leslie’s, and River Pools.