
Concrete has a reputation for being the strong, silent type: dependable, gray, and not exactly the life of the garden party. But when used thoughtfully, concrete can become one of the most durable, creative, and surprisingly eco-minded materials for outdoor projects. That is where DIY eco-concrete garden kits come in. These kits help home gardeners make planters, stepping stones, edging, troughs, seed-starting trays, small water features, and decorative garden accents with less waste and more personality than many store-bought options.
The “eco” part does not mean concrete suddenly becomes a salad. Cement production has a real environmental footprint, and pretending otherwise would be like calling a wheelbarrow a sports car because it has one tire. Instead, eco-concrete gardening focuses on smarter choices: using less material, choosing mixes with lower cement content when possible, adding recycled aggregates, making long-lasting pieces, reusing molds, avoiding unnecessary plastic décor, and designing garden features that support drainage, plant health, and years of use.
What Are DIY Eco-Concrete Garden Kits?
A DIY eco-concrete garden kit is a packaged or self-assembled set of materials used to create garden features from concrete, hypertufa, or a related cement-based mix. A basic kit may include a dry concrete or cement blend, reusable molds, natural pigments, recycled glass or stone chips, gloves, instructions, drainage inserts, and finishing tools. Some kits are designed for beginners who want a simple concrete planter. Others are more advanced and allow you to cast pavers, modular raised-bed blocks, garden labels, birdbath bowls, succulent troughs, or pervious stepping pads.
The best kits are not just about making something that looks cute on a patio. They help reduce waste by letting you build exactly what you need. A custom planter that fits a narrow balcony corner is better than buying three wrong-size pots, returning two, and emotionally apologizing to your trunk. DIY kits also encourage repair, reuse, and local creativity. Instead of treating garden décor as disposable, they turn it into a small craft project with a long service life.
Eco-concrete vs. regular concrete
Regular concrete is typically made from cement, aggregates such as sand and gravel, and water. Cement is the ingredient with the largest carbon impact because it requires high-temperature manufacturing and releases carbon dioxide during production. Eco-concrete approaches try to reduce that footprint by replacing part of the cement with supplementary cementitious materials, using recycled aggregates, optimizing the mix, extending durability, or reducing the total amount of concrete needed.
For garden kits, the goal is usually not structural engineering. You are not building a bridge for squirrels with licensing requirements. You are making planters, edging, small paths, and decorative pieces. That gives you flexibility to choose lightweight mixes, thinner forms, recycled fillers, and long-lasting designs without compromising safety.
Why Gardeners Love Eco-Concrete Kits
DIY eco-concrete garden kits have become popular because they sit at the intersection of sustainability, craft, and outdoor design. They give gardeners control over shape, texture, color, drainage, and size. They also create a natural, stone-like look that blends easily with herbs, succulents, native plants, ornamental grasses, and edible container gardens.
1. They last longer than many plastic pots
Plastic planters can crack, fade, warp, and eventually become trash. A well-cured concrete or hypertufa planter can last for years. Durability is one of the most eco-friendly qualities a product can have. If you only make it once and use it for a decade, your garden project has already outperformed a parade of cheap seasonal containers.
2. They can support better drainage
Concrete planters can be cast with proper drainage holes, raised feet, gravel bases, or breathable hypertufa walls. This matters because soggy roots are basically plants wearing wet socks forever. For herbs, succulents, alpines, and Mediterranean plants, drainage can make the difference between lush growth and a sad botanical farewell.
3. They use customizable molds
One of the biggest advantages of DIY kits is mold flexibility. Buckets, bowls, silicone forms, cardboard boxes, reusable plastic tubs, old nursery pots, and sand molds can all shape concrete. Reusing molds reduces waste and allows you to make matching garden pieces over time.
4. They make sustainability visible
Eco-concrete garden projects are conversation starters. A planter with crushed recycled glass, a hypertufa herb trough, or a pervious stepping stone does not shout “I have read about embodied carbon,” but it does quietly say, “I make thoughtful choices and occasionally own a dust mask.”
What Comes in a Good DIY Eco-Concrete Garden Kit?
Not all kits are created equal. Some are genuinely useful; others are just a bag of cement with optimism. A high-quality kit should include clear instructions, realistic curing times, safety guidance, and materials suited to the intended project.
Core materials
A typical kit may include a cement-based binder, sand, fine aggregate, lightweight aggregate such as perlite or vermiculite, recycled stone chips, mineral pigments, and optional fibers for reinforcement. Hypertufa kits often use Portland cement mixed with perlite and coconut coir or peat moss to create a lighter, porous, stone-like container. Coconut coir is often preferred by eco-minded gardeners because it is a renewable byproduct and avoids some of the environmental concerns associated with peat harvesting.
Reusable molds
Reusable molds are a major selling point. Silicone molds are excellent for small items like plant labels, mini pots, and decorative tiles. Rigid plastic tubs work for troughs and larger containers. Wood forms are useful for rectangular planters or edging blocks. A truly eco-conscious kit encourages repeated use rather than one-and-done crafting.
Safety supplies
Any kit that includes cement should remind users to wear gloves, eye protection, and a dust mask or respirator when mixing dry material. Wet cement can irritate or burn skin, and dry cement dust should not be inhaled. Safety gear is not the glamorous part of garden crafting, but neither is explaining to your hands why they ignored basic chemistry.
Finishing tools
Look for a trowel, mixing paddle, measuring cup, sanding block, wire brush, or texture stamp. These small tools help create clean edges, drainage openings, rustic surfaces, and professional-looking finishes.
Best Projects to Make With DIY Eco-Concrete Garden Kits
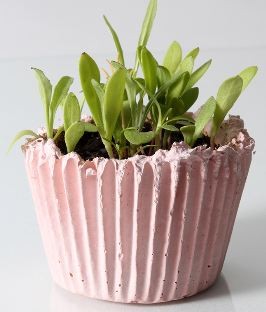
Concrete herb planters
Herb planters are one of the best beginner projects. Basil, thyme, rosemary, oregano, parsley, chives, and mint all grow well in containers when drainage is strong and the planter is properly cured. Concrete holds steady in wind, which is helpful on patios and balconies. For edible plants, let the planter cure fully and rinse it well before adding soil. New cement-based containers can be alkaline, so many gardeners leach or rinse them before planting.
Hypertufa succulent troughs
Hypertufa is a favorite for eco-concrete gardening because it mimics weathered stone while weighing less than solid concrete. A common mix includes cement, perlite, and coir or peat-like organic material. Once cured, hypertufa has a rustic, porous texture ideal for succulents, alpines, sedums, dwarf herbs, and small rock garden plants. It looks expensive in the way old stone looks expensive, except you made it in a bucket while wearing rubber gloves.
Stepping stones and garden pavers
Stepping stones are practical and easy to personalize. You can add leaf impressions, pebbles, shells, broken tile, recycled glass, or hand-stamped patterns. For an eco-friendly approach, make only the number you need, use local or salvaged decorative materials, and design the path so rainwater can soak into the soil between stones.
Pervious concrete pads
Pervious concrete is designed with interconnected voids that allow water to pass through. For home gardens, small pervious pads or stepping areas may help reduce puddling and runoff when used correctly. This is especially useful near rain gardens, side yards, potting benches, or outdoor work areas where water tends to collect. Pervious mixes require careful aggregate selection and curing, so beginners should start with small non-structural projects.
Garden edging blocks
DIY edging blocks help define herb beds, pollinator strips, vegetable plots, and gravel paths. They can be cast in simple rectangular molds and repeated for a modular look. Add natural pigments or pressed leaf textures to avoid the “parking lot border” effect.
Birdbaths and pollinator water stations
Shallow concrete bowls can become birdbaths or bee-friendly water stations. Keep the surface shallow, add small stones for landing spots, and clean the bowl often. Do not use sealers that may leach into water unless they are specifically labeled safe for that use.
How to Choose a More Sustainable Concrete Mix
The most eco-friendly garden kit is not always the one with the greenest label. Look at what it helps you avoid, how long the finished item will last, and whether the mix reduces unnecessary cement use.
Use less cement when possible
Cement is the carbon-heavy ingredient, so using less of it matters. Lightweight hypertufa-style mixes reduce total cement content by adding perlite, coir, or other fillers. For decorative garden pieces, you often do not need a heavy structural mix.
Consider supplementary cementitious materials
Some concrete mixes use blended cements or supplementary cementitious materials such as slag cement, fly ash, silica fume, calcined clay, or natural pozzolans. These materials can replace a portion of Portland cement and may improve durability, workability, or long-term performance depending on the mix. For DIY users, the easiest path is to buy a reputable blended or lower-carbon mix rather than experimenting wildly with mystery powders.
Add recycled aggregates thoughtfully
Crushed concrete, recycled glass, salvaged gravel, broken ceramic, and stone offcuts can be used decoratively in some garden projects. Keep pieces clean, avoid painted or contaminated materials, and do not use unknown debris in edible planters. For stepping stones and decorative tops, recycled aggregate can create a terrazzo-like finish that looks fancy enough to make your garden gnome stand straighter.
Design for long life
A thin planter that cracks after one winter is not eco-friendly, even if it began with noble intentions. Make walls thick enough for the project, include drainage holes, cure slowly, and avoid placing fresh concrete in freezing conditions. Long life is the quiet hero of sustainable design.
Step-by-Step: How to Use a DIY Eco-Concrete Garden Kit
Step 1: Plan the project
Decide what you are making before opening the mix. A planter needs drainage holes. A stepping stone needs enough thickness to handle foot traffic. A birdbath needs a shallow bowl and stable base. Sketch the size and location first so you do not accidentally make a 60-pound “small” planter that requires a forklift and emotional support.
Step 2: Prepare the workspace
Work outdoors or in a well-ventilated area. Cover your table or ground with a tarp. Keep water, molds, release oil, tools, gloves, eye protection, and a dust mask nearby. Concrete waits for no one once water enters the chat.
Step 3: Measure dry ingredients
Follow the kit instructions carefully. For hypertufa-style mixes, proportions often use cement with lightweight ingredients such as perlite and coir. For standard concrete, do not add random extra water to make it soupy. Too much water weakens the final piece and increases cracking.
Step 4: Add water slowly
Add water a little at a time until the mix holds together. For many planter mixes, the texture should resemble thick oatmeal or peanut butter, not gray soup. If you squeeze a handful, it should hold its shape without dripping like a leaky faucet.
Step 5: Fill and compact the mold
Press the mix firmly into the mold, especially around corners and edges. Tap the mold gently to release trapped air. For planters, insert an inner mold to create the hollow center and add drainage holes with dowels, straws, or removable plugs.
Step 6: Cure patiently
Curing is where many DIY projects succeed or fail. Keep the concrete damp and covered with plastic during the early curing period. Do not rush demolding. Many small concrete projects need at least a day or two before handling, while larger planters may need several days before mold removal and weeks before full use. Hypertufa planters often benefit from extended curing in shade.
Step 7: Rinse, leach, and finish
Fresh cement-based planters can be alkaline. Before planting, rinse them thoroughly and allow time for leaching. Some gardeners use a mild vinegar rinse for hypertufa, followed by clean water. Sand rough edges, brush the surface for texture, or seal only when appropriate for the intended use.
Plants That Work Well in Eco-Concrete Planters
Concrete and hypertufa containers are especially good for plants that enjoy excellent drainage. Succulents such as sedum, echeveria, hens-and-chicks, and stonecrop look right at home in rustic troughs. Herbs such as thyme, rosemary, sage, oregano, and lavender appreciate sunny, well-drained conditions. Compact ornamental grasses, alpine plants, dwarf conifers, and creeping groundcovers also pair beautifully with stone-like textures.
For vegetables, choose deeper containers and make sure the planter has fully cured and been rinsed. Leafy greens, dwarf peppers, bush beans, and compact tomatoes can work in larger concrete planters if soil depth, drainage, sunlight, and watering are managed well. Avoid tiny containers for thirsty crops unless you enjoy watering with the dedication of a full-time aquarium keeper.
Common Mistakes to Avoid
Adding too much water
Extra water makes mixing easier but weakens the final result. It can cause crumbling, cracking, and dusty surfaces. Add water gradually and stop when the mix reaches the recommended consistency.
Demolding too soon
Concrete may look solid before it is strong. Removing a mold too early can break corners or collapse planter walls. Be patient. Your future self, holding an intact planter instead of garden rubble, will thank you.
Skipping drainage
Every planter needs drainage unless it is designed as a water garden. Add holes during casting or drill them later with the correct masonry bit. Standing water is one of the fastest ways to turn healthy roots into compost-in-progress.
Ignoring weight
Concrete is heavy. Large planters should be made close to their final location or built with lightweight mixes. Add feet, casters, or a pedestal if needed.
Using unsafe recycled materials
Recycling is smart, but not every scrap belongs in a garden project. Avoid unknown painted materials, treated debris, old industrial fragments, or anything that could contain contaminants. For edible gardens, keep materials simple and clean.
Design Ideas for a Stylish Eco-Concrete Garden
Eco-concrete does not have to look like leftover sidewalk. With thoughtful design, it can feel modern, rustic, minimalist, cottage-style, or desert-chic.
Modern patio herb station
Create three rectangular concrete herb planters in different lengths. Plant rosemary in the tallest, basil in the widest, and thyme in a shallow trough. Add stamped labels or small concrete plant markers. The result is clean, useful, and dinner-friendly.
Pollinator path
Cast stepping stones with leaf impressions and place them between native flowering plants. Leave soil or mulch gaps between stones so water can soak in. Add a shallow concrete bee water dish nearby with pebbles for landing pads.
Succulent rock garden bowl
Make a wide hypertufa bowl with a rough exterior. Fill it with gritty succulent mix, then plant sedum, echeveria, and hens-and-chicks. Top with pea gravel or crushed recycled stone. It is low-maintenance, drought-tolerant, and dramatic without demanding applause.
Recycled glass accent planters
Add clean recycled glass chips to the surface of a planter or stepping stone, then polish lightly after curing. The glass catches sunlight and turns a simple project into garden jewelry.
Are DIY Eco-Concrete Garden Kits Really Sustainable?
The honest answer is: they can be, when used wisely. Concrete is not a zero-impact material. Cement production has significant emissions, so sustainability depends on reducing waste, limiting cement use, choosing better mixes, making durable objects, and replacing short-lived products. A small planter made from a thoughtful kit is not going to save the planet by itself. But a garden full of long-lasting, repairable, reusable, low-waste features is a meaningful step away from disposable outdoor décor.
Think of eco-concrete as a practical compromise. It gives you strength, weather resistance, and design flexibility while encouraging better material choices. The best results come from making fewer things, making them better, and using them longer.
Hands-On Experiences With DIY Eco-Concrete Garden Kits
The first thing most beginners learn about DIY eco-concrete garden kits is that concrete is both forgiving and completely honest. It will let you make charming, rustic planters with beginner-level skills, but it will also reveal every shortcut you take. Too much water? The edge crumbles. Forgot mold release? Congratulations, you now own a plastic bucket with concrete feelings. Skipped gloves? Your hands may file a formal complaint.
One of the most satisfying starter experiences is making a small herb planter. A rectangular mold made from a storage container or scrap wood works well. After mixing the concrete to a thick consistency, you press it into the outer mold, set a smaller container inside to create the planting cavity, and add drainage plugs. The project feels messy in the best way. It is part gardening, part sculpture, part “why is there cement on my elbow?” When the planter finally comes out of the mold, even a slightly uneven surface looks intentional. Rustic texture is wonderfully kind to beginners.
Hypertufa projects are even more beginner-friendly because the finished surface is supposed to look weathered. A hypertufa trough made with cement, perlite, and coir has a soft stone appearance that pairs beautifully with thyme, sedum, and small ornamental grasses. The lighter weight is a major advantage. A solid concrete trough can feel like moving a sleeping rhinoceros, while hypertufa is much easier to lift and position. The curing period takes patience, but the final planter looks as if it wandered in from an old European garden and decided to stay.
Another practical experience is casting stepping stones with leaves from the garden. Large hosta, fern, maple, or fig leaves can leave crisp impressions in the surface. The trick is to press the leaf gently, not bury it like evidence. After curing, the stone has a natural pattern that looks custom without requiring advanced art skills. If you use several stones along a garden bed, they create a path that protects soil from compaction and gives the space a more finished look.
Eco-conscious choices become easier with practice. You start saving clean containers for molds, collecting small stone offcuts, reusing mixing tubs, and measuring materials more accurately. You also learn not to overbuild. A small succulent pot does not need the same thickness as a driveway. A decorative plant marker can be thin. A large planter needs strength, drainage, and maybe a permanent home before it becomes too heavy to move. This kind of experience teaches sustainable design better than theory because every pound of material has to be mixed, carried, cured, and placed by real human arms.
The biggest lesson is that DIY eco-concrete gardening rewards patience. Slow curing, careful rinsing, and thoughtful planting produce better results than rushing. Once the pieces are in the garden, they age beautifully. Moss may soften the edges, minerals may create patina, and plants eventually spill over the sides. That is the charm. Unlike plastic décor that looks tired after one season, concrete and hypertufa often look better as they weather. They become part of the garden, not just objects sitting in it.
Conclusion
DIY eco-concrete garden kits are a smart choice for gardeners who want durable, creative, and more sustainable outdoor features. They help reduce waste by encouraging custom sizing, reusable molds, recycled accents, and long-lasting design. Whether you are casting herb planters, hypertufa troughs, stepping stones, edging blocks, or small pollinator water stations, the key is to use materials thoughtfully and build pieces that will serve your garden for years.
The most sustainable garden project is not always the trendiest one. It is the one that works well, lasts long, avoids unnecessary waste, and makes your outdoor space more useful and beautiful. With the right kit, a little patience, and a healthy respect for gloves, eco-concrete can turn a weekend project into a garden upgrade that feels practical, personal, and surprisingly fun.
SEO Tags