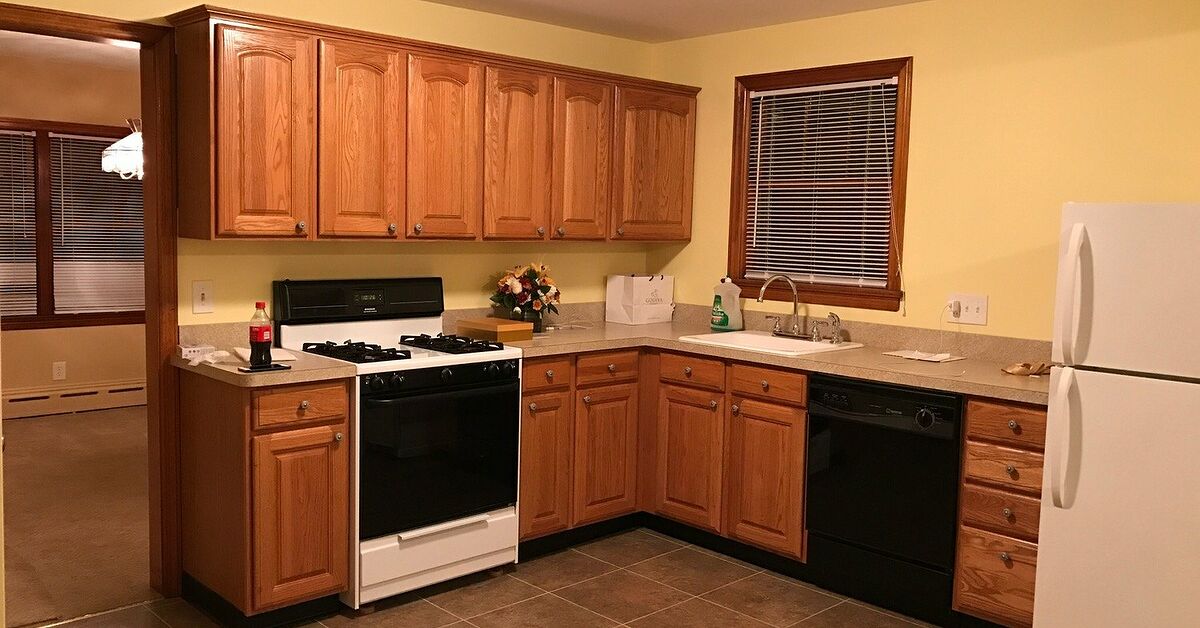

A kitchen island is one of those upgrades that makes a kitchen feel instantly more grown-up, like it finally got promoted from “place where cereal happens” to “beautiful command center of the home.” The good news? You do not need a custom cabinet shop, a billionaire’s renovation budget, or a reality-TV contractor dramatically pointing at blueprints. A DIY kitchen island with stock cabinets can give you storage, counter space, seating, and style using ready-made base cabinets from common home improvement stores.
Stock cabinets are the practical hero of many kitchen remodels. They are available in standard sizes, come in different finishes, and can often be mixed with trim, panels, paint, hardware, and a countertop to create a built-in look. With careful measuring and a weekend or two of focused work, you can build a kitchen island that looks custom without making your wallet hide behind the refrigerator.
This guide walks through planning, sizing, cabinet selection, installation, finishing, safety notes, and real-world experience so you can build a sturdy, attractive island that works for everyday cooking, homework, snacks, meal prep, and the occasional dramatic leaning-on-the-counter conversation.
Why Build a Kitchen Island With Stock Cabinets?
A kitchen island built from stock cabinets is popular because it hits the sweet spot between affordability and customization. Instead of building cabinet boxes from scratch, you start with pre-made units and customize the outside. That means less woodworking complexity, faster installation, and a more predictable result.
Stock Cabinets Save Time
Building cabinet carcasses, drawers, doors, face frames, and shelves from raw lumber takes skill and patience. Stock cabinets give you a ready-made structure. You can focus on layout, trim, countertop selection, and finishing details. In other words, you get to skip some of the fussy cabinet math and go straight to the fun partmaking it look expensive.
They Are Budget-Friendly
Custom kitchen islands can cost thousands of dollars, especially once you include cabinetry, countertop material, electrical work, and labor. Stock cabinets reduce the cabinet cost dramatically. A simple island using two or three base cabinets, plywood panels, trim, and a butcher block top can be far more affordable than a fully custom build.
You Can Customize the Look
Stock does not have to mean boring. You can add decorative end panels, beadboard, shiplap, furniture-style legs, corbels, baseboard molding, new pulls, a contrasting paint color, or a waterfall-style side panel. The cabinet box may be standard, but the final design can feel personal and polished.
Before You Start: Measure Like Your Island Depends on It
Because it does. Measuring is not glamorous, but it is the difference between a dreamy island and a very large obstacle course in the middle of your kitchen. Before buying cabinets, map the island footprint on your floor with painter’s tape. Walk around it. Open your oven, dishwasher, refrigerator, and nearby drawers. Pretend you are carrying a hot casserole. Pretend someone else is standing there asking where the forks are. This is serious science.
Recommended Clearance Around a Kitchen Island
Most kitchens need at least 36 inches of walkway clearance around an island, while 42 to 48 inches is more comfortable for busy work zones, seating areas, and appliance doors. If two people regularly cook together, wider aisles make the kitchen feel much less like a slow-motion traffic jam.
Think About Seating Early
If you want stools, plan the countertop overhang before ordering the top. A 12-inch overhang may work for casual seating, while 15 inches is more comfortable for counter-height stools. Each seat usually needs about 24 inches of width so people are not elbowing each other like they are competing for the last slice of pizza.
Watch Appliance Door Swings
Check how far your dishwasher door, oven door, and refrigerator doors open. An island placed too close to these appliances can turn simple tasks into kitchen yoga. You should be able to stand comfortably in front of an open appliance and still move around safely.
Choosing the Right Stock Cabinets
The most common choice for a DIY kitchen island is standard base cabinets. These are typically around 34.5 inches tall and 24 inches deep before the countertop. Once you add a countertop, the finished height is usually close to 36 inches, which matches standard kitchen counter height.
Best Cabinet Types for a DIY Island
Drawer base cabinets are excellent for islands because they make storage easy to access from above. Deep drawers can hold pots, pans, mixing bowls, food containers, baking sheets, and small appliances. Door cabinets work well for larger items, but drawers often feel more practical because you do not have to crouch and excavate like an archaeologist searching for the slow cooker.
A good island combination might include a 30-inch drawer base, a 24-inch door base, and an 18-inch trash pull-out cabinet. Another simple design is two 36-inch base cabinets placed back-to-back or side-by-side, depending on the island depth and storage needs.
Finished Ends Matter
Many stock cabinets are designed to sit against walls, so their sides may be unfinished or plain. For an island, all visible sides need attention. You can use matching end panels, plywood skins, beadboard, decorative trim, or painted panels to create a finished look. This is one of the biggest visual differences between “I built this carefully” and “some cabinets wandered into the kitchen and stayed.”
Match or Contrast Existing Cabinets?
You can match your existing kitchen cabinets for a seamless look, or paint the island a contrasting color for a designer feel. Navy, forest green, charcoal, warm gray, black, cream, and natural wood tones are popular island finishes. If your kitchen is mostly white, a contrasting island can add depth and personality without requiring a full remodel.
Tools and Materials You May Need
Your exact list will depend on the design, but most stock-cabinet kitchen island projects use basic DIY tools and materials.
Common Tools
- Measuring tape
- Painter’s tape
- Level
- Stud finder or floor joist locator, if needed
- Drill and driver bits
- Clamps
- Circular saw or miter saw
- Brad nailer or finish nailer
- Sanding block or orbital sander
- Caulk gun
Common Materials
- Stock base cabinets
- 2×4 lumber for a floor base or cleats
- Plywood panels or cabinet skins
- Trim, baseboard, or decorative molding
- Wood screws
- Construction adhesive
- Shims
- Wood filler
- Primer and paint
- Cabinet hardware
- Countertop material
Step-by-Step: How to Build a DIY Kitchen Island With Stock Cabinets
Step 1: Plan the Island Layout
Start with your kitchen’s traffic flow. Use painter’s tape to outline the island on the floor. Mark the cabinet depth, countertop overhang, seating area, and any side panels. Live with the taped outline for a day if possible. If you keep stepping over the tape or bumping into it, the island may be too large.
Decide which direction the cabinets should face. If the island is mainly for cooking, drawers facing the stove or prep area may be best. If it will serve a dining area, consider storage facing outward for dishes, games, or entertaining supplies.
Step 2: Build a Secure Base
A fixed island needs to be anchored so it does not shift. Many DIYers build a simple 2×4 base frame attached to the floor, then fasten the cabinets to that frame. The base should fit inside the cabinet footprint so it is hidden by toe kicks or trim.
Check for level before attaching anything permanently. Floors are often not perfectly flat, especially in older homes. Shims can help correct small uneven spots. A level island is important because cabinet doors, drawers, and countertops all behave better when gravity is not plotting against them.
Step 3: Set and Connect the Cabinets
Place the stock cabinets on the base frame or in their final position. Clamp neighboring cabinet face frames together so the fronts are flush. Drill pilot holes and screw the cabinets together through the face frames or side panels, depending on the cabinet design. Keep checking for level, plumb, and alignment as you go.
Do not rush this step. A tiny mismatch between cabinet faces can become very obvious once the countertop and trim are installed. Tight, even reveals make the finished island look professional.
Step 4: Anchor the Cabinets
Once the cabinets are aligned, secure them to the floor base or cleats. If you are not comfortable fastening into flooring or working around utilities, ask a qualified professional for help. This is especially important if the island will support a heavy countertop, a sink, an appliance, or electrical components.
Step 5: Add Side and Back Panels
Most stock cabinets need finished panels on the exposed sides and back. Cut plywood or decorative panels to fit, then attach them with adhesive and finish nails. For a built-in appearance, add vertical stiles, horizontal rails, or picture-frame molding. This simple trim work can transform basic cabinets into a furniture-style island.
Step 6: Install Toe Kick and Base Trim
Toe kick trim hides the lower cabinet base and gives your feet a comfortable place to stand while working at the island. If you want the island to look more like furniture, you can use taller baseboard molding instead. For a modern look, keep the trim simple and clean. For a farmhouse or traditional look, chunkier molding adds charm.
Step 7: Fill, Sand, Prime, and Paint
Fill nail holes and seams with wood filler or caulk where appropriate. Sand rough areas smooth. If you are painting unfinished wood, use a quality primer first. Semi-gloss or satin cabinet paint is a practical choice because it is easier to wipe clean. Kitchens are hardworking places, and spaghetti sauce has no respect for delicate finishes.
Step 8: Install the Countertop
Popular DIY island countertop options include butcher block, laminate, quartz remnants, solid surface, and sealed wood. Butcher block is a favorite because it is warm, relatively affordable, and easier for many DIYers to install than stone. Heavy materials like quartz, granite, or marble usually require professional measurement and installation.
Make sure the countertop overhang is properly supported. Small overhangs may not need extra support, but larger seating overhangs often require brackets, corbels, posts, or steel supports. Always follow the countertop manufacturer’s recommendations.
Step 9: Add Hardware and Final Details
New cabinet pulls or knobs can completely change the personality of the island. Matte black hardware feels crisp and modern. Brass adds warmth. Brushed nickel blends easily with stainless appliances. Wood knobs create a softer cottage look. Add hooks, towel bars, open shelving, a paper towel holder, or tray dividers if they fit your daily routine.
Countertop Ideas for a Stock Cabinet Island
Butcher Block
Butcher block is warm, classic, and DIY-friendly. It can be cut to size, sealed with oil or polyurethane, and paired beautifully with painted cabinets. It is great for prep space, but it needs regular care if used heavily.
Laminate
Laminate is budget-friendly and available in many patterns, including designs that mimic stone or wood. It is lightweight compared with stone and can be a smart choice for a family kitchen where durability and cost matter.
Quartz
Quartz is durable, stylish, and low-maintenance, but it is heavier and usually more expensive. It is best measured and installed by professionals. If your island is small, ask local countertop shops about remnants, which can lower the cost.
Wood Slab or Stained Plywood
For rustic or budget builds, a carefully finished wood top can look beautiful. The key is proper sanding, sealing, and support. A poorly sealed wood top will absorb stains faster than a white shirt at taco night.
Electrical and Plumbing Considerations
If your island will include outlets, a microwave shelf, a beverage fridge, a sink, or a dishwasher, plan those features before you build. Electrical and plumbing work can affect the cabinet layout, floor penetrations, countertop cuts, and local code requirements.
Kitchen island receptacle rules have changed in recent electrical code cycles, and local jurisdictions may adopt codes differently. Some areas may require future provisions even when an island outlet is not installed. Because electrical rules are safety-critical, consult a licensed electrician or local inspector before adding power to an island.
For plumbing, consider drain slope, venting, supply lines, floor access, and cabinet modifications. A sink island is possible, but it is no longer a simple weekend cabinet project. It becomes a real renovation, complete with grown-up responsibilities and possibly more trips to the hardware store than anyone emotionally planned for.
Smart Storage Ideas for Your DIY Island
Deep Drawers for Cookware
Deep drawers are ideal for pots, pans, lids, and mixing bowls. Add adjustable dividers to keep things organized. Drawers also make it easier to see what you own, which may prevent buying a fourth whisk because the first three were hiding in the back.
Trash and Recycling Pull-Out
A pull-out trash cabinet is one of the most useful island upgrades. It keeps garbage hidden but close to the prep zone. If you chop vegetables on the island, this feature quickly becomes your favorite.
Open Shelving
Open shelves on the end of the island can hold cookbooks, baskets, serving bowls, or decorative pieces. Keep them practical and not too cluttered. Open shelving looks best when it is styled with intention, not when it becomes a museum of random lunch boxes.
Tray Dividers
Vertical dividers are perfect for baking sheets, cutting boards, muffin tins, and serving trays. A narrow stock cabinet can be converted into tray storage with simple dividers.
Design Styles That Work Well With Stock Cabinets
Modern Farmhouse
Use shaker cabinets, a butcher block top, black pulls, white or navy paint, and simple X-panel end details. This style is friendly, practical, and still popular because it feels warm without being fussy.
Classic Traditional
Add furniture-style legs, raised panels, crown-like trim, decorative corbels, and a stone-look countertop. Traditional islands look best when the trim details are balanced and symmetrical.
Clean Modern
Choose flat-panel or simple shaker cabinets, minimal hardware, slab end panels, and a sleek countertop. Keep the color palette tight and avoid overdecorating.
Coastal Casual
Try light blue, soft gray, white oak, beadboard, woven baskets, and brushed nickel hardware. This look works especially well in bright kitchens with natural light.
Common Mistakes to Avoid
Making the Island Too Big
The most common mistake is building an island that overwhelms the kitchen. Bigger is not always better. An island should improve movement, not become a stylish blockade between you and the refrigerator.
Forgetting Countertop Overhang
Cabinet dimensions are not the same as finished island dimensions. Add the countertop overhang to your measurements, especially around seating areas and walkways.
Ignoring Floor Level
Uneven floors can cause cabinet gaps, crooked drawer fronts, and countertop problems. Use a level and shims during installation. This small step makes a big difference.
Skipping Finished Panels
Stock cabinets often need help on the sides and back. Finished panels and trim are what make the island look intentional from every angle.
Installing Heavy Countertops Without Support
Large overhangs and heavy surfaces need proper structural support. When in doubt, ask the countertop supplier or a qualified contractor.
Approximate Budget for a DIY Kitchen Island With Stock Cabinets
Costs vary widely depending on cabinet brand, countertop material, island size, and whether you hire professionals for electrical, plumbing, or countertop installation. A small island with two stock cabinets, painted panels, trim, and a butcher block top may cost a few hundred to around a thousand dollars. A larger island with premium cabinets, quartz, outlets, and custom trim can cost several thousand.
To save money, look for unfinished stock cabinets, countertop remnants, sale hardware, and simple trim profiles. Spend where it matters most: sturdy cabinets, a durable countertop, and safe installation.
Real-World Experience: What Building a Stock Cabinet Island Teaches You
Building a DIY kitchen island with stock cabinets teaches you quickly that kitchens are not as square, level, or cooperative as they appear in photos. The first big lesson is that painter’s tape is your best friend. A taped floor outline reveals problems that measurements alone may miss. You might think a 7-foot island sounds perfect until you realize the dishwasher door opens directly into your imaginary seating area. Tape does not lie, and it does not care about your Pinterest board.
The second lesson is that stock cabinets are wonderfully useful, but they are not magic. They need finishing. The backs may look plain, the sides may need panels, and the toe kick may not feel island-ready right out of the box. This is where trim becomes the secret sauce. A few boards arranged as stiles and rails can make basic cabinets look like a planned built-in. The transformation is surprisingly satisfying. One minute you have ordinary boxes; the next minute you are standing back with a cup of coffee whispering, “Well, look who got fancy.”
Another experience many DIYers share is the importance of drawers. Door cabinets are fine, but deep drawers in an island feel luxurious. They let you store cookware where you can actually reach it. No kneeling, no flashlight, no mysterious avalanche of plastic lids. If you are still choosing cabinets, prioritize drawers for the side facing your main cooking zone. Your future self will send a thank-you card.
Painting is also more important than people expect. An island gets bumped by hips, stools, backpacks, grocery bags, and enthusiastic pets. Use a durable cabinet-grade paint and give it proper curing time. Dry paint and cured paint are not the same thing. Dry paint says, “You may touch me.” Cured paint says, “I am ready for real life.” Respect the difference unless you enjoy touch-ups as a hobby.
Countertop choice shapes the whole project. Butcher block is approachable and warm, but it needs sealing and occasional maintenance. Quartz looks polished and handles daily use well, but it usually needs professional installation. Laminate is practical and budget-conscious. The best choice depends on how you use the kitchen. A family that bakes every weekend may want a durable, easy-clean surface. Someone who wants warmth and character may love wood. Someone who mostly uses the island as a coffee station and mail landing zone may simply need a surface that forgives life’s little messes.
Finally, the best DIY islands are designed around habits, not just looks. Where do you chop vegetables? Where do kids do homework? Where do groceries land? Where do you need trash, towels, pans, or serving bowls? A beautiful island that supports your routine will feel successful every day. A beautiful island that blocks the fridge will annoy you before the paint fully cures.
The biggest takeaway is simple: build slowly, measure repeatedly, and make decisions based on how your kitchen actually works. Stock cabinets give you a strong starting point. Thoughtful planning, careful leveling, secure anchoring, finished panels, and the right countertop turn those cabinets into a hardworking kitchen centerpiece. And when someone asks where you bought your island, you get the deeply satisfying pleasure of saying, “I built it.” Try not to say it too smugly. Or do. You earned it.
Conclusion
A DIY kitchen island with stock cabinets is one of the smartest ways to add storage, workspace, and style without committing to a fully custom renovation. The project works because it combines ready-made cabinet structure with personalized finishing details. Plan the footprint carefully, allow comfortable clearances, choose practical storage, support the countertop properly, and finish all visible sides so the island looks intentional from every angle.
Whether your goal is a compact prep island, a family breakfast spot, a baking station, or a dramatic centerpiece with personality, stock cabinets can get you there. The secret is not buying the most expensive materials. It is making thoughtful choices, checking level more often than you think necessary, and giving the details enough attention to make the final build feel custom.
Note: This article is written in original American English for web publishing and is based on practical DIY kitchen island guidance, cabinet installation principles, kitchen planning standards, and real home-improvement experience.