
A good schooling standard horse jump does not need to look like it just arrived from a five-star show ring with its own entourage. It does, however, need to be sturdy, adjustable, visible, smooth, and designed so the rail can fall when hit. That last point matters more than the paint color, the cute barn logo, or whether your horse thinks the new jump is secretly a dragon wearing stripes.
This guide explains how to build a practical pair of schooling jump standards for home training. A “schooling standard” is the upright support used to hold jump cups and rails for verticals, crossrails, small oxers, gymnastic exercises, and everyday flatwork-over-poles practice. The goal is not to build permanent cross-country obstacles or competition-certified equipment. The goal is to create a safe, useful, adjustable horse jump for supervised schooling.
Before you begin, remember that jumping carries risk for horse and rider. Use approved jump cups when possible, inspect every surface for sharp edges, avoid improvised materials that do not release properly, and ask an experienced trainer to review your setup before riding over it. A schooling jump should build confidence, not suspense.
What Is a Schooling Standard Horse Jump?
A schooling standard horse jump is a movable jump support used in training. Most homemade versions use a vertical wooden post mounted on a stable base, with evenly spaced holes or a jump-cup track so the rail height can be adjusted. Two standards plus one or more poles make a basic vertical. Add a ground line, flower box, filler, or second pair of standards, and you can create a more complete training setup.
For most home arenas, a pair of 4-foot to 5-foot standards is enough for beginner through intermediate schooling. Taller standards can be useful if you school larger fences, but bigger is not always better. Heavy, oversized standards are harder to move, more expensive to build, and less friendly when you are dragging them across the ring after a long ride.
Materials and Tools You Will Need
Materials for One Pair of Standards
- Two 4×4 posts, cut to 4 to 5 feet long
- Four 2×4 boards, each 18 to 24 inches long, for the feet
- Exterior-grade screws or lag screws, 3 inches or longer
- Two commercial jump cups or safety-compatible cup systems
- Measuring tape, pencil, carpenter’s square, and level
- Exterior primer and outdoor paint or stain
- Sandpaper or a power sander
- Wood filler or exterior caulk for rough spots
- Optional: metal jump-cup tracks for easier adjustment
Tools
- Drill and drill bits
- Saw, if cutting lumber yourself
- Socket wrench or driver bit
- Clamps
- Safety glasses, gloves, and dust mask
Pressure-treated lumber can last longer outdoors, but it should be handled carefully. Wear gloves, avoid breathing sawdust, cut or sand in a ventilated area, and wash up afterward. If you prefer a lighter, cleaner finish, exterior-grade untreated lumber can work if it is sealed well and stored out of standing water.
How to Build a Schooling Standard Horse Jump: 9 Steps
Step 1: Choose the Right Height and Design
Decide what kind of schooling you actually do. For ground poles, crossrails, and small verticals, 4-foot standards are usually practical. For riders schooling higher fences, 5-foot standards provide more adjustment room. The most common DIY design is a single upright 4×4 post attached to a cross-shaped base made from 2×4 boards.
The base must be wide enough to keep the standard from tipping, but not so bulky that it becomes a trip hazard. A good starting point is two feet per standard, each 18 to 24 inches long, arranged at right angles. This creates a stable footprint while keeping the jump movable. Think of it as building furniture for a horse who weighs 1,000 pounds and has opinions.
Step 2: Cut and Prepare the Upright Posts
Cut two 4×4 posts to equal length. If your lumberyard can make clean cuts, take advantage of it. Otherwise, measure carefully, mark all sides, and cut slowly. Uneven posts make uneven rails, and uneven rails make riders stare suspiciously at the jump while pretending they meant to circle.
After cutting, sand the top, edges, and corners of each post. Round off sharp corners slightly, especially near the top and around any drilled holes. Your hands, horse blankets, lead ropes, and arena helpers will all thank you. If the post has large knots, cracks, or splits, do not use it for the upright. Save questionable lumber for a garden project, not a jumping project.
Step 3: Build a Stable Base
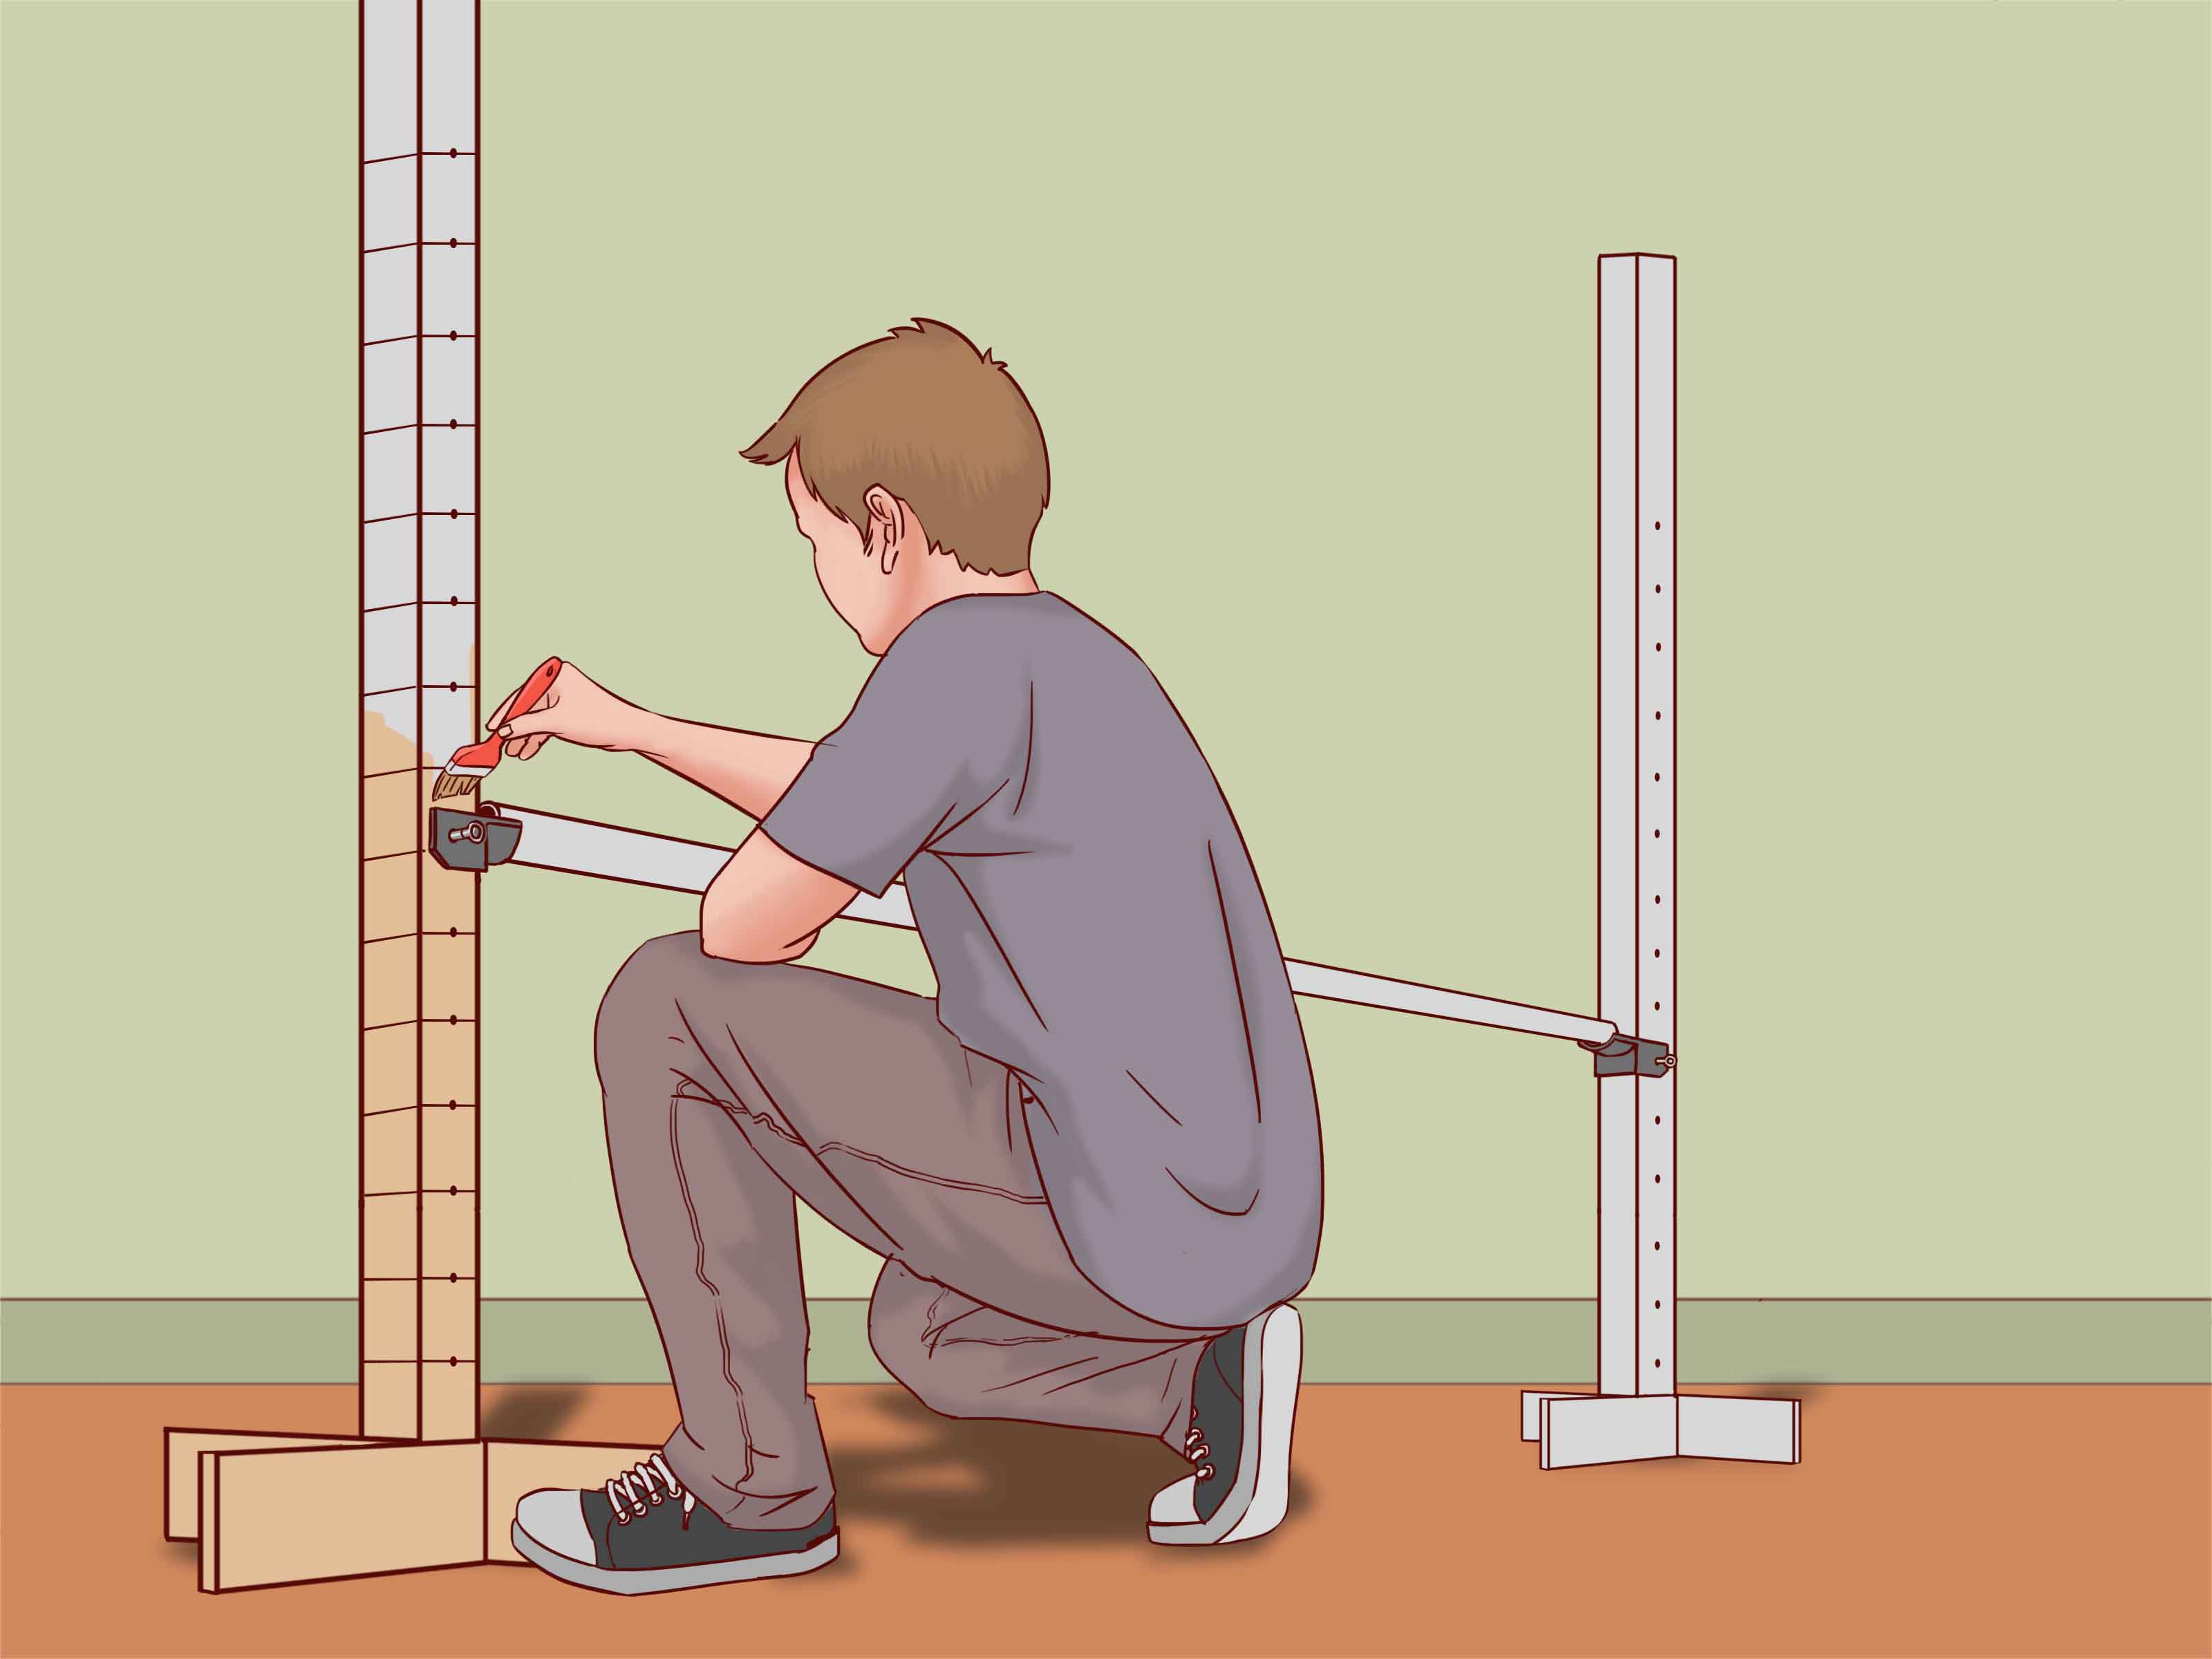
Place one 2×4 foot flat on the ground. Center the 4×4 post on top of it, making sure the post stands straight. Use a carpenter’s square and level to check alignment. Pre-drill holes to reduce splitting, then attach the foot to the post with exterior screws or lag screws.
Next, attach the second 2×4 foot perpendicular to the first, forming a cross. The finished base should support the upright from multiple directions. For extra durability, use two fasteners per connection and make sure every screw head sits flush with the wood. Raised hardware can scrape boots, catch lead ropes, or become the tiny villain of your arena.
Step 4: Mark the Jump Cup Holes
Measure from the ground up the centerline of each upright. Mark jump-cup holes at even intervals. Three-inch spacing is common for schooling standards because it allows useful height adjustments without turning the post into Swiss cheese. Start low enough for beginner exercises, often around 12 inches, and continue upward to the top working height of your standard.
Mark both posts exactly the same way. This is where patience pays off. If one standard has holes slightly higher than the other, your rail will sit crooked. A crooked rail may be useful for teaching humility, but it is not ideal for schooling rhythm, balance, or confidence.
Step 5: Drill Clean, Straight Holes
Use a drill bit that matches the pin size of your jump cups. Drill straight into the post, keeping the bit level. If you drill through the entire post, keep the exit side clean and sand any splintering. If your jump cups require only partial-depth holes, mark the bit with tape so you do not drill too deep.
Commercial jump-cup tracks are another smart option. Tracks cost more than simple holes, but they make height adjustment easy and consistent. They also reduce wear on the wood. If you use tracks, follow the manufacturer’s mounting instructions carefully and use hardware designed for outdoor use.
Step 6: Sand, Seal, and Inspect Every Surface
Once the structure is assembled, sand everything again. Run your hand over the post, base, edges, and holes. If you would not want your sleeve dragged across it, your horse should not brush against it either. Remove splinters, fill cracks, and smooth rough spots.
Seal exposed wood, especially cut ends. End grain absorbs moisture quickly, which can lead to swelling, checking, and rot. Outdoor primer plus exterior paint is a popular choice because it improves visibility and protects the wood. Bright colors can help horses read the fence, but avoid patterns so chaotic that your horse files a formal complaint.
Step 7: Paint for Visibility and Weather Protection
Use exterior-grade paint or stain after the wood is dry enough for finishing. If you are using pressure-treated lumber, give it time to dry before painting. Paint that traps moisture can peel, bubble, and make your beautiful jump look like it has seasonal allergies.
High-contrast colors are useful in schooling because they help the horse identify the rail and standards. White standards with colored rails are classic for a reason. You can also use barn colors, stripes, or simple decorative blocks, but keep the design readable. A schooling jump should invite the horse forward, not ask it to solve modern art at the canter.
Step 8: Add Jump Cups and Rails Correctly
Install jump cups according to their design. Cups should hold the rail securely enough that it does not wobble in a light breeze, but they should still allow the pole to fall when hit. For spread fences such as oxers, safety or breakaway cups are strongly recommended for the back rail. Many organized equestrian settings require safety cups in schooling areas because a fixed back rail can increase risk if a horse makes a serious mistake.
Use proper wooden poles or purpose-made jump rails. Avoid plumbing PVC as a rail for jumping. It can be too light, can roll unpredictably, and may shatter or create unsafe edges. A rail should be visible, smooth, and heavy enough to behave like a real pole while still being able to fall.
Step 9: Test the Jump Before Riding Over It
Before any horse approaches the jump, test the standards by hand. Push gently from different directions. The standards should stand upright without wobbling excessively. Place a rail in the cups and tap it to confirm it can come down. Check that no screws, splinters, cup pins, or rough edges are exposed.
Set your first schooling exercise low and simple. Start with a ground pole, then a tiny crossrail, then a small vertical if the horse is relaxed. Introduce new jumps slowly, especially if you have added bright paint, fillers, flowers, or anything your horse may interpret as “arena furniture with evil intentions.”
Important Safety Tips for Homemade Horse Jumps
Safety begins with design, but it does not end there. Inspect your schooling standards before each use. Wood changes with weather. Screws loosen. Paint chips. Cups bend. Rails crack. A jump that was fine last month may need attention today.
Remove unused cups and pins from standards. Extra hardware sticking out of the upright can catch reins, boots, blankets, or legs. Keep the arena footing level around the jump and avoid placing standards in holes, mud, slick spots, or deep uneven footing.
Do not build jumps that trap the horse. Rails should fall. Fillers should be lightweight or placed so they do not create dangerous gaps. Avoid sharp decorations, exposed nails, loose wire, glass, brittle plastic, or anything that could cut a horse if the jump is knocked down.
If you school oxers, use safety cups on the back rail and keep the shape appropriate. A square oxer or ascending oxer is generally safer than a descending oxer. For green horses, simple verticals, crossrails, trot poles, and gymnastic lines are often more educational than impressive-looking fences.
Common Mistakes to Avoid
Using Weak or Split Lumber
A standard needs sound wood. Large cracks, severe warping, deep knots, or soft rot are warning signs. If the post bends like a noodle or flakes apart like old pastry, retire it.
Making the Base Too Small
A narrow base may look tidy, but it can tip easily. The standard should be stable when bumped lightly, moved around the arena, or used on slightly imperfect footing.
Drilling Uneven Cup Holes
Uneven holes create uneven rails. Use a measuring tape, square, and pencil. Mark before drilling. Then check again. This is one of those “measure twice, avoid barn gossip once” situations.
Ignoring Maintenance
Outdoor jumps need care. Repaint chipped surfaces, tighten hardware, replace cracked rails, and store standards where they are not sitting in wet mud. Proper maintenance extends the life of the jump and keeps schooling safer.
How Much Does It Cost to Build Schooling Jump Standards?
The cost depends on lumber prices, hardware, paint, and whether you buy basic cups or safety-compatible cup systems. A simple pair of wooden schooling standards may cost far less than commercial show jumps, especially if you already own tools and paint. However, do not save money by skipping quality cups, exterior screws, or safe materials.
Commercial jumps are often more polished, lighter, and built with long-term durability in mind. DIY jumps are attractive because they are customizable and affordable. The best choice depends on your budget, riding level, storage situation, and how often the equipment will be used.
Best Uses for a Schooling Standard Horse Jump
Once your standards are built, you can use them for more than a single vertical. Set them low for trot poles. Create a crossrail for young riders or green horses. Add a second pair to build a small gymnastic line. Use a ground line to help the horse judge takeoff. Practice straightness by placing guide poles before and after the fence.
Schooling standards are also useful for desensitizing. Place flowers, cones, boxes, or safe fillers near the jump before asking the horse to jump them. Let the horse walk past new objects first. Confidence is trained in layers, not launched from a catapult.
Field Notes: Real-Life Experience Building and Using Schooling Standards
The first thing most riders learn after building their own horse jump is that the measuring tape is not optional. A standard that looks straight in the barn aisle can look hilariously crooked in the arena. The rail tells the truth. If the cups are off by even a small amount, the pole will slope, and suddenly everyone becomes a structural engineer.
One useful habit is to build both standards at the same time, side by side. Cut both posts together, mark both centerlines together, and drill one hole on each post before moving to the next height. This reduces small differences. Another good trick is to write the height marks lightly on painter’s tape before drilling. If a mark looks wrong, you can move the tape instead of explaining to your trainer why your 2-foot fence is having an identity crisis.
In practice, the base is where many homemade standards succeed or fail. A beautiful upright on a tiny base is like a fancy hat on a scarecrow: charming, but not reliable in a breeze. Wider feet make the standard more stable, especially on uneven outdoor footing. However, feet that are too long can get in the way when setting tight gymnastic exercises. For most home rings, 18 to 24 inches is a workable balance.
Paint choice also matters more than people expect. Dark rails can disappear in shadow. Busy patterns can make green horses hesitate. Simple contrast works best. White standards with blue, red, green, or natural poles are easy to see and easy to maintain. If you paint stripes, keep them clean and bold rather than tiny and decorative. Your horse is reading the fence at speed, not browsing a wallpaper catalog.
Storage is another lesson learned quickly. Standards left outside year-round age faster, especially if the base sits in mud. If you can, store them under cover or lift them off wet ground. Even a simple rack, pallet, or covered corner can extend their life. After rain, check the bases and screw heads. Moisture works quietly, and by the time the wobble is obvious, the repair may be bigger than expected.
Riders also discover that “schooling standard” does not mean “set it and forget it.” Before every ride, give the cups a quick look. Are they seated correctly? Are any pins bent? Is the rail cracked? Are extra cups removed? These checks take less than a minute and can prevent a bad surprise.
Finally, use your new jump thoughtfully. Start low, especially with young horses, nervous horses, or riders building confidence. A good homemade schooling jump should support better rhythm, balance, and relaxation. It should not become a test of bravery every Tuesday afternoon. Build it carefully, maintain it honestly, and it will become one of the most useful pieces of equipment in your arena.
Conclusion
Learning how to build a schooling standard horse jump is a practical project for riders who want affordable, adjustable training equipment at home. The key is to focus on safety before style: use solid lumber, build a stable base, drill accurate cup holes, sand every surface, finish the wood for weather protection, and choose cups that allow rails to fall properly. A homemade horse jump does not have to be fancy, but it must be reliable.
With careful measuring, quality hardware, and regular inspections, your DIY schooling standards can support everything from ground poles to small verticals and gymnastic exercises. Build slowly, test thoroughly, and introduce the jump to your horse with patience. In the end, the best schooling jump is not the one that looks most expensive. It is the one that helps horse and rider learn safely, confidently, and maybe with slightly fewer dramatic snorts.
Note: This article is for educational home-schooling purposes. Always follow local barn rules, competition regulations when applicable, and guidance from a qualified trainer or equestrian professional before jumping.