
Cowhide leather has a rare talent: It can look rugged, luxurious, and effortlessly stylish while quietly collecting dust, crumbs, fingerprints, pet hair, and the occasional evidence of a coffee-related emergency. Fortunately, cleaning cowhide leather is usually straightforwardas long as you remember that leather prefers a gentle spa day, not a trip through a car wash.
The correct cleaning method depends on what you own. A hair-on cowhide rug requires different care from a smooth cowhide sofa, handbag, jacket, or pair of boots. Finished, pigmented leather generally tolerates light damp cleaning, while absorbent aniline leather, suede, and nubuck need more specialized treatment. Before reaching for soap, identify the material and check the manufacturer’s care instructions.
This guide explains how to clean cowhide leather in 13 practical steps, remove common stains, prevent cracking or stiffness, and recognize when professional cleaning is the safer choice.
Important note: Always test moisture and cleaning products on a hidden area first. Do not machine-wash, soak, bleach, tumble-dry, iron, or aggressively scrub genuine cowhide. Hair-on rugs should normally be vacuumed with suction only, without a rotating brush.
Know What Type of Cowhide You Are Cleaning
“Cowhide leather” is a broad category rather than a single finish. Knowing which version is sitting in front of you prevents a minor stain from becoming a major character-building experience.
Hair-on cowhide
Hair-on hides are commonly used for rugs, pillows, wall coverings, and decorative upholstery. The upper surface retains the animal hair, while the underside is tanned leather. These pieces should receive minimal moisture because soaking can stiffen, shrink, curl, or damage the backing.
Pigmented or protected cowhide leather
This smooth leather has a protective surface coating and is often used on furniture, automobile seats, shoes, and bags. It is generally the easiest type to maintain because its finish offers better resistance to liquids and everyday grime.
Aniline and semi-aniline leather
Aniline leather has little or no pigmented surface coating, so its natural markings remain visible. It is soft and attractive but absorbs moisture more readily. Semi-aniline leather has light protection but can still darken or stain when cleaned incorrectly.
Suede and nubuck
Suede and nubuck have a velvety nap. Standard leather cleaner, soap, conditioner, and wet cloths may flatten or discolor the surface. Use products and brushes specifically labeled for suede or nubuck. Leather-care guidance consistently recommends distinguishing absorbent leather from protected leather before cleaning.
Supplies You May Need
- A vacuum with adjustable suction and a non-rotating floor or upholstery attachment
- Soft-bristled brush suitable for leather or natural hair
- Clean white cotton or lint-free cloths
- White paper towels
- Cool or lukewarm distilled water
- Mild, pH-balanced soap or manufacturer-approved leather cleaner
- Cornstarch for fresh oil or grease stains
- A blunt spoon, dull butter knife, or plastic scraper
- Leather conditioner for compatible smooth leather only
White cloths are preferable because colored towels can transfer dye when damp. Distilled water can also reduce the risk of mineral marks, especially on pale or absorbent leather.
How to Clean Cowhide Leather in 13 Steps
-
Step 1: Read the Care Label
Begin with the manufacturer’s instructions. Some cowhide items are protected with proprietary finishes, while others are intentionally left natural. A product that works beautifully on a sealed leather couch could permanently darken an untreated handbag.
Look for terms such as pigmented, protected, aniline, semi-aniline, hair-on hide, suede, or nubuck. When the label requires professional cleaning, treat that instruction as a rule rather than an opening bid.
-
Step 2: Inspect the Entire Piece
Check for loose hair, worn coloring, cracked areas, peeling finishes, mold, old repairs, and stains. Examine seams and edges, where moisture can enter more easily. On a cowhide rug, look underneath for brittle leather, curling, or dampness.
Take a quick photograph before cleaning. It gives you a useful comparison and helps you notice color changes during the patch test.
-
Step 3: Remove Dust and Loose Debris
Never apply cleaner over dust. Moisture can turn loose soil into gray paste and push it deeper into the material.
For smooth cowhide leather, wipe the surface with a clean, dry cloth or use a vacuum’s soft upholstery attachment. Pay attention to piping, seams, folds, and cushion gaps.
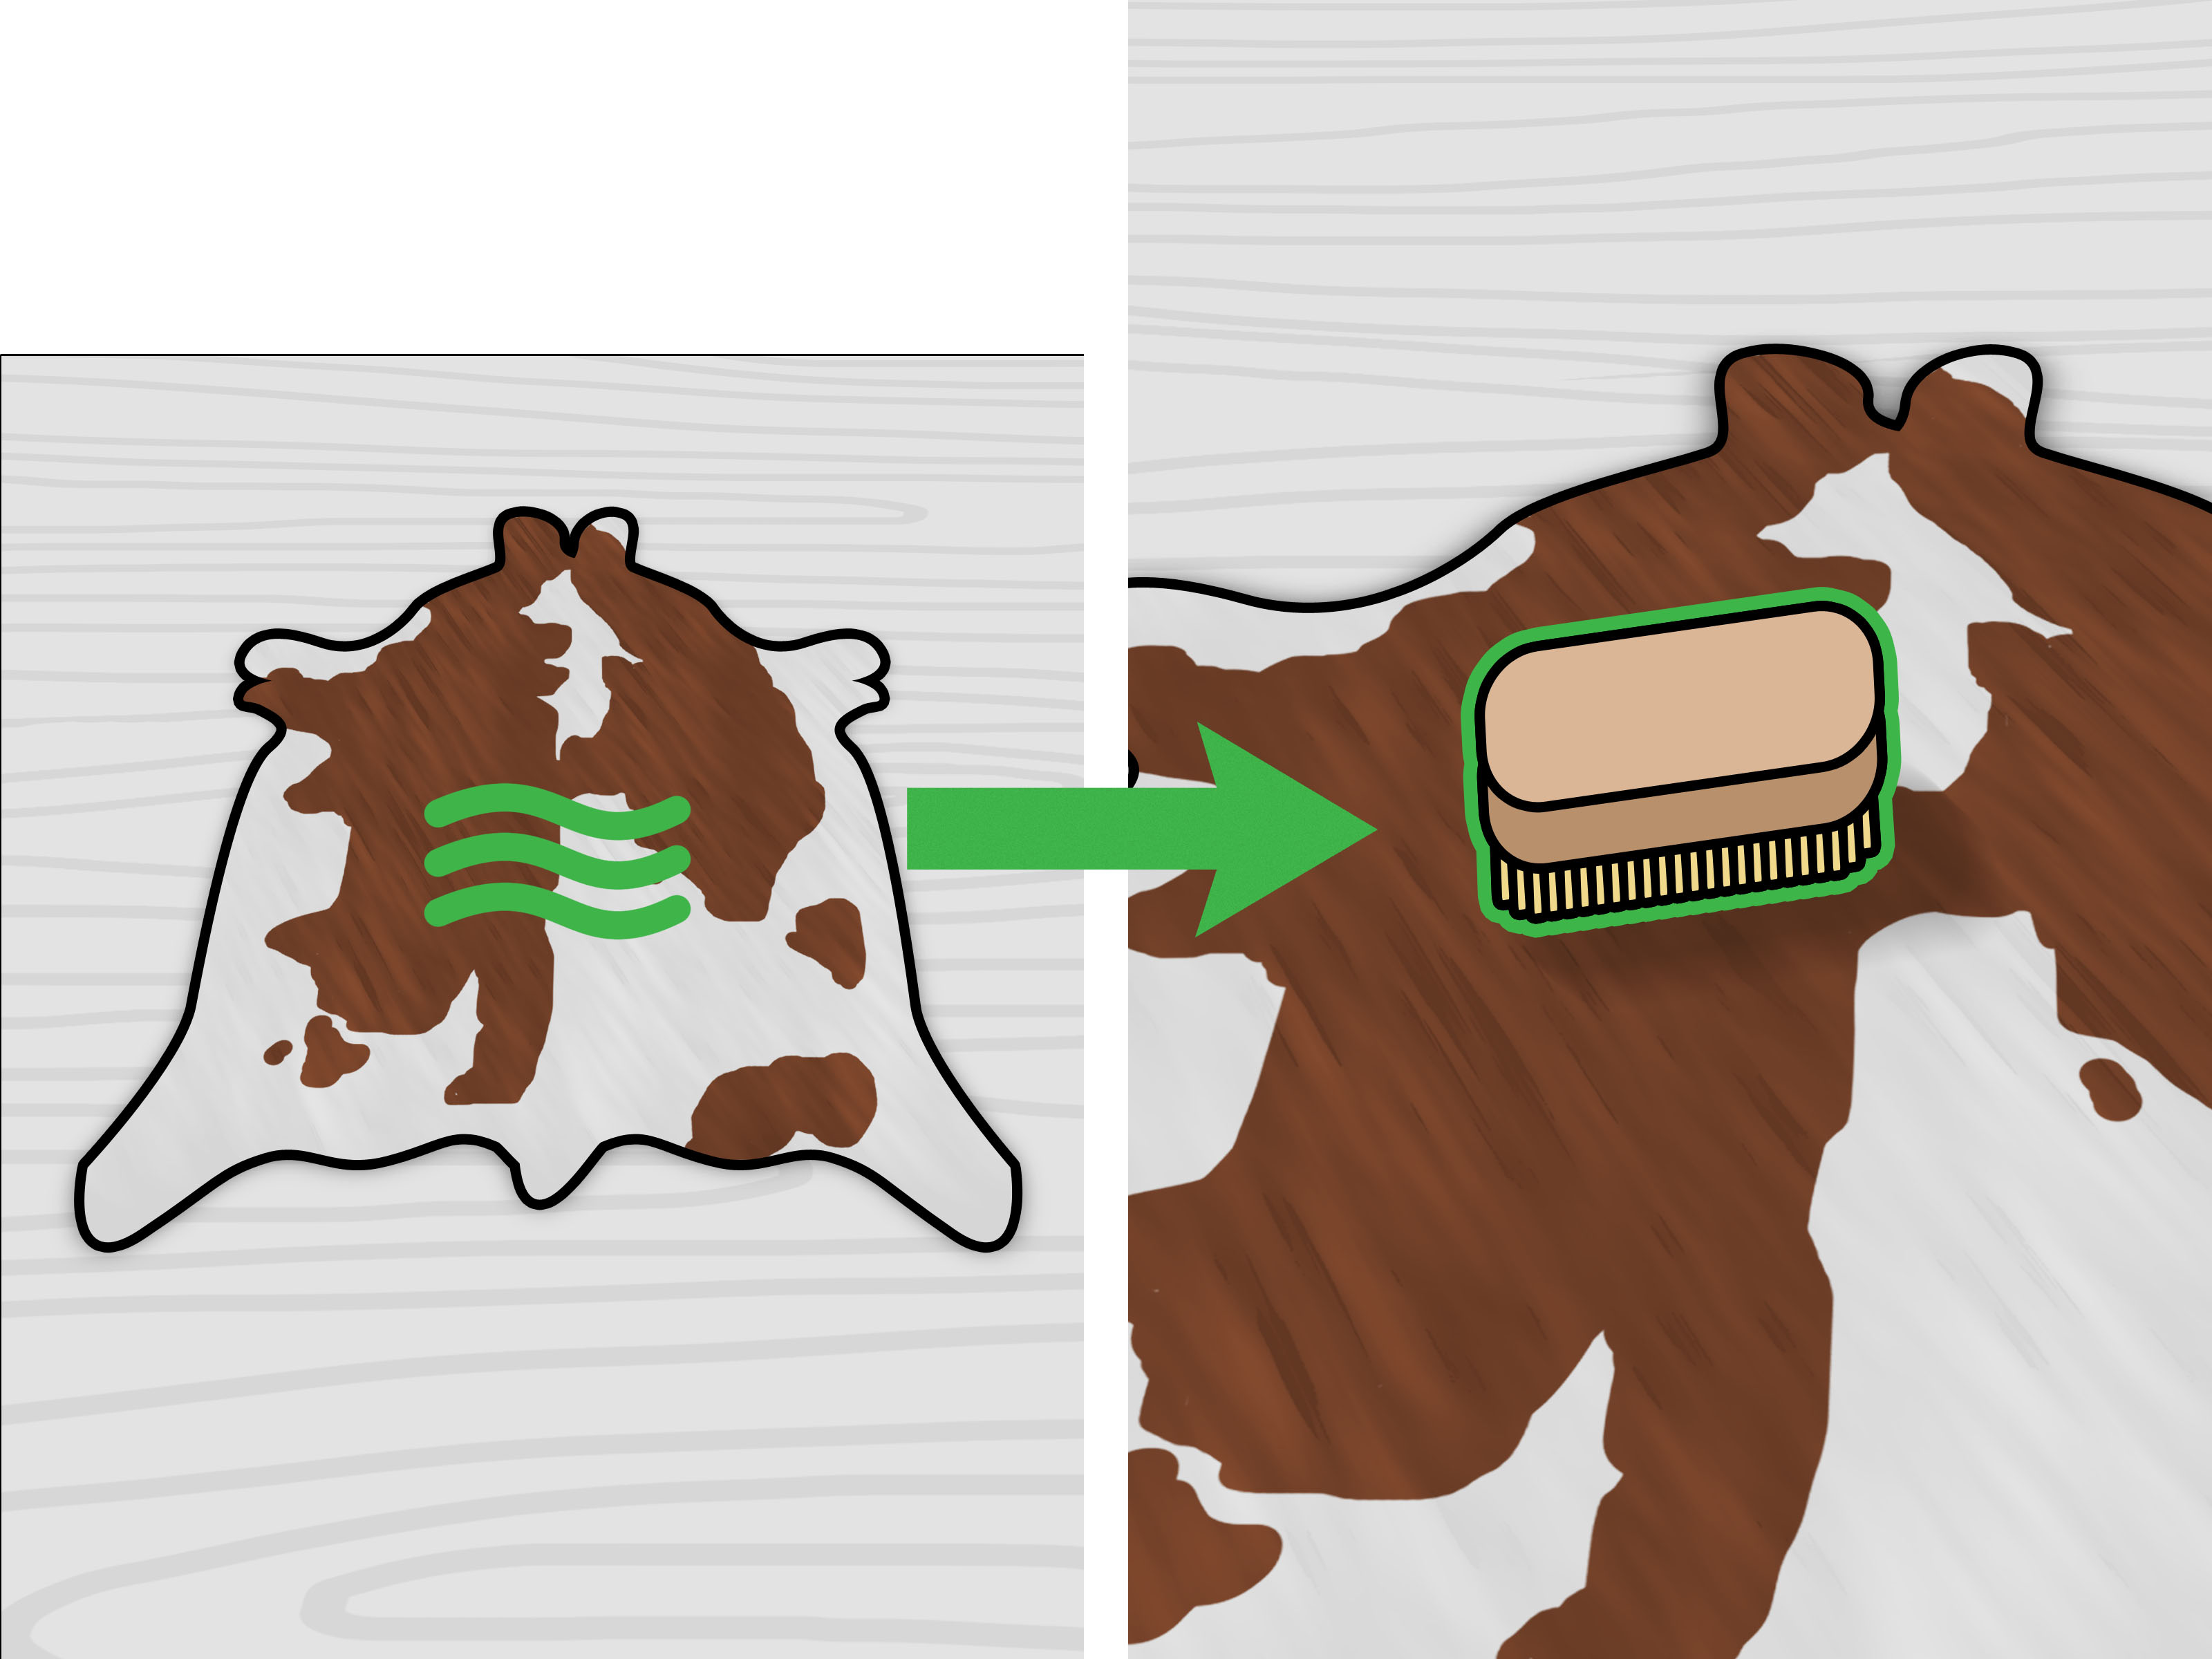
For a hair-on cowhide rug, take it outdoors and shake it gently when practical. Vacuum on low suction in the direction the hair naturally lies. Use a standard suction head or upholstery tool, not a beater bar or rotating brush, which can pull and damage the hair. Regular shaking, suction-only vacuuming, and periodic rotation are widely recommended for cowhide rugs.
-
Step 4: Perform a Patch Test
Apply a tiny amount of your proposed cleaner to a hidden location, such as the underside of a cushion, the interior seam of a bag, the back of a belt, or a concealed corner of a rug.
Allow the test area to dry completely. Check for darkening, fading, stiffness, dye transfer, loss of shine, or changes in texture. Do not judge the result while the leather is wet; many leathers temporarily darken with moisture.
Even products marketed for genuine leather should be patch-tested because tanning methods, dyes, finishes, and previous treatments vary.
-
Step 5: Blot Fresh Spills Immediately
Press a clean white cloth or paper towel onto the spill. Lift and replace the towel as it absorbs moisture. Do not rub back and forth; rubbing spreads the liquid, drives it into the leather, and tangles hair-on surfaces.
Work from the outside edge toward the center so the stain does not grow into its own zip code. Continue blotting until the towel picks up little additional moisture.
-
Step 6: Prepare a Mild Cleaning Solution
For compatible finished leather or hair-on cowhide, add only a few drops of mild soap to a bowl of cool or lukewarm water. The solution should be weak, not foamy enough to host a bubble party.
A manufacturer-approved cowhide or leather cleaner is usually safer than an improvised household mixture. Avoid bleach, ammonia, glass cleaner, strong degreasers, alkaline soap, solvent-based stain remover, furniture polish, and undiluted alcohol. Harsh products can remove color, dry the leather, or damage its protective finish.
-
Step 7: Dampen the ClothNot the Leather
Dip a clean cloth into the solution and wring it thoroughly. It should feel barely damp. Never pour water directly onto cowhide leather or spray an unknown cleaner heavily across the surface.
For a hair-on rug, keep moisture on the hair and away from the backing as much as possible. For smooth leather, prevent liquid from collecting around stitching, perforations, buttons, and edges.
-
Step 8: Clean in Small Sections
Wipe smooth leather gently using short, overlapping motions. Do not scrub. Frequently turn the cloth to a clean section so you lift dirt instead of redistributing it.
On hair-on cowhide, wipe or blot in the direction of the hair. Cleaning against the grain can leave the coat rough, tangled, or uneven. Treat a small area at a time and stop immediately if color transfers to the cloth.
With absorbent aniline leather, isolated spot cleaning can sometimes create a visible ring. Manufacturer-approved whole-panel cleaning may be necessary, but valuable pieces should be handled by a leather specialist.
-
Step 9: Treat Dried Food and Solid Residue
Let soft residue firm up before attempting removal. Use the edge of a spoon, dull butter knife, or plastic scraper to lift the material carefully. On a cowhide rug, scrape in the direction of the hair and work toward the center of the spot.
Once the solid material is gone, use your barely damp cloth and mild cleaner to blot the remaining mark. Repeat gentle applications rather than trying to defeat the stain in one heroic scrub.
-
Step 10: Absorb Oil and Grease Stains
For a fresh greasy spot, blot away the excess without spreading it. Cover the remaining mark with cornstarch and leave it for several hours or overnight so the powder can absorb oil.
Remove the powder gently with a soft brush or suction-only vacuum. Repeat if necessary. Avoid wetting an oil stain immediately because water can spread the grease or create a second stain around the first.
Deep, old, or widespread grease stains should be evaluated by a professional. Strong solvents may lift the stain, but they can also lift the finish and colorwhich is an expensive way to achieve a two-tone design.
-
Step 11: Remove Cleaner Residue
Use a second clean cloth that has been lightly dampened with plain distilled water. Wring it thoroughly, then wipe the cleaned area to remove soap residue.
Do not rinse the item under running water. Residual soap attracts dirt, but excess rinsing water can cause stiffness, spotting, shrinkage, curling, or mildew. The goal is controlled moisture, not saturation.
-
Step 12: Dry Naturally
Blot the surface with a dry towel and allow the cowhide to air-dry at room temperature. Keep it away from direct sunlight, radiators, fireplaces, heating vents, hair dryers, and other concentrated heat sources.
Heat can cause leather fibers to dry unevenly, become rigid, shrink, or crack. Direct sun may also fade dark markings and yellow pale areas. Place a rug flat in a well-ventilated room, hair side up, and keep people and pets away until it is completely dry.
Natural air-drying away from heat and strong light is a basic leather-care rule.
-
Step 13: Restore the Finish and Set a Maintenance Routine
After a hair-on cowhide is fully dry, brush it gently in the direction of the hair to restore its natural lay. Rotate a rug every few months so sunlight, foot traffic, and furniture pressure affect it more evenly.
For smooth, finished cowhide leather, apply a compatible leather conditioner only when the manufacturer recommends it. Use a thin, even coat and wipe away excess product. Conditioner should not be applied to hair-on surfaces, suede, nubuck, or leather that specifically prohibits treatment.
Routine maintenance is more effective than repeated deep cleaning. Dust smooth leather weekly or as needed, vacuum cowhide rugs regularly, address spills immediately, and keep all cowhide items away from prolonged moisture and intense sunlight.
Quick Guide to Common Cowhide Stains
| Type of Stain | Recommended First Response | What to Avoid |
|---|---|---|
| Water, coffee, or juice | Blot immediately, then use a barely damp cloth and mild approved cleaner | Rubbing, soaking, hot water |
| Food residue | Lift solids with a blunt edge and spot-clean gently | Sharp scraping tools and aggressive brushing |
| Oil or grease | Blot, apply cornstarch, allow time to absorb, and vacuum gently | Flooding the mark with water or solvent |
| Mud | Let it dry, brush or vacuum away loose soil, then spot-clean | Smearing wet mud into the leather |
| Pet accident | Blot promptly and use a cleaner approved for genuine cowhide | Enzyme cleaner unless the manufacturer confirms compatibility |
| Ink, dye, mold, or unknown chemical | Stop and contact a leather-cleaning professional | Internet chemistry experiments |
Cleaning Mistakes That Can Ruin Cowhide Leather
Putting cowhide in a washing machine
Machine agitation and prolonged soaking can distort the leather backing, loosen hair, damage seams, and create irreversible stiffness. Even a large washing machine is not a cowhide spa.
Using a rotating vacuum brush
A beater bar can catch the hair, stress the follicles, and wear thin areas. Choose low suction and a smooth floorhead or upholstery attachment.
Scrubbing a stubborn stain
Hard rubbing can remove pigment, polish the nap, roughen the hair, or create a pale patch that is more obvious than the original stain.
Using too much conditioner
Conditioner is not automatically suitable for every leather. Excess product may darken pale cowhide, leave a sticky residue, attract dirt, or interfere with the finish. Hair-on hides generally do not need conditioner applied to the coat.
Steam-cleaning without approval
Online advice about steam cleaning cowhide is inconsistent. Some older care guides allow carefully controlled steam, while other specialists warn that heat and moisture can stiffen, warp, or encourage mold in the leather backing. The safest default is to avoid steam unless the product manufacturer specifically approves it.
When to Call a Professional Leather Cleaner
Professional care is recommended when the cowhide is valuable, antique, heavily soiled, moldy, unusually brittle, strongly odorous, or stained with ink, paint, dye, cosmetics, chemicals, or an unidentified substance. You should also seek help when:
- The color transfers during a patch test.
- The backing is cracking or curling severely.
- The stain covers a large area.
- The item is made from absorbent aniline leather.
- The care label specifies professional cleaning.
- The leather has previous repairs or a delicate decorative finish.
A specialist can identify the finish, control moisture, match color, and treat the leather without relying on guesswork. Professional intervention is especially sensible when replacing the item would cost more than cleaning it correctly.
Practical Experience: Lessons That Make Cowhide Cleaning Easier
The most useful lesson in real-world cowhide care is that speed matters more than strength. A fresh coffee spill that is blotted within a minute is often a minor interruption. The same spill discovered beneath a magazine two days later may require several careful treatments. Keeping white cloths or paper towels nearby is not glamorous, but neither is explaining a brown ring in the middle of an ivory rug.
Another common experience is that people use far too much water. A cleaning cloth can look almost dry and still contain enough moisture to lift ordinary grime. When droplets can be squeezed from the cloth, it is too wet. Controlled moisture gives you time to observe how the leather reacts and dramatically lowers the risk of a hardened or curled backing.
Vacuum technique also makes a visible difference. Running a rotating brush back and forth may seem thorough, but it can roughen the hair and create uneven wear. Low suction, slow passes, and movement in the direction of the hair remove surprising amounts of dust without making the rug look as though it recently argued with a lawn mower.
Patch testing is another habit that feels unnecessaryuntil the day it prevents a disaster. Pale leather can darken, black leather can transfer pigment, and old leather may react differently from new leather even when both items appear similar. A test should be allowed to dry completely because temporary wet darkening is not the same as permanent discoloration.
Grease stains teach patience. The natural instinct is to wet the mark, scrub it, and hope determination wins. In practice, an absorbent powder left undisturbed often does more useful work than ten minutes of rubbing. Several gentle treatments are safer than one aggressive attempt.
Owners of cowhide rugs also learn that placement is part of cleaning. A rug beneath a frequently moved dining chair will experience constant friction. One beside a sunny window may fade on one side. A hide in a damp basement can develop odor or backing damage even when nobody spills anything on it. Rotating the rug, limiting harsh sun, using a suitable nonslip pad, and avoiding chronically humid rooms reduce future cleaning problems.
Finally, not every mark needs to disappear completely. Genuine cowhide contains natural variations, scars, wrinkles, and changes in texture. Over-cleaning a small imperfection can create a larger, more obvious patch. The goal is clean, healthy, well-maintained leathernot a surface so aggressively treated that it forgets it was ever natural.
Cleaning cowhide leather successfully comes down to four habits: identify the finish, remove loose dirt first, use the least moisture possible, and let the material dry naturally. Treat stains early, work gently, and call a specialist when the risks outweigh the rewards. Follow those principles, and your cowhide rug, furniture, bag, or boots can keep their texture, color, and character for yearswithout requiring a chemistry degree or a heroic quantity of soap.