
Note: Wear appropriate eye, hand, respiratory, and foot protection. Bottle cutting involves sharp glass and is undertaken at the reader’s own risk.
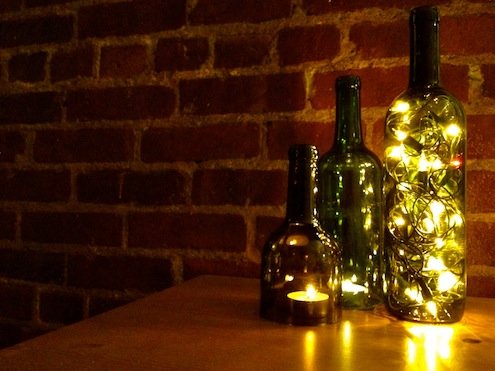
Empty wine bottles have an impressive talent for multiplying. One minute, you save a pretty blue bottle because it might become a vase. A few dinners later, your recycling bin looks like it owns a small vineyard. Learning how to cut wine bottles gives those containers a useful second act as drinking glasses, candle holders, planters, pendant-light shades, or decorative vessels.
The project is not quite as simple as attacking a bottle with the nearest sharp object. Glass behaves differently from wood, plastic, and metal. A glass cutter does not slice through the bottle; it creates a controlled flaw called a score line. Heat and cold then produce stress around that line, encouraging the bottle to separate where you planned rather than improvising a new shape across the kitchen floor.
This guide explains the most dependable bottle-cutting method, an alternative rotary-tool technique, essential safety precautions, edge-polishing steps, common mistakes, and practical lessons that make the process cleaner and more predictable.
Can You Really Cut a Wine Bottle at Home?
Yes, ordinary wine bottles can be cut with affordable tools, patience, and a suitable workspace. Most wine bottles are made from soda-lime container glass. They are not normally tempered like certain automotive or architectural products, but they can still crack unpredictably if they contain damage, uneven walls, internal stress, or manufacturing defects.
No home method guarantees a flawless result every time. Even an experienced maker may lose a bottle occasionally. Treat every bottle as expendable, and never practice on a rare, sentimental, or collectible container. The goal is controlled separation, not a dramatic showdown between you and a 2017 cabernet bottle.
Choose the Right Bottle
Beginners generally get better results with a straight-sided, round bottle of average thickness. Cylindrical wine bottles rotate smoothly in a bottle-cutting jig and allow the scoring wheel to stay at a consistent height.
Look for a clean, undamaged container
Inspect the bottle under bright light. Reject it if you see chips, impact marks, star-shaped cracks, deep scratches, or bruised areas in the glass. Existing damage may become an uncontrolled starting point for a fracture.
Avoid complicated shapes at first
Square bottles, heavily embossed bottles, bottles with raised lettering, and containers with rapidly changing diameters are harder to score evenly. Save those ambitious candidates until you can consistently cut ordinary bottles.
Consider the glass thickness
Very thick bottles may need additional heating and cooling cycles. Thin bottles can separate quickly but may be less forgiving of excessive pressure. Consistency matters more than brute force in either case.
Tools and Materials
Gather everything before scoring the bottle. Once the process begins, you do not want to wander around looking for sandpaper while holding two pieces of sharp glass.
- An empty, undamaged wine bottle
- A bottle-cutting jig with a carbide scoring wheel
- Safety goggles with side protection
- Cut-resistant gloves
- Closed-toe shoes and long pants
- A permanent marker or masking tape
- Very hot water
- Cold water and ice
- Two containers large enough for the bottle, or a controlled pouring setup
- Wet-or-dry silicon carbide sandpaper in several grits
- A flat waterproof sanding surface
- A bucket or tray for glass debris
- A dust mask or suitable particulate protection for powered grinding
A bottle-cutting jig is strongly preferable to holding a small handheld cutter against a round bottle. The jig stabilizes the container and keeps the scoring wheel in one position as the bottle rotates.
Safety Rules Before Cutting Glass Bottles
Glass projects reward preparation. They punish bare feet, cluttered workbenches, and the sentence, “I’ll just do one quick cut without goggles.”
Protect your eyes and face
Wear impact-rated safety goggles or safety glasses with side protection throughout scoring, separating, grinding, and cleanup. Powered grinding can throw small glass particles, so additional face protection may be appropriate.
Protect your hands without becoming careless
Cut-resistant gloves reduce the chance of injury from sharp edges, but they do not make broken glass harmless. Handle each separated piece gently and keep your fingers away from the fresh rim.
Control glass dust
Wet-sand whenever possible. Water captures much of the fine material and keeps the abrasive from loading quickly. When using a rotary tool or powered grinder, wear appropriate respiratory protection and work in a well-ventilated area away from food preparation surfaces.
Prepare the floor and work surface
Use a stable bench or counter with good lighting. Keep children and pets away. A rubber mat can help stop the bottle from rolling, while a tray or disposable covering makes cleanup easier. Wear closed-toe shoes until the entire area has been inspected and cleaned.
Do not force a stubborn fracture
Never twist, pull, or strike a partially separated bottle with your hands. Return it to a controlled heating-and-cooling cycle. Forcing the bottle can send a crack diagonally through the glass or produce sharp fragments.
Method One: Cut a Wine Bottle With a Bottle-Cutting Jig
This is the most approachable method for producing a level cut around a round bottle. The process has three main phases: make one clean score, apply controlled thermal stress, and smooth the new edge.
Step 1: Remove the label and adhesive
Soak the bottle in warm, soapy water until the label loosens. Remove remaining glue with a suitable adhesive remover, then wash and dry the bottle thoroughly. Dirt, glue, and paper can interfere with the scoring wheel or hide defects.
Step 2: Decide where to make the cut
Choose a straight section of the bottle. For a drinking glass, leave enough height for a comfortable tumbler. For a candle holder or planter, proportions can be more flexible.
Mark the intended cut height with a small dot. A band of masking tape may help you visualize the finished shape, but do not depend on tape alone to guide a handheld cutter unless it is perfectly aligned.
Step 3: Adjust the bottle cutter
Place the bottle in the jig and adjust the supports so it rests securely. Position the scoring wheel at the desired height. Confirm that the bottle can rotate without wobbling, lifting, or sliding sideways.
Step 4: Make one continuous score
Press the bottle gently against the scoring wheel and rotate it once in a smooth, continuous motion. Use steady, moderate pressure. A proper score often produces a consistent scratching sound.
Stop when the line returns to its starting point. Do not go around a second time. Repeated passes create intersecting scratches and small chips, giving the fracture several possible routes. Glass appreciates clear instructions; multiple score lines are more like a confusing group chat.
Step 5: Inspect the score line
The score should be thin, continuous, and even. It does not need to resemble a trench. A deep, flaky score usually means too much pressure was applied.
If the line contains a major gap or severe overlap, it is often safer to discard the attempt and practice on another bottle. Trying to patch the score with several short passes can produce an irregular break.
Step 6: Apply heat around the score
Heat the scored area evenly by rotating the bottle while pouring very hot water over the line. Another option is to lower the scored section into a container of hot water. Keep the temperature exposure focused near the score rather than heating the entire bottle unnecessarily.
Do not hold the bottle over an open flame. Flame-based methods can heat the glass unevenly, create soot, and add fire hazards without improving precision.
Step 7: Cool the scored area
Immediately expose the same section to cold water, rotating the bottle so cooling remains even. The temperature difference creates stress in the glass. Because the score line is already a weakened path, a crack should begin to travel around it.
You may hear a faint ticking or cracking sound. That is a reason to stay alert, not an invitation to squeeze harder.
Step 8: Repeat gradually
Alternate controlled hot and cold cycles until the bottle separates. It may take several rounds, especially with thick glass. Avoid escalating immediately to extreme temperatures. Gradual, uniform treatment often produces a cleaner result than one aggressive shock.
Support both parts as the fracture completes so neither section falls into the sink or onto the work surface.
Method Two: Cut a Wine Bottle With a Rotary Tool
A rotary tool fitted with a diamond cutting wheel can cut directly through the bottle. This technique may be useful for unusual shapes or projects requiring cuts that a fixed jig cannot produce. It also creates more noise, glass slurry, airborne particles, and opportunities for the tool to wander.
Secure the bottle
Place the bottle in a padded vise, purpose-built holder, or stable cradle. Do not overtighten a clamp against glass. The bottle should be unable to roll, but excessive pressure can crack it before the wheel starts.
Mark the cutting line
Wrap a straight strip of tape around the bottle or use a height guide to establish the path. Check the line from several angles. A small alignment error at the start can become a noticeably crooked rim after one full rotation.
Use a diamond wheel and light pressure
Wear eye protection, gloves, respiratory protection, and suitable clothing. Start the tool before contacting the glass, then guide the wheel slowly along the marked path. Let the abrasive perform the cutting instead of forcing the tool downward.
Keep the cutting area cool
Diamond accessories and glass can overheat. Use the cooling approach recommended by the tool and accessory manufacturer. Water may be used in certain setups, but electrical tools and water require strict separation and proper equipment. Never create a wet workstation unless the tool system is specifically configured for it.
Make shallow, controlled passes rather than trying to cut the full wall thickness immediately. Maintain a steady path until the cut connects.
How to Smooth the Cut Edge
A bottle is not finished when it separates. The fresh edge may be sharp enough to cut skin even when it looks reasonably smooth. Any piece intended for regular handling requires careful grinding and polishing.
Start with a coarse wet abrasive
Place coarse wet-or-dry silicon carbide sandpaper on a flat, waterproof surface. Add water and move the cut rim across the abrasive in gentle circles or figure-eight motions. Keep the bottle upright so the rim remains level.
This first stage removes high spots and flattens the edge. Do not push hard. Excessive pressure can chip the rim or crack the bottle wall.
Round the inner and outer corners
Once the rim is level, use wet sandpaper or a suitable diamond hand pad to soften both corners. Work evenly around the circumference. The objective is a rounded profile with no sharp lip on either side.
Progress through finer grits
Move from coarse to medium and then fine abrasive, rinsing the bottle and work area between grits. Skipping directly from a very coarse grit to a polishing grit leaves deep scratches that require much more work later.
A matte rim is generally easier to produce than a transparent, factory-polished edge. For decorative projects, an evenly frosted finish can look intentional and attractive.
Inspect the finished rim
Rinse and dry the bottle, then inspect it under strong light. Look for chips, hairline cracks, pointed areas, and deep scratches extending down the wall. Carefully test the rim with a folded cloth rather than dragging a bare finger along it.
Discard any piece with a spreading crack or a defect that cannot be ground away without making the wall dangerously thin.
Common Wine Bottle Cutting Mistakes
Scoring the same line repeatedly
One complete score is usually more effective than several passes. Repeated scoring damages the surrounding glass and makes the fracture less predictable.
Pressing too hard
The cutter should create a controlled scratch, not crush the surface. A white, chipped, or powdery line is evidence of excessive pressure.
Using an uneven score
If the bottle wobbles or the scoring wheel shifts, the beginning and end of the line may not meet. Stabilize the jig before sacrificing another bottle to modern art.
Applying heat to only one spot
Rotate the bottle continuously during heating and cooling. Concentrated heat can send a crack away from the score line.
Pulling the bottle apart
A bottle that has not separated is not ready. Continue controlled temperature cycles rather than twisting the halves.
Stopping before the edge is truly safe
A quick swipe with fine sandpaper may make the rim feel less aggressive, but it does not necessarily remove chips or sharp inner corners. Edge finishing often takes longer than the actual separation.
What Can You Make With Cut Wine Bottles?
Once the technique becomes reliable, cut bottles can support many creative projects:
- Small planters for succulents or herb cuttings
- Candle sleeves and hurricane-style covers
- Decorative vases
- Pencil cups and workshop organizers
- Pendant-light shades installed with approved electrical hardware
- Wind chimes and hanging garden decorations
- Self-watering planters made from both bottle sections
- Table centerpieces and event decorations
Exercise additional caution before turning cut bottles into drinking glasses. The rim must be uniformly rounded and free from cracks, chips, and deep scratches. Decorative success does not automatically equal food-service safety. When there is any doubt about the integrity of a piece, use it for a non-food project.
Workshop Experiences: What Cutting Wine Bottles Actually Teaches You
The first useful lesson is that the score line matters more than the dramatic hot-and-cold portion of the project. Beginners often focus on thermal shock because it feels like the moment when something is happening. In practice, the bottle’s fate is usually decided earlier. A clean, level, single score gives the fracture one sensible route. A rough score with overlaps, gaps, and excessive pressure gives it several bad ideas.
During early practice, it is tempting to press harder because the scratch appears too faint. That instinct commonly creates a chipped line. A lighter, steady score may look less impressive, yet it can produce a cleaner separation. Listening helps. A consistent scratching sound generally indicates stable contact, while sudden changes suggest that the bottle is wobbling or the pressure has shifted.
Another recurring lesson is that identical-looking bottles may behave differently. Two containers from the same brand can have small variations in wall thickness, surface damage, and residual stress. One may separate after two cycles, while the next requires five. A third may crack diagonally despite apparently correct preparation. This is why experienced bottle cutters save several similar containers when producing a matching set.
Patience becomes particularly important during thermal cycling. When nothing happens after the first round, the natural response is to use hotter water, colder ice, and more force. That combination can turn a controlled project into a sudden pile of fragments. Repeating moderate, even cycles is usually a better strategy. The faint ticking sound of a fracture developing is more useful than a theatrical snap.
Edge finishing also changes how the project is perceived. Before sanding, a freshly separated bottle can look like an almost-finished masterpiece. Ten minutes later, after identifying high spots, chips, and sharp inner corners, it becomes obvious that separation was only the halfway point. Flattening the rim on wet abrasive produces the first major improvement. Rounding both corners produces the second. Progressing patiently through finer grits is what makes the piece feel deliberate rather than rescued from an accident.
Keeping the sandpaper wet improves control and makes cleanup easier. The water turns glass residue into slurry instead of allowing fine particles to spread across the bench. It is still necessary to contain and dispose of that slurry carefully, but the workspace remains much more manageable.
Practice also reveals that some bottles are better suited to decoration than drinkware. A slightly uneven cut can often be corrected for a planter or candle holder because the rim will not touch anyone’s mouth. A drinking glass deserves a stricter inspection standard. Any questionable chip, crack, or thin section should retire the piece from beverage duty.
Finally, the most efficient workflow is usually a small production line. Clean several bottles at once, inspect them together, set the cutter once for a matching height, score each bottle, and then perform the separation and sanding stages. This approach produces more consistent dimensions and reduces setup time. It also provides backup pieces when one bottle decides that your carefully drawn horizontal line was merely a suggestion.
Conclusion
Learning how to cut wine bottles is mainly an exercise in control. Select an undamaged bottle, stabilize it in a proper jig, create one continuous score, apply heat and cold evenly, and allow the fracture to develop without force. After separation, spend as much time as necessary flattening, rounding, and polishing the edge.
The technique becomes more reliable with practice, but glass always deserves respect. Wear appropriate protection, contain debris, reject damaged pieces, and never treat an uncertain rim as finished. With those habits in place, yesterday’s wine bottle can become a planter, candle holder, vase, or decorative glass object instead of taking another one-way trip to the recycling bin.